Showing posts with label cupcakes. Show all posts

Monday, July 4, 2011

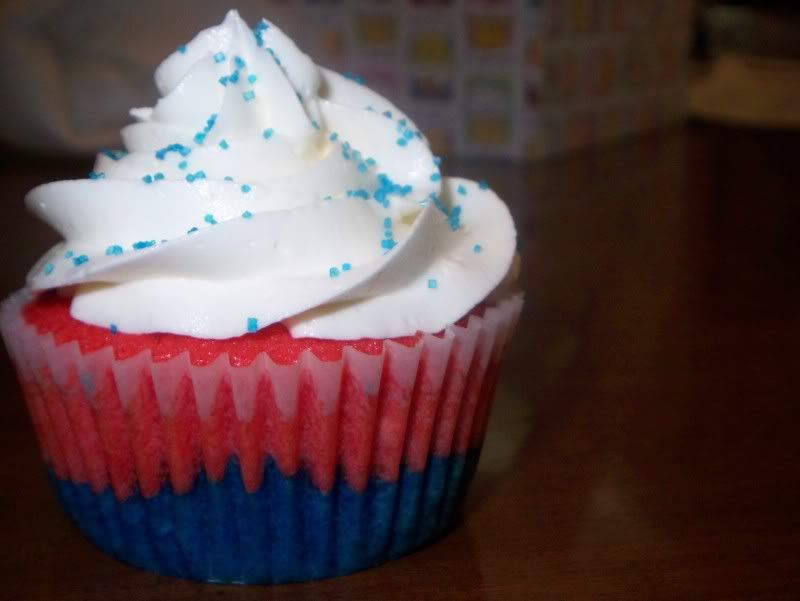
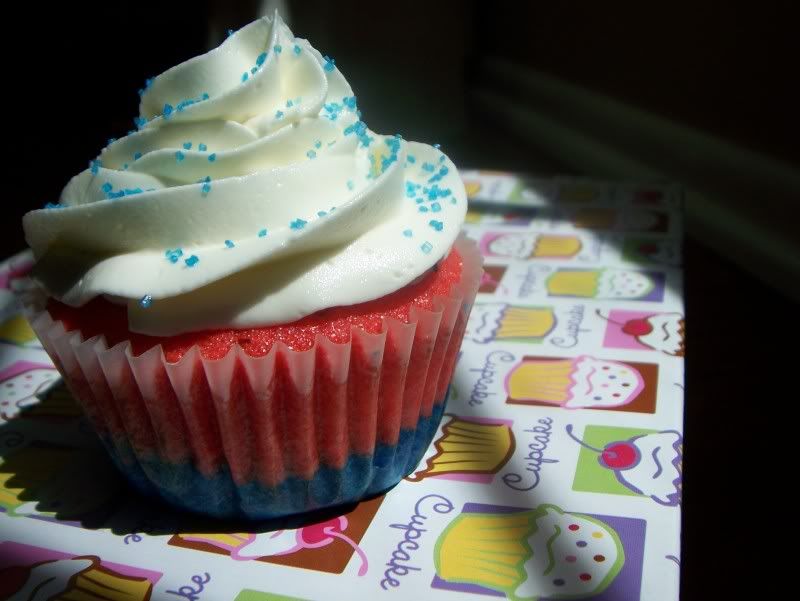
Patriotic Cupcakes

Happy Independence Day!!


If I know anything about myself, it’s that history and geography are not my strong suits. It took me forever to learn the 50 states and their locations and, to this day, I still get Wyoming and Colorado confused – they are both sort of rectangle-ish! I am also very lacking when it come to any history predating the New Kids on the Block, A.L.F., Fraggle Rock and the Goonies. I could tell you how many toothpicks Dustin Hoffman counted in Rain Man (246 and 4 left in the box), but I can’t remember pretty basic United States history such as when and where the civil war ended (1865 at the Appomattox courthouse – sadly, I did a report on Appomattox and visited the very courthouse in middle school and still couldn’t recall this without the help of Google).


Even so, I can appreciate Independence Day and the hard work and sacrifice from our armed forces to keep our freedoms alive! In honor of our Independence and our flag, I whipped up a batch of “Old Glory” Cupcakes. These were very pretty and delicious to eat, but there was an unintended side effect – to get the colors this rich, a lot of food coloring was used, that food coloring ended up dyeing tongues blue. As weird as that was to discover, it was kind of fun feeling like a kid again with one of those blue raspberry popsicles.


Hope everyone has a safe and Happy Independence Day, and many thanks to all of our soldiers, international and domestic, fighting for our freedoms every day.


Vanilla Cupcakes The Girl Tastes

Yields: 6 cupcakes
Ingredients
2/3 c. flour
1/2 tsp. baking powder
1/8 tsp. salt
2 tbsp. cream
2 tbsp. milk
1/2 tsp. vanilla extract
5 tbsp. butter, softened
1/3 c. sugar
1 egg
Instructions
Prepare your ingredients: In a small bowl, whisk together the flour, baking powder, and salt. In a liquid measuring cup, mix together the cream, milk, and vanilla. 

Make the batter: Using a hand-mixer, whip the butter for about 30 seconds. Add the sugar, and cream until very light and fluffy. Beat in the egg, just until incorporated. Now, switch to a whisk to add the dry ingredients in three installments, alternating with the wet ingredients. (Add in this order: dry-wet-dry-wet-dry.) After each installment, stir just until combined. Batter will be thick. 

Use batter as is, or you can separate into different bowls and color as I did.

Bake: Line a muffin tin with six liners. Distribute batter evenly between the liners; it should fill them about 3/4 of the way. Bake in a preheated oven until a toothpick inserted into the center comes out mostly clean. Cool on wire rack before frosting.

Tuesday, May 24, 2011

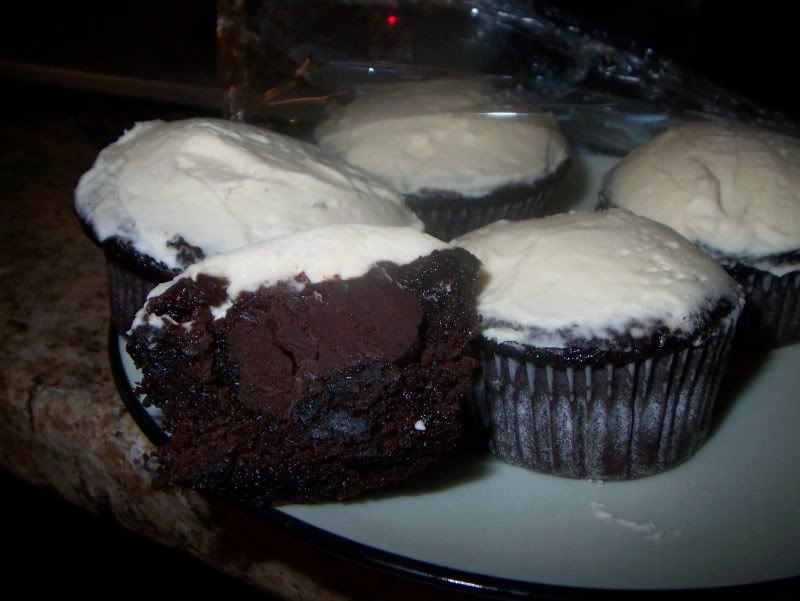
Black Bottom Cupcakes

School has been an interesting transition. I wake up more than an hour later, I feel rested and alert, I have time to make coffee and actually eat a well-balanced breakfast. By the time I get home, I have the time to clean the house, do laundry, unload the dishwasher and play with the puppy more than I ever got to before. 


If there was ever a time before where I was not sure if this was the right decision, I'm absolutely certain now. I feel like a whole different person - happier, and much more content (maybe that's the extra sleep talking).


The house has started looking so much nicer, as I'm slowly, but surely, checking things off my mile-long to-do list. Even the puppy seems happier to be getting twice-daily walks - when he used to get maybe five a week. 


Once the house is taken care of, I can't wait to start sharing more recipes than I have been in the more recent past! Yay!


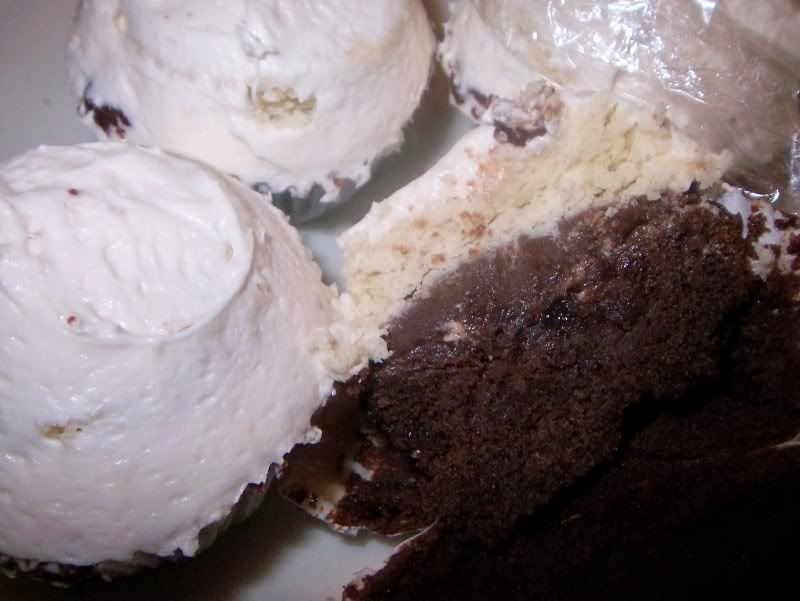
Here is the other recipe I made for the National Food Blogger's Bake sale. I love these cupcakes. And the best part is, if you omit the cheesecake filling, you have a dairy-free, egg-free cake, sometimes known as Wacky Cake or Crazy Cake.


Black bottoms are such a throwback to being a kid - perfect birthday party fare - both easy to transport and very little mess since there is no frosting. 


Sometime I'll have to make the bundt cake version and share that here, it is absolutely delicious! But these will have to suffice for now. I hope you enjoy!

Black Bottom Cupcakes
From My Recipe Box

Ingredients

1 (8 ounce) package of cream cheese, softened
1 egg
1/3 cup white sugar
1/8 tsp salt
1 cup miniature semisweet chocolate chips
1 1/2 cups all-purpose flour
1 cup white sugar
1/4 cup unsweetened cocoa powder
1 teaspoon baking soda
1/2 teaspoon salt

1 cup water
1/3 cup vegetable oil
1 Tbsp Cider Vinegar
1 tsp Vanilla extract

    Directions

    Preheat oven to 350 degrees F (175 degrees C). Line muffin tins with paper cups or lightly spray with non-stick cooking spray.

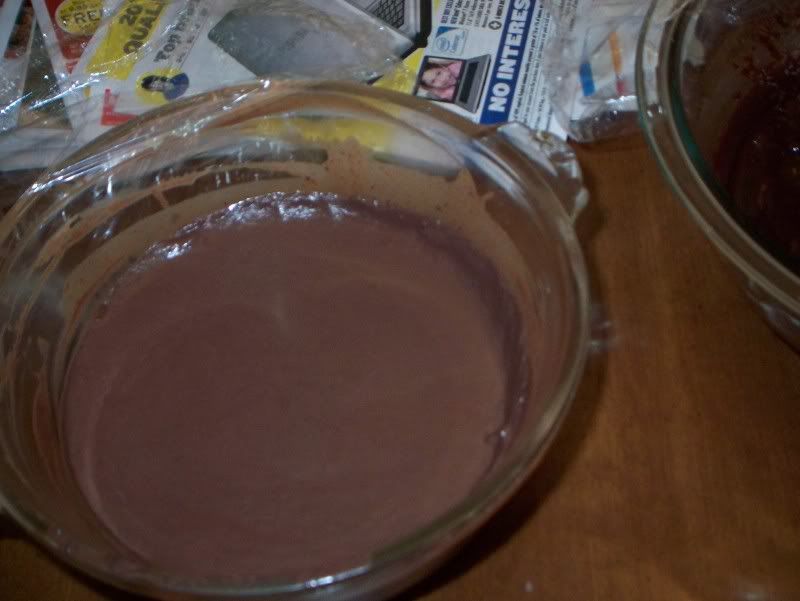
    In a medium bowl, beat the cream cheese, egg, 1/3 cup sugar and 1/8 teaspoon salt until light and fluffy. Stir in the chocolate chips and set aside.

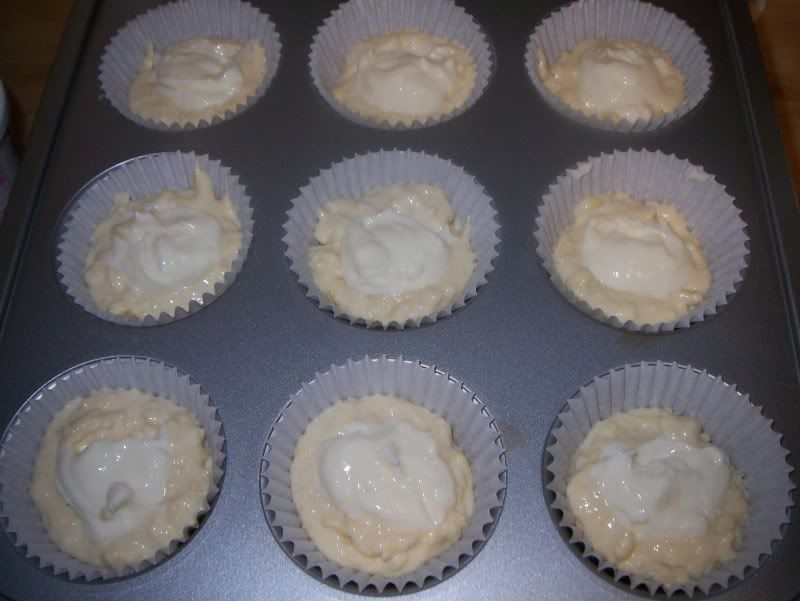
    In a large bowl, mix together the flour, 1 cup sugar, cocoa, baking soda and 1/2 teaspoon salt. Make a well in the center and add the water, oil, vinegar and vanilla. Stir together until well blended. Fill muffin tins 1/3 full with the batter and top with a dollop of the cream cheese mixture.

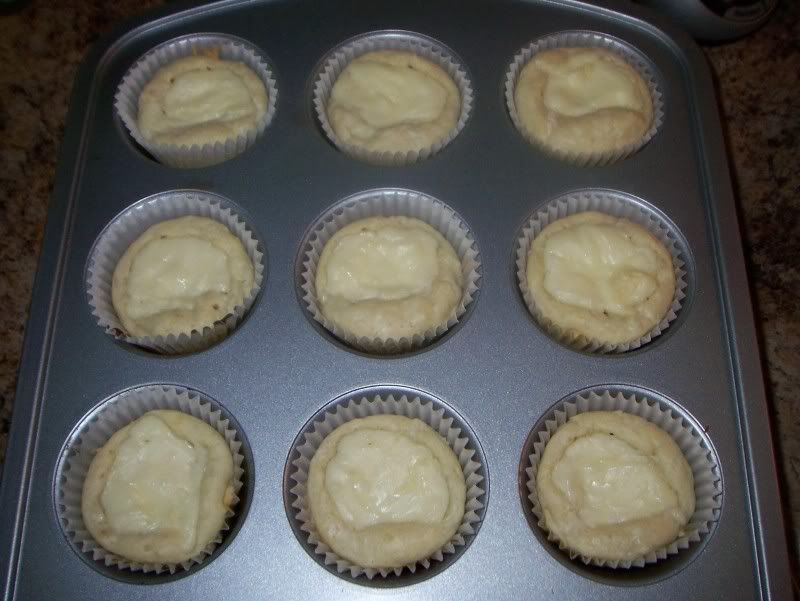
    Bake in preheated oven for 25 to 30 minutes.

    Thursday, February 3, 2011

    Carrot Cake

    I really need to find more excuses to bake for people because as much as I love making desserts, I really can’t afford to be eating three dozen cookies, a double-layer cake or an entire pie every few days. So, when birthdays, anniversaries, baby showers, bridal showers, a good dentist check-up, or any other event calling for celebration rolls around, I always want to make a dessert.

    Carrot cake is a favorite of mine, but I get a little wary when making it for other people. There are so many ideas of what carrot cake is – anything from a spice cake with grated carrots and (maybe) walnuts, to cakes with spice, carrots, coconut, crushed pineapple and raisins. The only thing really tying these two cakes together is the cream cheese icing, which even that can have white chocolate thrown into the mix.

    Because this was for a friend’s birthday, I made sure to ask which type of carrot cake the recipient would prefer. Being told he was more of a ‘purist,’ I knew exactly which recipe I wanted to try.


    As much as I love the traditional (to my family) carrot cake with crushed pineapple, walnuts and coconut flakes, I found this cake to be truly special in how moist and tender it was, without the distraction of all the other ingredients. The spice came through beautifully with the cocoa powder being a nice addition, and the slight tang of the cream cheese icing cut the sweetness of the cake as a whole.

    The best part of this cake? It’s a mini!

    First, nothing to me says “birthday” like a layer cake. Cupcakes are cute, and I love them, but I always look forward to being able to cut whatever sized slice I wanted out of a cake. Even if it’s the same amount of cake as four cupcakes, I don’t feel nearly as guilty for eating one ginormous slice of cake as I would eating four cupcakes.

    Second, they’re cute.

    Last, I don’t know why, but part of my enjoyment of carrot cake is the way the cake is layered with the icing. I will never say no to a carrot cake cupcake, but I much prefer the ratio of icing to cake in each bite of a slice of cake, versus a cupcake. But it’s only carrot cake so far that I’m this picky about. Weird. Maybe it’s because I can never take a normal bit of a cupcake without wearing half of the icing on my nose or upper lip.

    Alas, I digress. Back to mini cakes and veering away from my lack of ability to eat a cupcake like a normal person…

    I made two mini cakes by filling some small stoneware dishes with the batter. The approximately six-inch diameter mini-cakes are much more manageable to transport and will easily feed the amount of people attending at the birthday dinner. And, seriously, how cute are these?? One of the cakes was four layers tall, the other was two (that was a thank-you to my in-laws for puppy sitting for us this past weekend!)

    With the rest of the batter I did make cupcakes so that I could take them into work and not be tempted by them sitting on my dining room table. Unfortunately, I still have yet to master the art of transporting them. The trek from my house to the train to the city had a net casualty count of six cupcakes. At least they still taste great!

    Because I am not sure how the copyright issue works with this recipe, from Rose Levy Beranbaum’s book entited “Rose’s Heavenly Cakes,” I will direct you to where I found a copy of this recipe, which is here.


    I followed the cake recipe exactly, and it was absolutely amazing. Perfectly moist and that hint of cocoa did amazing things for the taste of the cake. For the frosting, I omitted the sour cream and white chocolate, favoring the powdered sugar version. I did add about 1/4 c to 1/2 c more sugar than the recipe called for because I wanted the icing to be a little stiffer for decorating.


    (This would also be perfect if you haven't decided on that special dessert for Valetine's Day! It's not far off now!)

    Linked up to:


    Sunday, January 9, 2011

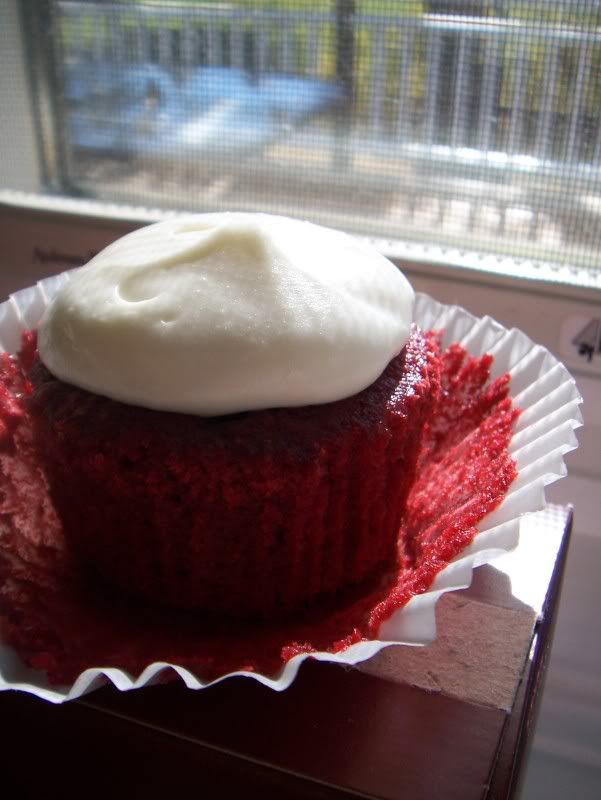
    Red Velvet Cupcake

    This post is in response to a specific request for a red velvet recipe - I'm always glad to do what I can!

    I wish I could tell you I knew what red velvet cake was actually supposed to taste like. It does have cocoa in it, so there is a slight chocolate flavor, but there isn’t enough to make it a ‘chocolate’ cake, and it’s definitely not a white or yellow cake – so what is it? No clue.

    All I know is that, in my opinion, I’ve had really great ones, and really terrible ones. The good ones are moist and tender, with a uniform crumb texture and a good ratio of icing to cake – typically a cream cheese icing. The not-so-good ones were so dry that as soon as I took a bite, it felt like I had cotton mouth, and it was difficult to chew and swallow the cake. The icing was cloyingly sweet, and there was way too much of it on the cake – maybe in an attempt to compensate for the lackluster cake underneath? In both cases, I’ve had some that are just barely red, where the cocoa color was more prevalent, and some that looked like they were going to bleed out as soon as you took a bite. I have never made red velvet before, but figured a recipe with some decent reviews and feedback would be a good place to start.

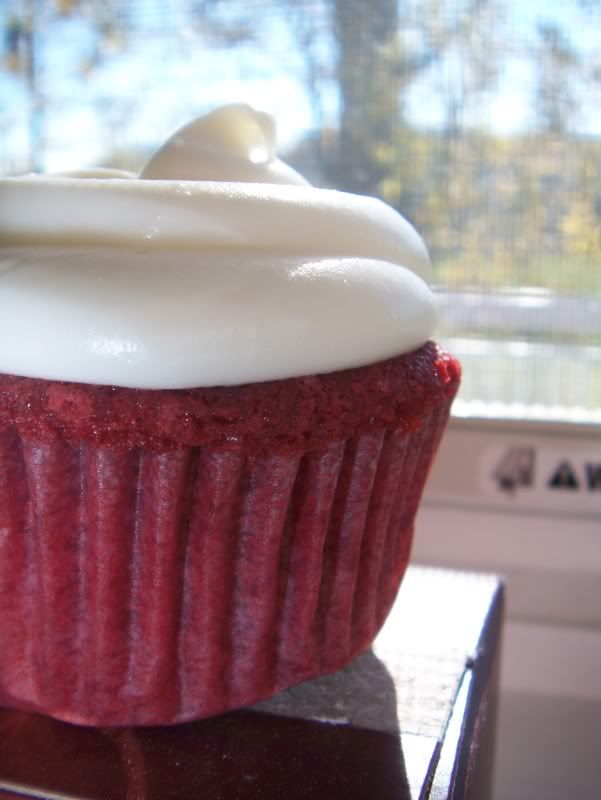
    I love how pretty the cupcakes are – bright red cake, stark white frosting. They really do have the “POW!” factor. They were moist and flavorful, hurting both notes of cocoa and tangy buttermilk.

    Nothing will ever replace a classic chocolate cupcake with white frosting in my heart, but I think I can certainly make some space for red velvet as well!


    Grandmother Paula's Red Velvet Cake
    Adapted slightly from Paula Deen via FoodNetwork.com
    Makes about 27 cupcakes

    Cake:
    2 cups sugar
    1/2 pound (2 sticks) butter, at room temperature
    2 eggs
    2 tablespoons cocoa powder
    1 ounces red food coloring
    2 1/2 cups cake flour
    1 teaspoon salt
    1 cup buttermilk
    1 teaspoon vanilla extract
    1/2 teaspoon baking soda
    1 tablespoon vinegar

    Directions
    Preheat oven to 350 degrees F.

    In a mixing bowl, cream the sugar and butter, beat until light and fluffy. Add the eggs one at a time and mix well after each addition. Mix cocoa and food coloring together and then add to sugar mixture; mix well. Sift together flour and salt. Add flour mixture to the creamed mixture alternately with buttermilk. Blend in vanilla. In a small bowl, combine baking soda and vinegar and add to mixture. Pour batter into cupcake liners. Bake for 20 to 25 minutes, or until a toothpick inserted into the center comes out clean. Remove from heat and cool completely before frosting.
    Vanilla Cream Cheese Frosting
    From AllRecipes.com

    1 (8 ounce) package cream cheese, softened
    1/4 cup butter, softened
    2 tablespoons sour cream
    2 teaspoons Vanilla Extract
    1 (16 ounce) box confectioners' sugar

    Vanilla Cream Cheese Frosting: Beat cream cheese, softened, butter, sour cream and Vanilla Extract in large bowl until light and fluffy. Gradually beat in confectioners' sugar until smooth.

    Thursday, December 9, 2010

    Mojito Cupcakes

    I loved mixed drinks. I just wish they loved me back. Nowadays I typically stick to beer simply because they don’t slap me in the face like mixed drinks tend to do.

    Some of my favorite drinks are Mudslides, Long Island Iced teas, and Mojitos. Mudslides are my drink of choice when I’m sitting on a beach, long islands will cure what ails ya, and Mojitos are so light and refreshing, they mentally transport me to somewhere much more tropical than Chicago.

    I figured that a mojito cupcake would be the perfect non-chocolate cupcake option (paired with none other than the Car Bomb Cupcakes) for my dessert spread. I love when I can bake with a little creativity. And it’s not that bar-themed cupcakes have never been done before, but I always love when I get to chance to create something a little out of the ordinary for my friends. When I mentioned the idea of making a yellow cupcake with rum, lime and mint to my husband, he faltered a little bit before tentatively saying ‘it should be fine... I think.’ This got me thinking about the fact that I had not used mint a lot before in my baking and I was wondering if the cakes would end up with a strange flavor or aftertaste that I wasn’t anticipating. The only way to find out was to try it and hope for the best.

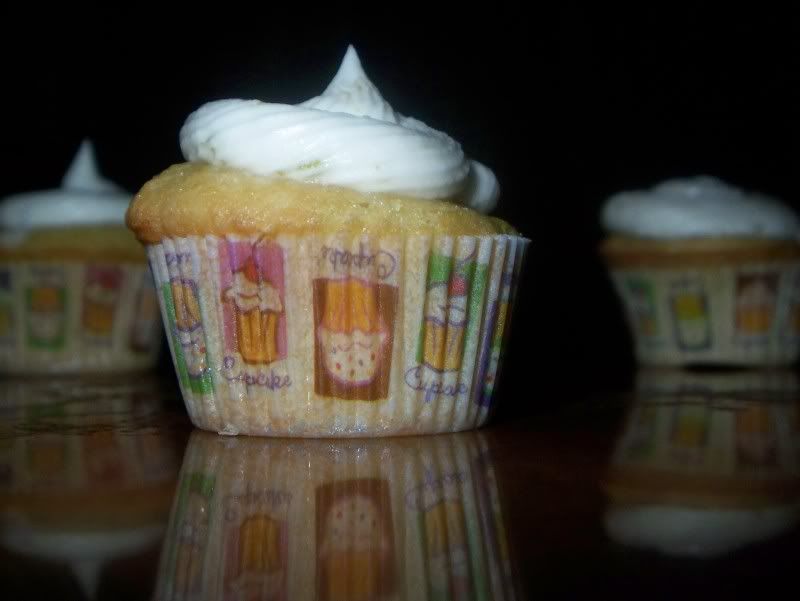
    The cupcake consists of a cake using mint infused milk, lime and rum, which is then coated lightly with a rum, mint and lime glaze and finally topped with a rum and lime buttercream. The cupcake recipe yields a light, fluffy and moist cupcake that has a nice punch of citrus from the lime juice and zest. The addition of the mint infused milk gives it an ever-so-subtle flavor, but resulted in a wonderful freshness and lightness to the cake. The glaze was probably an unnecessary step, but certainly dialed up the rum notes a little bit more.

    The cake itself was delicious, but the icing sent it over the top. A lot of the recipes I’ve seen use a cream cheese-based frosting, and I was just too hesitant about the tangy flavor overpowering the subtle flavor components of the cake, so I settled on a lime and rum buttercream frosting. My husband and I both agreed though that the icing was what tied the whole cake together. And because this recipe starts with a killer cupcake, by omitting the rum and mint you make a wonderfully summery lime cupcake that would be perfectly suited for an afternoon tea or baby/bridal shower. You could also jazz the cake up with a coconut buttercream (yum!) or a lime curd filling. Or switch out the rum for tequila, omit the mint and glaze, and you’re on your way to a margarita.


    Delicious.


    Mojito Cupcakes

    Mojito Icing:
    Group Recipes

    1 1/2 cups powdered (icing) sugar (or more, depending on rum amount)
    3 T butter, softened
    zest and juice of half a lime
    half shot of spiced or dark rum (or more or less to taste)
    12 sprigs of mint garnish (optional)

    Mojito Icing:
    Mix the butter and sugar together in a bowl until smooth.
    Add the rum and lime, mix further until stiff peaks form (add more powdered sugar if necessary).
    Taste to see if it needs more rum, and add as appropriate.
    I use a flat knife to spread the icing onto the tops of the mojito cupcakes because a spatula is just too big.
    Then add a sprig of mint on each to garnish.

    Rum Syrup Glaze
    Cream Puffs in Venice
    For the rum syrup:
    1 cup sugar
    1/4 cup water
    1/4 cup butter
    1/4 cup dark rum
    2 or 3 pieces of lime zest
    a few sprigs of fresh mint
    In a small pot, combine the sugar, water and butter over medium-high heat.
    Bring the mixture to a boil, stirring often.
    Once the butter has completely melted and the sugar has dissolved, remove from the heat.
    Carefully add the rum. The mixture will bubble and spurt so take care not to burn yourself.
    Once you’ve mixed in all the rum, add the lime zest and mint and let the syrup infuse for 5 minutes before spooning over the warm cupcakes.

    Mojito Cupcakes
    Alpine Berry

    makes 12 regular cupcakes

    1 1/2 cups all-purpose flour
    1 1/4 tsp baking powder
    1/4 tsp baking soda
    1/4 tsp salt
    1/2 cup mint leaves, loosely packed
    3/4 cup whole milk, hot
    1/4 pound (1 stick) unsalted butter, at room temp.
    1 cup granulated sugar
    2 eggs
    grated zest of 2 limes
    1/2 tsp vanilla extract
    1 tsp rum (optional)

    Preheat to 350F.

    Add mint leaves to hot milk. Let steep for 10-15 minutes. Pour milk through a fine-mesh sieve into a small bowl. Press liquid from mint leaves. Discard leaves and allow milk to cool slightly.

    Sift flour, baking powder, baking soda and salt. Set aside.

    In the bowl of a stand mixer, beat butter on medium speed until creamy, about 30 seconds. Add sugar and continue beating until light and fluffy, 3-5 minutes. Scrape the sides of the bowl occasionally.

    Add eggs, one at a time, beating after each addition. Mix in lime zest, vanilla and rum (if using).

    On very low speed, add flour mixture in 3 additions, alternating with milk and ending with flour, mixing until just incorporated.

    Fill 18 standard muffin cups half full. Bake until cupcakes spring back when touched, 18-22 minutes. Allow to cool in pan for 5 minutes. Remove cupcakes from pan and cool completely.

    Wednesday, July 7, 2010

    Summertime Cupcakes

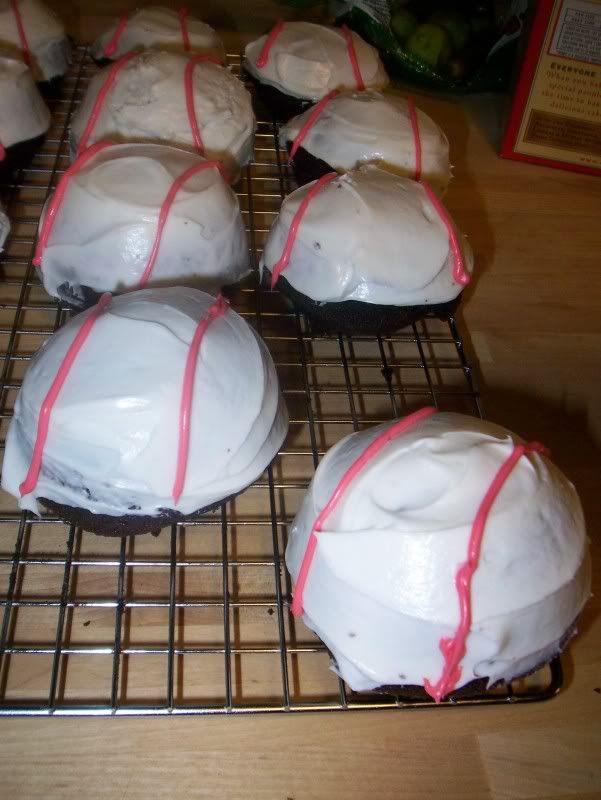
    Playing in a company softball league this summer gives me the perfect excuse to try out new things without being required to consume all of them myself (or forcing my poor husband to eat them all!) I recently bought a mini ball pan from the Wilton Tent Sale here, and what a better excuse to see what perfectly round cupcakes look like than softball cupcakes! Because I was in a hurry, I used a devil’s food boxed cake mix and a can of vanilla icing.

    One of the perks of this softball league is that you are allowed to bring your own booze to the games and drink while you play. (And, given our record, that’s probably a good thing!) So, of course, I had to incorporate booze into the cupcakes somehow. I made a brandy whipped chocolate ganache to fill the cupcakes and, let me tell you, you can definitely taste the raw brandy in the filling. I probably wouldn’t be serving these to any kiddos, but you can always leave the alcohol out for a kid-friendly filling. If you remember my Irish Car Bomb Cupcakes, I felt the filling was a little too dense, so I opted for a higher cream-to-chocolate ratio this time around, and whipped my ganache as it was cooling so it wouldn’t be quite so dense when it set up. While tasty, I think I over-compensated a little. I doubt I needed to whip the ganache, but I certainly did no harm in doing so.

    Next time, I will use a little bit denser mix or make my own batter, because while I love the fact that the cake was light and airy, the crumb was a little too moist and delicate to handle as much as I needed to for the filling and frosting of the cupcakes. I only had one mini ball pan with six cavities for batter which meant I had to bake off four batches of cupcakes to use up the mix and noticed that the longer the cake mix sat, the funkier the cupcakes looked as they baked. The first batch were beautifully domed. The second batch, the outer edges rose first, and then they got a weird hump-thingy in the middle. The final batch did a similar thing to the second batch, but a little more pronounced. That was a little bizarre to see, but I guess that’s why the instructions say to bake the cake ‘immediately’ instead of baking the cake ‘whenever you feel like it.’ Good to know.

    Also, don’t make the same mistake I did, and while waiting for my ganache to cool enough that I could whip it, I thought I’d get a head start icing my cupcakes. Anyone else notice a problem with this? After getting through three of the mini-balls, I realized that I cannot pick up my cupcakes to fill them now, so I had to poke a hole through the icing, fill it, and re-ice the whole dern cupcake. And I made an absolute mess of my piping bag. That’s the one problem of my mind constantly running faster than my logic filter.

    Like I mentioned, the cupcakes were made from a box mix. The icing was just the can of vanilla icing, with part of it tinted pink/red for the stripes. The only thing I made ‘from scratch’ is the chocolate ganache, and even that is as easy as throwing together a box cake mix.

    (I hesitated to post these because I'm still practicing my piping skills with my new decorating set. I'm sure if I had more than 20 minutes to decorate them, they'd look a whole lot better. But I guess if I post these now, I will one day be able to see an improvement on my skills in the future!)


    Chocolate Ganache

    2/3 c Chocolate chips
    2/3 c cream
    1 tbsp butter
    1 tbsp brandy

    I put all my ingredients into a pyrex cup and microwaved in 30 second intervals, stirring each time. It took about 2-2 1/2 minutes for the chocolate to completely melt. I then let it cool to room temperature, stirring every 15-20 minutes or so, and once it got thick, whipped it with a whisk until it was light and airy. And addictive.

    Tuesday, May 18, 2010

    Put the (Key) Lime (Cheesecake) in the Coconut (Tartcakes) and Eat 'Em All Up

    Prompted by a contest by Coconut and Lime, I decided to try my hand at coming up with a recipe that incorporates both coconut and lime as key ingredients. I enjoy Black Bottom Cupcakes, but rarely do you see any variations on the chocolate base with chocolate-chip cheesecake-like filling. My quest was to make a coconut cupcake filled with a key lime cheesecake filling. Without getting into the gory details, I will say that the first batch was, without sugarcoating it, a disaster. Since I was experimenting, I decided to not only make my ‘creation’ but also the original version of a black bottom, as a ‘control’ if you will. I discovered a few things. Halving a wacky cake recipe doesn’t work – the vinegar and baking soda are in specific proportions in the original recipe and my cupcakes ballooned out of their respective tins, only to collapse in on themselves and never truly set up. I also found out I like chocolate a little too much. I forgot to adjust the amount of chocolate chips from the original recipe and the result was a melted chocolate pool in the bottom of each cupcake that I’m sure also contributed at least partially to the cupcake collapse. Finally, wacky cake is a thin batter meaning the coconut that I so lovingly toasted and mixed into the batter sunk straight to the bottom instead of remaining suspended like I had expected. Oops. I didn’t take pictures because I was too busy trying to mitigate the damage to my muffins tins. After a good two hour soak and scrub they are mostly back to normal.

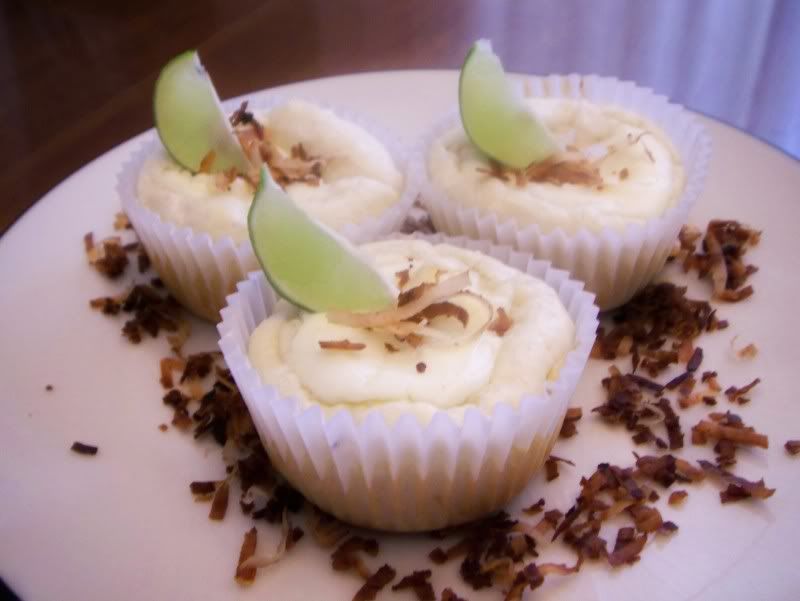
    After those unsuccessful trials in the kitchen, I took a new approach. I decided to ditch the wacky cake batter in favor of a true coconut cupcake and then spoon in the filling. Success! Well, mostly. The cupcake came out a little more dense than anticipated, but it was still good. It seemed like what you would get if a tart shell and cupcake had a love-child filled with key lime cheesecake. It wasn’t quite a cupcake because it wasn’t as fluffy as you’d expect, but it wasn’t a tart, either. The tartcake was born!

    The hubs - who doesn’t like coconut – offered to be a taste-tester for me, but only had one bite because, go figure, he didn’t like that it tasted like coconut. He couldn’t even make it to the key lime filling. But don’t feel bad because he didn’t like the cupcake. There was some extra filling leftover, so I put that in a ramekin and baked it off for a little bit so he was able to get a crustless mini key lime cheesecake out of the deal. That, for the record, he did enjoy.

    After having one, I am pleasantly surprised at my first black-bottom inspiration attempt. Just because it wasn’t exactly what I was envisioning didn’t make it any less delicious. A coconutty cupcake with a tangy, creamy key lime cheesecake filling.

    Thanks to Coconut and Lime for hosting this contest, and even if I don’t win the contest, I’m a winner because I go the confidence to try something totally new, and to persevere even after my initial miserable failure! (Which is a miracle considering what a pain in the rear juicing those itty bitty key limes is! I’m glad I have my juicer!)

    Next time I try these I may try a different cupcake recipe to see if the density was a result of the cupcake recipe or a result of adding in the cream cheese filling and consequently changing how a normal cupcake would have baked.

    Put the (Key) Lime (Cheesecake) in the Coconut (Tartcakes)
    Adapted From
    Domestic Diva Mysteriesand Cookie Madness

    Filling
    5 oz cream cheese
    2 Tbsp plus 2 tsp Sugar
    1 Tbsp key Lime Juice
    1 Egg White
    2 tsp Sour Cream

    Cupcakes:
    1 cup flour
    1 teaspoon baking powder
    1/4 teaspoon salt
    1/2 cup plus 2 tablespoons sugar
    1 egg
    ¼ c milk and 1/3 cup milk, divided
    1/3 cup heavy cream
    1/2 cup shredded coconut
    ½ tsp coconut extract

    Directions
    Preheat the oven to 350 degrees. Place cupcake liners in the cupcake pan.

    Make the filling: Beat the cream cheese, sugar and salt until smooth. Add the egg white and stir or beat on low speed just until mixed; stir in the sour cream and lime juice. Set aside.

    Make the tartcake: Combine the flour, sugar, baking powder, shredded coconut, and salt, and mix with a fork.
    Separate the egg. Beat the egg white until it forms gentle peaks, but isn't dry. Set aside.

    Beat the egg yolk briefly, slow the mixer and add add ¼ c of milk. Slowly add some of the flour mixture. Alternate adding the liquids and the rest of the flour mixture.

    Spoon one tablespoon of cheesecake mixture into each liner, making sure to sink the filling down a little into the cupcake.
    Bake on center rack for 22-25 minutes.
    Let cool in cupcake pan for 30 minutes and then transfer to the refrigerator to chill.

    This made 11 cupcakes for me with a little filling leftover.

    Thursday, May 6, 2010

    It's What's on the Inside That Counts

    I was in training in Wisconsin all week and was lucky enough to be able to meet up with my sister-in-law for a fin-filled evening of outlet shopping. Our first stop was at Rue 21, and I am amazed what sorts of clothing they have.

    First, it seems like the 90’s neon colors are coming back…

    Rue 21 is also big on their graphic tees. I have a hard time pulling off the typical graphic tees because I feel like even though the graphics or overall design of the shirt if great, there is a ‘subliminal message’ on some of the shirts that I feel like I don’t represent. You know, like the shirts like this, this or this.

    Amid all those bright colors and shirts I can’t wear, they had some incredibly adorable food-related tees. Unfortunately, some of my favorites aren’t on the main website. But here are a couple of them.

    BFF's
    Cereal Killer
    Don't hate me cos you aint me.

    Then I saw it. A graphic tee with a statement I’m happy to make on a t-shirt. And maybe when you see It, you’ll see why I just had to buy it.


    I can’t wait to wear it!


    Friday, April 30, 2010

    Car Bomb Cupcakes

    Guinness stout cupcakes, whiskey chocolate ganache, Baileys buttercream frosting. Oh my.
    I saw this recipe a while ago on Smitten Kitchen, and have been wanting to make them ever since. The opportunity came when the hubs and I were invited to a Bachelor/Bachelorette the weekend of St. Patty’s day. I may not enjoy chugging (aka choking down) the curdled shot that is a real Irish Car Bomb, but a cupcake that is inspired by it? Yes, please.

    I've seen so many blogs that say this cake/cupcake recipe is their go-to recipe for a no fail chocolate cake. I can see why. These were some of the moistest cupcakes I've ever tried, and remained so even when kept in the fridge for several days. The alcohol is essentially baked out during the cooking process so, while the Guinness did add a little ‘something’ to the cupcake itself, I really don’t think anyone would be able to tell there was beer in it.

    The cupcakes were supposed to be filled with a ganache spiked with whiskey, but used bourbon as my weapon of choice because that’s all I had. I put it all in a gallon-sized ziplock bag and snipped the end off to fill the little cavity I created in the cupcakes. It was pretty fun to watch the cupcakes begin to bulge and swell as they were filled to capacity with chocolate. The ganache itself was a pretty solid nugget when the cupcakes were cold, and only a little less solid when it came to room temperature. You could easily bite through it, but I think I was picturing a more truffle-like filling and may alter the recipe next time to reflect that. It was still amazingly tasty, and I’d make it again in a heartbeat. The alcohol is raw in the ganache, but it wasn't overpowering as I expected, it just added a nice touch of flavor.

    The Baileys buttercream was the pièce de résistance, and it was my favorite part of the cupcake. I do think I may have licked some directly from the bowl. One of the tricks from Smitten Kitchen was to add the powdered sugar a little at a time, and that really seemed to work for me. The Baileys frosting definitely has the biggest punch of any of the cupcake components, but I loved it. However, if that isn’t your thing, go ahead and use half milk/half Baileys, or all milk if you want to omit the alcohol completely.

    This is not a complicated recipe by any means, but the 'wow' factor is definitely there.

    For the record, my friends had a wonderful party, and even got to see the Chicago River dyed mutant green. I really hope they enjoyed their treats!

    Best wishes to them both for a long and happy marriage!

    Chocolate Whiskey and Beer Cupcakes
    Adapted from: Smitten Kitchen
    Makes 20 to 24 cupcakes

    Guinness Chocolate Cupcakes

    1 cup stout (such as Guinness)
    1 cup (2 sticks) unsalted butter
    3/4 cup Dutch-process cocoa
    2 cups all purpose flour
    2 cups sugar
    1 1/2 teaspoons baking soda
    3/4 teaspoon salt
    2 large eggs
    2/3 cup sour cream

    Ganache Filling

    8 ounces bittersweet chocolate
    2/3 cup heavy cream
    2 tablespoons butter, room temperature
    1 to 2 teaspoons Irish whiskey (optional, I used 2 teaspoons of bourbon, and a little more may have ‘accidentally’ dripped into the bowl.)

    Baileys Frosting

    3 to 4 cups confections sugar
    1 stick (1/2 cup or 4 ounces) unsalted butter, at room temperatue
    3 to 4 tablespoons Baileys (milk, heavy cream, or combination)

    Directions
    Preheat oven to 350°F. Line 24 cupcake cups with liners. Bring 1 cup stout and 1 cup butter to simmer in heavy large saucepan over medium heat. Add cocoa powder and whisk until mixture is smooth. Cool slightly.

    Whisk flour, sugar, baking soda, and 3/4 teaspoon salt in large bowl to blend. Using electric mixer, beat eggs and sour cream in another large bowl to blend. Add stout-chocolate mixture to egg mixture and beat just to combine. Add flour mixture and beat briefly on slow speed. Using rubber spatula, fold batter until completely combined. Divide batter among cupcake liners, filling them 2/3 to 3/4 of the way. Bake cake until tester inserted into center comes out clean, rotating them once front to back if your oven bakes unevenly, about 17 minutes. Cool cupcakes on a rack completely.

    Make the filling: Chop the chocolate and transfer it to a heatproof bowl. Heat the cream until simmering and pour it over the chocolate. Let it sit for one minute and then stir until smooth. (If this has not sufficiently melted the chocolate, you can return it to a double-boiler to gently melt what remains. 20 seconds in the microwave, watching carefully, will also work.) Add the butter and whiskey (if you’re using it) and stir until combined.

    Fill the cupcakes: Let the ganache cool until thick but still soft enough to be piped. I used a grapefruit knife and grapefruit spoon to cut the centers out of the cooled cupcakes. You could easily use a paring knife as well. You want to go about 2/3 of the way down the cupcake but not cut through the bottom. Feel free to eat those centers. Or wait to dip them in any leftover frosting. Then eat them. Put the ganache into a piping bag with a wide tip and fill the holes in each cupcake to the top. (Here I just used a quart sized ziplock baggie with the tip cut off)

    Make the frosting: Whip the butter in the bowl of an electric mixer, or with a hand mixer, for several minutes. You want to get it very light and fluffy. Slowly add the powdered sugar, a few tablespoons at a time.

    When the frosting looks thick enough to spread, drizzle in the Baileys (or milk) and whip it until combined. If this has made the frosting too thin (it shouldn’t, but just in case) beat in another spoonful or two of powdered sugar.

    Ice and decorate the cupcakes.

    Do ahead: You can bake the cupcakes a week or two in advance and store them, well wrapped, in the freezer. You can also fill them before you freeze them. They also keep filled — or filled and frosted — in the fridge for a day. (Longer, they will start to get stale.)

    Thursday, April 29, 2010

    Twix Cupcakes

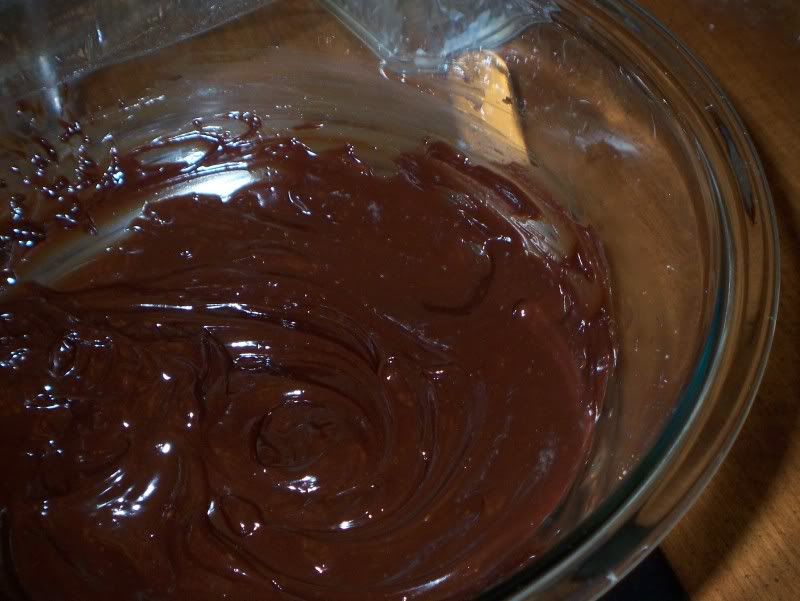
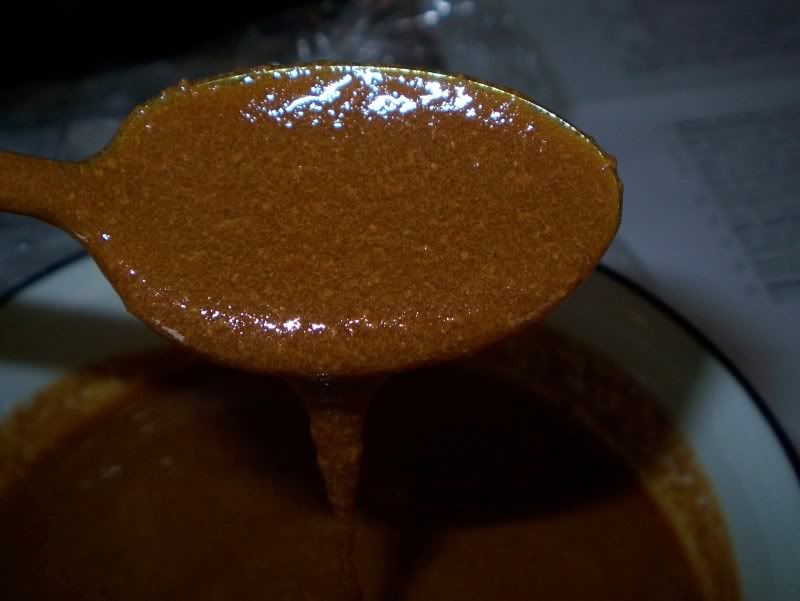
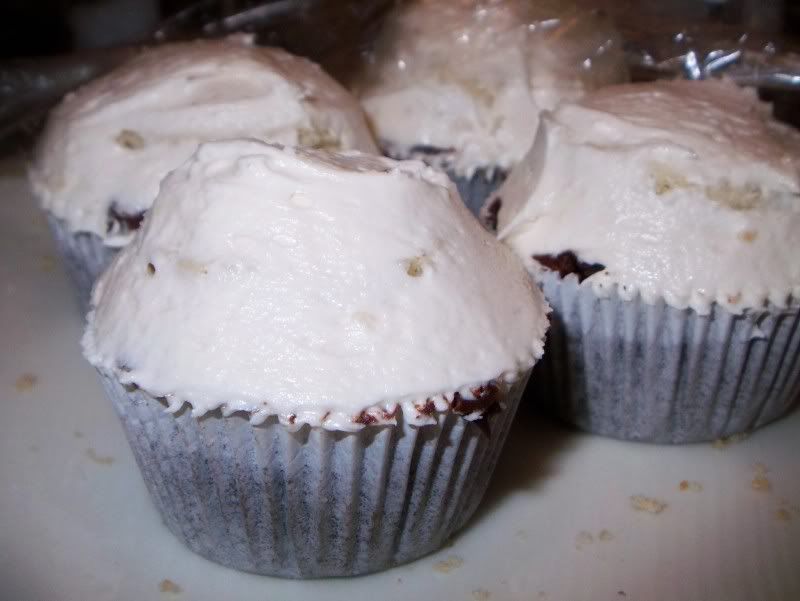
    I have a soft spot for all things chocolate. And caramel. And cookie. That’s probably the reason one of my favorite candies is the Twix bar. A little shortbread cookie, topped with caramel and then enrobed in milk chocolate. I was really in the mood to make cupcakes recently, but I wanted to do something special. So I decided to make a chocolate cupcake topped with homemade caramel, chocolate ganache, and circular shortbread cookie with a caramel buttercream frosting. It’s hard to see in that picture, but I promise you, it’s all there.

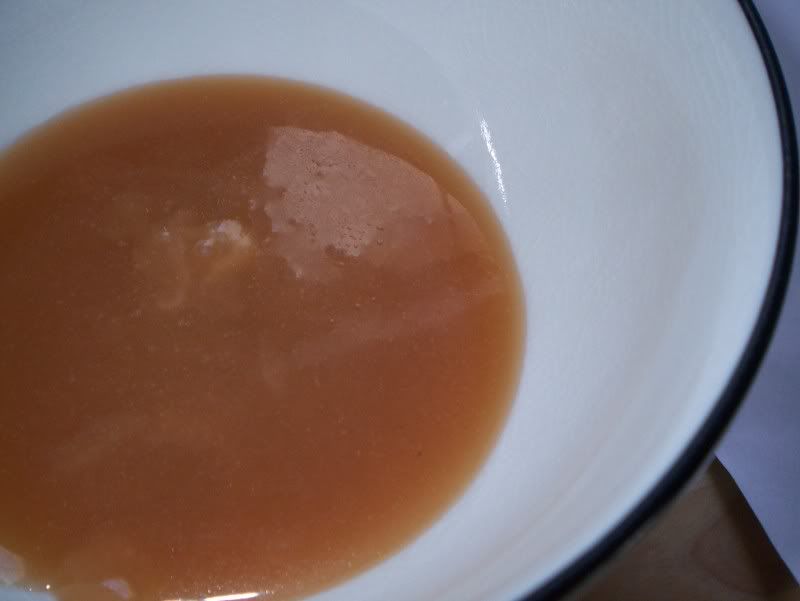
    Though I’ve made cupcakes before, this was my first time making buttercream, shortbread, caramel and chocolate ganache. And what an experience that was. First things first. When a recipe says "heavy cream" or "whole milk" DO NOT, I repeat DO NOT use fat-free half and half by mistake. Lets take a look at what happens, shall we?

    Bad Ganache (top) versus Good Ganache (bottom)

    Bad Caramel (top) versus Good Caramel (bottom)
    Fat-free half and half curdles much easier than its full-fat counterparts. The fat in real cream allows it to withstand both simmering and any acidity it may encounter in certain sauces, which is not true for the fat-free version. You can see the little flecks of curdled cream, especially in the caramel (not to mention the caramel may or may not have gotten slightly overcooked as well which was just another reason to start over). The second attempt was much better than the first, especially when I double-checked that I was indeed using heavy cream this time around. I also diligently watched my caramel this time; I did not want to make it a third time simply because I let it burn again. (As an aside, the amount in the above picture is what was left over after removing the 1 cup portion for the frosting.) My husband can attest to the fact I get ridiculously excited when things work the way they are supposed to. I must have made him look at my bowl five or six times because I couldn’t believe I successfully made caramel. It even thickened like it was supposed to – which meant I called him over again to specifically point that out. He’s a good sport.

    The cupcake recipe was from Martha Stewart’s website; I used the ever popular "One Bowl Chocolate Cupcake" recipe from the Cupcakes book. This batter was easy to throw together, though I had a really hard time figuring out how to transfer the incredibly loose batter from my bowl to the cupcake wrappers. They baked just fine, and surprisingly flat. While this was a good cupcake, I definitely will not stop looking for the ‘perfect chocolate cupcake.’ I have since found another recipe from one of Martha’s Baking Handbook that is named the same thing, but has a different list of ingredients, and word on the street says it's even better than this recipe. I’ll have to try it next time.

    I do have to say that the cupcakes themselves were a little difficult to eat because of the shortbread cookie on top, but I don’t think that discouraged anyone from digging right in. These are not dainty cupcakes. These are dive-in-head-first-get-frosting-all-over-your-nose-and-face cupcakes. Or, if you’re civilized, you can definitely cut one in half and eat it that way. But why dirty more dishes than you have to?
    I also tried making these as mini cupcakes, but the shortbread was so hard to make that small that the ‘twix’ aspect was mostly lost.
    This recipe is incredibly long, I’m warning you now. Because there are five distinct components to this cupcake, it does take a while to make. But it is so worth it.
    Twix Cupcakes

    Caramel
    Adapted from Cheryl Porro
    4 Tbsp Water
    1 c Sugar
    2 Tbsp Light Corn Syrup
    ½ c Heavy Cream
    2 Tbsp Butter
    ½ tsp Lemon Juice

    Combine the water, sugar, and the corn syrup in a deep saucepan and cook over medium heat.
    Stir together with a wooden spoon until the sugar is incorporated.
    Cover the saucepan and let it cook over medium heat for 3 minutes.
    After 3 minutes, remove the lid, increase the heat to medium-high, and bring to a boil. Do not stir from this point on, but it is important to carefully shake the pan so that one area of the caramel doesn’t burn.
    Continue to cook until the caramel turns an even amber color then remove from the heat and let stand for about 30 seconds.
    Pour the heavy cream into the mixture. Wear oven mitts, stand away from the pan, and be careful. The mixture will bubble up significantly.
    Stir the mixture, again being careful. Add the butter, and lemon juice. Stir until combined.
    Measure 1 cup into a Pyrex measuring cup. Stirring occasionally, allow to cool until thick like molasses and warm to the touch, about 20 minutes. The 1 cup that was set aside goes into the buttercream frosting with leftovers will be used on top of the cupcakes themselves.

    Caramel Buttercream Frosting
    Adapted from Cheryl Porro
    2 sticks Butter
    8 oz Cream cheese
    5-6 c Confectioner’s Sugar
    1 c Caramel

    Bring butter to room temperature by letting it sit out for 1 or 2 hours.
    Beat butter and cream cheese at medium speed until creamy.
    Sift 3 cups of powdered sugar into the butter/cream cheese mixture and beat to combine.
    Add 1 cup of caramel and beat to combine.
    Sift 2-3 cups of powder sugar, in 1 cup increments and beating between each, until you arrive at the thickness and sweetness you desire. (I used 6 cups)

    Shortbread
    Adapted from Taste of Home
    1 stick + 3 Tbsp Butter, softened
    1/4 c Sugar
    2 c Cake Flour
    2 Tbsp Ground rice (processed rice grains in food processor or coffee grinder, do not use rice flour)

    With a rack in the lowest portion of the oven, preheat to 350. Spray a 9×13″ baking pan with cooking spray, line with parchment paper, then spray the paper.
    In a stand mixer with the paddle attachment, or with a hand mixer, cream the butter and sugar together on medium speed for about 2 minutes. It should be fluffy.
    Gradually add in the flour and the rice until the dough comes together.
    Press the dough into the bottom of the prepared pan and bake for 12 minutes. Rotate the pan and continue to bake for another 8 minutes. The shortbread should be a deep golden brown. Cool on a rack to room temperature, still in the pan.

    Chocolate Cupcakes
    Adapted from Martha Stewart’s Cupcakes Book. Yield: 12 cupcakes.

    Ingredients:
    ¾ c Unsweetened Cocoa Powder
    1 ½ c AP Flour
    1 ½ c Sugar
    1 ½ tsp Baking Powder
    ¾ tsp Salt
    2 Large eggs
    ¾ c Warm Water
    ¾ c Buttermilk (I substituted 3/4 c milk mixed with 2 ½ tsp lemon juice, after letting it sit for 5 minutes)
    3 Tbsp Canola oil
    1 tsp Vanilla
    Directions:
    Preheat oven to 350F. Line 2 cupcake tins with liners and set aside.
    Sift together cocoa powder, flour, sugar, baking soda, baking powder, and salt into a large bowl. Add eggs, warm water, buttermilk, oil, and vanilla, and mix until smooth, about 3 minutes. Scrape down the sides and bottom of bowl to ensure batter is well mixed.
    Divide batter evenly among muffin cups (I poured into a funnel with the end of a wooden spoon as my stopper, lifted the spoon until batter filled the cups then replaced it to stop the flow of batter.), filling each 2/3 full. Bake until tops spring back when touched, about 20 minutes, rotating pan once if needed. Transfer to a wire rack; let cool completely.

    Chocolate Ganache
    From Joy of Baking

    8 oz. Bittersweet Chocolate
    ¾ c Heavy Whipping Cream
    2 Tbsp Unsalted Butter
    1 Tbsp Cognac or Brandy (optional)
    Directions:
    Place the chopped chocolate in a medium sized stainless steel bowl. Set aside.
    Heat the cream and butter in a medium sized saucepan over medium heat. Bring to just a boil.
    Immediately pour the boiling cream over the chocolate and allow to stand for 5 minutes.
    Stir with a whisk until smooth. Add liqueur if desired.

    Assembling the Cupcakes

    Make caramel. Allow to cool completely.
    Make cupcakes and allow to cool completely.
    Cut out pieces of shortbread using a round cookie cutter that is slightly smaller than the diameter of the cupcake. Set aside.
    Make Caramel Buttercream frosting.
    Make chocolate ganache. Spread thin coating on each cupcake and let set up a little bit.
    Spread thin layer of leftover caramel on each cupcake (this can be hard with the ganache already on the cupcake, but it’s easier if you let the ganache set slightly first.)
    Top each with a shortbread disk.
    Frost each cupcake with your Caramel Buttercream.


    Related Posts Plugin for WordPress, Blogger...