Showing posts with label citrus. Show all posts

Friday, May 27, 2011

Lemon Meringue Pie

I am a huge, like HUUUUGE, fan of chocolate. If you want me to try anything, just dip  it in some chocolate. Seriously.


But, as much as I love chocolate, I am realizing that there is more to the world of desserts than just white, semi-sweet, and dark.


Citrus has been slowly making its way into my dessert cravings. First, it was a bit of orange zest into a recipe. Then it was the addition of the zest and juice. Citrus really has a way of waking up flavors. But, the beauty of it is that it can also stand up perfectly well by itself.


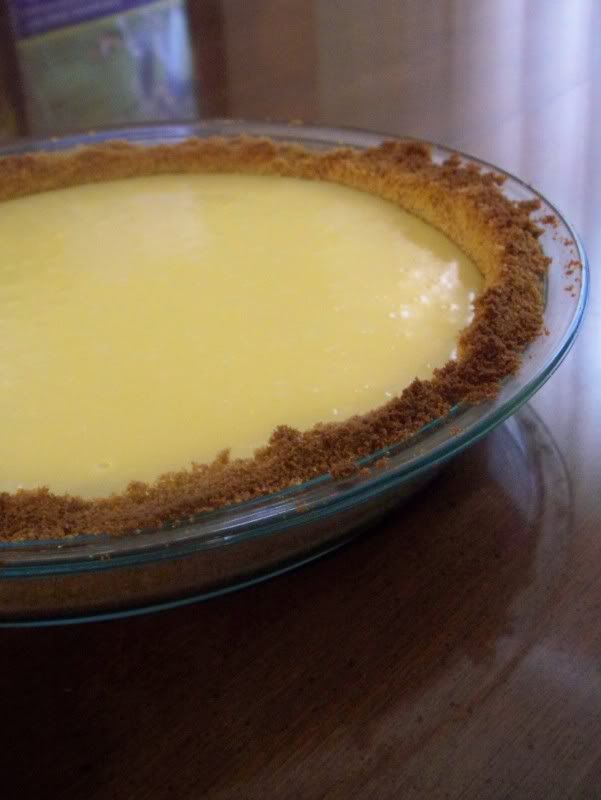
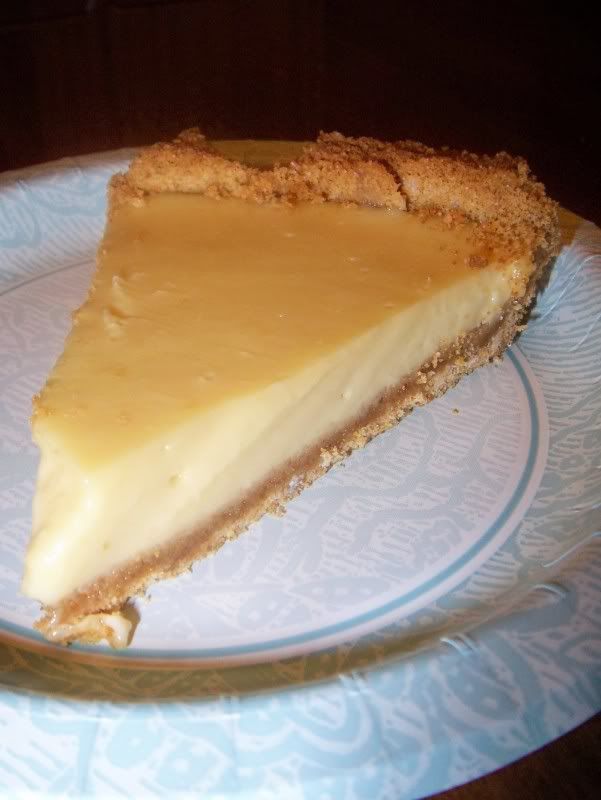
Case and point - the lemon meringue pie. A wonderfully lemony dessert that can hold its own on the plate (not to mention, it doesn't leave me in a food coma after a slice - or two.) I didn't have to adjust this recipe at all, and the filling was so lemony - but not in an overpowering way. Light, fresh and amazing.


In the spirit of full-disclosure, I will say that i probably need to try making meringue again, as mine wept after a few hours. Oh well, I could just eat it with my eyes closed, and I would be none-the-wiser. :) Maybe you'll have better luck with the meringue than I did!


Ingredients

1 cup white sugar
2 tablespoons all-purpose flour
3 tablespoons cornstarch
1/4 teaspoon salt
1 1/2 cups water
2 lemons, juiced and zested
2 tablespoons butter
4 egg yolks, beaten
1 (9 inch) pie crust, baked
4 egg whites
6 tablespoons white sugar

    Directions

    Preheat oven to 350 degrees F (175 degrees C).

    To Make Lemon Filling: In a medium saucepan, whisk together 1 cup sugar, flour, cornstarch, and salt. Stir in water, lemon juice and lemon zest. 
    Cook over medium-high heat, stirring frequently, until mixture comes to a boil. Stir in butter. Place egg yolks in a small bowl and gradually whisk in 1/2 cup of hot sugar mixture. 
    Whisk egg yolk mixture back into remaining sugar mixture. Bring to a boil and continue to cook while stirring constantly until thick. Remove from heat. 
    Pour filling into baked pastry shell.
    To Make Meringue: In a large glass or metal bowl, whip egg whites until foamy. Add sugar gradually, and continue to whip until stiff peaks form. Spread meringue over pie, sealing the edges at the crust.
    Bake in preheated oven for 10 minutes, or until meringue is golden brown.

      Wednesday, February 2, 2011

      Broiled Sockeye Salmon with Citrus Glaze

      Happy Groundhog Day! As we in the midwest are digging out of our massive snowstorm, I figured now would be the perfect time to share a recipe that reminds me a little bit of sitting on the beach during the summer...beacause if this weather is any indication, Puxatawny Phil is definitely seeing his shadow.


      “Just keep swimming, just keep swimming, just keep swimming, swimming swimming.
      What do we do?
      We swim, swim, swim!”


      I am ecstatic that the storyline of Finding Nemo does not feature a salmon, because I’m pretty sure I’d feel forever guilty for eating, and enjoying immensely, a beloved children’s character. (Don’t get me started on Flounder from the Little Mermaid).

      Salmon is an incredibly versatile fish thanks to its unique flavor. It is strong enough to stand up well to
      hoisin sauce and spice, yet a simple citrus and sugar glaze can accentuate its more delicate features. This glaze we use typically when we can get our hands on fresh wild Sockeye salmon. Since it’s a little more expensive than the usual salmon filets we purchase, I think it is important to really highlight the flavor of the fish, and let that be the star of the show.

      I was not sure if simply broiling the fish would cook it all the way through before burning the sugar, but the recipe worked perfectly. The sugar in the citrus glaze caramelizes and crisps up underneath the broiler, providing a nice balance to the perfectly cooked, flaky salmon.

      Broiled Sockeye Salmon with Citrus Glaze
      From
      Alton Brown via FoodNetwork.com

      Ingredients
      1 side, skin-on, sockeye salmon, 1 1/2 to 2 pounds, pin bones removed
      1/3 cup dark brown sugar
      2 tablespoons lemon zest
      1 1/2 teaspoons kosher salt
      1/2 teaspoon freshly ground black pepper
      Directions
      Position a rack in the oven 3 inches from the broiler. Line a half sheet pan with aluminum foil and place the salmon on the pan.

      Place the sugar, zest, salt, and pepper into the bowl of a small food processor and process for 1 minute or until well combined. Evenly spread the mixture onto the salmon and allow to sit for 45 minutes, at room temperature.

      Turn the oven on to the high broiler setting for 2 minutes. After 2 minutes, place the salmon into the oven and broil for 6 to 8 minutes or until the thickest part of the fish reaches an internal temperature of 131 degrees F on an instant-read thermometer. Remove the salmon from the oven and allow to rest, uncovered, for 8 to 10 minutes. Serve immediately.

      Sunday, December 19, 2010

      Fresh Orange Spritz Cookies

      I didn’t get to do my usual Christmas baking last year because we were on vacation in Thailand. I managed to eat more than my fair share of goodies there, even if they aren’t what is considered traditional American holiday treats. But, this did mean that my newly-acquired spritz cookie press has been sitting idle since I got it last Christmas. I already made one batch of Spritz Cookies, I wanted to get double-use out of my cookie press this year. Wilton has a lot of great recipes to use with their products, and this cookie press is no expectation. There are not only several variations of the spritz cookie available, but they also developed several savory cracker-like recipes to be used with the press as well.

      This orange spritz cookie recipe caught my eye, and I thought this would be great turned into a sandwich cookie with a chocolate filling. I have only ever made the almond/vanilla spritz cookie recipe posted above, so I felt a little daring using a whole new recipe in my cookie press for the first time ever. New recipes scare me a little bit, too, because I am always fearful that I will spend all the time prepping a recipe that turns out to be a failure in the end.

      Putting the dough together, my worries calmed a little. It felt as a spritz cookie dough should feel and the orange zest and juice radiated a fresh, citrusy aroma in the kitchen. While they were good, the chocolate sent it over the top. The sweetness of the chocolate and the slight citrusy tang of the cookie is a winning combination. My cookie press will definitely be seeing this recipe again. It's perfect for anytime, not just the holidays, which means my cookie press will not be simply gathering dust the other eleven months of the year this time.

      Curious about what I’ve made already? Check out:
      White Trash
      Quick Mix Spritz Cookies
      Peppermint Icicle Candy
      Spiced Pecans and Pralines


      Fresh Orange Spritz Cookies
      Adapted slightly from Wilton.com

      Ingredients:
      1 cup butter , softened
      1 cup granulated sugar
      1 egg yolk
      2 tablespoons orange juice
      2 1/4 cups all-purpose flour
      1 tablespoon orange rind , finely chopped
      1/4 cup pecans , finely chopped (optional – I left out)
      Dash of orange food coloring, if desired

      Makes: About 5 dozen cookies.

      Instructions

      Preheat oven to 350.

      In mixer bowl, cream butter and sugar. Beat in egg and orange juice.

      Mix in flour, orange rind and optional pecans.

      Mix just until combined, add food coloring, if using. Dough should be soft but not sticky.

      Shape dough into small logs and place in Cookie Master Plus.

      Using desired disk, press shapes onto ungreased cookie sheet.

      Bake 10-12 minutes or until edges are lightly browned.

      Cool 2 minutes on cookie sheet on rack.

      Remove from cookie sheet and cool completely on rack.

      The filling was simple tempered chocolate. Simple as in only one ingredient, but tempering chocolate is a delicate process. This is my first try at doing this, but it was pretty straight forward. I got the instructions here. You could probably easily just sandwich the cookies with plain melted chocolate, but having dipped cookies before and ending up with blooming chocolate, I wanted to give tempering a try. It's a simple process, but definitely time consuming. If you want to avoid blooming chocolate, you can try chocolate candy melts sold at most craft stores. Either way, it's a winner.

      Thursday, December 9, 2010

      Mojito Cupcakes

      I loved mixed drinks. I just wish they loved me back. Nowadays I typically stick to beer simply because they don’t slap me in the face like mixed drinks tend to do.

      Some of my favorite drinks are Mudslides, Long Island Iced teas, and Mojitos. Mudslides are my drink of choice when I’m sitting on a beach, long islands will cure what ails ya, and Mojitos are so light and refreshing, they mentally transport me to somewhere much more tropical than Chicago.

      I figured that a mojito cupcake would be the perfect non-chocolate cupcake option (paired with none other than the Car Bomb Cupcakes) for my dessert spread. I love when I can bake with a little creativity. And it’s not that bar-themed cupcakes have never been done before, but I always love when I get to chance to create something a little out of the ordinary for my friends. When I mentioned the idea of making a yellow cupcake with rum, lime and mint to my husband, he faltered a little bit before tentatively saying ‘it should be fine... I think.’ This got me thinking about the fact that I had not used mint a lot before in my baking and I was wondering if the cakes would end up with a strange flavor or aftertaste that I wasn’t anticipating. The only way to find out was to try it and hope for the best.

      The cupcake consists of a cake using mint infused milk, lime and rum, which is then coated lightly with a rum, mint and lime glaze and finally topped with a rum and lime buttercream. The cupcake recipe yields a light, fluffy and moist cupcake that has a nice punch of citrus from the lime juice and zest. The addition of the mint infused milk gives it an ever-so-subtle flavor, but resulted in a wonderful freshness and lightness to the cake. The glaze was probably an unnecessary step, but certainly dialed up the rum notes a little bit more.

      The cake itself was delicious, but the icing sent it over the top. A lot of the recipes I’ve seen use a cream cheese-based frosting, and I was just too hesitant about the tangy flavor overpowering the subtle flavor components of the cake, so I settled on a lime and rum buttercream frosting. My husband and I both agreed though that the icing was what tied the whole cake together. And because this recipe starts with a killer cupcake, by omitting the rum and mint you make a wonderfully summery lime cupcake that would be perfectly suited for an afternoon tea or baby/bridal shower. You could also jazz the cake up with a coconut buttercream (yum!) or a lime curd filling. Or switch out the rum for tequila, omit the mint and glaze, and you’re on your way to a margarita.


      Delicious.


      Mojito Cupcakes

      Mojito Icing:
      Group Recipes

      1 1/2 cups powdered (icing) sugar (or more, depending on rum amount)
      3 T butter, softened
      zest and juice of half a lime
      half shot of spiced or dark rum (or more or less to taste)
      12 sprigs of mint garnish (optional)

      Mojito Icing:
      Mix the butter and sugar together in a bowl until smooth.
      Add the rum and lime, mix further until stiff peaks form (add more powdered sugar if necessary).
      Taste to see if it needs more rum, and add as appropriate.
      I use a flat knife to spread the icing onto the tops of the mojito cupcakes because a spatula is just too big.
      Then add a sprig of mint on each to garnish.

      Rum Syrup Glaze
      Cream Puffs in Venice
      For the rum syrup:
      1 cup sugar
      1/4 cup water
      1/4 cup butter
      1/4 cup dark rum
      2 or 3 pieces of lime zest
      a few sprigs of fresh mint
      In a small pot, combine the sugar, water and butter over medium-high heat.
      Bring the mixture to a boil, stirring often.
      Once the butter has completely melted and the sugar has dissolved, remove from the heat.
      Carefully add the rum. The mixture will bubble and spurt so take care not to burn yourself.
      Once you’ve mixed in all the rum, add the lime zest and mint and let the syrup infuse for 5 minutes before spooning over the warm cupcakes.

      Mojito Cupcakes
      Alpine Berry

      makes 12 regular cupcakes

      1 1/2 cups all-purpose flour
      1 1/4 tsp baking powder
      1/4 tsp baking soda
      1/4 tsp salt
      1/2 cup mint leaves, loosely packed
      3/4 cup whole milk, hot
      1/4 pound (1 stick) unsalted butter, at room temp.
      1 cup granulated sugar
      2 eggs
      grated zest of 2 limes
      1/2 tsp vanilla extract
      1 tsp rum (optional)

      Preheat to 350F.

      Add mint leaves to hot milk. Let steep for 10-15 minutes. Pour milk through a fine-mesh sieve into a small bowl. Press liquid from mint leaves. Discard leaves and allow milk to cool slightly.

      Sift flour, baking powder, baking soda and salt. Set aside.

      In the bowl of a stand mixer, beat butter on medium speed until creamy, about 30 seconds. Add sugar and continue beating until light and fluffy, 3-5 minutes. Scrape the sides of the bowl occasionally.

      Add eggs, one at a time, beating after each addition. Mix in lime zest, vanilla and rum (if using).

      On very low speed, add flour mixture in 3 additions, alternating with milk and ending with flour, mixing until just incorporated.

      Fill 18 standard muffin cups half full. Bake until cupcakes spring back when touched, 18-22 minutes. Allow to cool in pan for 5 minutes. Remove cupcakes from pan and cool completely.

      Sunday, July 25, 2010

      Key Lime Pie

      Ok, so I lied. It’ not really a Key Lime Pie. It’s a Persian Lime Pie. But that does not make it any less delicious. I also have yet to figure out how to make the perfect graham cracker crust. The ones I make taste great, but they tend to be very delicate and on the verge of crumbly. That is one of the perks of using the premade graham cracker crusts, I find them much sturdier than I could ever make mine. Even a crumbly crust could not stop me from finding homemade far superior than store-bought, however. I love having the freedom to make a crust as thin or as thick as I want, and I can control how much sugar I add.

      For 2/3 cups of lime juice, I used all but five of my limes out of a pound of Persian limes. Those suckers are tiny. That afternoon, my juicer was my BFF for life. I did omit the lime zest that is originally called for in the recipe. Call me old-fashioned, but I love the homogenous color of a classic key lime pie. (It should probably also be noted that I do not have a microplane zester, and that is about the only way you’re getting any zest off of those things. I tried using my mini grater, and after grating my fingers three times and having no zest to my name, I quit. That may or may not have predominately influenced my decision to love the classic key lime pie.)

      My family tends to like the embellishments simple; just a nice, healthy dollop of cool whip. I prefer it plain, though. I added a little extra juice than called for in the original recipe. I like my pies tart. This one did not disappoint. This pie has a pronounced tartness that is perfectly balanced with the sweetness and richness of the graham cracker crust.

      My only complaint I have is that literally takes 30 minutes to assemble and bake, you have to wait over an hour for it to chill before you can finally dig in. That’s just plain cruel.


      Key Lime Pie


      Adapted from
      The Pioneer Woman

      Ingredients

      Crust

      13 whole Graham Crackers (the 4-section Large Pieces)
      1/4 cups Sugar
      1/4 cups Butter, Melted

      Filling

      2/3 cups Lime Juice
      2 whole Egg Yolks
      1 can (14 Oz) Sweetened Condensed Milk
      Preparation Instructions
      Preheat oven to 350 degrees

      For the crust:
      Crush crackers in a food processor or Ziploc bag. Pour them into a bowl and stir in sugar and melted butter. Press into a pie pan and bake for 5 minutes or until golden and set. Remove from oven and set aside to cool slightly.

      For the filling:
      Mix lime zest, lime juice, and egg yolks in a mixing bowl. Add in condensed milk and mix on high until smooth and thick. Pour mixture into crust and bake for 15 minutes.
      Remove from oven, allow to cool, then refrigerate for at least 1 hour—more if possible.

      Serve plain, with a dollop of Cool Whip, or the sweetened lime whipped cream as described in the original recipe.

      Tuesday, May 18, 2010

      Put the (Key) Lime (Cheesecake) in the Coconut (Tartcakes) and Eat 'Em All Up

      Prompted by a contest by Coconut and Lime, I decided to try my hand at coming up with a recipe that incorporates both coconut and lime as key ingredients. I enjoy Black Bottom Cupcakes, but rarely do you see any variations on the chocolate base with chocolate-chip cheesecake-like filling. My quest was to make a coconut cupcake filled with a key lime cheesecake filling. Without getting into the gory details, I will say that the first batch was, without sugarcoating it, a disaster. Since I was experimenting, I decided to not only make my ‘creation’ but also the original version of a black bottom, as a ‘control’ if you will. I discovered a few things. Halving a wacky cake recipe doesn’t work – the vinegar and baking soda are in specific proportions in the original recipe and my cupcakes ballooned out of their respective tins, only to collapse in on themselves and never truly set up. I also found out I like chocolate a little too much. I forgot to adjust the amount of chocolate chips from the original recipe and the result was a melted chocolate pool in the bottom of each cupcake that I’m sure also contributed at least partially to the cupcake collapse. Finally, wacky cake is a thin batter meaning the coconut that I so lovingly toasted and mixed into the batter sunk straight to the bottom instead of remaining suspended like I had expected. Oops. I didn’t take pictures because I was too busy trying to mitigate the damage to my muffins tins. After a good two hour soak and scrub they are mostly back to normal.

      After those unsuccessful trials in the kitchen, I took a new approach. I decided to ditch the wacky cake batter in favor of a true coconut cupcake and then spoon in the filling. Success! Well, mostly. The cupcake came out a little more dense than anticipated, but it was still good. It seemed like what you would get if a tart shell and cupcake had a love-child filled with key lime cheesecake. It wasn’t quite a cupcake because it wasn’t as fluffy as you’d expect, but it wasn’t a tart, either. The tartcake was born!

      The hubs - who doesn’t like coconut – offered to be a taste-tester for me, but only had one bite because, go figure, he didn’t like that it tasted like coconut. He couldn’t even make it to the key lime filling. But don’t feel bad because he didn’t like the cupcake. There was some extra filling leftover, so I put that in a ramekin and baked it off for a little bit so he was able to get a crustless mini key lime cheesecake out of the deal. That, for the record, he did enjoy.

      After having one, I am pleasantly surprised at my first black-bottom inspiration attempt. Just because it wasn’t exactly what I was envisioning didn’t make it any less delicious. A coconutty cupcake with a tangy, creamy key lime cheesecake filling.

      Thanks to Coconut and Lime for hosting this contest, and even if I don’t win the contest, I’m a winner because I go the confidence to try something totally new, and to persevere even after my initial miserable failure! (Which is a miracle considering what a pain in the rear juicing those itty bitty key limes is! I’m glad I have my juicer!)

      Next time I try these I may try a different cupcake recipe to see if the density was a result of the cupcake recipe or a result of adding in the cream cheese filling and consequently changing how a normal cupcake would have baked.

      Put the (Key) Lime (Cheesecake) in the Coconut (Tartcakes)
      Adapted From
      Domestic Diva Mysteriesand Cookie Madness

      Filling
      5 oz cream cheese
      2 Tbsp plus 2 tsp Sugar
      1 Tbsp key Lime Juice
      1 Egg White
      2 tsp Sour Cream

      Cupcakes:
      1 cup flour
      1 teaspoon baking powder
      1/4 teaspoon salt
      1/2 cup plus 2 tablespoons sugar
      1 egg
      ¼ c milk and 1/3 cup milk, divided
      1/3 cup heavy cream
      1/2 cup shredded coconut
      ½ tsp coconut extract

      Directions
      Preheat the oven to 350 degrees. Place cupcake liners in the cupcake pan.

      Make the filling: Beat the cream cheese, sugar and salt until smooth. Add the egg white and stir or beat on low speed just until mixed; stir in the sour cream and lime juice. Set aside.

      Make the tartcake: Combine the flour, sugar, baking powder, shredded coconut, and salt, and mix with a fork.
      Separate the egg. Beat the egg white until it forms gentle peaks, but isn't dry. Set aside.

      Beat the egg yolk briefly, slow the mixer and add add ¼ c of milk. Slowly add some of the flour mixture. Alternate adding the liquids and the rest of the flour mixture.

      Spoon one tablespoon of cheesecake mixture into each liner, making sure to sink the filling down a little into the cupcake.
      Bake on center rack for 22-25 minutes.
      Let cool in cupcake pan for 30 minutes and then transfer to the refrigerator to chill.

      This made 11 cupcakes for me with a little filling leftover.
      Related Posts Plugin for WordPress, Blogger...