Showing posts with label breakfast. Show all posts

Sunday, April 24, 2011

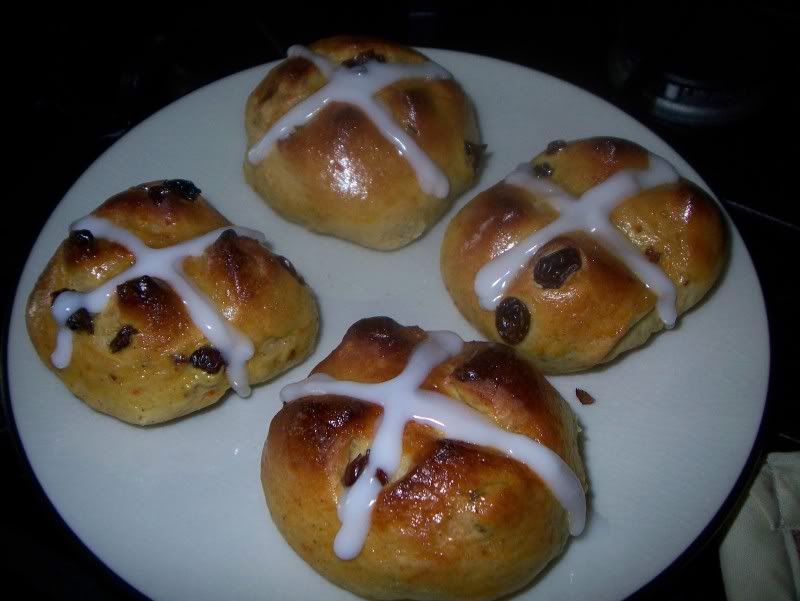
Hot Cross Buns

Happy Easter Y'All!


I hope you have a wonderful day with you friends, family and loved ones! I plan on sitting down to a meal of ham, sweet potato casserole, corn pudding and green beans - and more desesrts than I know what to do with!


Today, I'm going to keep the post short, as I want to spend as much time as I can with my parents, who drove all the way from the East Coast to spend the holiday with us!


So I'll leave you with a great recipe for a traditional hot-crossed bun that is as easy as it is delcious!


Hot Crossed Buns Recipe
From
Simply Recipes
Makes 16 buns.

Ingredients
1 1/4-ounce package active dry yeast (about 2 1/2 teaspoons)
3/4 cup warm milk
3 1/4 to 3 1/2 cups all purpose flour
1 teaspoon salt
1/4 cup plus 1 teaspoon granulated white sugar
2 teaspoons ground spices (for example, 1/2 teaspoon cardamom, 1/2 teaspoon cinnamon, 1/2 teaspoon allspice, 1/4 teaspoon cloves, 1/4 teaspoon nutmeg)
1 teaspoon salt
4 Tbsp butter, softened
2 eggs, room temperature (if taking right out of the fridge, let sit in warm water for a few minutes to take the chill off before using)
3/4 cup currants or raisins (can sub half of currants with chopped candied citrus peel)
2 teaspoons grated orange zest
 
Glaze
1 egg
1 Tbsp milk

Frosting
1 teaspoon milk or orange juice
3 to 4 Tbsp powdered sugar

Directions
In a bowl, stir together 1/4 cup of the warmed milk and one teaspoon of sugar. Sprinkle the yeast over the milk and let sit for 5-10 minutes until foamy.

In a large bowl or the mixing bowl of an electric mixer, vigorously whisk together 3 cups of the flour (reserving additional flour for later step), the salt, spices, and 1/4 cup of sugar.

Create a well in the flour and add the foamy yeast, softened butter, and eggs. Using a wooden spoon or the paddle attachment of your mixer, mix the ingredients until well incorporated. The mixture should be shaggy and quite sticky. Add in the currants, candied peel, and orange zest.

If you are using a stand-up mixer, switch to the dough hook attachment and start to knead on low speed. (If not using a mixer, use your hands to knead.) Slowly sprinkle in additional flour, a tablespoon at a time, kneading to incorporate after each addition, until the flour is still slightly tacky, but is no longer completely sticking to your fingers when you work with it.

Form a ball of dough in the bowl and cover with plastic wrap. Let sit, covered, at room temperature (or in a warm spot) for 2 hours, until the dough has doubled in size.

Press down on the dough to gently compress it. Roll the ball of dough into a log shape and cut it into two halves. Place one half back in the bowl while you work with the other half. Take the dough half you are working with and cut it into 8 equal pieces. The easiest way to do this is to roll it into a log, cut it in half, then roll those pieces into logs, cut them in half, and then do it again, roll those pieces into logs, and cut them in half.

Take the individual pieces and form them into mounds, placing them 1 1/2 inches apart from each other on a baking sheet. Cover with plastic wrap and then work the remaining dough into 8 equal pieces and place them in mounds on a baking sheet, again cover with plastic wrap. Let the dough mounds sit at room temperature (or warm place) to rise again, until the mounds have doubled in volume, about 30-40 minutes.

Preheat oven to 400°F. Prepare egg wash by whisking together one egg and a tablespoon of milk. If you want, you can score the top of the buns with a knife in a cross pattern. You will want to make fairly deep cuts, for the pattern to be noticeable after they're done. Using a pasty brush, brush on the egg wash over the dough mounds. The egg wash will give them a shiny appearance when cooked.

Place in the middle rack of the oven and cook for 10-12 minutes, until the buns are lightly browned. Remove from oven and let cool on the pan for a few minutes, then transfer the buns to a wire rack to cool.

To paint a cross on the top of the buns, wait until the buns have cooled (or the frosting will run). Whisk together the milk and the powdered sugar. Keep adding powdered sugar until you get a thick consistency. Place in a plastic sandwich bag. Snip off a small piece from the corner of the bag and use the bag to pipe two lines of frosting across each bun to make a cross.


Saturday, February 19, 2011

Bagels

Bagels are not new to me. I have made them before. Unfortunately, the results of my first batch were never worthy of sharing, an d I wanted to wait until I had a successful recipe.


To me, a good bagel is chewy, not dry and bready. My last attempt, while well-intentioned, might as well have been rolls with holes. They were not smooth and pretty on top like a bagel should be – they were lumpy and dull. When do the words ‘lumpy’ and ‘dull’ describe anything good?


See for yourself:

Not pretty.

I decided to give it a try again when I saw a new recipe that called for a sponge starter, instead of just starting out with regular bread dough. I let the sponge sit overnight, and then made the bagels the next morning. It was so fun to knead this dough because I could really feel the glutens activate and relax, and what started off as a shaggy dough turned soft and supple.


The last time I tried to make the holes in the bagels, I had the worst time keeping the edges even. Some spots would be really thick, and others would be super thin. I made a conscious effort this time around to avoid that problem and, for the most part, I succeeded.


When I boiled the bagels, I got a little worried because again they looked slightly lumpy after existing their water bath. I prepared myself for disappointment, but at least they only had to bake for 10 minutes before I could find out if the recipe worked.


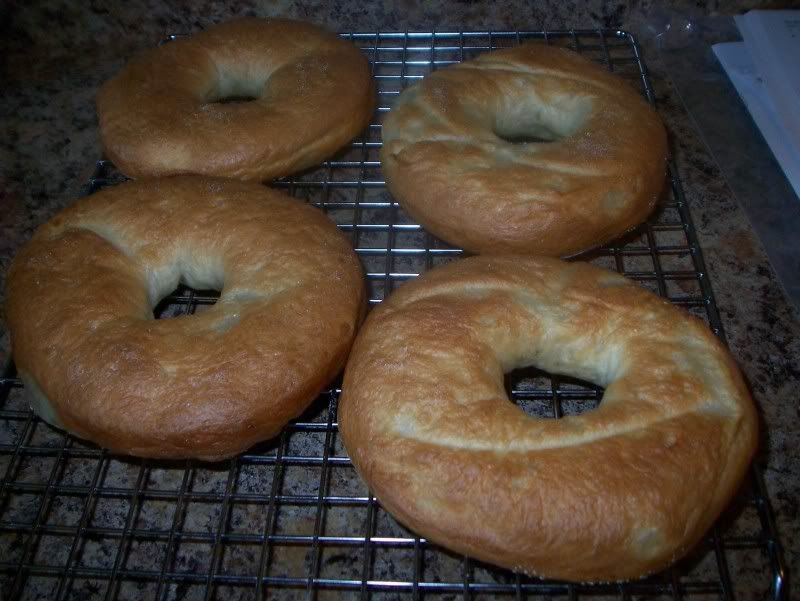
In the oven, the slightly lumpy exterior magically vanished, and a smooth, slightly glossy surface emerged on the top of each bagel. After ten minutes, I pulled perfectly golden brown bagels out of the oven. They looked like bagels, but I still was holding out on a verdict until I got a taste of one.


This recipe was a winner. These bagels were heavenly. Slightly chewy, with a thin, soft, shiny exterior crust – I have had one pretty much every day since making them (they make great sandwiches!)


Next time I’m trying a cinnamon-raisin version – as requested by the hubby. I can’t wait to make these again!


Peter Reinhart’s Bagels


Adpated from The Bread Baker’s Apprentice - As written on Smitten Kitchen's Website
Makes 1 dozen bagels

Yield: 12 extremely large, 16 regularly large or 24 miniature bagels

Sponge
1 teaspoon instant yeast
4 cups unbleached high-gluten or bread flour (see note below)
2 1/2 cups water, room temperature

Dough
1/2 teaspoon instant yeast
3 3/4 cups unbleached high-gluten or bread flour
2 3/4 teaspoons salt
2 teaspoons malt powder or 1 tablespoon dark or light malt syrup, honey, or brown sugar (see note below)

To Finish
1 tablespoon baking soda
Cornmeal or semolina flour for dusting

Day one: To make the sponge, stir the yeast into the flour in a 4-quart mixing bowl. Add the water, whisking or stirring only until it forms a smooth, sticky batter (like pancake batter). Cover the bowl with plastic wrap and leave at room temperature for approximately 2 hours, or until the mixture becomes very foamy and bubbly. It should swell to nearly double in size and collapse when the bowl is tapped on the countertop.

To make the dough, in the same mixing bowl (or in the bowl of an electric mixer), add the additional yeast to the sponge and stir. Then add 3 cups of the flour and all of the salt and malt. Stir (or mix on low speed with the dough hook) until the ingredients for a ball, slowly working in the remaining 3/4 cup flour to stiffen the dough.

Transfer the dough to the counter and knead for at least 10 minutes (or for 6 minutes by machine). The dough should be firm, stiffer than French bread dough, but still pliable and smooth. There should be no raw flour – all ingredients should be hydrated. The dough should pass the windowpane test and register 77 to 71 degrees F. If the dough seems to dry and rips, add a few drops of water and continue kneading. If the dough seems tacky or sticky, add more flour to achieve the stiffness required. The kneaded dough should feel satiny and pliable but not be tacky.

Immediately divide the dough into 4 1/2 ounce pieces for standard bagels, or smaller if desired. Form the pieces into rolls.

 Cover the rolls with a damp towel and allow them to rest for approximately 20 minutes.

Line 2 sheet pans with baking parchment and mist lightly with spray oil. Proceed with one of the following shaping methods:

Method 1: Poke a hole in a ball of bagel dough and gently rotate your thumb around the inside of the hole to widen it to approximately 2 1/2 inches in diameter (half of this for a mini-bagel). The dough should be as evenly stretched as possible (try to avoid thick and thin spots.)

Method 2: Roll out the dough into an 8-inch long rope. (This may require rolling part of the way and resting if the pieces are too elastic and snap back, in which case, allow them to rest for 3 minutes and then extend them again to bring to full length. Wrap the dough around the palm and back of your hand, between the thumb and forefinger, overlapping the ends by several inches. Press the overlapping ends on the counter with the palm of your hand, rocking back and forth to seal.

Place each of the shaped pieces 2 inches apart on the pans. Mist the bagels very lightly with the spray oil and slip each pan into a food-grade plastic bag, or cover loosely with plastic wrap. Let the pans sit at room temperature for about 20 minutes.

Check to see if the bagels are ready to be retarded in the refrigerator by using the “float test”. Fill a small bowl with cool or room-temperature water. The bagels are ready to be retarded when they float within 10 seconds of being dropped into the water. Take one bagel and test it. If it floats, immediately return the tester bagel to the pan, pat it dry, cover the pan, and place it in the refrigerator overnight (it can stay in the refrigerator for up to 2 days). If the bagel does not float. Return it to the pan and continue to proof the dough at room temperature, checking back every 10 to 20 minutes or so until a tester floats. The time needed to accomplish the float will vary, depending on the ambient temperature and the stiffness of the dough.

The following day (or when you are ready to bake the bagels), preheat the oven to 500 degrees F with the two racks set in the middle of the oven. Bring a large pot of water to a boil (the wider the pot the better), and add the baking soda (and optionally, a few tablespoons of barley syrup). Have a slotted spoon or skimmer nearby.

Remove the bagels from the refrigerator and gently drop them into the water, boiling only as many as comfortably fit (they should float within 10 seconds). After 1 minutes flip them over rand boil for another minute. If you like very chewy bagels, you can extend the boiling to 2 minutes per side. While the bagels are boiling, sprinkle the same parchment-lined sheet pans with cornmeal or semolina flour. (If you decide to replace the paper, be sure to spray the new paper lightly with spray oil to prevent the bagels from sticking to the surface.) If you want to top the bagels, do so as soon as they come out of the water. You can use any of the suggestions in the ingredients list or a combination.

When all the bagels have been boiled, place the pans on the 2 middle shelves in the oven. Bake for approximately 5 minutes, then rotate the pans, switching shelves and giving the pans a 180-degree rotation. (If you are baking only 1 pan, keep it on the center shelf but still rotate 180 degrees.) After the rotation, lower the oven setting to 450 degrees F and continue baking for about 5 minutes, or until the bagels turn light golden brown. You may bake them darker if you prefer.

Remove the pans from the oven and let the bagels cool on a rack for 15 minutes or longer before serving.

Tuesday, January 4, 2011

Cinnamon Rolls

As many times as I’ve made yeast dough, up until the morning I made these, I don’t recall ever making cinnamon rolls. I have wanted to try making them for a long time, but it is hard to justify a whole batch of rolls for two people. My parents coming to visit for a weekend gave me the push to try. While I had thought of trying an overnight cinnamon roll recipe, I couldn’t pry myself away from our exciting card games to make the dough. I figured that spending time with my family was more important that cinnamon rolls, so I figured we’d just go out to breakfast the next morning or eat cereal or pancakes.
Luckily for me, however, our little puppy starts waking up for the day around 6:30 am. I actually love having our puppy as my alarm clock on the weekends because I can wake up and get my day started and it’s a great time to spend some time with the puppy without him being too hyper. I played with him a little bit, and then Cody decided he’d much rather lay on his mat and chew his bone than play with me. With a couple hours to kill before everyone else started waking up, I figured this would be a perfect time to make my cinnamon rolls.
The process was pretty simple, but still managed to misread the instructions the first time around. Thankfully, the recipe is forgiving. After having the wet and dry ingredients mixed, I realized I’d forgotten 2/3 cup of milk. So I just dumped it in and mixed until it was combined. Easy peasy. I blame that one on the fact my coffee hadn’t kicked in yet.
The other problem with making yeast dough so early in the morning is that because I didn’t want to disturb everyone with the whirr of my stand mixer, the only tools I used were my metal mixing bowl, a wooden spoon, and my hands. I love my stand mixer, but I forget how relaxing kneading dough by hand can be. There is something really fascinating about how the texture changes in the dough as you keep kneading it.
And please, for the love of pete, don’t be like me and let butter and sugar bubble over the edge of your dish and burn onto the bottom of the stove. Put something underneath to catch any stray filling that may ooze out. (I will say that I finally had an excuse to test out the self-cleaning feature of my oven, and it was like the spill never happened, it was amazing!)


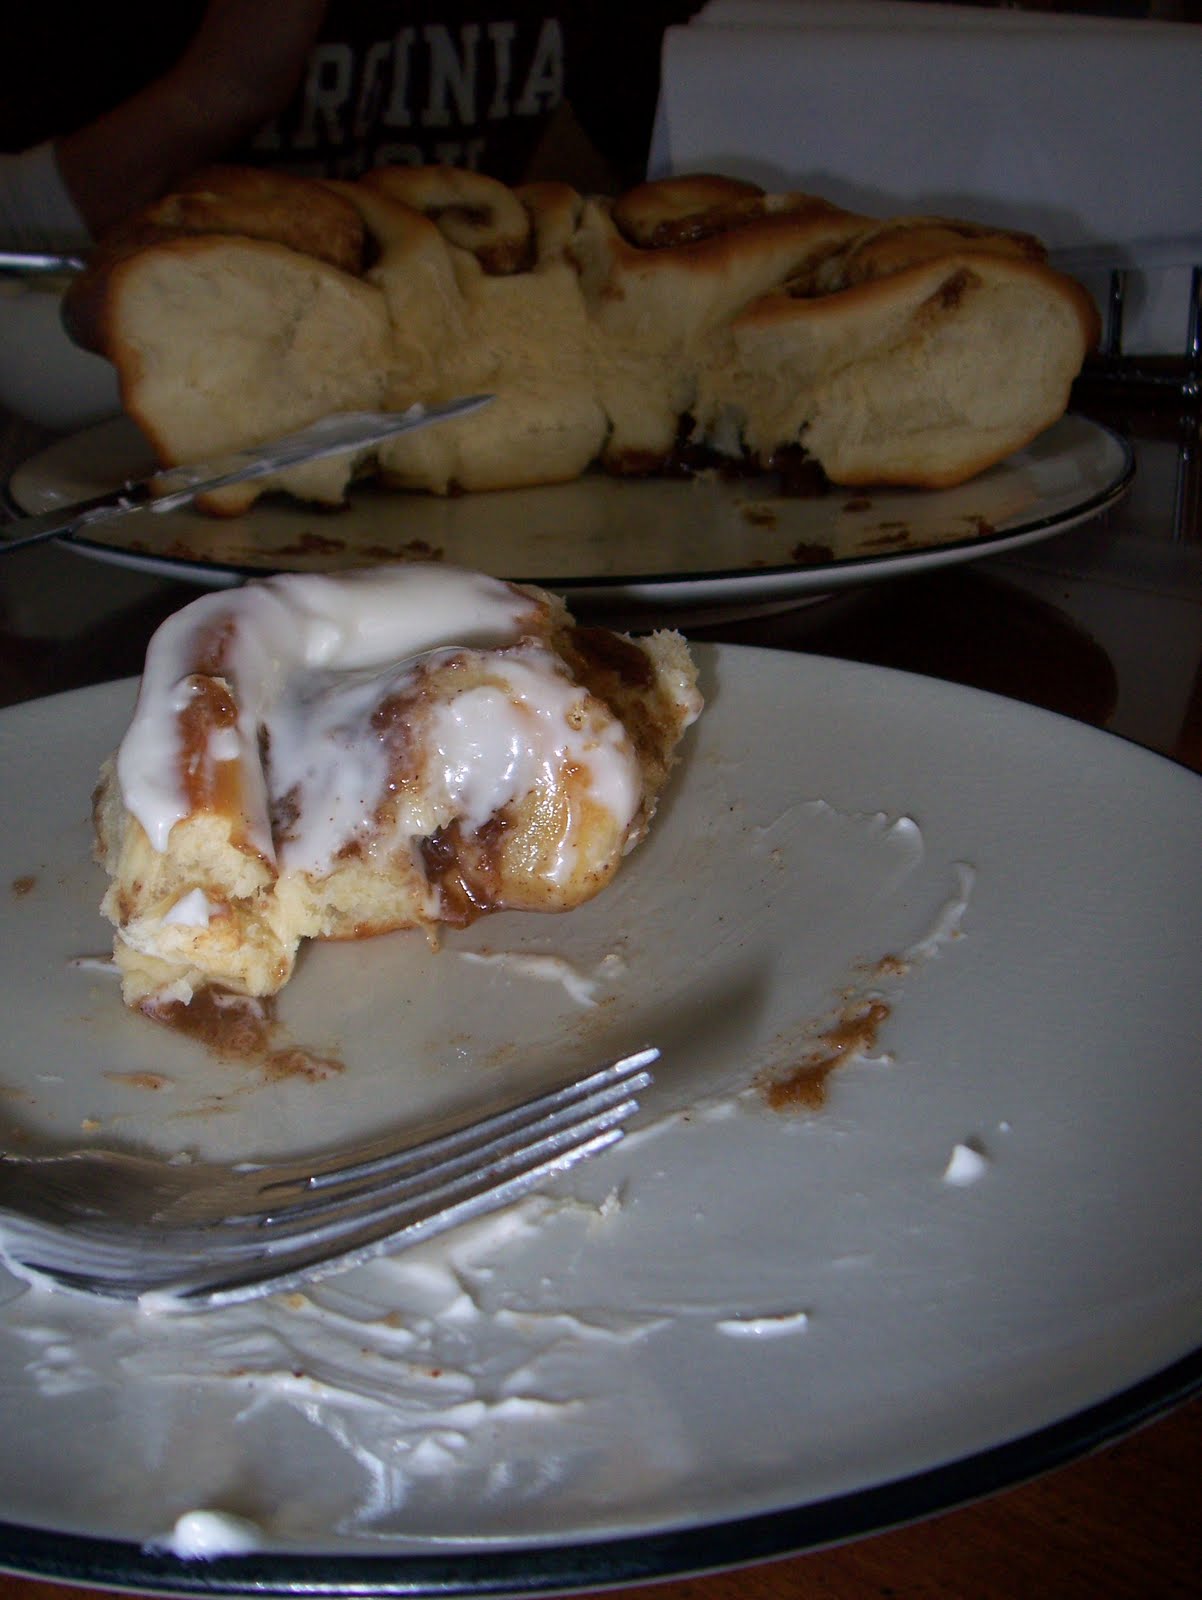
They were finally finished around 9:15-9:30ish. And while it was a little painful waiting that long to eat breakfast, it was definitely worth it. They were superb. Soft and slightly eggy, with a rich cinnamon-butter-brown sugar center oozing out. And no cinnamon roll is complete without some sort of frosting or glaze. I’m not a huge fan of a confectioners’ sugar glaze, so I used up the cream cheese in my fridge and made a cream cheese frosting.
As for storing them, I kept the icing and the rolls separate, since I knew we couldn’t finish the eight rolls between us in one morning. I figured they would reheat much easier without the icing. These do get a little hard after cooling, as many cinnamon rolls do, but I heated a leftover cinnamon bun for breakfast the next day, and after a minute in the microwave at 40% power, I could barely tell the difference between that one and the one fresh out of the oven the day before. I slathered it with some of the leftover icing, and it was pure heaven, for two mornings straight.


Cinnamon Rolls
From
Joy of Baking

Dough:

4 1/2 - 5 cups (630 - 700 grams) all-purpose flour
1 package (1/4 ounce) (7 grams) active dry yeast
1 cup (240 ml) milk
1/3 cup (75 grams) unsalted butter
1/3 cup (66 grams) granulated white sugar
1/2 teaspoon (2.5 grams) salt
3 large eggs

Filling:

3/4 cup (160 grams) packed light brown sugar
1/4 cup (35 grams) all-purpose flour
1 tablespoon ground cinnamon
1/2 cup (113 grams) unsalted butter, cold (cut into pieces)
1/2 cup light raisins (optional)
1 tablespoon half-and-half (light cream)

Cinnamon Rolls: In the bowl of your electric mixer, with the paddle attachment, combine 2 1/4 cups (315 grams) of the flour and the yeast.

In a small saucepan, stirring constantly, heat the milk, butter, sugar, and salt just till warm (120 -130 degrees F) (49 - 54 degrees C) and the butter is almost melted.

Gradually pour the milk mixture into the flour mixture, with the mixer on low speed. Add eggs, one at a time, beating after each addition. Scrape down the sides of the bowl. Beat this mixture on high speed for 3 minutes. Replace the paddle attachment with the dough hook (or do the kneading by hand), and knead in as much of the remaining 2 1/4 to 2 3/4 cups (315 - 385 grams) flour until you make a moderately soft dough that is smooth and elastic (3 to 5 minutes). (Dough will no longer be sticky to the touch.)

Shape into a ball. Place the dough into a greased bowl, turning once. Cover and let rise in a warm place till double (approximately 1 - 1 1/2 hours).

When the dough has doubled in size punch it down. Place onto a lightly floured surface, cover with a clean towel, and let rest for 10 minutes.


Meanwhile, combine the ingredients for the filling. In a medium-sized bowl place the brown sugar, flour, and cinnamon. Stir to combine. Cut in the cold butter with a pastry blender, or two knives, until the mixture is crumbly. Set aside.

After about 10 minutes, roll the dough into a 12 inch (30 cm) square. Sprinkle the filling evenly over the rolled out dough and top with raisins (if desired). Carefully roll the dough into a log and pinch the edges to seal. Slice the log (roll) into eight equal-sized pieces. Arrange dough pieces in a greased 13 x 9 x 2 inch (33 x 23 x 5 cm) baking pan.

Cover dough loosely with clear plastic wrap, leaving room for rolls to rise. At this point you can refrigerate the dough for anywhere from 2 to 24 hours. If overnight, the next morning remove the rolls from the refrigerator, take off the plastic wrap, and let stand at room temperature for 30 minutes. (If you are making the cinnamon rolls immediately, don?t chill dough. Instead, cover loosely with plastic wrap, and let dough rise in a warm place till nearly double, about 45 minutes to 1 hour.)

Break any surface bubbles with a toothpick. Brush dough with half-and-half or light cream. Bake in a 375 degrees F (190 degrees C) oven for 25 to 30 minutes or till light brown. (Can tell if done by inserting a toothpick into one of the buns, and it should come out clean. Also, if you lightly tap on the top of the buns it should sound hollow.)

If necessary, to prevent over-browning, cover rolls loosely with foil the last 5 to 10 minutes of baking. Remove rolls from oven. Brush again with half-and-half or light cream. Cool 5 minutes and then invert onto a baking rack and re-invert onto a serving plate or platter.

Can drizzle with the Powdered Sugar

Glaze.

Serve warm or at room temperature.

Makes 8 rolls.

Cream Cheese Icing

1 c confectioners' sugar
2/3 c cream cheese
3 Tbsp butter

Mix together until smooth. Smear onto warm buns.

Monday, October 18, 2010

French Toast

Nothing starts the day off right like a good breakfast. Some days I like the savory breakfasts – cream chipped beef, corned beef hash, home fries, eggs, sausage, bacon, etc. Most days, however, I love that you can eat something sweet and slathered in maple syrup and call it a meal, instead of just dessert! French toast is easy, but there is a technique to it. You do need stale, dried out bread, it soaks up more of the egg mixture and, more importantly, it holds up better. Fresh bread tends to get mushy and almost slimy to the point it’s impossible to work with.

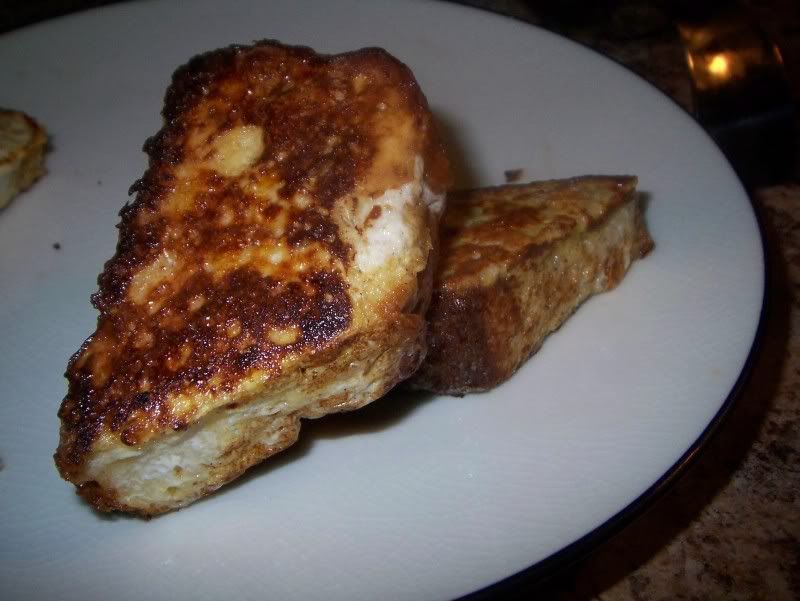
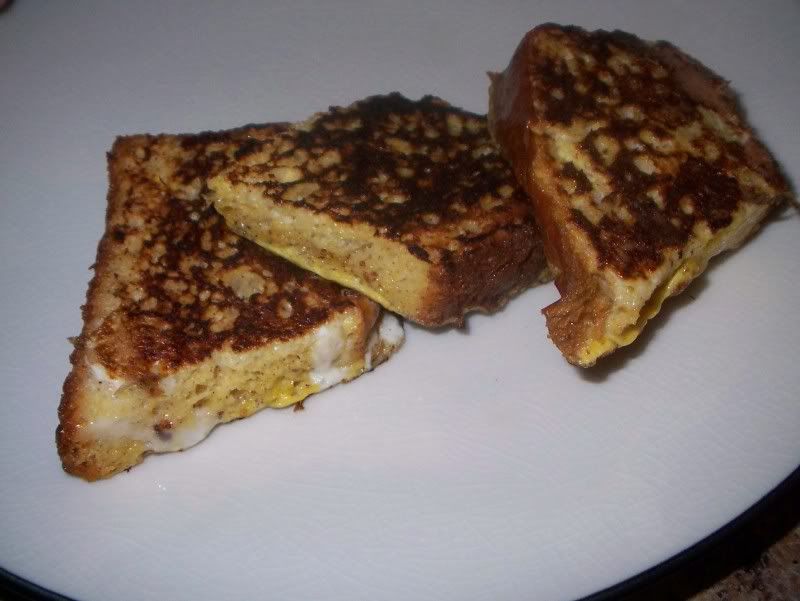
I made this French toast using my Pao Doce from a while ago. It freezes well, so I pulled some I had been saving in our freezer and sliced off a couple chunks for breakfast. The real trick is to cook it pretty low and slow. You want the inside to ‘set up’ similar to a custard without burning the outside.

My husband and I both love French toast, but we differ greatly on how we dress it up once it comes out of the skillet. He loves to drench his in maple syrup, whereas I swear by my cinnamon sugar – no syrup. Or, if you can get your hands on some of Watkins Cinna-Cream sprinkles, buy them. It’s cinnamon sugar but with a vanilla twist. Amazing. Seriously, go get some.


My bread was cooked in a 9” cake pan, and I cut off two 3/4-1” slices near the center of the loaf to make four pretty large pieces of French toast. And that’s more than enough for the two of us.
French Toast

Generously Serves 2

4 thick slices of stale bread
2 eggs
1/4 cup milk
1/2 teaspoon ground cinnamon
3/4 teaspoon vanilla extract (I use Watkins Brand)
Pinch ground nutmeg (optional)
salt to taste

Beat together egg, milk, salt, spices and vanilla.
Heat a lightly oiled or buttered griddle of skillet over medium/medium-high flame.
Dunk each slice of bread in egg mixture, soaking both sides.
Place in pan, and cook on both sides until golden.
Serve hot.

Friday, July 9, 2010

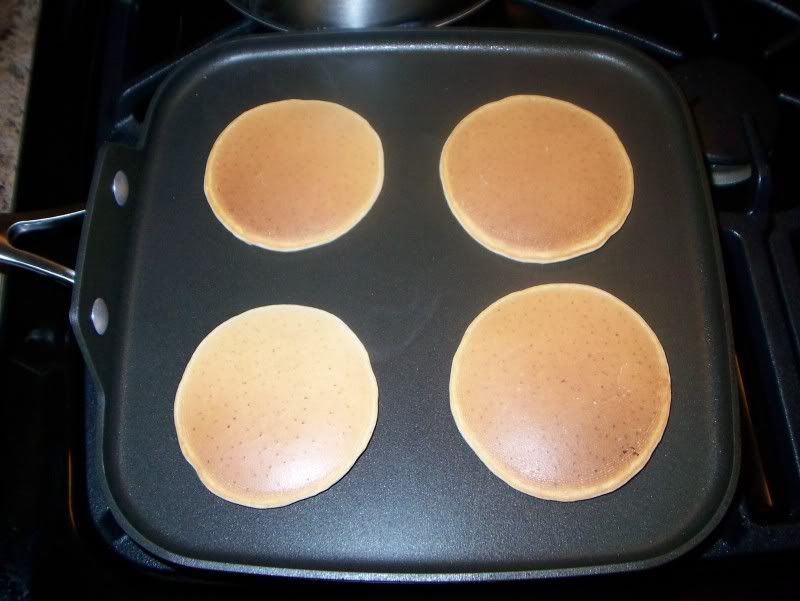
Brown Sugar and Cinnamon Pancakes

Breakfast. It’s the most important meal of the day. Some people can get by simply by pouring some cereal into a bowl, dousing it with milk and calling it a day. I will typically eat cereal only when I have to. I love omelets, french toast, pancakes, waffles, crepes, cinnamon buns and all the other glorious baked goods with tons of butter that are only fit to eat because they are breakfast foods!
Every once in a while, I enjoy breakfast dinners. There is something so comforting to me coming home after a long day of work and having pancakes, eggs and sausage. And because I’m usually really exhausted after work (and after working out) my pancakes have been coming from *gasp* the box! I don’t usually leave well-enough alone, though. I like jazzing up my pancakes, so it looks like I at least put a little effort into my dinner. Bananas, blueberries, nuts, chocolate sometimes just whatever I see laying around. My most recent discovery though, are brown sugar and cinnamon pancakes. Perfect for a late night or an early morning when you want something quick and easy on the table, but jazzed up enough that anyone eating them can feel the love.
Brown Sugar and Cinnamon Bisquick Pancakes
1 c Bisquick
½ c Milk
1 Egg
2 Tbsp Brown Sugar
2 tsp Cinnamon
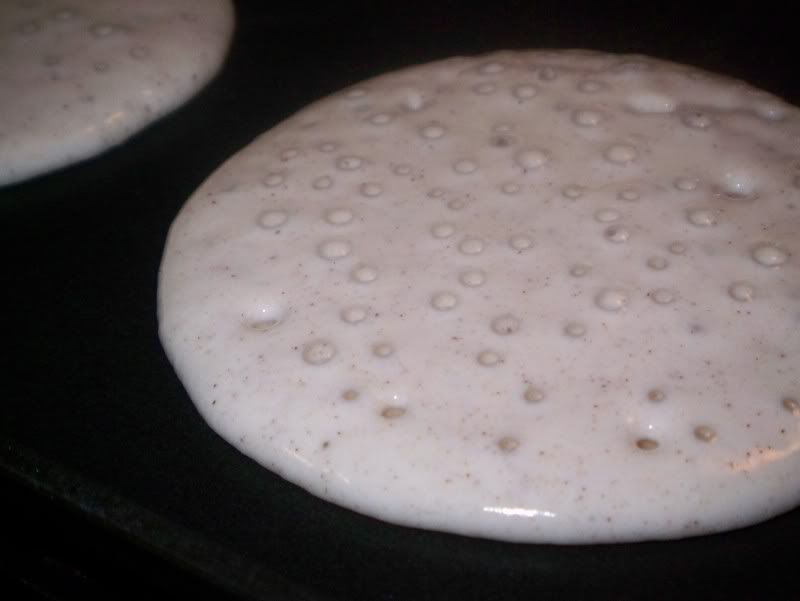
Stir Bisquick, brown sugar and cinnamon together in a bowl. Add egg and milk, stirring until just combined. Batter will be lumpy. Do not overstir.
Cook on medium heat on one side until bubbles pop and top side appears to have dried out slightly.
Flip and cook on other side for 1-2 additional minutes.
Store, covered, in warm oven until ready to serve.

Sunday, May 9, 2010

Brown Sugar Pecan Sticky Buns

I am so fortunate – I won the mom lottery. Not only do I have my mother who is a constant source of strength and inspiration but I also have a mother-in-law who is supportive, caring and has warmly welcomed me into the family since day one.

I know that there was a time I took my mom for granted. I assumed she would always be there for me, offering advice and supporting me no matter what path in life I chose. What I didn’t realize was that this was a luxury, not a given. I had a reality-check several years ago when my mom was diagnosed with cancer. The thought of losing her made me painfully aware of the fact that I should be appreciating what I have on a daily basis, and not just blindly thinking that we’ll always have tomorrow. Thankfully, as a result of her fighting spirit coupled with her treatment, she is now cancer-free. I hope that I inherited her optimism, grace and resiliency if ever faced with such hardship.

Sometimes it’s hard having my mom is on the East Coast while I’m out here in the Midwest. I can send cards, flowers and sentiments, but I still miss the days when I could hug her and say “Happy Mother’s Day, I love you” in person. For the most part, my hugs are now ‘oven baked.’ I occasionally send care packages to my family of sweets and treats that I think they’d enjoy.

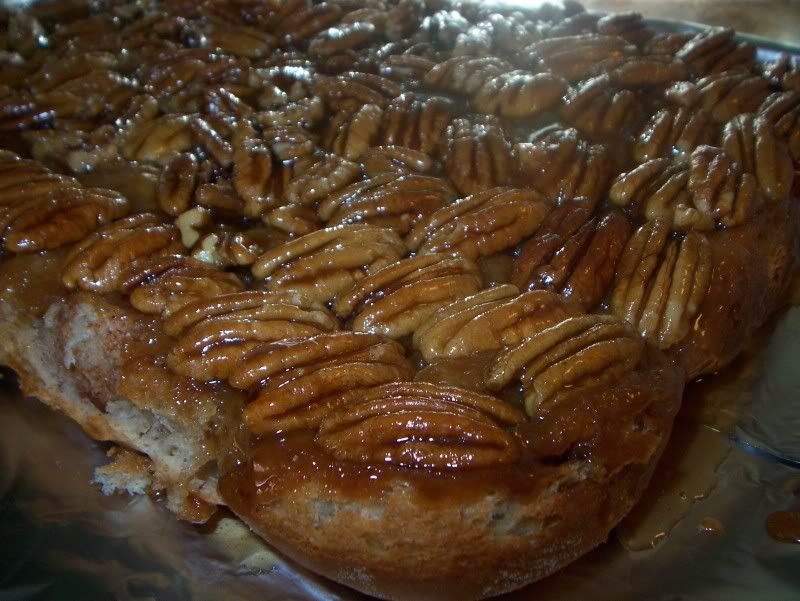
My mom is a lover of pecans. And caramel. This recipe jumped out as something that seems very ‘her.’ Though I’d never had sticky buns (versus glazed cinnamon buns), this looked like a promising recipe. This called for a sweet, spiced dough rolled with cinnamon, butter and sugar with a caramelized sugar and pecan topping.

The aroma of these buns baking is intoxicating. Fresh out of the oven, the topping is somewhat loose, but once it’s given a chance to set up, it somewhat resembles having a cinnamon bun topped with a pecan caramel toffee.

So if you’re like me and can’t say “I love you” in person, say it with buns. Buttery, sugary, pecan buns.

And just think, the more you eat, the bigger ‘hug’ you’ll get each time you put on your jeans!

Happy Mother’s Day, Mom! I love you!


Spiced Sweet Dough
From: Bon Appetite Magazine, December 2009. Yields dough for 30

Ingredients:
1 c Warm milk (105°-115° F)
2 pkg Active dry yeast
¼ tsp plus 2/3 c White sugar
1 ½ tsp Finely grated Orange peel
3 ¾ c AP Flour
2 tsp Ground cinnamon
1 ¼ tsp Salt
1 tsp Ground ginger
1 Large Egg
1 Large Egg Yolk
½ c (1 stick) Unsalted butter, room temperature
Directions:
Stir milk, yeast, and 1/4 teaspoon sugar in small bowl. Let stand until mixture bubbles, about 6 minutes. Stir again.
Mix remaining 2/3 cup sugar and orange peel in medium bowl.
Add flour, cinnamon, salt, and ginger to bowl of heavy-duty stand mixer fitted with paddle attachment; mix on low speed. Add yeast mixture; mix on medium-low speed until dry shaggy mass forms, scraping down bowl occasionally, about 2 minutes. Add egg and egg yolk; beat on medium speed until well blended. Add sugar mixture; beat until moist soft dough that resembles thick batter forms, about 3 minutes.
Add butter by 1 1/2 tablespoonfuls; beat on medium-low speed until almost incorporated before adding more, about 2 minutes (dough will be sticky). Beat dough on medium-high 2 minutes longer. Let dough rest in bowl 10 minutes (dough will become less sticky).
Scrape dough out onto work surface; gather together. Place in large buttered bowl. Cover with plastic wrap; let rise at room temperature until almost doubled, about 2 hours. Punch dough down; cover with plastic wrap and chill overnight.


Brown Sugar Pecan Sticky Buns
From: Bon Appetite Magazine, December 2009. Yields 30.

Ingredients:
Topping
1 ½ c Packed golden brown sugar
¾ c (1 ½ sticks) Unsalted butter, diced
¾ c Honey
3 c Pecan halves
Filling
½ c Sugar
6 Tbsp Golden brown sugar
1 Tbsp Ground cinnamon
Spiced Sweet Dough
4 Tbsp (1/2 stick) Unsalted butter, room temperature
Directions:

Topping
Butter two 13x9x2-inch glass baking dishes. Whisk sugar, butter, and honey in small saucepan over medium-low heat until smooth and bubbling around sides. Divide hot syrup between prepared baking dishes, allowing topping to cover bottom of each dish. Place pecan halves, rounded side down, in syrup, dividing equally. Cool.

Filling
Whisk both sugars and cinnamon in small bowl.
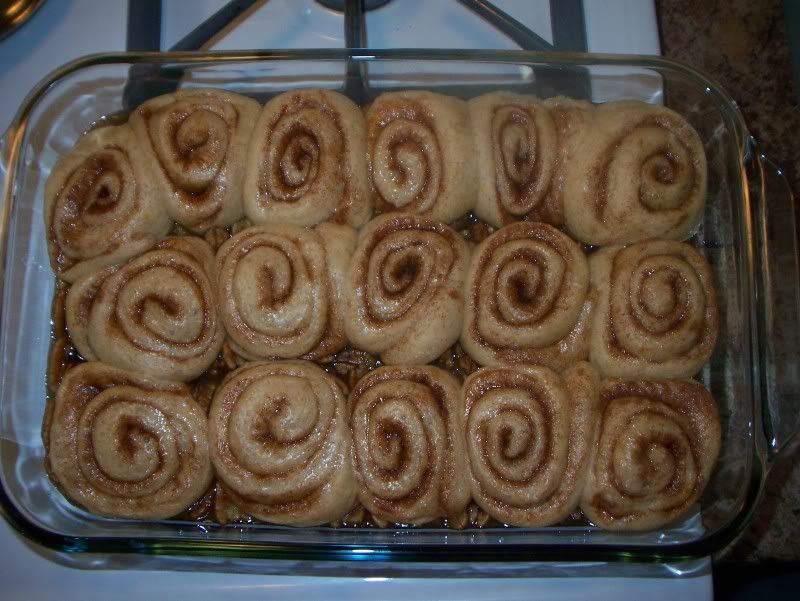
Turn cold Spiced Sweet Dough out onto floured surface; sprinkle with flour. Divide dough in half. Roll out dough to two 15x12-inch rectangles. Using fingers, spread 2 tablespoons butter evenly over each rectangle. Sprinkle cinnamon sugar over each. Starting at 1 long side of each dough rectangle, tightly roll up dough jelly-roll style, enclosing filling. Using large knife, cut each roll crosswise into fifteen 1-inch-thick slices. Arrange 15 dough slices, cut side down, atop cooled syrup and pecan halves in each baking dish, spacing evenly apart. Cover with waxed paper; let rise in warm draft-free area until buns are puffy and doubled, about 1 hour 45 minutes.
Position 1 rack in top third and 1 rack in bottom third of oven; preheat to 375°F. Line 2 rimmed baking sheets with parchment; place dishes with sticky buns on baking sheets. Bake buns until deep golden brown and filling is barely bubbling around edges, about 25 minutes. Let buns stand 2 minutes. Cut around sides of buns to loosen. Place large rimmed platter atop each baking dish. Using oven mitts, firmly hold baking dish and platter together and invert buns onto platter. Cool at least 45 minutes. Serve slightly warm or at room temperature.
Tip: You can roll, cut and assemble ahead. Put in freezer until ready to use. Night before, move from freezer to refrigerator and let sit overnight. Let sit on the counter for an hour before baking, then bake as directed.
Related Posts Plugin for WordPress, Blogger...