Showing posts with label party foods. Show all posts

Friday, February 4, 2011

Ham and Cheddar Stuffed Pretzel Bites

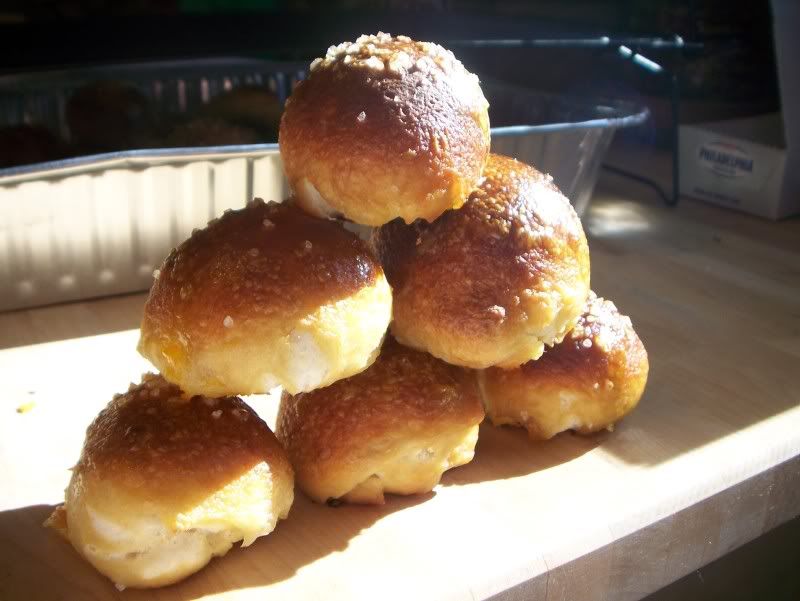
With a few days to go before the Super Bowl, I wanted to share a recipe that will please any guest at your Super Bowl party, football lover or not. Step aside, churros. Move out of the way, nachos. When it comes to foods fit for game day, the soft pretzel wins my heart over every single time. But stuffing the soft, bite-sized nuggets with ham and cheddar – that sends me over the moon.

I think a lot of my soft pretzel love is due to the fact that they are so versatile. They can be eaten plain, savory or sweet, or be dipped in pretty much anything your heart desires. And when you’re at the stadium, you just ring it around your finger and still carry two or three drinks back to your seat.

In Baltimore, a popular appetizer is a king-sized soft pretzel, smothered in crab dip, covered in cheese and then baked until hot and melty. I have gotten that as my dinner on more than one occasion. Even now, the pretzel world is expanding into stuffed pretzels, proving that there are even more options than ever. One of the more well-known brands I’ve seen are Kim and Scott’s http://www.kimandscotts.com/ stuffed pretzels. They have both sweet and savory varieties of stuffed pretzels, from chocolate pretzels stuffed with fudge, cinnamon-sugar topped pretzels stuffed with apple pie filling, and cheese-topped jalapeƱo-cheese stuffed pretzels.

Hands down, my favorite pretzel is traditional German Bavarian pretzels, which are difficult to find outside of Oktoberfest celebrations here in the US. The pretzels in German beer gardens are the best I’ve ever had. Instead of trying to replicate a perfect plain pretzel, I figured I would spice things up a bit. I decided to make my usual pretzel dough, stuff them with ham and cheese and make little nuggets out of them. They are a perfect, portable appetizer, suitable for hot or room-temperature consumption.

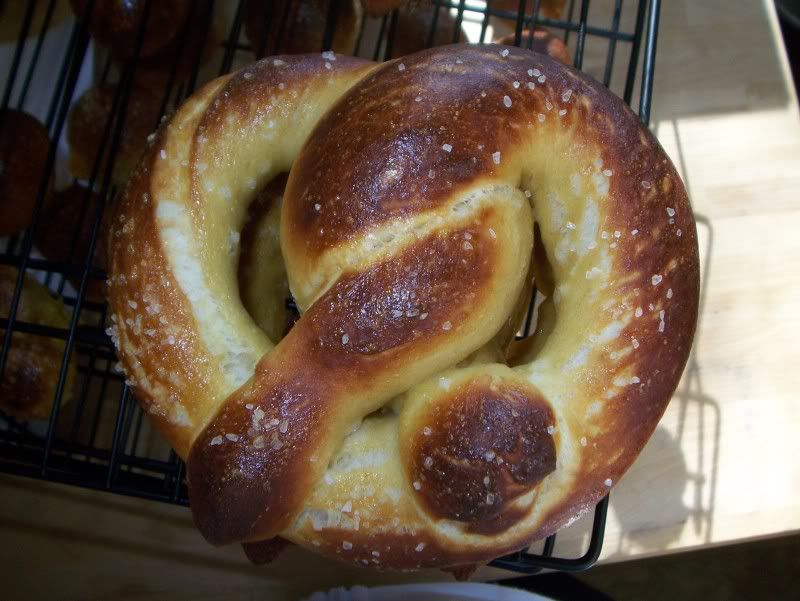
I also decided to have some fun and make an actual pretzel-shaped pretzel as well as one stuffed with ham and cheddar, in the style of those Kim and Scott's pretzels – just to see what would happen. The regular one was easy to roll into a tube and then create the pretzel knot. The stuffed one was a little more complicated, but was definitely worth the wow-factor.

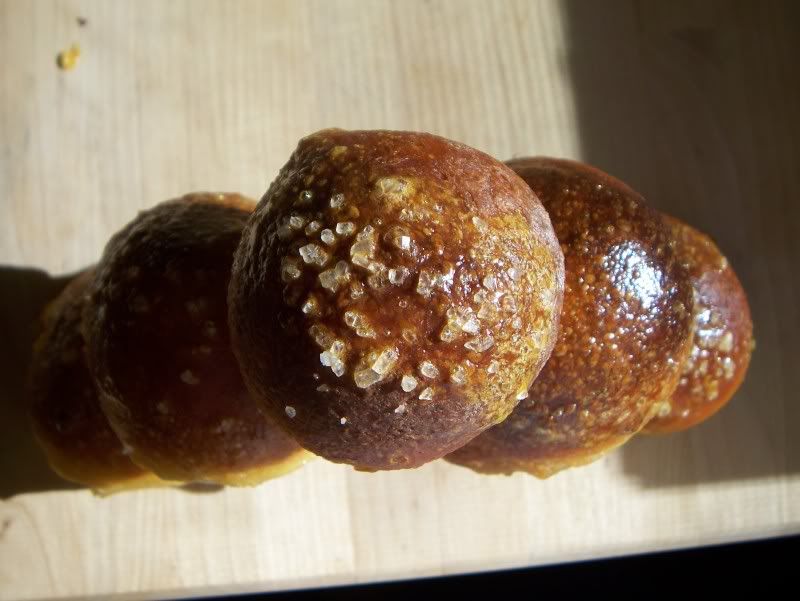
These were fantastic. The outside could have had a little bit of a thicker crust, but it was not a fatal flaw. I did notice, though, that the longer pretzels sat at room temperature, the more of the salt seemed to dissolve into the outer skin. When eating the pretzel, it would have the correct level of saltiness, but it was missing the crunch that the pretzel salt brings. Which means I will either be investing in some pretzel salt, or eating the pretzels faster. Probably eating them faster, knowing me.
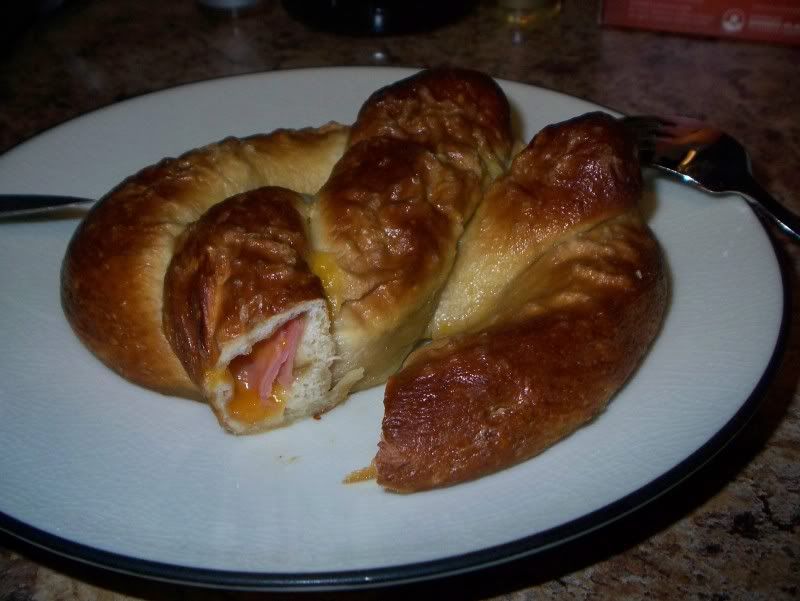
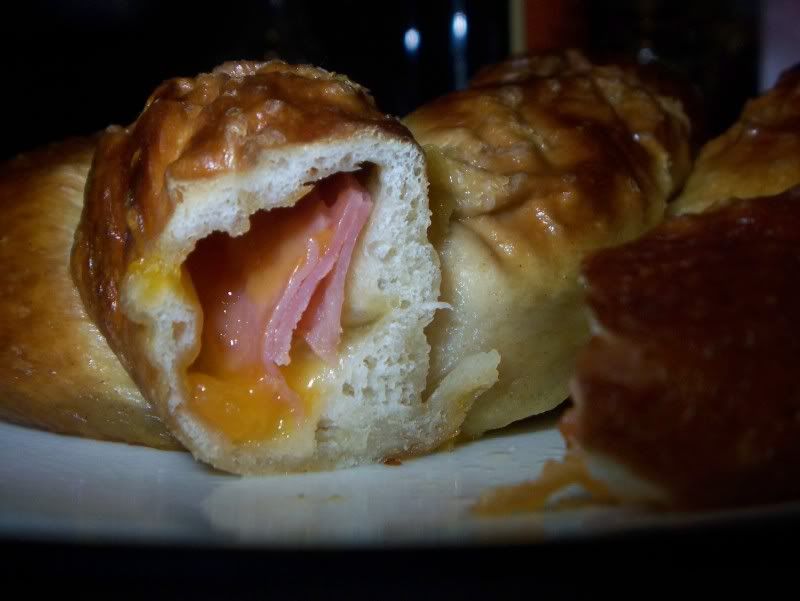

Ham and Cheddar Stuffed Pretzels

Pretzel Dough Recipe from Alton Brown via FoodNetwork.com
About 5 dozen pretzel bites or 8 regular pretzels (or be crazy and do a combination of both!)

My adaptations to this basic recipe are in italics.

Pretzel Dough
1 1/2 cups warm (110 to 115 degrees F) water
1 tablespoon sugar
2 teaspoons kosher salt
1 package active dry yeast
22 ounces all-purpose flour, approximately 4 1/2 cups
2 ounces unsalted butter, melted
Vegetable oil, for pan
10 cups water
2/3 cup baking soda
1 large egg yolk beaten with 1 tablespoon water
Pretzel salt

Filling
8 oz cheddar, shredded
8 oz deli ham, cut into small pieces or pulled apart


Combine the water, sugar and kosher salt in the bowl of a stand mixer and sprinkle the yeast on top. Allow to sit for 5 minutes or until the mixture begins to foam. Add the flour and butter and, using the dough hook attachment, mix on low speed until well combined. Change to medium speed and knead until the dough is smooth and pulls away from the side of the bowl, approximately 4 to 5 minutes. Remove the dough from the bowl, clean the bowl and then oil it well with vegetable oil. Return the dough to the bowl, cover with plastic wrap and sit in a warm place for approximately 50 to 55 minutes or until the dough has doubled in size.

Preheat the oven to 450 degrees F. Line 2 half-sheet pans with parchment paper and lightly brush with the vegetable oil. Set aside.

Bring the 10 cups of water and the baking soda to a rolling boil in an 8-quart saucepan or roasting pan.

In the meantime, turn the dough out onto a slightly oiled work surface and divide into 8 equal pieces.

For the individual pretzels, roll one of your eight pieces into a rope about 24 inches long. Twist into a pretzel shape, set aside. To stuff the pretzel, roll one of your eight pieces into a rope about 24 inches long, and then flattened out to about an inch wide. Run 1 oz of cheese and 1 oz of ham up the middle of the flattened dough, and then pinch the dough shut around the filling, trying to remove as much excess air as possible from the inside. Then the dough can be carefully knotted into the classic pretzel shape. Make a U-shape with the rope, holding the ends of the rope, cross them over each other and press onto the bottom of the U in order to form the shape of a pretzel. Place onto the parchment-lined half sheet pan.

For the nuggets, divide each of the eight pieces into another eight pieces. Make each piece into a small circle, about one to 1-1/4 inches in diameter. Also, try to make the outer edge of the nugget a little thinner than the center of the disk, since you’ll be gathering it. Put about 1-2 tsp of cheese and the same amount of ham in the center of the disk. A small pinch will do, be careful not to overfill the nugget or else it will be hard to pinch shut and will ooze cheese everywhere when it boils and then bakes. Gather the edges of the circle and pinch shut into a ball shape.


Place the pretzels into the boiling water, 1 by 1, for 30 seconds. This gets a little complicated with the nuggets, but do the best you can. I did batches of three to four nuggets at a time. Remove them from the water using a large flat spatula. Return to the half sheet pan, brush the top of each pretzel with the beaten egg yolk and water mixture and sprinkle with the pretzel salt. Bake until dark golden brown in color, approximately 12 to 14 minutes. Transfer to a cooling rack for at least 5 minutes before serving.

Wednesday, October 27, 2010

S'mores Tarts

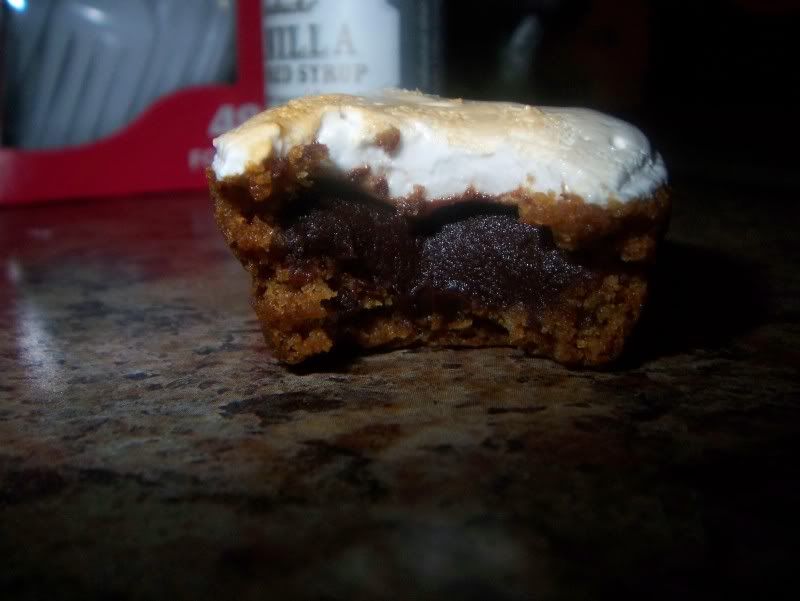
Few things remind me of summer more than s’mores and I thought it might be fun to create a miniature s’mores tart for a get-together we were having at our house. I’ve seen many versions of s’mores tarts, but since I don’t own mini tart pans (or any tart pans for that matter) and knew I wasn’t about to go out and buy them, I had to improvise a bit. I knew that my vision included little graham cracker cups (versus a more traditional graham cracker crumb crust like on my key lime pie), filled with ganache and topped with marshmallow, so I enlisted the help of my mini-muffin pan. Docking these crusts was extremely important to getting a shell, versus a muffin-shaped graham puff, but the end result was a perfectly bite-sized graham cracker tart shell perfect for filling with ganache and topping with homemade vanilla marshmallow.

My first batch of graham crackers cooked too long, and while they were nice and crisp like graham crackers, they were also a little too brown and crunchy – and tasted right on the verge of burnt. I cooked the next batch about 5 minutes less, and when they came out they were golden brown and still a little soft. Perfect. I know that graham crackers are typically drier and more crumbly, but I wanted a little softer graham to go with the marshmallow and ganache.I also think that next time around I will use a little more honey and a little less molasses, because I think the molasses was a little more pronounced than I would have liked in the plain cracker (though it was certainly more muted when the other components were added).

I tried a new marshmallow recipe this time around and noticed that it was much denser than the light, airy marshmallows I made previously. But these were delicious. They tasted like a sturdier version of marshmallow fluff, without all the preservatives. But boy, oh boy, was this stuff sticky. My other batch of marshmallows was sticky, but I was able to get it all into a pan, and most likely could have piped it without incident. This batch was much denser, and after two failed attempts at piping it delicately and artfully onto the tarts, I had to resort to slapping it on with a spoon before it totally set up. Anything the marshmallow touched was covered, including my hands and face – the telltale sign of sneaking a ‘taster’ bite. Oops.

I was worried that the chewier marshmallow was a bad choice, because in my impatience to try them while still warm, the ganache oozed out from the back of the tarts and marshmallow stuck to my lips, hands and face. The marshmallow also was stringy, so I could pull the tart back and arm’s length from my face and still have a string connecting my face to the tart. I was a little worried that all this effort to make these from scratch was going to become one big disappointment.

But after getting the chance to set overnight, the combination of textures was perfect between the graham cracker shell, ganache filling and marshmallow topping. You could bite through the marshmallow easily, and it was more velvety, silky smooth than dry and airy like those Jet-Puffed store marshmallows. The ganache had also set up just enough that it wasn’t totally solid, but also didn’t ooze out of the tart anymore.

These were a lot of effort to get together, but I would definitely call them a success, and totally worth it. While I’m sad they’re all gone now, I’m also happy because I think I might be addicted to them and the only way I would stop eating them is if they were not in front of my face.


Homemade S’mores Tarts
Homemade graham cracker, dark chocolate ganache, toasted homemade marshmallow

For the graham crackers
Hands On Gourmet
2 ¼ cups all purpose flour
1 tablespoon whole wheat flour
1 cup brown sugar
1 teaspoon baking soda
1 teaspoon salt
¼ pound butter, chilled and cut into small cubes
2 tablespoons molasses
3 tablespoons honey
¼ cup milk
1 tablespoon vanilla extract
cinnamon sugar (1/2 cup sugar + 1 tablespoon cinnamon)

Combine all the dry ingredients except the cinnamon sugar. Work the butter into the dry ingredients to form a coarse meal. Combine the wet ingredients and add to the dough. Mix to combine. Flatten out the dough, wrap in plastic and chill until the dough firms up. Dust a work surface with flour and roll the dough out to 1/8” thick sheet, dusting with extra flour as needed. Chill the sheet of dough. Cut into squares and dock the dough with a fork. Sprinkle with cinnamon sugar.
Oil tartlet molds and form the graham cracker dough into them. Bake at 325 for 20 minutes. When cool, remove the shells from the molds.

Vanilla Marshmallow Layer
Couldn't be Parve

1/4 cup + 1 tablespoons (2.5 oz) cold water
2 teaspoons pure vanilla extract
1 1/2 tablespoons powdered gelatin
6 tablespoons (3 oz) cold water
10 tablespoons corn syrup
pinch of salt
3/4 cups granulated sugar
Combine the first three ingredients in a medium bowl and whisk until well blended and smooth. Set aside.
Combine second quantity of water, corn syrup, salt and sugar in a 4-quart saucepan and place over medium heat. When the mixture comes to a boil brush down the sides of the pan above the upper surface of the syrup with a clean, moistened pastry brush or paper towel to dissolve any remaining sugar crystals. Do not stir the syrup once it comes to a boil.
Place a candy or instant read thermometer into the syrup and continue to cook, without stirring, until syrup reaches 248F. Remove pan from heat and carefully stir in gelatin mixture.
Pour the mixture into the bowl of an electric stand mixer fitted with the whisk attachment. Starting at medium speed gradually increase the mixer speed to high. While the mixture is beating remove the tart with the ganache from the refrigerator. Beat the mixture for 10-12 minutes. When done it should look white and fluffy and the bowl will no longer be hot to the touch.
Using a wet spatula scrape mixture into prepared pan on top of ganache. Spread into a smooth even layer using a wet spatula (or well moistened hands). Set tart aside, uncovered, at room temperature for at least 4 hours or over night. (As a warning, this marshmallow is SUPER sticky. I couldn’t pipe it at all. I ended up using a spoon to individually portion out the marshmallow.)
If desired, toast top of the tart with a kitchen torch or broiler. Press up on bottom of pan to release tart from the pan. If using the broiler let the tart sit for a little while before removing from the pan and cutting to allow time for the ganache to re-harden.

Chocolate Ganache Layer
8 oz heavy cream
8 of baking chocolate (Ghiradelli dark chips or Hersheys Semi-Sweet Morsels)

Place chocolate in bowl. Heat cream butter and sugar in small pan. Once cream is barely simmering, pour over chocolate and allow it to sit for 5 minutes. Wisk until smooth.

To Finish
Fill the shells with ganache, top with marshmallow and let sit overnight to set. If you're like me and don't have a kitchen torch, put them under the broiler for 30-45 seconds until slightly toasted. Make sure they get a chance to cool to room temperature before serving or else you'll get a melty, sticky mess.
Related Posts Plugin for WordPress, Blogger...