Showing posts with label cheese. Show all posts

Friday, March 25, 2011

Cooking Light Neopolitan Pizza Dough

When I was a kid and my parents used to order pizza, I would always grab a slice, peel off all the cheese and eat the saucy crust. As I got older, peeling of all the cheese has matured to peeling off only some of the cheese and blotting the rest of it with about half a roll of paper towels to remove the puddles of oil pooling on my slice. I love pizza, but I have my limits on how much grease and cheese I can consume before turning a not-so-pretty shade of green and laying in the fetal position on the couch for the rest of the night. While the hubby and I do order pizzas from time to time (sometimes you just have that craving!), for the most part, when we want a ‘za fix, we’ll make it ourselves. Pizza doesn’t have to be a greasy , oil-laden, gloopy cheesy mess.


My first pizzas were as simple as putting sauce and cheese on some sort of bread – ritz crackers, bagels, pitas, and English muffins. While tasty, they lack the true ‘spirit’ of a good pizza, the chewy yet crunchy crust. I progressed to using packaged pizza dough mixes. Most just called for adding water and maybe a little olive oil. It’s a running joke in our family how many times I have screwed this dough up. You’d think after 4 or 5 times, not only would I not need to read the label to know how much water to put in, I wouldn’t misread the label every single time. It’d call for one-third cup of water, I’d add two-thirds and then wonder why I had a soupy mess on my hands. A smack on the forehead and some additional flour later, I’d salvage the dough and we’d have our pizza.


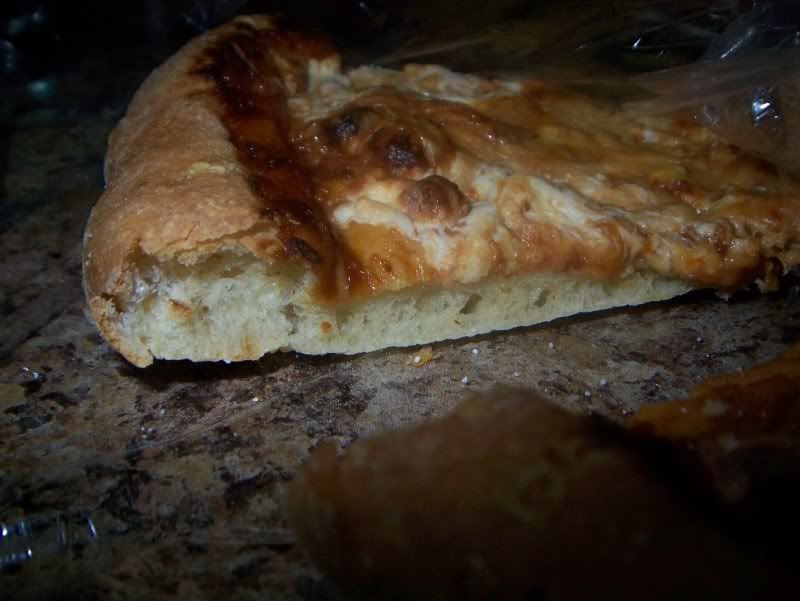
Not until about last year did I start making our crusts from scratch. I’ve been through about four recipes so far, and am coming close to my ideal crust. A chewy crust on top, with a little crispiness on the bottom, with a lot of irregularly sized bubbles. My favorite pieces always had the gigantic bubble that practically created a cavern in the crust. I’ve tried several cooking methods, and have found that high heat for a short period of time creates the crust we like. It does take a little bit of planning to have fresh pizza dough on the day you want it, but it is definitely worth it. I love adding a little garlic powder to my dough for a little extra somethin’-somethin’.


Not only do you have the freedom to personalize your toppings, you can also dial back the cheesiness if you are like me. Fair warning though, if you like a LOT of toppings, you will have a difficult time transferring your pizza to your cutting board. Keep it relatively simple, and you’ll be rewarded.
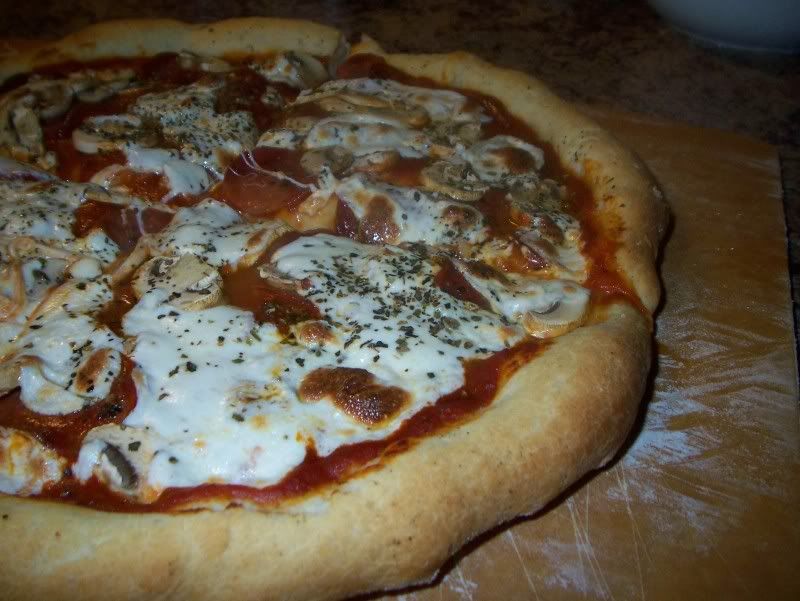
Neopolitan Pizza Dough
Adapted from Cooking Light
Because this classic Neapolitan-style pizza is so simple, it depends on quality ingredients: Use the best fresh mozzarella and basil you can find.
Yield: 5 servings (serving size: 2 wedges)

Ingredients
1 cup warm water (100° to 110°), divided
8 ounces bread flour (about 2 cups plus 2 tablespoons)
2 ounces semolina flour
1 package dry yeast (about 2 1/4 teaspoons)
4 teaspoons olive oil
3/4 teaspoon kosher salt, divided
2 tsp Garlic Powder
Cooking spray
1 tablespoon yellow cornmeal
3/4 cup Pizza Sauce
1 1/4 cups (5 ounces) thinly sliced fresh mozzarella cheese

Directions
Pour 3/4 cup warm water in the bowl of a stand mixer with dough hook attached. Weigh or lightly spoon flour into dry measuring cups and spoons; level with a knife. Add flour to 3/4 cup water; mix until combined. Cover and let stand 20 minutes. Combine remaining 1/4 cup water and yeast in a small bowl; let stand 5 minutes or until bubbly. Add yeast mixture, oil, and 1/2 teaspoon salt to flour mixture; mix 5 minutes or until a soft dough forms. Place dough in a large bowl coated with cooking spray; cover surface of dough with plastic wrap lightly coated with cooking spray. Refrigerate 24 hours.

Remove dough from refrigerator. Let stand, covered, 1 hour or until dough comes to room temperature. Punch dough down. Press dough out to a 12-inch circle on a lightly floured baking sheet, without raised sides, sprinkled with cornmeal. Crimp edges to form a 1/2-inch border. Cover dough loosely with plastic wrap.

Position an oven rack in the lowest setting. Place a pizza stone on lowest rack. Preheat oven to 550°. Preheat the pizza stone for 30 minutes before baking dough.

Remove plastic wrap from dough. Sprinkle dough with the remaining 1/4 teaspoon salt. Spread Pizza Sauce evenly over dough, leaving a 1/2-inch border. Arrange cheese slices evenly over pizza. Slide pizza onto preheated pizza stone, using a spatula as a guide. Bake at 550° for 11 minutes or until the crust is golden. Cut pizza into 10 wedges, serve.

Friday, March 18, 2011

Chicken Cordon Bleu

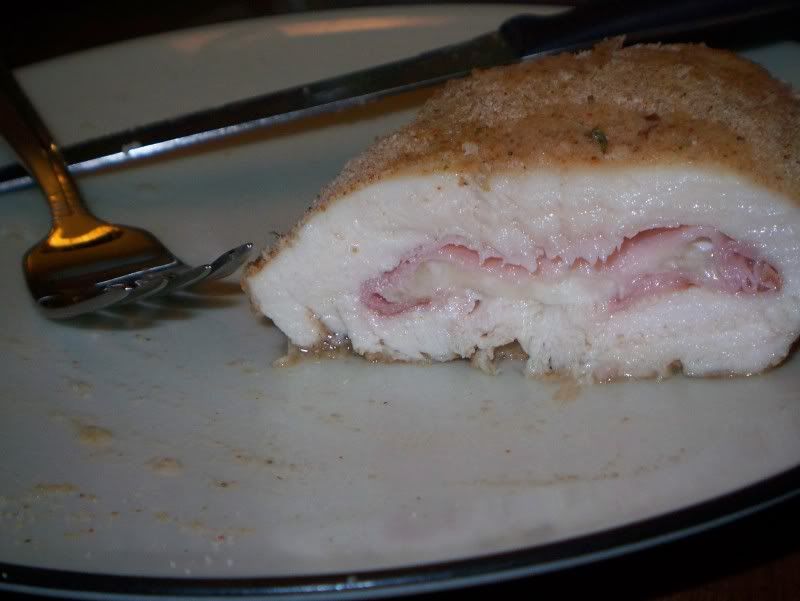
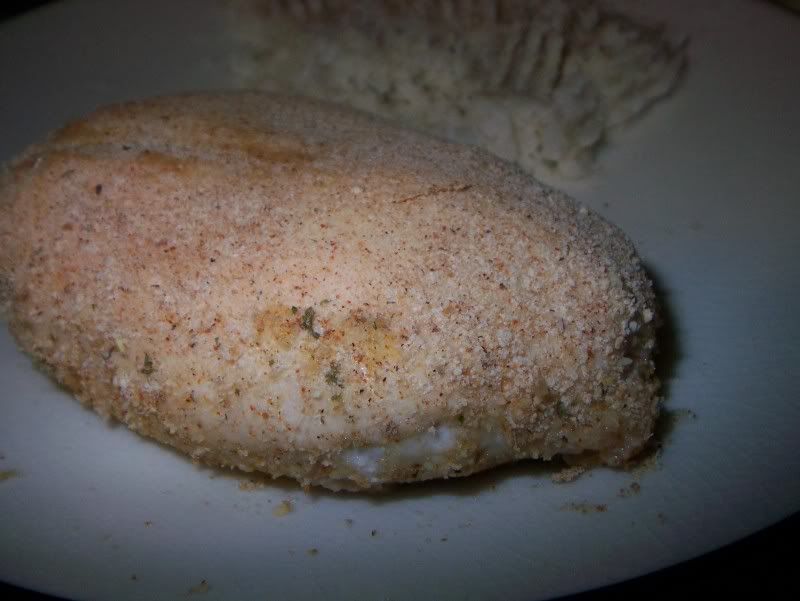
This is a more traditional Chicken Cordon Bleu recipe, as compared to my Pizza Chicken Roll-ups from before. The paprika and cayenne are totally optional, but we both like a little spice with our chicken.


While I can’t vouch for this meal’s authenticity in terms of a real cordon bleu…I know the components of the recipe, the rest was just eyeballed and estimated. In the end, I have a meal that looks like it should and tastes pretty good, and that’s what matters to me, even if it’s not 100% authentic. The chicken is moist and tender, and the saltiness of the ham and cheese really adds a depth of flavor missing from a basic baked chicken breast. The best part for me is the bread crumbs on top - slightly crunchy and totally delicious! I love that from the outside, it looks like nothing too special, but once you cut into it, the cheese starts to ooze out and the ham peeks out. Always nice to keep your dinner guests guessing!


Chicken Cordon Bleu

Ingredients
2 Chicken Breasts, pounded out to about 1/4" thick
1/2 c flour
1 tsp cayenne pepper, optional
1 tsp paprika, optional
1 egg, slighty beaten
1/2 c breadcrumbs, Italian seasoned (or add about 2 tsp each of dried basil and oregano)
4 thin slices of deli ham
2-3 slices of provolone or swiss cheese
Salt
Pepper

Directions
Pat chicken dry, and salt and pepper both sides.

Lay 1-2 slices of cheese in each chicken breast, and then add 2 slices of deli ham.

Roll chicken over the fillings and use toothpicks to keep it rolled shut.

In one bowl, mix the flour, cayenne pepper, and paprika. Have the egg in another bowl. In a third bowl, pour in your breadcrumbs.

Dredge each chicken roll in flour, tapping lightly to remove excess. Dip in egg mixture and then coat with breadcrumbs.

Put in a rimmed baking sheet (in case the cheese escapes) and bake at 350 for 30-35 minutes or until cooked through. Time will vary depending on the size and thickness of your chicken breast, so your best bet is to stab it with a knife and look at the chicken and juices to make sure it’s finished. Just go in from the bottom if you want it to still be pretty!)

Tuesday, February 22, 2011

Mozzarella Sticks

My very first summer in the Midwest, before I started working, my then-boyfriend, now-husband decided it would be fun to go to the Wisconsin Dells for an extended weekend to get in our last summer kicks in before buckling down and joining the ‘real world.’


Before moving to Illinois, I had never heard of the Dells. The hubby would try to explain it to me, but nothing could prepare me for when we drove down the main street with water parks on either side, and having a military-grade Duck pull up beside us with its tour group in tow.


The trip itself was wonderful. We went on our very own Duck tour of the Dells, visited the water parks (including a ride on a water slide that was 10 stories tall), attended a magic show and went to the famous Tommy Bartlett Air and Water Show, they’re famous for the pyramid of water skiers.


We’ve been back to the area several times since then – but only once was it to visit the water parks. The other times we just happened to be passing though and had to make our obligatory stop at a famous local restaurant and micro-brewery called Moosejaw. According to the hubs, if you go to the dells, you go to this place to eat.


On my first visit, I knew that this place had to be good. There was a line out the door and around their porch. Thankfully we could camp out at the downstairs bar and had gotten there early enough that we were seated by the time we actually got hungry.


I have never had a better mozzarella stick than the ones they serve at Moosejaw. They’re prepared almost in an eggroll style, instead of the more traditional breading of other mozzarella sticks. And, maybe it’s because we were in Wisconsin, but the cheese was just worlds above any other stick I’ve ever had.


If we know we are passing through the dells on a trip, we will usually plan the timing so that we can stop at Moosejaw for a meal. I’m not a huge fan of mozzarella sticks, but these? These I can’t get enough of.


Since most days it just isn’t practical to drive 3 hours each way just for dinner, I’ve been experimenting with making my own mozzarella sticks to try and satisfy my craving. After a few batches, I have finally made something that works for us, even if it isn’t exactly like my beloved Moosejaw’s.


Mozzarella Sticks

Ingredients:
Package of Egg roll wrappers (20 in the package I used)
1 egg, slightly beaten with a tablespoon of water, until frothy
16 oz packaged Mozzarella (mine is shaped like a log, cut the log in half across the short width, and then each half cut into ten strips along the long direction.)

2 eggs
1.25 c Bread crumbs
1 Tbsp Dried oregano
1 Tbsp Dried basil
½ c grated parmesan

Directions:
To wrap the mozzarella:

Place an eggroll wrapper on the countertop with a point facing you. Place the mozzarella horizontally on the lower third of the wrapper.

Roll the corner closest to you over the filling. Moisten the top point with a little bit of the egg wash.

Fold the sides over the filling.

Roll the eggroll shut, and press to seal. Repeat with remaining wrapper and cheese.

I let these sit in my fridge for a little bit on a cooling rack in a sheet pan to let the egg really seal the seams well. Do not stack the mozzarella sticks – they will stick together!

For the breading:

Mix dry ingredients together in a medium bowl.

Pu the two eggs in a medium bowl and mix until mostly broken up and there are no clumps of egg white visible.

Using one hand. dip your wrapped mozzarella sticks in the egg wash, shake to remove the excess egg.

Drop into the breadcrumb mixture and, using your ‘non-eggy’ hand, coat the eggroll wrapper thoroughly with the breadcrumbs. Place back on the cooling rack until all the mozzarella sticks are breaded.

Meanwhile, I get my mini deep fryer heating to 375 degrees (you could also do this in a deep, wide pan with oil).

Once the oil gets up to temperature, fry the mozzarella sticks, 3-4 at a time, until golden brown. Remove to a paper towel to drain slightly.

Serve with marinara sauce, if desired.

Friday, February 4, 2011

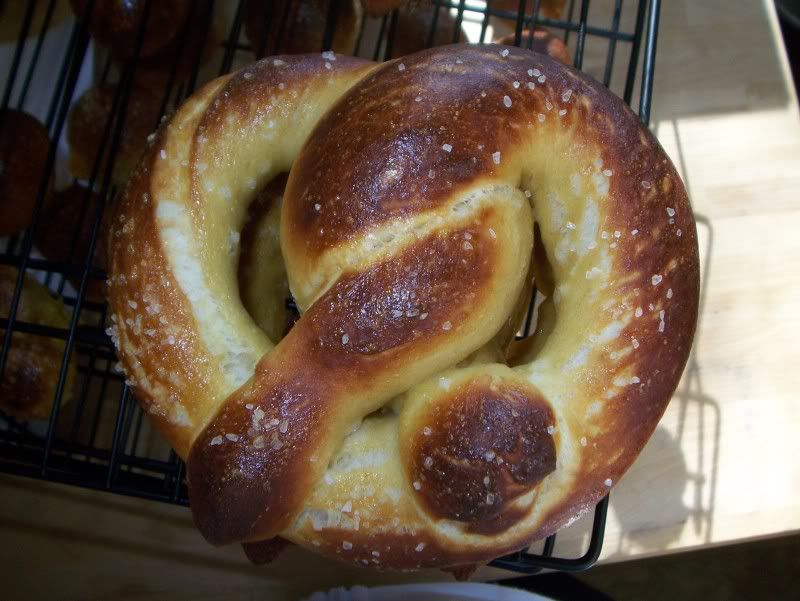
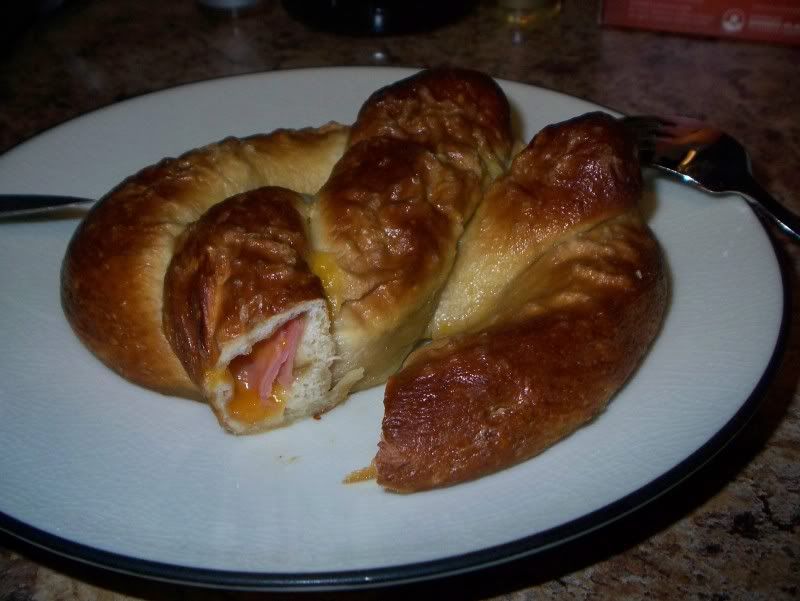
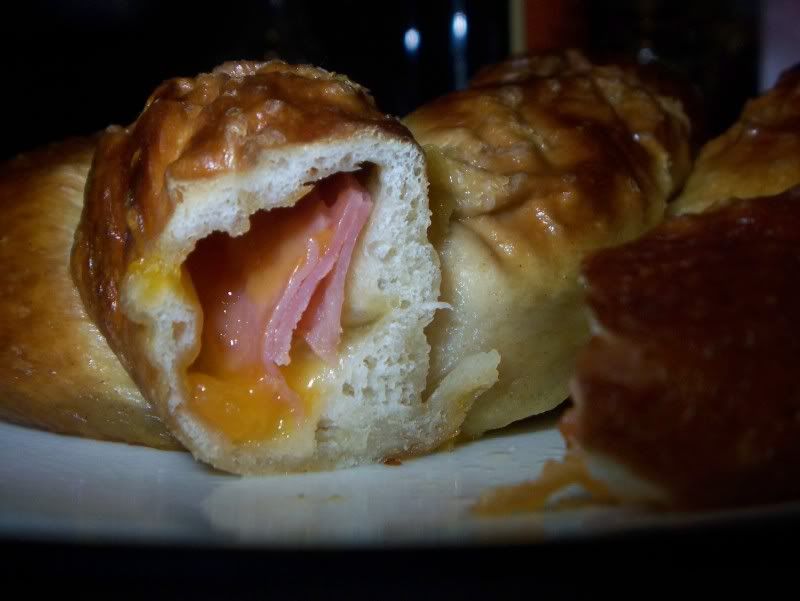
Ham and Cheddar Stuffed Pretzel Bites

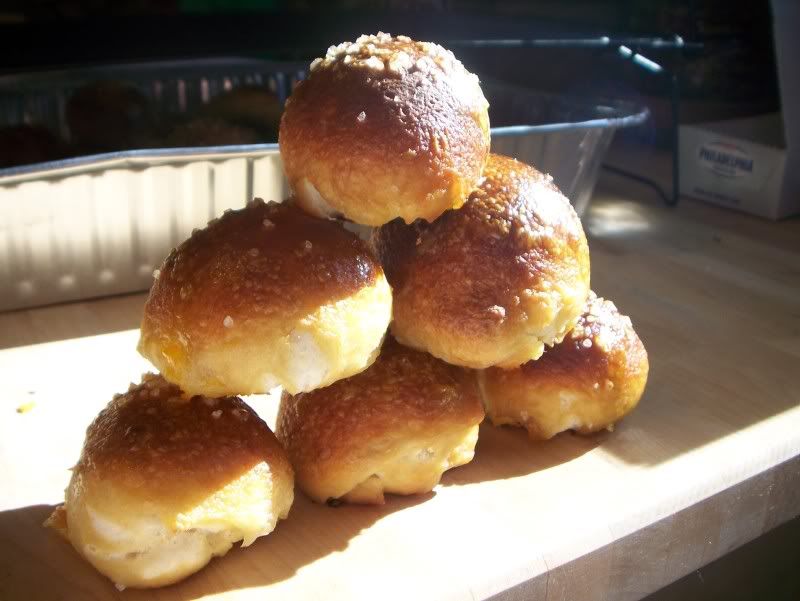
With a few days to go before the Super Bowl, I wanted to share a recipe that will please any guest at your Super Bowl party, football lover or not. Step aside, churros. Move out of the way, nachos. When it comes to foods fit for game day, the soft pretzel wins my heart over every single time. But stuffing the soft, bite-sized nuggets with ham and cheddar – that sends me over the moon.

I think a lot of my soft pretzel love is due to the fact that they are so versatile. They can be eaten plain, savory or sweet, or be dipped in pretty much anything your heart desires. And when you’re at the stadium, you just ring it around your finger and still carry two or three drinks back to your seat.

In Baltimore, a popular appetizer is a king-sized soft pretzel, smothered in crab dip, covered in cheese and then baked until hot and melty. I have gotten that as my dinner on more than one occasion. Even now, the pretzel world is expanding into stuffed pretzels, proving that there are even more options than ever. One of the more well-known brands I’ve seen are Kim and Scott’s http://www.kimandscotts.com/ stuffed pretzels. They have both sweet and savory varieties of stuffed pretzels, from chocolate pretzels stuffed with fudge, cinnamon-sugar topped pretzels stuffed with apple pie filling, and cheese-topped jalapeƱo-cheese stuffed pretzels.

Hands down, my favorite pretzel is traditional German Bavarian pretzels, which are difficult to find outside of Oktoberfest celebrations here in the US. The pretzels in German beer gardens are the best I’ve ever had. Instead of trying to replicate a perfect plain pretzel, I figured I would spice things up a bit. I decided to make my usual pretzel dough, stuff them with ham and cheese and make little nuggets out of them. They are a perfect, portable appetizer, suitable for hot or room-temperature consumption.


I also decided to have some fun and make an actual pretzel-shaped pretzel as well as one stuffed with ham and cheddar, in the style of those Kim and Scott's pretzels – just to see what would happen. The regular one was easy to roll into a tube and then create the pretzel knot. The stuffed one was a little more complicated, but was definitely worth the wow-factor.


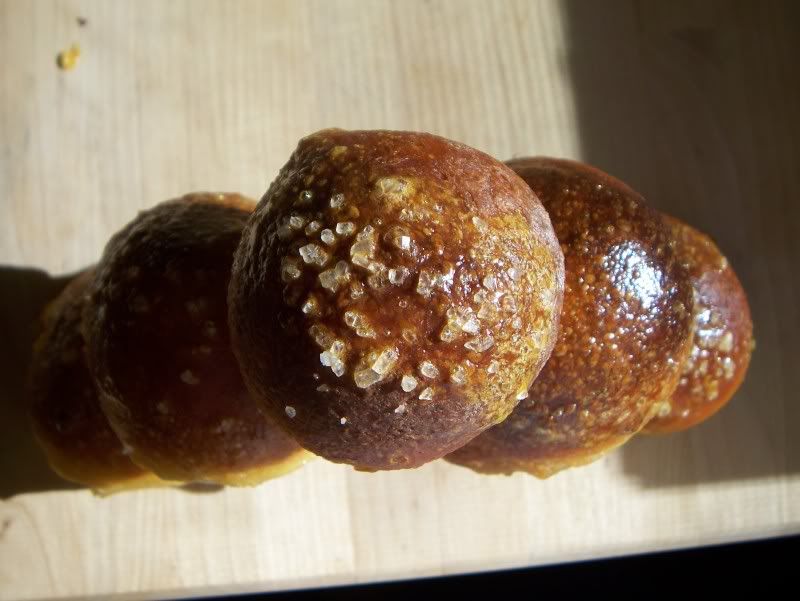
These were fantastic. The outside could have had a little bit of a thicker crust, but it was not a fatal flaw. I did notice, though, that the longer pretzels sat at room temperature, the more of the salt seemed to dissolve into the outer skin. When eating the pretzel, it would have the correct level of saltiness, but it was missing the crunch that the pretzel salt brings. Which means I will either be investing in some pretzel salt, or eating the pretzels faster. Probably eating them faster, knowing me.


Ham and Cheddar Stuffed Pretzels

Pretzel Dough Recipe from Alton Brown via FoodNetwork.com
About 5 dozen pretzel bites or 8 regular pretzels (or be crazy and do a combination of both!)

My adaptations to this basic recipe are in italics.

Pretzel Dough
1 1/2 cups warm (110 to 115 degrees F) water
1 tablespoon sugar
2 teaspoons kosher salt
1 package active dry yeast
22 ounces all-purpose flour, approximately 4 1/2 cups
2 ounces unsalted butter, melted
Vegetable oil, for pan
10 cups water
2/3 cup baking soda
1 large egg yolk beaten with 1 tablespoon water
Pretzel salt

Filling
8 oz cheddar, shredded
8 oz deli ham, cut into small pieces or pulled apart


Combine the water, sugar and kosher salt in the bowl of a stand mixer and sprinkle the yeast on top. Allow to sit for 5 minutes or until the mixture begins to foam. Add the flour and butter and, using the dough hook attachment, mix on low speed until well combined. Change to medium speed and knead until the dough is smooth and pulls away from the side of the bowl, approximately 4 to 5 minutes. Remove the dough from the bowl, clean the bowl and then oil it well with vegetable oil. Return the dough to the bowl, cover with plastic wrap and sit in a warm place for approximately 50 to 55 minutes or until the dough has doubled in size.

Preheat the oven to 450 degrees F. Line 2 half-sheet pans with parchment paper and lightly brush with the vegetable oil. Set aside.

Bring the 10 cups of water and the baking soda to a rolling boil in an 8-quart saucepan or roasting pan.

In the meantime, turn the dough out onto a slightly oiled work surface and divide into 8 equal pieces.

For the individual pretzels, roll one of your eight pieces into a rope about 24 inches long. Twist into a pretzel shape, set aside. To stuff the pretzel, roll one of your eight pieces into a rope about 24 inches long, and then flattened out to about an inch wide. Run 1 oz of cheese and 1 oz of ham up the middle of the flattened dough, and then pinch the dough shut around the filling, trying to remove as much excess air as possible from the inside. Then the dough can be carefully knotted into the classic pretzel shape. Make a U-shape with the rope, holding the ends of the rope, cross them over each other and press onto the bottom of the U in order to form the shape of a pretzel. Place onto the parchment-lined half sheet pan.

For the nuggets, divide each of the eight pieces into another eight pieces. Make each piece into a small circle, about one to 1-1/4 inches in diameter. Also, try to make the outer edge of the nugget a little thinner than the center of the disk, since you’ll be gathering it. Put about 1-2 tsp of cheese and the same amount of ham in the center of the disk. A small pinch will do, be careful not to overfill the nugget or else it will be hard to pinch shut and will ooze cheese everywhere when it boils and then bakes. Gather the edges of the circle and pinch shut into a ball shape.


Place the pretzels into the boiling water, 1 by 1, for 30 seconds. This gets a little complicated with the nuggets, but do the best you can. I did batches of three to four nuggets at a time. Remove them from the water using a large flat spatula. Return to the half sheet pan, brush the top of each pretzel with the beaten egg yolk and water mixture and sprinkle with the pretzel salt. Bake until dark golden brown in color, approximately 12 to 14 minutes. Transfer to a cooling rack for at least 5 minutes before serving.

Saturday, January 22, 2011

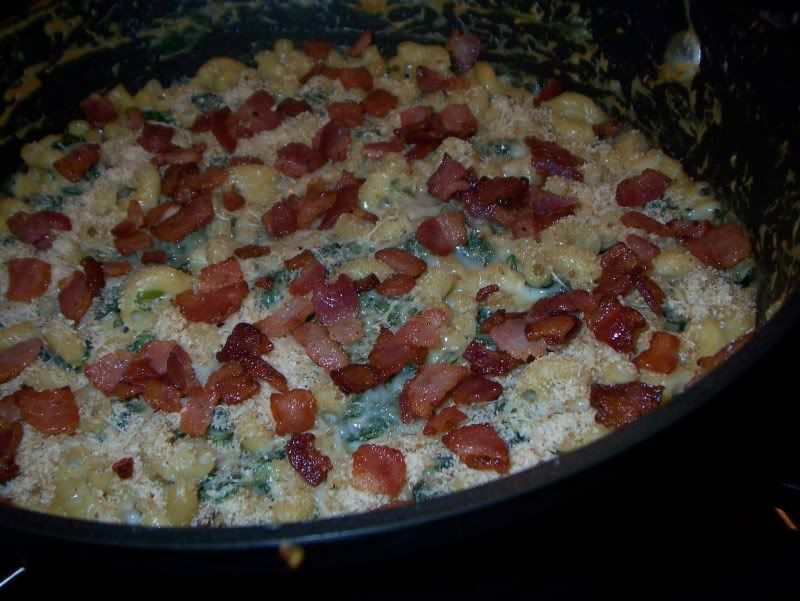
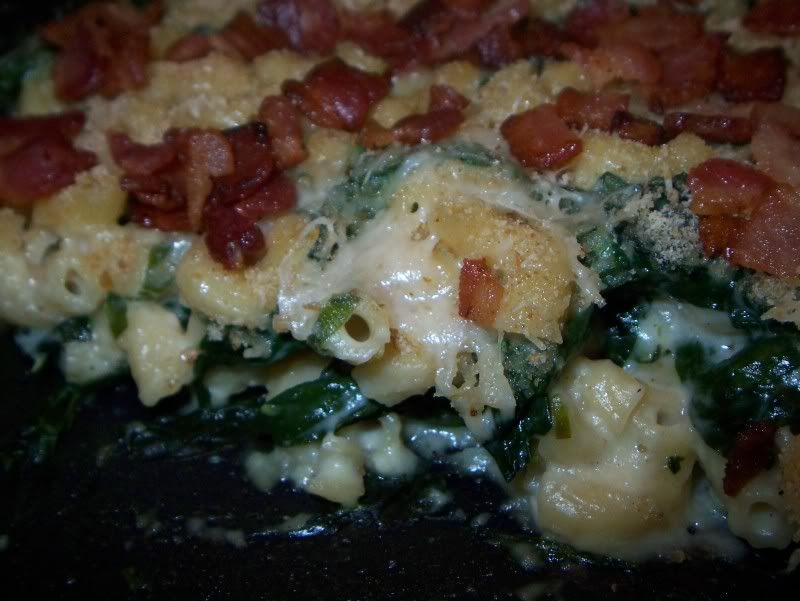
Spinach and Bacon Mac N Cheese

Holy Cow, I'm at my 100th post! Is it just me, or is that exciting? I figured for this occasion, I'd share a classic comfort food, jazzed up and blinged out. Ok, no bling, but this is definitely a nice spin on a classic macaroni and cheese.

Mac and Cheese night at our house is either a really good thing or a really bad thing. The past few attempts have yielded one of two results – a cheese sauce that otherwise tasted fine but curdled because I used fat free half-and-half, or a beautiful sauce and not-so-good flavors.

We have a restaurant by us that has a ‘make your own mac and cheese’ menu, where you can choose your add-ins, and it is mixed up fresh for you. My husband and I compromised between his highly carnivorous diet and my more omnivorous one and ordered mac and cheese with bacon and spinach. It was so good - creamy and velvety, with just the right hit of saltiness to cut through the richness of the cheese. I hoped that one day I could make macaroni and cheese that was this good. Unfortunately for me, the odds aren’t really in my favor when it comes to this American classic.

It wasn’t until a few nights ago that the hubby and I were trying to decide what to make for dinner, and I suggested macaroni and cheese. After what I think may have been a small nervous twitch in his eye, he actually agreed. I saw this recipe a while ago, put it in my ‘to make’ binder and forgot about it. While flipping through my recipes, the combination of the spinach and smoked gouda caught my eye. I realized that with the addition of some bacon, it would be very similar to the dish we enjoyed so much at the restaurant.

As fearful as I was about screwing up, this recipe seemed almost foolproof. This time, the roux worked beautifully, the sauce thickened up as expected and the flavors of this mac and cheese were out of this world. The spinach added a little bite to the recipe, and I used baby spinach so that the bitterness wasn’t too overwhelming, but was sturdy enough to stand up to the richness of the cheese sauce.

And how did it compare to the original version? My husband said it was a hundred times better than what we got at the restaurant.

What a sweetheart. He’s definitely a keeper!


Spinach and Bacon Mac N Cheese
Adapted slightly from
Culinary in the Desert

Ingredients
1/2 c bread crumbs
1/4 cup thinly sliced green onions
2 garlic cloves, minced
2 tablespoons all-purpose flour
2 cups fat-free milk
1/2 teaspoon salt
1/4 teaspoon black pepper
1/2 cup (2 ounces) shredded smoked Gouda cheese
1/3 cup (about 1 1/2 ounces) grated fresh Parmesan cheese
Three strips of thick cut bacon, chopped
5 cups coarsely chopped fresh spinach
4 cups hot cooked elbow macaroni (about 2 cups uncooked)
Tabasco Sauce

Directions
Preheat oven to 350

Dice bacon into small pieces, cook in large saucepan until crispy. Scoop bacon out of pan with slotted spoon onto paper towels and set aside.
Keep saucepan (with the rendered bacon fat) over medium heat. Add onions and garlic; cook 1 minute. Add flour; cook 1 minute, stirring constantly. Gradually add milk, salt, and pepper, stirring constantly with a whisk until blended. Bring to a boil; cook until thick (about 2 minutes). Add cheeses; stir until melted. Add spinach, bacon and macaroni to cheese sauce, stirring until well blended.

Spoon mixture into a 2-quart baking dish coated with cooking spray. Sprinkle with breadcrumbs. Bake at 350° for 15 minutes or until bubbly. Garnish with Tabasco sauce, if desired.
4 servings

Sunday, December 12, 2010

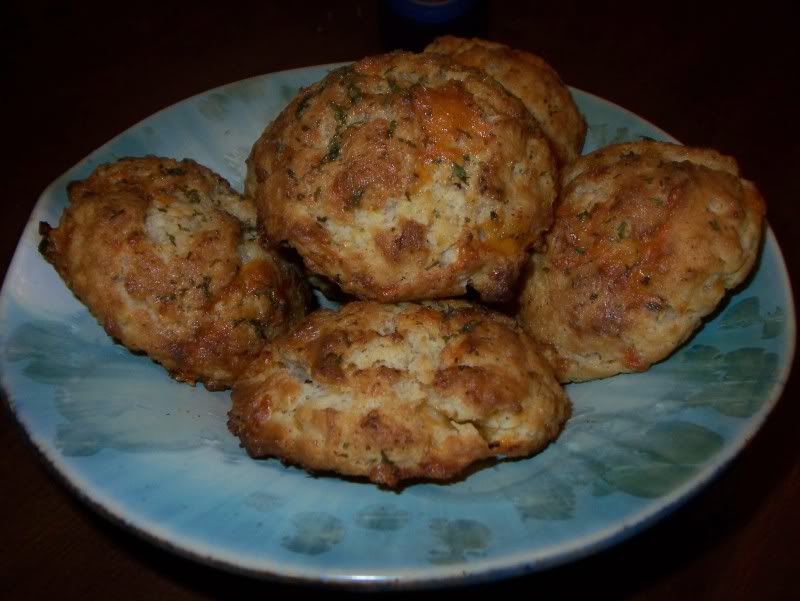
Cheddar Bay Biscuits

A good biscuit is a thing of beauty. It can be a vehicle for sausage gravy or a delivery system for your favorite jam. You can stick a sausage patty inside for a sandwich or plop it on top of chicken stew to make quick dumplings. But the best biscuit is the one that can stand on its own, with only a smear of butter.

I’m guilty of serving my fair share of hockey puck biscuits, especially the first few times after I vehemently swore off of Bisquick for my recipes. I do not know why I feel better about making biscuits without Bisquick, but I think it is mostly attributed to the fact that I use it so infrequently that a box hits its expiration date before I can use half of it. I hate wasting things, so I decided to start making things like pancakes and biscuits from scratch, without the help of Bisquick.

I’ve made cutout biscuits that could probably be used in the NFL, and I’ve made drop biscuits that were so strangely wet that the bottoms burnt before the inside lost its gumminess. I put the biscuit recipe search off to the side after having to eat several sub-par biscuits.

One evening, my husband came home after a really long day, and I wanted to make something special for him. I know he loves Red Lobster’s Cheddar Bay biscuits, so I ventured back into the biscuit world again to find a recipe that would be similar to that one.

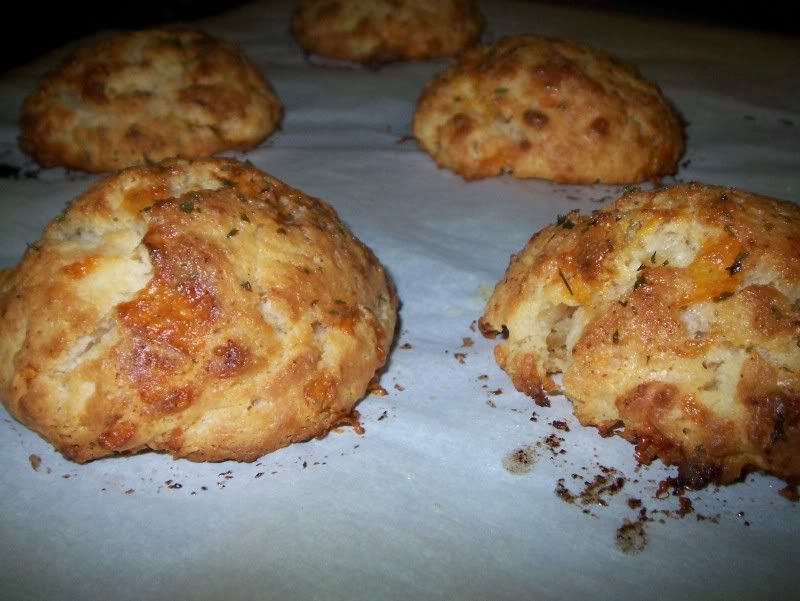
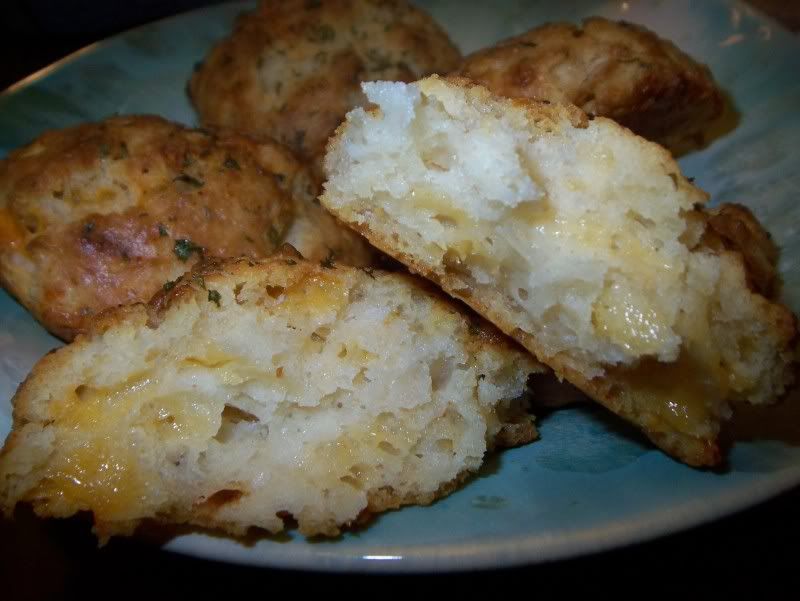
I landed on this recipe, and am thrilled that I did. While outside was slightly crisp with a crunch - not quite identical to the Red Lobster counterparts - these were definitely winners nonetheless. The outside, though different than the authentic cheddar bay biscuits was delicious, the buttery topping added a nice punch of flavor. The inside of these biscuits are the things dreams are made of - tender, soft, cheesy and light as air inside. Perfection.


While I may keep looking for another Cheddar Bay biscuit recipe, I will definitely be keeping this cheddar cheese biscuit in my repertoire. I may also try leaving out all the cheese and spices and see what this biscuit would be like topped with some sausage gravy. It would be a vast improvement from my last few attempts.


The Ultimate Cheddar Bay Biscuits
From
Chickens in the Road

Biscuits
2 1/2 cups all-purpose flour
1 tablespoon baking powder
2 teaspoons sugar
1/2 teaspoon cream of tartar
1/4 teaspoon salt
1/4 teaspoon ground cayenne pepper
1/2 teaspoon garlic powder
1/2 cup butter, softened
1 1/4 cups grated cheddar cheese
1/2 cup sour cream
1 1/4 cups milk
Note: If using a baking mix, replace first 5 ingredients with 2 1/2 cups baking mix.
Place first 5 ingredients (or 2 1/2 cups baking mix) in a large bowl. Add cayenne pepper and garlic powder.

Work in the butter with a pastry cutter. Stir in cheese then add sour cream and milk. Scoop biscuit dough out by big spoonfuls and place in a greased 9 x 13 casserole pan. (Or other type of pan with an edge to it–if you use a flat baking sheet, butter sauce will spill down into your oven. Ask me how I know that……)

Topping
6 tablespoons butter, melted
1 teaspoon garlic powder
1 teaspoon parsley
dash of salt
Melt butter. Stir in garlic powder, parsley, and a dash of salt. Spoon half of topping over unbaked biscuits.
Bake at 450 degrees for 25 minutes.* After removing biscuits from the oven, spoon the rest of the topping over them.

*Your baking time may vary! I make 20 biscuits from this recipe. If you make your biscuits smaller or larger, it will change your baking time.

Tuesday, May 11, 2010

Asiago Cheese Semolina Bread

Last week I ventured back into the world of risotto with a recipe out of the current Cooking Light magazine. It called for a small amount of asiago cheese which, of course, meant we had to buy a wedge that was four times more than what was needed for the recipe. Before the cheese even landed in my basket, I already knew how I would use the excess.

I love pretty much any bread plus asiago cheese combination, and the leftover cheese was just dying to be mixed into a loaf of bread. Inspired by King Arthur Flour's baking blog, which featured a loaf of Three-Cheese semolina bread, I created somewhat of my own recipe to make the bread with the ingredients I had on hand. I ventured on my own after mistakenly using semolina flour instead of semolina, and just went on my own tangent from there. I also don't use instant yeast, so I had to re-vamp the recipe slightly to allow my yeast to bloom before using in the recipe.

Bread is a pretty simple formula - water, yeast, flour, sometimes salt, and whatever add-ins you want. Recently I bought semolina flour for use in my pizza dough, but have wanted to see what affects it would have on my breads as well. So not only does this recipe use bread flour, but it calls for semolina flour, too. The grated asiago cheese adds a nice saltiness to the dough, but I think the best surprise in this recipe is the garlic-infused olive oil. It adds another depth of flavor that makes this bread so wonderful. Next time I may roast the garlic first, so that I can mix all the garlic and olive oil in with the dough.

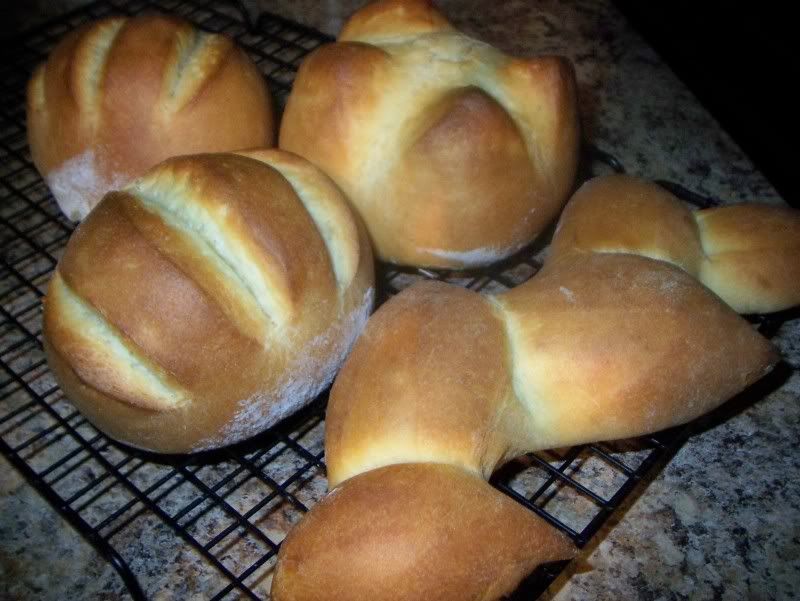
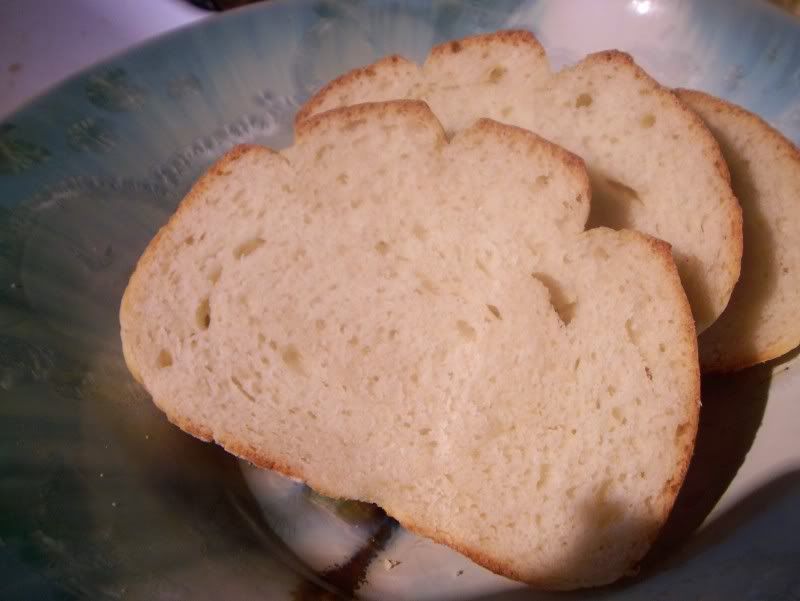
The bread has a soft exterior and is wonderfully soft inside, without being airy. There are some 'extra large' holes throughout the bread are little cheesy pockets of goodness. I will have to make sure that next time I'm not so insane with the knife when I'm slicing the tops of the loaves prior to baking. I sliced them a little too deep. At least it doesn't affect the flavor of the bread, but it does make for some funny-shaped slices.

Already I have eaten it toasted with butter, and topped with pizza sauce, fresh mozzarella, oregano and basil. I think some of the leftovers are destined to be cut into cubes and toasted for some killer croutons.

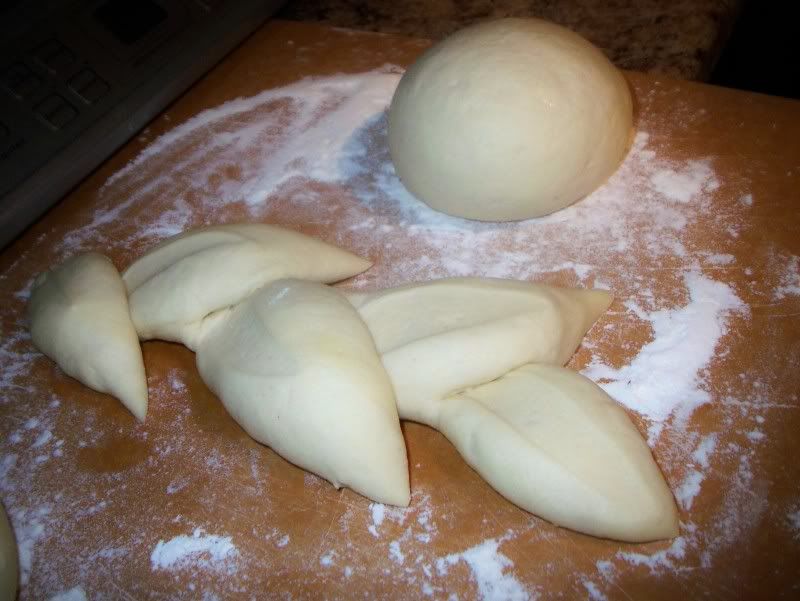
The recipe calls for one large loaf or two smaller loaves, but I divided my dough into four, making three small, grapefruit sized boules and one epi style loaf. It makes more reasonable sandwich slice sizes for me, and I can also give away a whole loaf without it being an indecent amount of bread.

Asiago Cheese Semolina Bread
Makes 1 large loaf or two smaller loaves

2 c Bread Flour
1 c Semolina flour
2 tsp Active dry yeast
1 tsp salt
2 Tbsp oil
3 cloves garlic, peeled and slightly smashed
1 c and 1/4 c water, divided
3 c grated asiago cheese
flour or cornmeal for sprinkling

In a small saucepan, put olive oil and three cloves of garlic. Keep over low heat until aromatic, about 5 minutes. Remove from heat, remove garlic cloves from oil and set aside.
In a small bowl, mix yeast and 1/4 c water (which should be around 110-115 degrees F). Let sit for 5 minutes.
In the bowl of your stand mixer, mix bread flour, semolina flour, and salt until combined.
Add yeast mixture, garlic-infused oil and 1 c water until dough comes together. Your stand mixer will most likely start struggling once the dough starts coming together. Switch over to the dough hook and let it go for 15-20 minutes on medium. The dough will become smooth and elastic.
Put dough in a lightly greased bowl covered with lightly greased plastic wrap and let sit for about 2 hours, or until doubled in size.
Line a baking sheet with parchment paper. Sprinkle flour or cornmeal onto the pan.
Gently deflate the dough and shape it into whatever you want. Tent lightly with plastic wrap and let rise for about an hour, or until puffy. Preheat the oven to 425 degrees when the rise time is nearly complete.
Remove the plastic wrap and spray loaf or loaves with water. Using a sharp knife, slash loaves in whatever design you want in the top.
Bake for 30 minutes and then check the internal temperature. The bread is done when the temperature reaches 190 to 200 degrees F.
Put bread on rack to cool completely.

Saturday, May 8, 2010

Kickin' Mac N Cheese

Our dinner planning always starts the same way:
“What do you want for dinner?”
“I don’t know. What are you in the mood for?”
“I don’t care. What do you want? I asked you first.”


This back-and-forth banter continues for a bit, until we realize that we’re getting no closer to figuring out what to eat. We then realized that we actually default to a couple of some dinner-decision-making-tools that work for us.

Tool 1: Choose a protein. Choose a side. Decide from there how you want to prepare them. I’ve found it is so much easier for me to narrow down choices when I have specifics to focus on. Example: Protein = Beef and Side = Potatoes. This would give us a few options right off the bat – filet mignon and gilled potatoes, thinly sliced flank steak with hasselbeck potatoes, philly cheesesteaks and smashed potatoes or even jazzed up hamburgers with baked potato fries. And if none of those sound good, I’ll check any of a number of food blogs or recipe websites for new inspiration.
Tool 2: The elimination process. Decide what you don’t want to eat and figure out what’s left. Then, seeTool 1.

My husband was recently on a basketball team for his office which had games on Tuesdays. This meant we needed something quick and light so that he wouldn’t get halfway down the court then double over with indigestion. This came to mean Tuesday nights were almost always pasta nights. After the end of his league, we enjoyed this routine so much that we’ve since adopted Tool 3: “Pasta Tuesday.” By initiating “Pasta Tuesday” we’ve been able to remove more guesswork from menu planning. It’s a specific enough choice that it limits the options, but it’s broad enough that any flavors we crave can be incorporated into the meal.

This Mac n cheese will be a great addition to our ‘Pasta Tuesday” rotation. I’ve tried several recipes, and this is by far the tastiest that has come out of my kitchen. I found the original recipe on epicurious.com, and with a 3.5 fork rating and 130-some reviews, I figured I’d give it a try. And, I think the fact it includes one of my new favorite things:

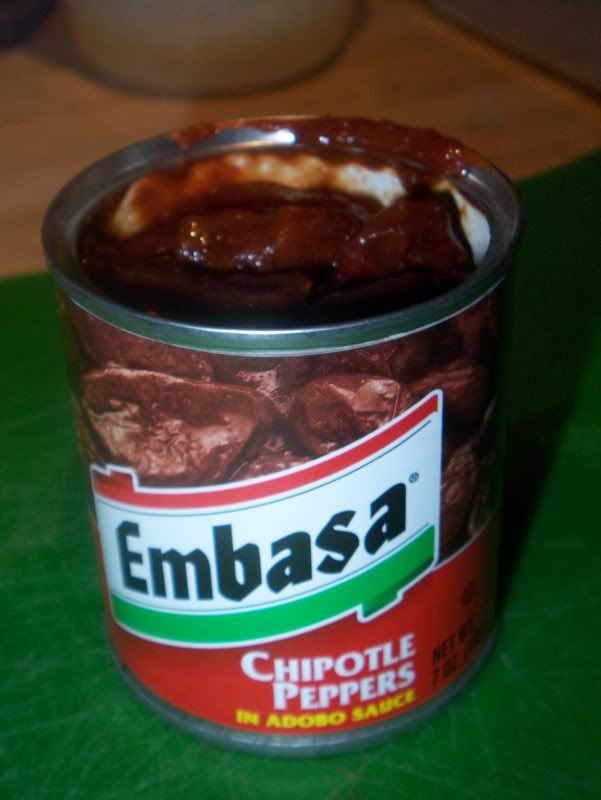
tipped the scales in favor of this recipe. I only started cooking with chipotles maybe about a month ago, and I’m kicking myself that I didn’t start sooner. The smoky heat they add to pretty much everything is fantastic.

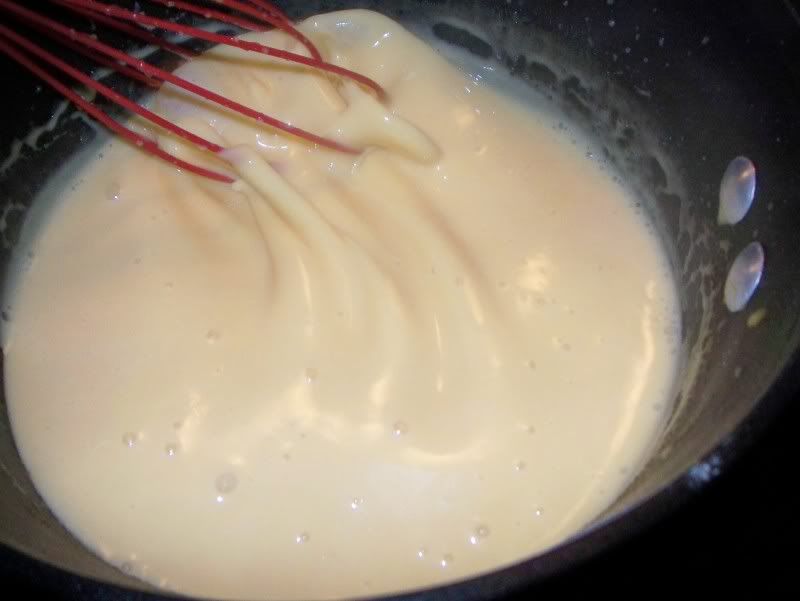
This recipe was a “make and bake” recipe, where you combined the cooked components into a casserole dish and let it finish up in the oven. I have really wanted to make a stove-top cheese sauce, so I adjusted the recipe even more to accommodate this. I will admit, though, I thought I had made a huge mistake by trying to make a stove-top sauce without ever having done it before. Because I also lightened the recipe up so that instead of whole milk and heavy cream I used 1% milk, I was terrified that I would curdle my cheese sauce again. Yes, again. Curdled cheese sauce is not pretty. I learned from my mistakes experience that fat is what keeps sauce from curdling, and the less fat you have, the greater chance of curdling. Temperature also plays a big role. 180 degrees F is a key temperature when working with lower-fat products. I never let the heat on my pot get up to “medium.” This is where patience pays off. I started low, but my cheese wasn’t melting entirely, so I’d get oily, cheesy strings attached to my whisk. Gradually I would increase the heat, stir some more, and check again. Eventually I found the magic temperature on my stove that melted all the cheese but didn’t curdle the milk. Also white wine or sherry was supposed to aid in keeping a creamy sauce together, so I popped open my bottle of sherry and dumped some in. What could it hurt? Alcohol makes everything better.

By the time I was finished, the cheese sauce melted nicely and thickened up. Look how beautiful it is.
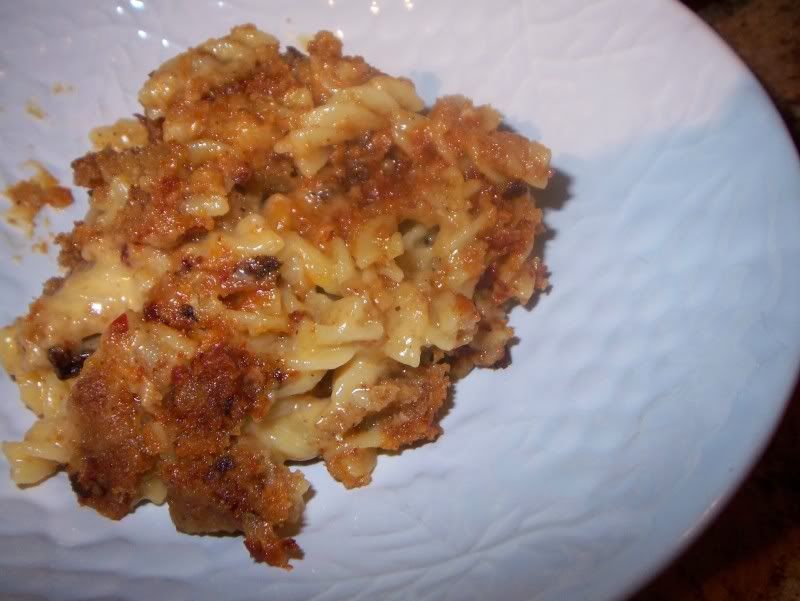
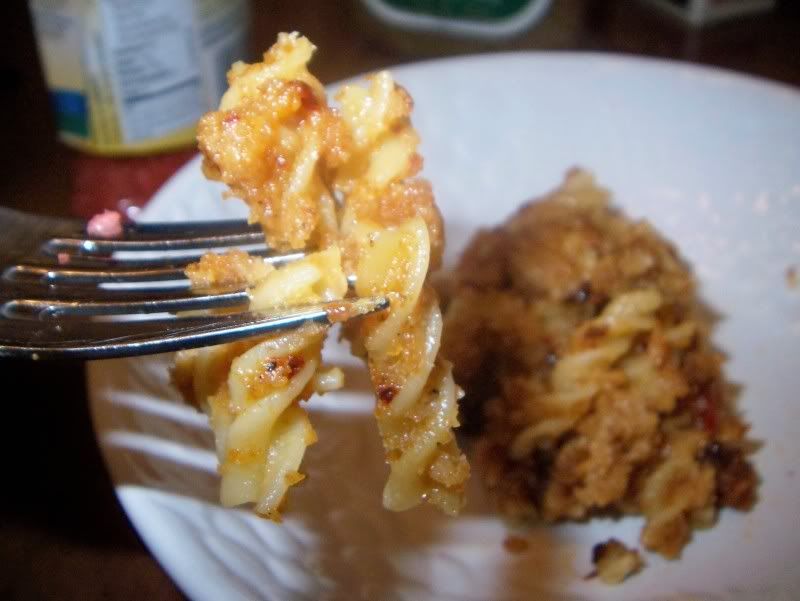
The pasta then jumps in the pool with the cheese and transferred to a baking dish. If you like it really cheesy and saucy, I’d say skip the baking dish and eat right that second. The ten minutes of baking to toast up the bread crumbs on top also lets some of the cheese absorb, which results in a denser, less saucy mac and cheese.
This meal was delicious, and even the hubby said it was a great improvement over my last attempt which was definitely cheesy, but lacked any discernible flavor or zing. With three chipotles, this one definitely had zing. If you don’t like as much spice, or even any at all, you can reduce or omit completely the chipotles in this recipe. I might recommend a dash of cayenne pepper as a replacement just because I think the heat plays off the richness of the cheese and makes a more well-rounded dish.
My four-cheese mix consisted of extra-sharp cheddar, smoked gouda, Monterey jack and parmesan only because I was trying to use our cheese drawer remnants. Feel free to improvise and experiment with your own mixtures. Another good mix would be 3 oz Cheddar, 2.5 oz havarti, 1.5 oz gouda and 1 oz fontina, swiss or gruyere.


Kickin’ Mac-n-Cheese with Garlic Bread Crumbs
Adapted from Epicurious.com
http://www.epicurious.com/recipes/food/views/Macaroni-and-Cheese-with-Garlic-Bread-Crumbs-Plain-and-Chipotle-102738#ixzz0n9hESbMX
For bread crumbs:
1 1/2 teaspoons unsalted butter
1 1/2 teaspoons olive oil
2 large garlic cloves, finely chopped
1/2 cups bread crumbs
For macaroni:
1 to 1.5 tablespoons chopped chipotle chiles in adobo (I used 3 chilis)
1 Tbsp unsalted butter
1 Tbsp all-purpose flour
3/4 cups 1% milk
1-2 Tbsp sherry (I just opened and dumped it in, so this is just an estimate)
1 tsp dijon mustard
1/4 pound macaroni (4 oz)
1/2 pounds cheese blend of choice, grated (my blend was 3 oz cheddar, 1 oz monterey jack, 2.5 oz gruyere 1.5 oz parmesan)
Pepper to taste

Preparation
Make bread crumbs:
Heat butter and oil in a 10-inch heavy skillet over moderate heat until foam subsides, then cook garlic and bread crumbs, stirring, until crumbs are golden. Transfer to paper towels to drain and season with salt.

Make macaroni:
Preheat oven to 350°F. Chop chipotles.
Melt butter in a medium saucepan over moderate heat, then reduce heat to low add flour and cook, whisking, several minutes. This will not make a ton of roux, so don’t worry if you just have a couple little clumps whisking around the pan. That’s ok. Gradually whisk in milk, mustard and cook on low to med-low, whisking occasionally.
Cook macaroni in a large pot of boiling salted water until just tender (I undercooked mine ever so slightly so that they wouldn’t overcook when in the oven). Drain in a colander and transfer to a large bowl.
Over low heat, mix in ½ cup of cheese into your milk mixture until melted, stirring frequently. Continue adding half cup cheese at a time until all is used and thoroughly blended. Mix in pasta, pepper, and chipotles, if using.
Serve now or spoon into an 8x8 baking dish and sprinkle with bread crumbs. Bake in middle of oven for amount 10 minutes.

Here are the original oven directions from the recipe. I did not follow these so I can’t vouch for them. But it seemed like a lot of reviewers had success with it. This is from the point you finished the white sauce and cooked the pasta:
To the pasta, stir in white sauce, cheese, and salt to taste.
Stir chipotles (if using) into macaroni. Spoon into an 8x8 baking dish and sprinkle with bread crumbs. Bake casserole in middle of oven 15-20 minutes, or until bubbly.
Cook's note: • Macaroni and cheese may be made 2 days ahead, put into casseroles, cooled completely, and chilled, covered. Do not add bread crumbs until ready to bake. (Baking may take longer than 15-20 minutes if reheating from refrigerator.)

Related Posts Plugin for WordPress, Blogger...