Friday, September 24, 2010

Some Happy News! (AKA Tastespotting accepted one of my pictures!)

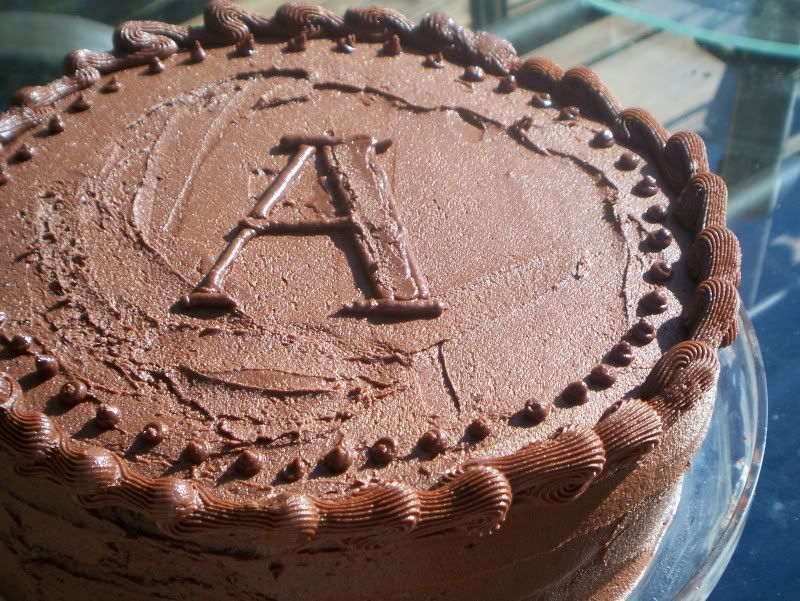
It doesn't take very much on a friday to make me happy, but I am ecsatic that one of my photos submitted to the Tastespotting website was picked for the front page! It's photo 101634, not that I'm counting :)

Even better, it's of the birthday cake I made for my hubby, so I'm proud that I actually made him a cake that tasted delicious and apparently was pretty enough to be featured on Tastespotting!

Yay and Happy Friday!

(PS, remember the
Asiago Cheese Bread from a while ago? There's a Part II post coming tonight. Be excited!)

Saturday, September 18, 2010

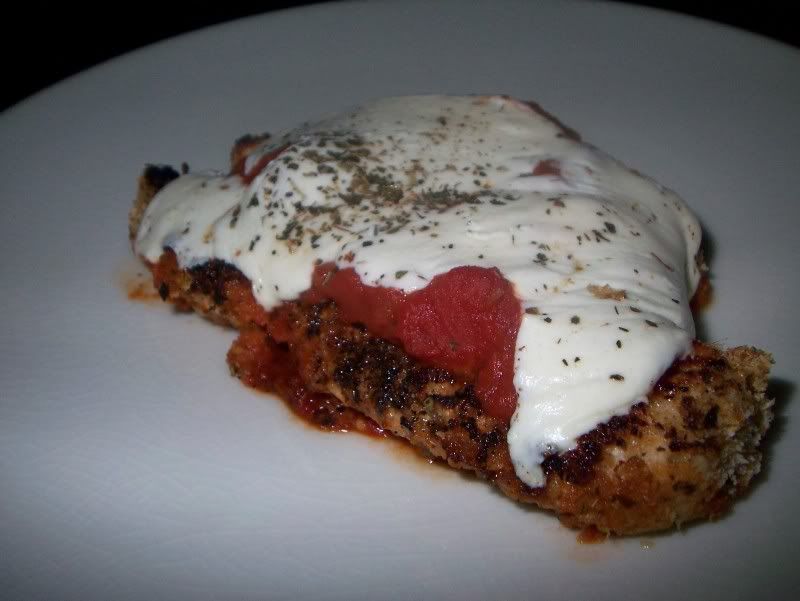
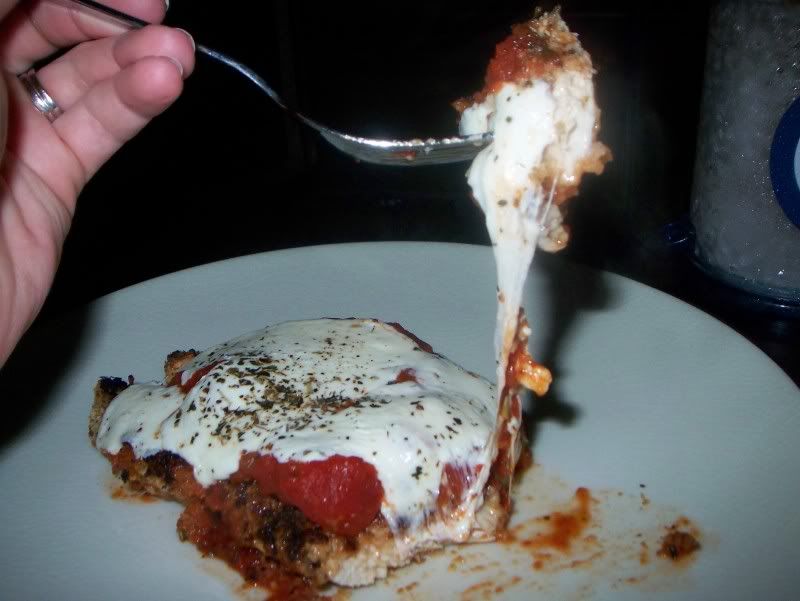
Chicken Parmesan

I finally saw “The Godfather” – parts one, two and three – for the first time recently. I see why these movies have such a following, they really sucked me in. In the first movie, it took me nearly the entire movie to finally accept that Michael Corleone was a young Al Pacino. I think it was a lack of wrinkles.

I did the math, and we watched Italian mobsters for nearly nine hours. No wonder I started talking like Marlon Brando with everything I said, and kept saying things about “an offer he couldn’t refuse.” Right?

Right?

Sigh.


Either way, this trilogy also really got me craving Italian food. This chicken parmesan recipe has been a work in progress for me. I usually get a decent crust on my chicken, but then when I bake it in the sauce, it loses its crispiness. By using less sauce when I bake it, and simply reserving some for dipping, I maintain the crispiness of the breading without sacrificing the sauce my husband loves oh-so-much. Also, by pounding the chicken thin, it cooks so much faster, so I can prepare this on a busy weeknight and feel like we’re really indulging in something that took a lot longer to make.

Once I had my chicken parmesan and strained my vocal cords enough to keep myself quiet for a while, we finally decided it was time to watch another movie. Can you guess what movie followed such a cinematic classic?

Hot Tub Time Machine.
Chicken Parmesan

1/4 c panko breadcrumbs
1/4 c regular bread crumbs
1/4 c grated parmesan cheese
1 Tbsp and 2 tsp Italian seasoning, divided (or use dried oregano and basil)
1 tsp cayenne pepper
Dash each of salt and freshly ground pepper
2 boneless skinless chicken breasts, pounded to 1/4-1/2-inch thickness
1 1/4 c Spaghetti sauce, plus ~1/2 c more for dipping (this equates to most of a 14 oz jar)
Fresh mozzarella cheese
2 Eggs
1 Tbsp canola oil

Preheat oven to 350 degrees F.

In a wide, shallow bowl, mix together panko, bread crumbs, parmesan cheese, salt, cayenne, black pepper and 1 Tbsp Italian seasoning.

In another wide bowl, gently beat eggs.

Dip chicken in eggs and then dredge in breadcrumb mixture until completely coated. Set aside.

Heat oil over medium heat in skillet large enough to hold the chicken.

Cook 3 1/2 minutes on each side until nicely browned on both sides. (I’ve used both tongs and a spatula to turn my chicken and found I have a lot less risk of damaging the crusty coating if I use a spatula. I always end up having my chicken slip out of my tongs and ripping off some of the breadcrumbs.)

In an 8 x 8 or 9 x 13 baking dish, spread a thin layer of spaghetti sauce. Lay your chicken breasts into the sauce. Top with more sauce.

Layer on slices of mozzarella cheese and sprinkle a tsp of the Italian seasoning on each breast.

Bake at 350 for 20 minutes, or until cheese is melty and chicken is completely cooked through.

Once you chicken comes out of the oven, heat up the additional half cup of spaghetti sauce in the microwave for dipping.

Sunday, September 12, 2010

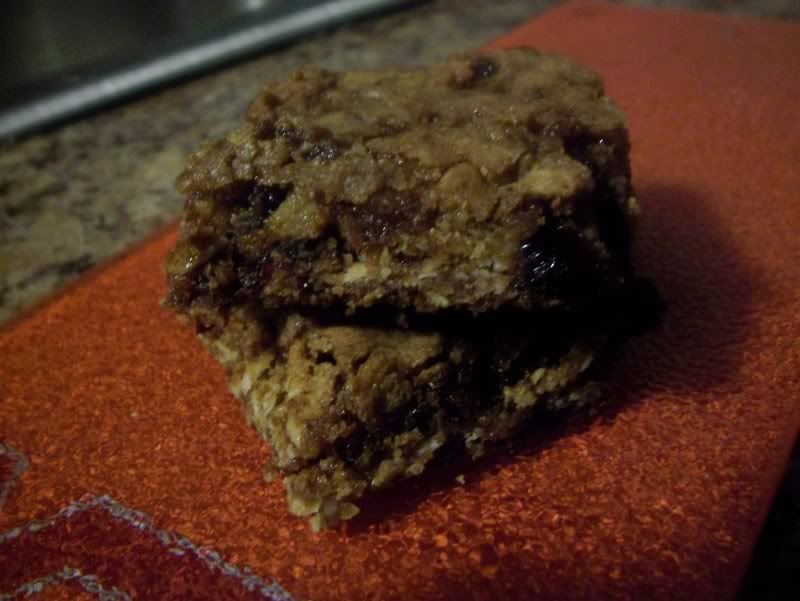
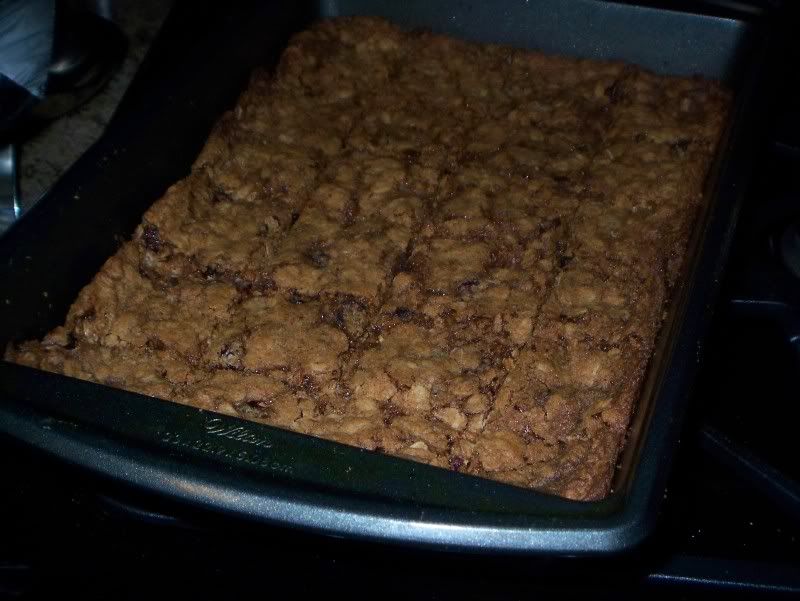
Oatmeal Craisin Cookie Bars

Another week of softball and another week of goodies. This week I was not sure what I was going to make. Thankfully one of my coworkers mentioned that he enjoyed oatmeal craisin cookies. It’s been a long time since I’ve had a homemade oatmeal cookie and I realized that I had all the ingredients readily available in my pantry, so I decided that would be what I’d make. Because these treats commute by car, train, and foot to get to the office, I decided to make them into cookie bars, instead of individual cookies. The cookie bars travel well in my 9 x 13 pan carrier, and I don’t have to worry about the cookie crumblies in the bottom of a bag if I used a ziplock instead.

I’m apparently becoming known as “the baker” on my morning train. Every week I board the train with my cupcake carrier or my 9 x 13 pan, and the regulars always ask two questions: 1) What did I make and 2) Did I bring enough to share with everyone. I told them I made Oatmeal Craisin Cookie Bars and before I could say another word, the engineer of the train popped out from behind the door of his engine room, looked back and said “COOKIES?!” It was so sudden and unexpected that it startled us as first. Then we all broke out into laughter - apparently the only other thing that gets a reaction from the conductor besides people running past the train gates are cookies. Yes, cookies will elicit that type of response from just about anyone.

While I did not have enough to share with them this week, I promised them, all of them, that in the near future that I will bring a treat especially for them.

I got this recipe off of AllRecipes.com, and adapted it based on the comments it has received. I’m still somewhat skeptical of the original 10-12 minute baking time in the recipe. I pulled the pan out of the oven at 12 minutes, and let the still-incredibly loose bars cool in the pan. I tried cutting them after cooling, and they were still soft and wet, on the verge of gummy, instead of chewy. I turned my oven back on and put them in for another ten minutes, part of that time while the oven was still preheating.

This time it worked. I was worried they would get too dark, but they finally set up once I added more bake time. The bars will still be quite soft once they are removed from the oven, but they will not be jiggly. And they will set up into wonderfully chewy bars once they get to room temperature.

I didn’t have self-rising flour, so I used an AP flour/baking powder/salt replacement in this recipe.

I’m glad I made something that had oats and craisins and will stand up to the upper-90 degree temperatures we’re expecting tonight for our game.

Oatmeal Craisin Cookie Bars
Adapted From
AllRecipes

Ingredients
1/2 cup butter, softened
1/2 cup white sugar
1/2 cup brown sugar
1 egg
1 teaspoon vanilla extract
3/4 c AP flour
1 teaspoon baking powder
1/2 teaspoon baking soda
1 tablespoon ground cinnamon
3/4 teaspoon salt
1 1/2 cups quick cooking oats
1 cup craisins
Directions
Put craisins in a bowl with about 1/2 – 3/4 c water. Cook on high for 5 minutes. When finished, let sit for another 10 or so while assembling rest of the bars.

Preheat oven to 350 degrees F. Grease a 9x13 inch pan.

In a medium bowl, cream together the butter, brown sugar and white sugar, until smooth. Beat in the egg then stir in the vanilla. Combine the flour, baking soda, cinnamon and salt: stir into the creamed mixture. Fold in the quick oats and raisins. Spread evenly into the prepared pan.

Bake for 20-22 minutes in the preheated oven. Let cool in pan before cutting into bars.

Monday, September 6, 2010

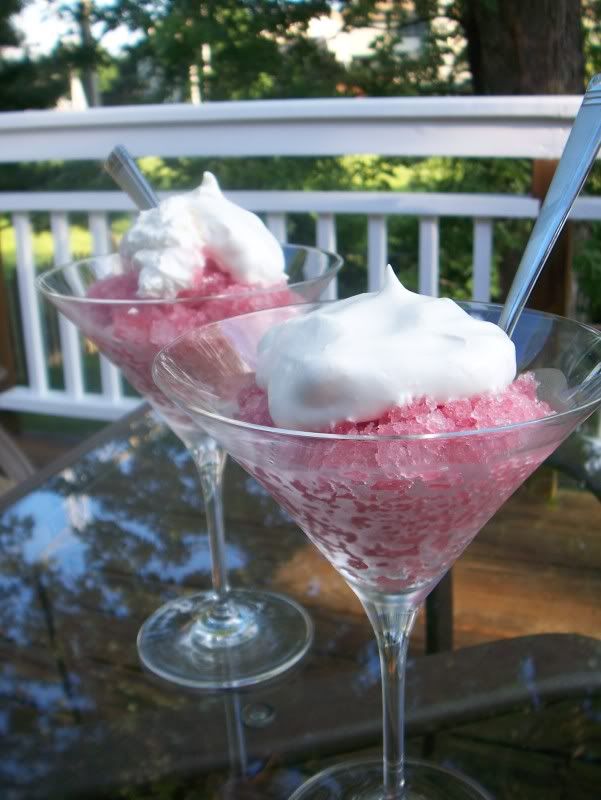
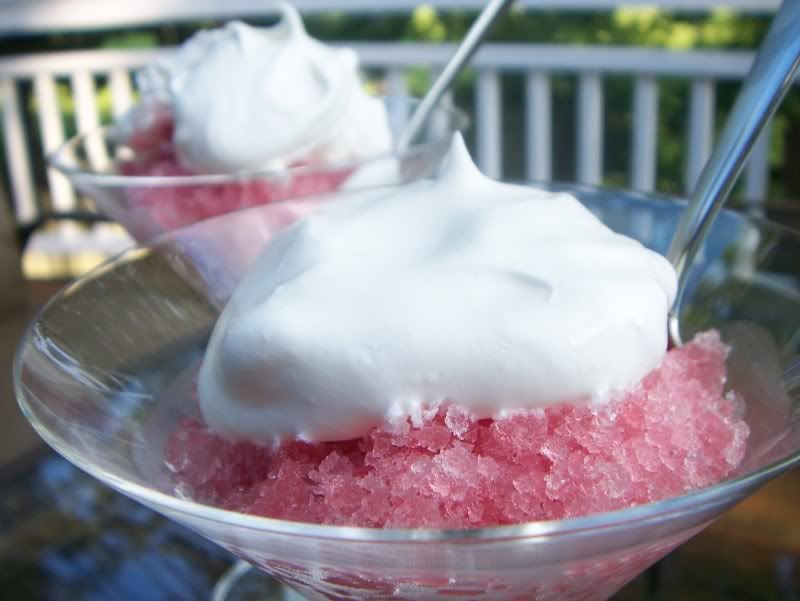
Hibiscus Leaf Tea Granita

Happy Labor Day!!

This recipe is my attempt at clinging onto summer just a little bit longer. I'm not ready for autumn, much less winter, yet.

This year marked the 30th anniversary for the Taste of Chicago, a quintessential summer event here. This year, they did things a little differently. There were fewer vendors, and the layout changed from previous years. Instead of the vendors going right up the middle of the street, they now are only on the sides of the road, leaving a much more open area in the middle for walking, eating and scoping out your next bite. One of the perks of working in downtown Chicago is that a group of us hit the taste for lunch one day. We get there right as it opens, usually mid-week, so that we avoid the lunch/weekend-rush that the Taste is infamous for.

If you are not from Chicago, I can see going to the Taste and getting an Italian sausage, deep dish pizza slice or a ‘garden dog,’ but for me, I use the Taste as an excuse to sample anything I have not tried before. Last year I had shark and curried goat. This year I had my first ever fresh pierogies, a jibarito sandwich and something called bissap sorbet. The sorbet was described as a hibiscus leaf tea sorbet served with a dollop of whipped cream. It was such a refreshing, light dessert in the hot, humid weather and left me feeling satisfied without feeling too guilty (hey, at least it wasn’t a slice of cheesecake!) I left the Taste thinking that I would buy a quart of that if I could, it was a perfect summer treat.

As luck would have it, that weekend my family and I went to Chicago’s Chinatown, and we stumbled upon a store that sold nothing but tea. As we were shopping around for green teas (they had some there that retailed for 124 dollars a pound!), the cashier came by with samples of some of their other tea varieties. One was hibiscus tea. As soon as I tasted it, I grabbed a box, paid for it, and left with a plan to recreate the sorbet from the Taste.

Because I do not have an ice cream maker, I decided to make a granita instead. It’s a little more coarse than sorbet, but finer than Italian ice, so I figured that would be a good compromise. It took forever for the granita to freeze. There is patience required in waiting for the hot water to cool enough to put in the freezer, and then you have to babysit it for as long as necessary, scraping the sides of the bowl down so you get granita and not a giant pyrex-bowl-shaped popsicle.

While it did take forever, the results were definitely worth it. It is light, refreshing and practically guilt-free. I used a 1/2 cup of sugar in mine, which is the only ingredient other than the tea in this recipe. The four cups of water yields probably a good 8-10 servings (we’ve already finished six and still have quite a bit left). One serving has a maximum of approximately one tablespoon of sugar, or 15 calories. It can’t get much better than that. Ok, well if you want the twenty-five calories you get from the additional two tablespoons of cool whip, still not a diet-buster.

Hibiscus Tea Granita


3 Hibiscus leaf tea bags
½ c sugar
4 c water, divided (2 cups can be cool/room temperature)

Put two cups of water and sugar in pot over medium heat. Heat, while stirring, until sugar dissolves into water. Drop in tea bags and let steep for 5-7 minutes, or until a dark raspberry color. Add in the additional two cups of water and let sit for a few more minutes. Remove tea bags and let sit on counter until room temperature. Place mixture in freezer and let sit for 1.5-2 hours. Scrape down sides with a fork. Let sit in freezer again for another hour to hour and a half. Scrape down sides. Repeat process until liquid is all frozen. Serve plain or with a small dollop of cool whip or whipped cream.

Monday, August 30, 2010

Meet my Newest Distraction! AKA "Cody"

As of two weeks ago, our family has had a little addition. Please welcome Cody, our 14 week old Pembroke Welsh Corgi! He was born on May 19th and we finally got to pick him up on August 16! We got to visit the litter and the mama when the puppies were 4 1/2 weeks old, and we got to take our first pictures and videos of Cody. And oh my goodness, how he has changed in 8 weeks! Can you believe this is the same puppy as the above picture??
It's been an adjustment for everyone, both him and us. It took him about a week to fully get used to his new surroundings, including having to leave mama and his brothers and sisters to join our family. We're now getting up at 5am to make sure we can take care of him and ourselves before leaving for work for the day.
It's so worth it though. He is a constant source of daily giggles. In the first week he was with us, he learned to go up stairs and tentatively down them as well (but not without a TON of supervision, I can tell I’m going to be a paranoid parent). We’re still working on the nipping – especially hard considering he’s teething right now and because that's how he is used to getting attention. Cody has been an absolute joy so far and we cannot wait to see what happiness he will bring us in the hopefully 12-14 happy healthy years we have with him!
Even when he's been a little frustrating (peeing on our carpet, nipping, refusing to go in his crate), we still know adding him to our family was the right decision. I mean, come on, just look at that face:
It’s amazing watching him grow right before our very eyes, and we cannot wait to see what handsome dog he will become. (Though we are incredibly excited for him to be fully trained and not have to clean up after him in the house!)
Welcome to our Family, Cody!

Thursday, August 26, 2010

Birthday Cake!

I love making cakes. And decorating them. And especially eating them. I have finally started to understand why cupcakes are all the rage. They are essentially portion-controlled cakes. I will admit that biting into a cupcake is not nearly as satisfying to me as taking a nice big slice out of a layer cake and plopping a big hunk of vanilla ice cream on top. I find a beauty in cakes, their construction, the balance of cake, filling and frosting, and in their decorations. But with only two people in our house, both of whom are fairly conscious of our daily diets, having surplus cake around is a problem. Which is unfortunately why I do not make them very much.

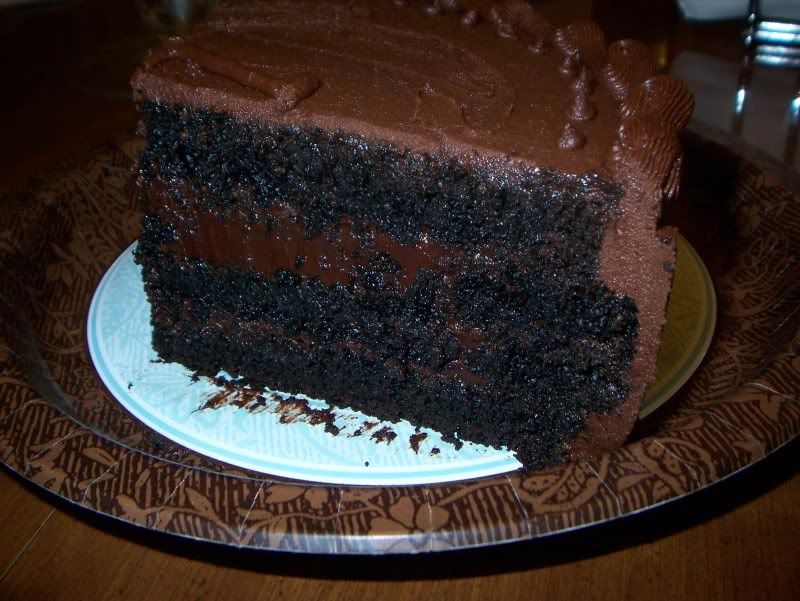
My husband’s birthday was recently and he requested and all-chocolate cake to celebrate. So, not only do I get my cake, I get chocolate, too! This is an ultimate chocolate layer cake. It’s a chocolate cake, chocolate ganache and chocolate buttercream. I decorated it simply because I didn’t want to go overboard girly on his cake.

The cake was Martha’s one bowl chocolate cupcake recipe baked into two round cake pans. I made the batter, weighed it in my pans and started to bake them off. I set my timer and came back when it beeped. When I opened my oven door, the cakes didn’t even look close to finished. I started to panic, wondering if Martha had set me astray. I persisted, put more time on the timer and prayed I didn’t mess it up. It would have helped if I read the instructions again. What took me a while to realize was that I followed the recipe instructions for the cupcakes, including the bake time. If I had read the footnote about ”If making a two-layer cake... I would have saved myself the moment of panic, because these cakes were done just when Martha said they’d be.

The ganache is a basic chocolate ganache, and so far my favorite, with the perfect proportions of chocolate to cream and butter. It was smooth and set enough so that when the cake was sliced into, the ganache held its shape but soft enough that when you ate a piece, it enrobed your tongue luscious chocolate.

The frosting is a new recipe, and a keeper if I do say so myself. It’s different because it uses melted butter instead of just room temperature, but the rougher, drier texture of the frosting when combined with the silken filling and the soft, moist, airy cake was absolutely to die for.

The cake assembly itself was probably the most difficult for me. I cut each layer in half, so I was working with relatively thin layers of cake. Oh, the things I do to make sure more ganache is in the cake...

While the bottoms of both layers were easily sturdy enough to stack, the tops were a different story. They were much softer and much more delicate. I got the first two layers assembled without incident. And then I went for the third layer. Somewhere in between picking the cake up off of the wax paper and laying it on top of the ganache, it broke into three pieces. Two stayed in my hands while one unceremoniously fell onto the table, which broke that piece into two pieces. I now have four pieces of cake, and a relatively slippery ganache layer in between. The math didn’t add up, but I persisted anyway. I reassembled my cake jigsaw puzzle on top of the ganache, layered more ganache on top, and then put on my top layer. That’s when the problem started.

I walked away to get my frosting, and when I came back, I noticed a little lump of cake bulging out the side. I used my finger to poke it back in, which then squeezed a little lump out of the opposite side. Hoping that when the ganache set up it would hold the layers better, I swaddled my cake in plastic wrap and threw it in the fridge.

While not perfect when it came out, I figured the frosting would bind it all together. I squeezed the couple cake protrusions back in and frosted the sides before they had a chance to bulge again. Success! A non-bulgy cake!

I really enjoyed this recipe, and hope to make it again in cake form – though I will most likely at least be making the one-bowl cupcake recipe again in the near future, and this time in cupcake form.

Chocolate Birthday Cake
Frosting and Ganache From
A Spicy Perspective
Cake from Martha Stewart's One Bowl Chocolate Cake Recipe (not posting due to copyright but a google search will give you the recipe)

Ganache Filling
12 oz. heavy cream (about 1 ½ cups)
12 oz. baking chocolate ( I use Ghirardelli dark chips)
2 Tb. butter
2 Tb. sugar

Frosting
1 stick butter, melted (1/2 cup)
2/3 cup cocoa powder
3+ cups powdered sugar
1/3 cup cream (or milk)
1 tsp. vanilla extract
1 tsp. instant coffee

After baking your two 8-9" cakes: Allow the cakes to cool for 10 minutes, then use the edge of the pan as a guide to cut of the round top. This makes a great mid-cake-baking snack!

Run a knife around the edges and flip out onto a cooling rack. I like to “slam” the cakes out of pan to (hopefully) insure they come out in one piece! Once totally cooled, carefully slice through the middle to make 4 thin round disks. Stack with wax paper in between, then wrap in plastic wrap. Freeze, until ready to assemble. Frozen cakes are SO much easier to handle while frosting. It also helps to keep the frosting from getting crumby!


For the ganache: Place the chocolate chips in a glass bowl.
Heat the cream, butter and sugar in a small pan. Once the cream is just barely simmering, pour it over the chocolate and allow it to sit for 5 minutes.
Then whisk until perfectly smooth. Allow the ganache to cool another 10-15 minutes before assembling layers.


For the frosting: Heat the cream in the microwave until hot to the touch, then add the instant coffee to it and mix. Place the cream in the freezer for a few minutes to cool rapidly. Using an electric mixer, mix the melted butter, vanilla and cocoa powder until well combined. Alternate, adding the cooled coffee-cream and powdered sugar until smooth. Add a little more cream or powdered sugar until desired consistency is reached.

To assemble: Take the cakes out of the freezer. Slather 1/3 of the ganache in between each layer, until all four layers are stacked.

Press the top of the cake to level it. Using a large spreader, smooth the frosting around the sides. Then frost the top and re-smooth the edges.


Use a damp paper towel to clean up the edges of the cake stand. Place the last bit of the frosting in a piping bag to “fancy-up” the edges, if you want!

Leave the cake out, at room temperature so the insides can thaw. Cake taste better when the frosting and filling are room temperature and soft!

Monday, August 16, 2010

Ribs

While most Marylanders know that it’s not summer without Crab Feasts, I also think that barbecue and pit beef deserve their spot in the “It’s not summer until you have...” category. Crab Feasts and barbecue seem to accompany most of my favorite memories. Now living in the Midwest, Crab Feasts are few and far-between but barbecue... that’s one thing we do have.

Going to school in southwestern Virginia, ribs I remember going to some of my first college football games (when they were still in the Big East), and seeing the hard-core tailgaters with their smokers pulling behind their Winnebago as they drove into the parking lot to find their spots on game day. This was the first time I’d ever seen an entire pig in a smoker. While it was a little strange at first (I loved Wilbur from Charlotte’s Web!), I gladly got my spot in line to try some. Walking up, I grabbed a bun, and the guy literally grabbed a piece of meat, pulled it off, and stuck it on my bun. It practically shredded itself on my sandwich it was so tender.

Even our rehearsal dinner was catered by a local barbecue joint (if you’re in the area and want some delicious barbecue, look out for Andy Nelsons http://www.andynelsonsbbq.com/)

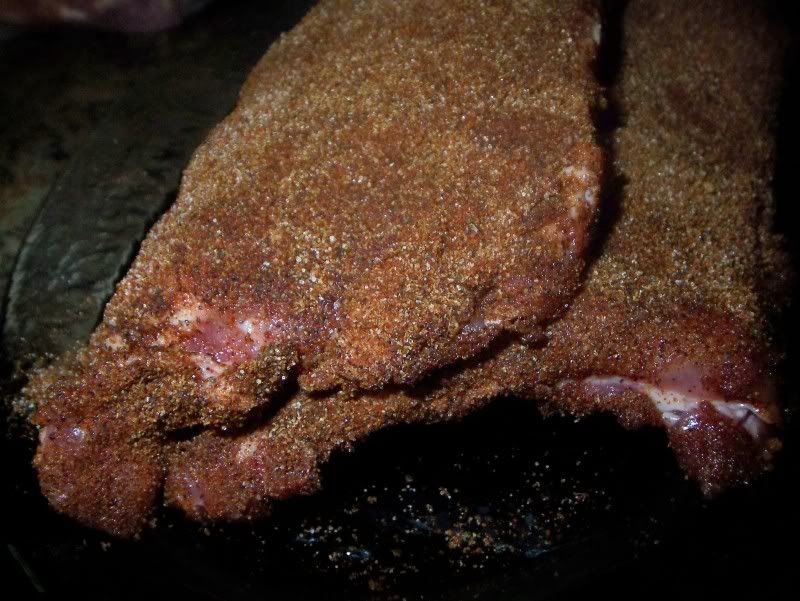
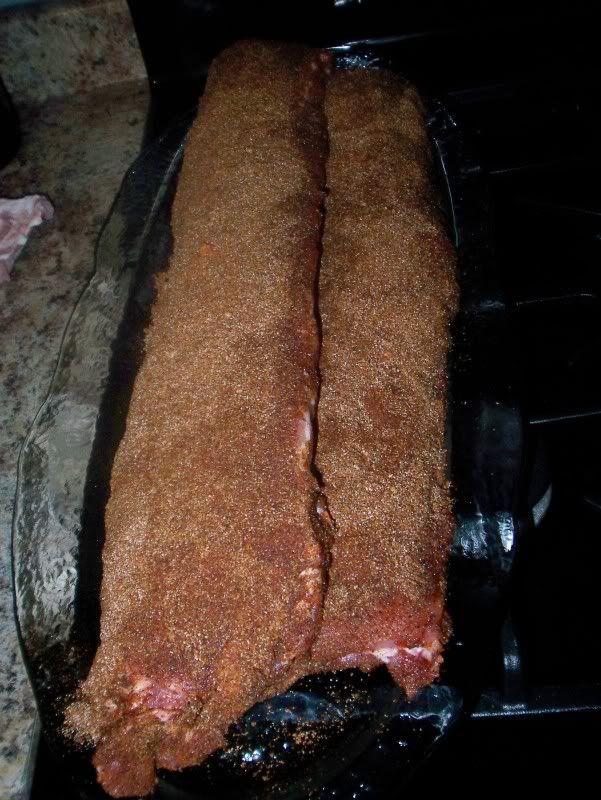
I have made shredded pork and chicken several times in the slow cooker, but had always been a little hesitant to make ribs. I think it was mainly because the time commitment for ribs is more than most other things I have tried. And while these baby back ribs did take seven-and-a-half hours in the oven, the only problem I had was smelling the ribs all day. I couldn’t figure out why I was so hungry the entire day, until I would walk upstairs and hit the smell of the ribs. I also had not thought about how I would prepare a few of the other dinner items needing an oven. With a little bit of thinking and a lot of help for our countertop toaster/convection oven, we easily rectified the problem.

The fact that there are no “after” pictures, while sad, is truly a testament to how delicious these ribs were (and how hungry we all were after smelling them cook for hours!).


Slow Barbecue Ribs
Adapted From:
Use Real Butter

4-5 lb. rack of ribs (I used 2 full racks of baby back ribs)
dry rub – recipe below
1 1/3 cup random store-brand BBQ sauce like Masterpiece or Bullseye (something with molasses in it – a sweeter type)

Dry Rub

2 Tbsp cumin
2 Tbsp brown sugar
4 Tbsp paprika
2 Tbsp chili powder
2 tsp cayenne powder
2 tbsp salt
2 tbsp black pepper, ground
1 tsp onion powder
1 tsp garlic powder

Mix together.

Dry off the rack of ribs. This is personal preference, but I cut my racks into three sections – they’re easier to fit in my pans, and easier to pick up after cooking without breaking into bits.

Rub spices over all of the rack. Cover in plastic wrap and refrigerate for up to 24 hours, but at least 4 hours.

Preheat oven to 225F.

Place the rack in a large roasting pan lined with foil for ease of clean up.

Cover with foil. Bake the ribs for 8 hours (Mine baked for 7 1/4).

Remove from oven and set the ribs on a rack to let the excess fat drip off (to reduce the grease fire on the grill).

Heat the grill on high for ten minutes, then reduce heat to medium.

Place the ribs on the grill for 5 minutes, covered.

Flip the ribs and grill for another 5 minutes.

Flip again and brush the top side of the ribs with barbecue sauce and allow grilling for 5 minutes.

Flip one last time and brush the top side with more sauce.

Serve, preferably with a tub of Wet-Wipes.

Tuesday, August 10, 2010

Banana Gingerbread

It's hot as Hades out here right now and I'm posting a gingerbread recipe. Just bear with me, it's worth the heat of the oven.

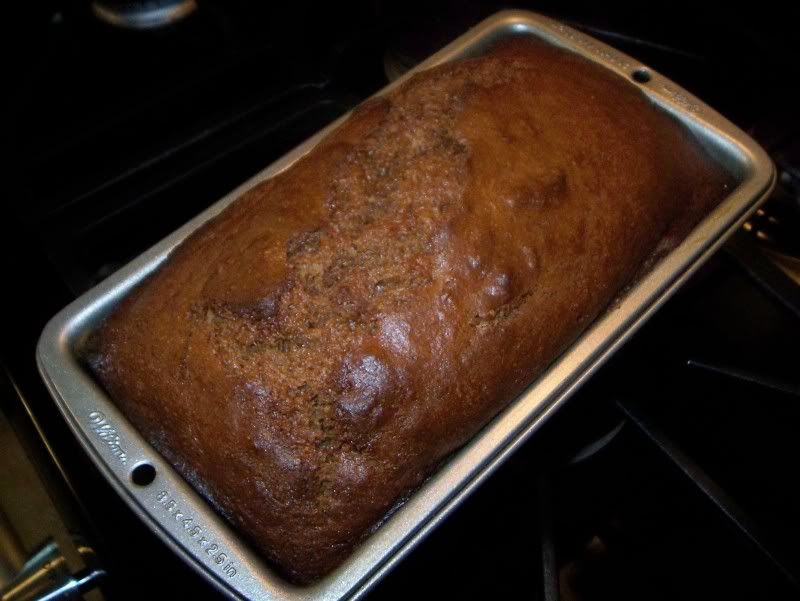
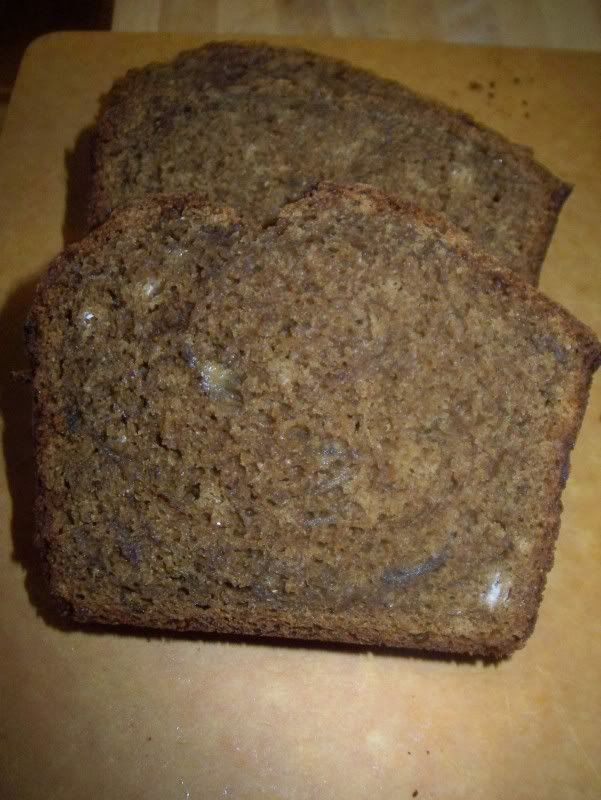
This recipe is from bakingbites.com. It is so amazingly tasty. Definitely best once it's first cooled from the oven, but I've frozen it and eaten it after it's rethawed, and it's still good, just a little bit drier. I pretty much followed this recipe to a "t" and it's wonderful. This is probably one of my favorite quick breads out there - maybe because it's more like a banana ginger spice cake? Probably.

Banana Gingerbread
From Baking Bites

1 cup whole wheat flour
1 cup all purpose flour
1/2 tsp baking powder
1/2 tsp baking soda
1/2 tsp salt
1 tsp ground ginger
1 tsp ground cinnamon (sub for 1 1/2 tsp pumpkin pie spice)
1/2 tsp ground allspice
1/2 tsp ground cloves
1/4 tsp ground cardamom
pinch freshly ground nutmeg
1/2 cup brown sugar
1 cup banana, mashed (about 2 large)
1/2 cup molasses
1/2 cup buttermilk
4 tbsp vegetable oil

Preheat oven to 350F. Lightly grease a 9×5-inch loaf pan.
In a large bowl, whisk together flours, baking powder, baking soda, salt and spices.
In a medium bowl, whisk together brown sugar, banana, molasses, buttermilk and vegetable oil. Pour into dry ingredients and stir until just ombined. Pour into prepared pan and sprinkle with coarse sugar, if desired.
Bake for about 45 minutes, until a toothpick inserted into the center of the loaf comes out clean.
Makes 1 loaf, 8-10 slices.

Thursday, August 5, 2010

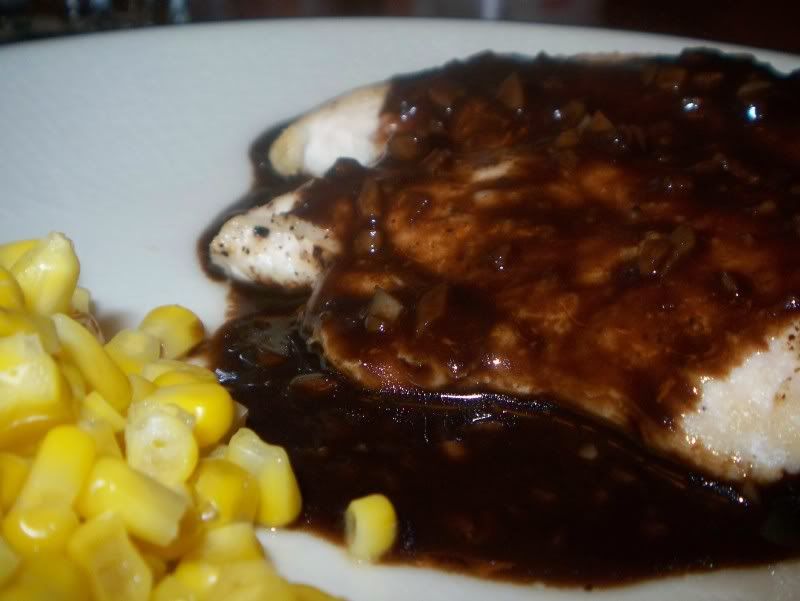
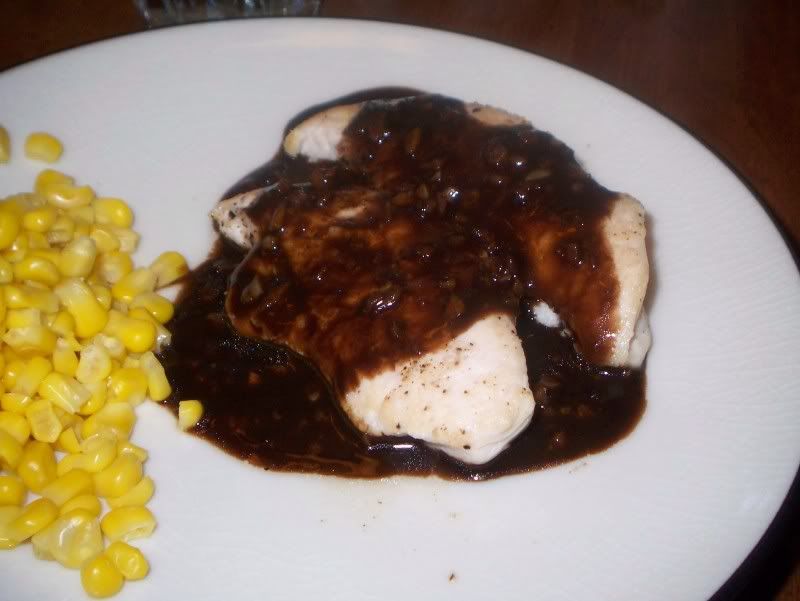
Chicken Thighs with a Balsamic and Garlic Sauce

Ok, I really need to work on my photography skills. Only I could manage to make something that tastes delicious look so unappetizing.

But don’t let my bad photography skills deter you from trying this dish. It was very good. I have a new-found love for all things balsamic, especially when it’s cooked down to a nearly syrupy consistency. It loses much of its acidic bite, but keeps its unique flavor while also getting sweeter. I find it amazing that if you reduce plain balsamic vinegar down enough, it provides a perfect balance to fresh strawberries.

When you are reducing anything, quality is key. I live by the mantra “garbage in, garbage out” – both in engineering, and cooking. That’s why you always hear cooks and recipes beg and plead for you to cook only with wine you’d drink. If you cannot palate it in a glass, reducing it only concentrates the flavors you do not like in the first place. While I wouldn’t recommend drinking balsamic straight from the bottle, the same rule applies. Get a good brand, you’ll be rewarded.


Chicken Thighs with a Balsamic and Garlic Sauce
Adapted From:
For the Love of Cooking

2 boneless skinless chicken thighs, trimmed of any fat
1 tbsp olive oil
Sea salt and fresh cracked pepper to taste
1 tbsp flour
1 tbsp butter, softened
3 cloves of garlic, minced
1/3 cup of balsamic vinegar
1 cup of chicken broth

Preheat the oven to 350 degrees. Heat the olive oil in a large oven proof skillet over medium high heat. Season the chicken thighs with sea salt and fresh cracked pepper. Lay the chicken thighs smooth side down in the pan and cook until golden brown, about 4 minutes. Turn the chicken over and place in the oven. Cook for 8 minutes or until cooked through.

Remove chicken from oven and set aside on a platter to rest with a tinfoil tent to keep warm. Return the skillet to the stove over medium high heat (add more olive oil if needed) and add minced garlic. Cook, stirring constantly for 60 seconds then add the balsamic vinegar. Stir, scraping the browned bits from the bottom of the pan for about 1 minute. Add the chicken broth and bring to a boil. Mix the butter and flour together making a paste. Whisk in the flour and butter mixture and let the sauce return to a boil. Simmer until the sauce gets thick - about 1-2 minutes. Pour the sauce over chicken and serve. Enjoy.

Monday, August 2, 2010

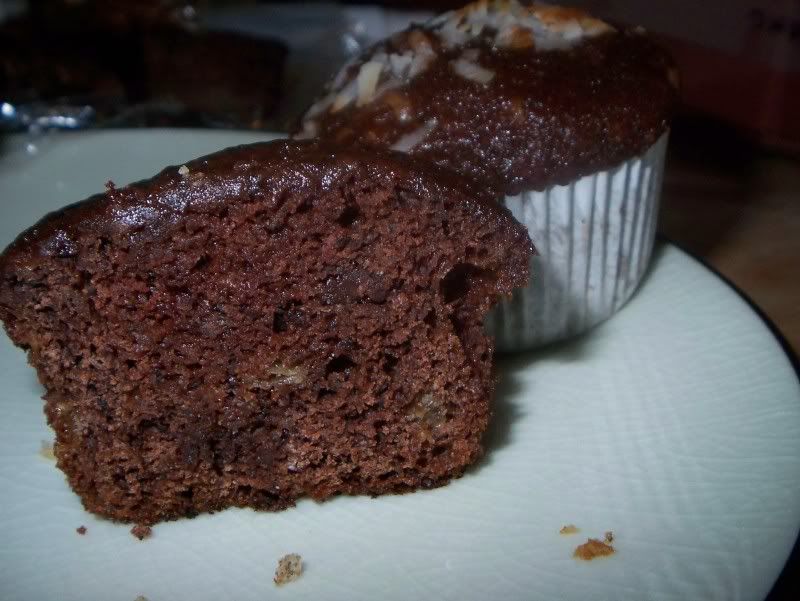
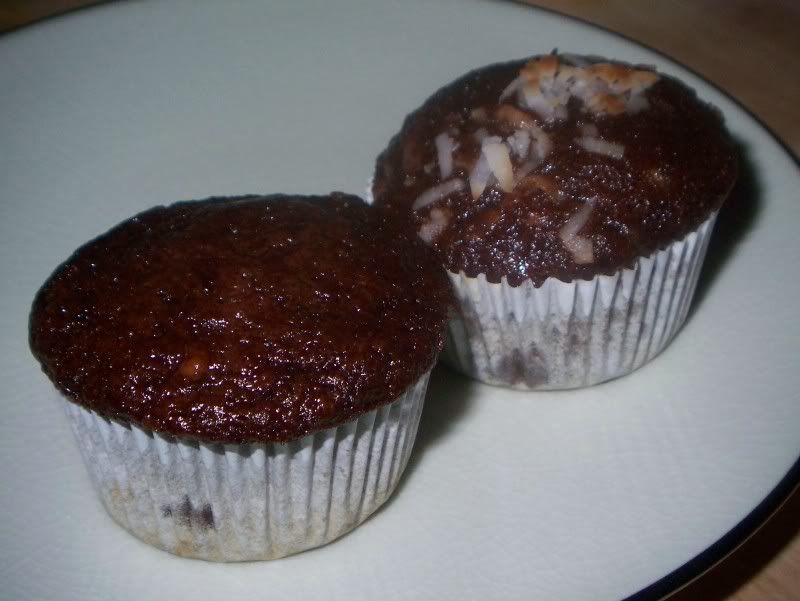
Chocolate-Chocolate Chip Banana Muffins

I had been having a great day, even for a Monday. I was rocking a new haircut, was gifted coconut rum cake (that will improve anyone’s day, I guarantee!), and got out of work on time. After work, I had to stop at the bank to replenish my quarter supply for my daily commuter parking lot fee. Instead of filling out a withdrawal slip, I just go to the ATM, take out some money and exchange a twenty dollar bill for two rolls of quarters.

As I turned around from the ATM to sort my money, put the receipt in my purse and go into the bank for my quarters, a lady walked up to use the ATM I was just leaving – or at least that’s what I mistakenly assumed. I moved off to my right to let her get by me, but instead of going around me to the ATM, she nearly plowed me over to get into the bank. I said “excuse me,” and had brushed it off, as I always end up doing the ‘dance’ with people trying to get around me. You know, the classic - go to your right to let the person by, and they go the same way. Then you shift to your left to let them go, and they shift, having the same idea. I didn’t think much of it. Apparently, though, to this lady, I must have looked like a crazed fool. She just stopped dead in her tracks, looked at me incredulously and said, “What are you DOING?” She rolled her eyes, shook her head and finally found it in herself to walk past me and carry on with her life.

I do not like when people intentionally make a big deal out of nothing (spoken from the person venting about one minor interaction in a whole day – I get the irony), and I do not like when someone treats me like I did something wrong and ruined their entire day because of something so trite. It sticks with me because I do not want to give people the impression that I’m rude or inconsiderate, and I feel like the people around that saw what happened may think I am by how she reacted at me.

A few years back, an incident like that would have ruined the rest of my day – I could have won the mega millions and I still would have been upset. I’d focus on that one event, being hurt and sometimes embarrassed because of something completely out of my control. But somewhere along the way, I finally learned that life is too short to let grumps, grouches, meanies or dillweeds take the joy out of my life. I heard somewhere that life is 10% of what happens to you and 90% how you react to it. That stuck with me.

So, I got my quarters, got on the train and carried on with my life. Instead of allowing that one incident to ruin an otherwise great day, I held onto those feelings just long enough to fuel a great run when I got home. By the time I was finished, I forgot all about what happened, and had done something positive for my body at the same time. Oh, and I had some chocolate, too. That always helps.

These muffins are like the love child of banana bread and a chocolate cake. They are moist and dense like a muffin. The bananas in it make it feel somewhat healthy (great after a run) and the chocolate in it is pronounced and satisfying (great anytime). These freeze amazingly well, and are a perfect go-to snack when you need a chocolate fix without all the guilt of a pint of Ben and Jerry’s.


Chocolate-Chocolate Chip Banana Muffins
Adapted from Grouprecipes.com
Ingredients
1 c AP Flour, ½ c Whole Wheat Flour
1 cup sugar
1/4 cup baking cocoa
1 tsp baking soda
1/2 tsp salt
1/4 tsp baking powder
1 1/3 cups mashed ripe banana
1/3 cup applesauce
1 egg
1 cup semisweet chocolate chips

Directions
In a large bowl, combine the first six ingredients.
In a small bowl, combine bananas, oil and egg.
Stir into dry ingredients just until moistened.
Fold in chocolate chips.
Fill greased or paper lined muffin cups three fourths full. After 6 tins are filled, and maybe a few minis, add a bit of coconut to the rest of the batter and scoop into remaining cups.
Bake at 350 deg F for 20-25 minutes or until muffins test done.
Related Posts Plugin for WordPress, Blogger...