Showing posts with label easy. Show all posts

Wednesday, August 10, 2011

Classic Corn Bread

Hey Y'all.

July hit me like a ton of bricks. You didn't think I forgot about you, did you? 

Working two jobs, taking 11 credits at school and throwing the occasional trip into the mix has kept me incredibly busy. I have been cooking, I just haven't had time to sit down at the computer and type it up.

This next week I'll be on vacation as well, visiting the fam on the east coast, so unfortunately I'll probably have sparse posting until the end of the month, when school starts up again. Just fair warning!

Speaking of the East Coast...

Because I grew up on the East Coast, with family ranging from Georgia to Pennsylvania, I have a very interesting frame of reference for food. There are many things that I love that are regional foods, but I don’t associate them with regional foods – I just associate them with growing up. Foods such as hominy and liver pudding, or puddin’ as I like to say, shrimp and grits, biscuits and sausage gravy, scrapple and whoopie pies are still some of my favorites, but trying to find versions reminiscent of home out in the Midwest can be difficult.


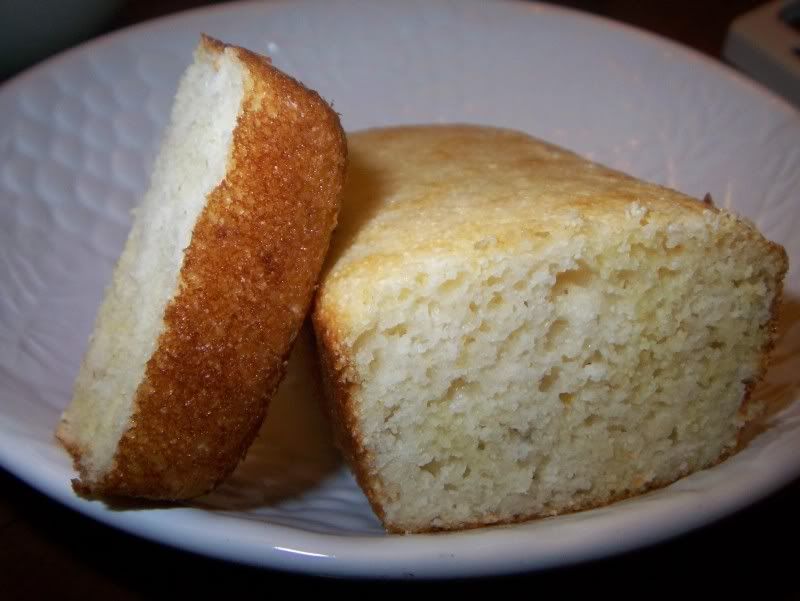
Cornbread is also very regional – most places have it, but how it’s prepared and eaten is very location-specific. I like my cornbread ‘southern-style” sweet and cakey. It can have jalapeƱo, cheese and/or bits of corn in it, but the sweeter, the better.


I’ve made a few recipes from scratch, blindly following the recipe with no real idea of the expected end result. Typically the cornbread was too dry, and not sweet enough. I figured this time I would try the recipe on the back of the corn meal carton, who knows cornbread better than the people that make the main ingredient for it? I upped the amount of sugar in the recipe, of course, but kept the rest the same.


And it was delicious.


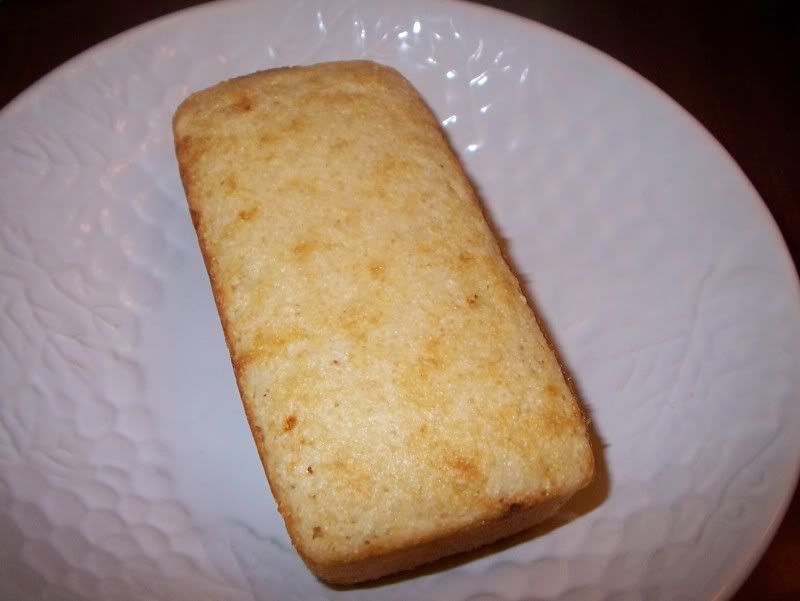
I’ve made the recipe a few times now, occasionally adding cheese, corn and jalepenos to it, and also making it in mini loaf pans, as shown in this post, muffin tins and, my all time favorite – my cast iron corn stick pan.


Sweet Southern Corn Bread

Adapted from the Back of the Quaker Cornmeal Canister

Yield one 8x8 Pan
You will need:
1-¼ cup all-purpose flour
¾ cup Quaker Corn Meal
6 Tbsp sugar
2 tsp baking powder
½ tsp salt
1 cup milk
¼ cup vegetable oil
2 egg whites beaten or 1 whole egg

Directions
Mix the dry ingredients. Beat the egg. Add the wet ingredients to dry. Pour into a buttered 8x8 or 9x9 casserole dish. Bake at 400 for 20-25 minutes.

Thursday, June 30, 2011

Surf n' Turf Tacos

Every once in a while, I'll pull out all my old cooking magazines I've bought and start perusing to see if there are any recipes that I remember sounding interesting, but never got around to making.

The hubby and I were trying to plan out meals for the week, and were eternally stuck on what we should do, other than our 'Pasta Wednesday.'  Thankfully, I have a pretty good arsenal of cooking magazines, spanning each of the four seasons, so I pulled out a few of my summer-themed magazines to see if anything sounded tasty.

Leave it to Rachel Ray to have a delicious recipe in her magazine. I hate to say that I find her a little over-the-top on her two cooking shows (I don't watch her talk show), but whenever I come across her recipes, I usually find something quick, easy and delicious. Thank goodness for magazines and FoodNetwork.com! I can search her recipes without actually having to watch a whole episode!

These tacos are light, yet filling, and very flavorful, even with the seemingly few spices. We even had some leftovers, which I then made into a breakfast burrito the next morning. Ah-mazing!

Whip up a batch of these for summer, and you won't be disappointed. You might even feel like you took a little trip to somewhere a little more tropical than your backyard or dining room table!

Surf 'n' Turf Tacos

Adapted Slightly From Rachel Ray Magazine
Serves 8

Ingredients
1 small head napa cabbage, chopped
Juice of 6 limes (about 1/2 cup)
2 cups sour cream
Sixteen 6-inch flour tortillas
1 tablespoon garlic powder
1 tablespoon paprika
1 tablespoon ground cumin
1 teaspoon chili powder
1 teaspoon cayenne pepper
Salt
1 pound trimmed flank steak, cut crosswise into 1/4-inch strips
6 tablespoons vegetable oil
1 pound red snapper fillets, cut crosswise into 1/2-inch strips (I used Cod)
Pepper
1 cup store-bought guacamole, plus more for serving
One 16-ounce jar salsa, for serving

Directions
In a large bowl, toss the cabbage with half of the lime juice. In a small bowl, whisk together the sour cream and remaining lime juice. Cover and refrigerate.

Preheat the oven to 250°. Spread the tortillas on a baking sheet, cover with foil and warm in the oven for 10 minutes.

Meanwhile, in a large bowl, whisk the garlic powder, paprika, cumin, chili powder, cayenne pepper, and 2 teaspoons salt. Add the steak, tossing to coat.

In a large skillet, heat 1/4 cup oil over medium-high heat until rippling. Add the steak, lower the heat to medium and cook, turning occasionally, until browned, about 5 minutes. Transfer to a large plate. Add the remaining 2 tablespoons oil to the skillet. Season the fish lightly with salt and pepper (Note: I also added a little cayenne pepper and cumin). Cook, in the skillet, turning once, until golden, about 5 minutes.

Lay the tortillas on a work surface. Spread 1 tablespoon guacamole on each, then top with some of the cabbage. Divide the meat among 8 tortillas and the fish among 8 tortillas. Fold to form tacos. Serve with more guacamole and cabbage, the lime-sour cream and the salsa.

Saturday, June 18, 2011

Citrus-glazed salmon with spinach

Summer is in full-swing now, and the hubby and I are constantly trying to find meals that require very little oven time. Our house is quirky, in that the downstairs is usually always comfortable in the summer, but the upstairs can have major temperature swings, especially when the oven and/or stove are on for long periods of time.


Of course, our thermostat is right outside the kitchen, so when I'm baking or cooking a lot on the stove, even if it isn't that hot outside, our A/C turns on in full force.


This salad was perfect for one of these days. It requires near-minimal time on the stovetop/under the broiler, and you could even just use the grill outside to make the salmon. 


The other incentive for this recipe was the sheer amount of spinach we always seem to have around. When I make a recipe that calls for spinach, the only thing we can find are 4 pound bags of the stuff. Four pounds of spinach for four people is a lot! So I make spinach salads, throw spinach in pretty much anything I can (mac and cheese, pasta, chicken dishes) and I try to find recipes that use it as a main ingredient. The fates aligned when I saw this recipe in that week's issue of the Tribune.


This meal was light and refreshing, and the grapefruit provided a nice zing that cut through the sturdy flavor of the salmon. 


This is one dinner you won't have to sweat over!

Citrus-Glazed Salmon with Spinach

Ingredients:
1 large ruby red grapefruit
12 to 16 ounces fresh spinach
3/4 cup white balsamic vinegar, or white wine vinegar with a touch of honey
3 tablespoons olive oil
1/4 teaspoon salt
Freshly ground pepper
4 salmon fillets or steaks, about 4 ounces each
1 medium shallot, finely chopped

Directions:
1. Peel and section grapefruit over a bowl, catching the juice; you'll need about 1/4 cup. Dice grapefruit segments; place segments and spinach in a large bowl.

2. Combine 2 tablespoons grapefruit juice, 1/2 cup balsamic vinegar, 2 tablespoons olive oil, salt and pepper to taste in a small bowl. Arrange salmon on a plate; pour 1/2 cup vinaigrette over salmon (reserving remaining vinaigrette). Let stand 15-20 minutes.

3. Meanwhile, heat broiler. Line a broiler pan or shallow baking pan with foil; brush with oil. Remove salmon from marinade, discarding marinade; place salmon in pan. Broil 8 to 10 minutes.

4. To dress spinach, put reserved vinaigrette in a heavy saucepan; reduce slightly over medium-high heat. Mix remaining 2 tablespoons grapefruit juice, 1/4 cup vinegar and 1 tablespoon oil in a bowl with the shallots and reduced vinaigrette. Pour over spinach; toss to coat. Divide spinach among four dinner plates; top with salmon.

Tuesday, June 7, 2011

Summer Orzo Salad

Summer school has been such a refreshing experience. Not easy, though. I'm taking 11 credits this summer, aka 3 classes. One is a 4-week intense class, and the other two are 8-week classes. I'm doing well (thankfully), but that means there is a lot of classwork (lecture and online stuff), lots of homework and LOTS of studying. It's been a long time since I've had to study. Right now it's about rough endoplasmic reticulum, eukaryotes and meiosis/mitosis.

And yesterday (pardon if it's tmi) but we had an explosively sick puppy yesterday. I had my biology class, and came home after about an hour of studying so I could get lunch and let the puppy out (I had a bio midterm this morning). I was sitting down upstairs, and all of a sudden I hear our puppy getting sick on the chair upstairs. Then on the floor, and the rug. I quick rushed him outside, but of course he was done. I put him in his crate to keep him from getting too worked up, and then had the glorious job of cleaning all of the mess up. (I'm pretty sure the chair is beyond salvage. Darn.) I had to leave again for another class in the afternoon, the whole time feeling so sorry that I had to leave a sick puppy behind. Thankfully he was ok in the two hours I was gone. We kept him off food for the last 24 hours, and tonight just reintroduced him to a small portion of his food. So far, so good. And I think I did well on my test (thank goodness I studied the past few days as well and didn't save it until the last minute!) So, if you have any spare vibes for the puppy, we could sure use them!

So if you have happened to notice slight downward trend of posting, that's why. (And also tuition/books really tends to cut into the 'baking for fun' budget!) I haven't stopped baking or cooking, don't get me wrong, but most of the time when I would be posting, I am studying or doing homework. These classes go so fast that it's near-impossible to catch back up after getting behind. My bio class ends in two weeks, so hopefully I'll have a little bit more free time with only two classes to manage!

I also now have a part time job in retail to start bringing in some extra bucks, so, while that has been fun, it's also one more thing to consider! Whew!

Anyway, there are days I don't really feel like making anything too complicated - I think you can see why now. This orzo salad is delicious and cool, perfect for these days where it is still 95 degrees at 7:30 pm. Like tonight. Craziness. If you notice, I went a little crazy with the feta - that's how much I love cheese. You don't have to put that much on!

Long gone are the days of heavy, mayonnaise-laden pasta salad made with elbow noodles, sitting on the picnic table under the sweltering sun. It seems that now, pasta salads are more and more taking advantage of the abundance of fresh and healthy ingredients available in the summer with only the lightest of oil and balsamic dressings serving only to enhance the natural flavors. This orzo salad has wonderfully fresh and light flavors, the basil adds a bright punch of flavor and the mint plays wonderfully off the sweetness of the tomatoes and the acidity of the balsamic. Even the textures in the salad were interesting. The red onion provided a slight crunch, the garbanzo beans were firm yet buttery little nuggets contrasting the softness of the tomatoes and orzo. I kept the salt at a minimum in the salad because the feta itself has a decent saltiness to it.

Summer Orzo Salad

Salad
4 cups vegetable broth
1 1/2 cups orzo
1 (15-ounce) can garbanzo beans, drained and rinsed
1 1/2 cups red and yellow teardrop tomatoes or grape tomatoes, halved
3/4 cup finely chopped red onion
1/4 cup chopped fresh basil leaves
1/4 cup chopped fresh mint leaves
salt and freshly ground black pepper
a few tbsp crumbled feta
Dressing
2 Tbsp red wine vinegar
2 Tbsp fresh lemon juice
2 Tbsp olive oil
1 tsp honey
1/2 tsp salt
a few pinches freshly ground black pepper

Directions
Bring the broth to a boil in a medium saucepan. Add the orzo and cook until tender, stirring frequently, about 9 minutes. Drain then transfer to a large bowl and cool completely.

Add the onion, beans, tomato, mint, and basil, toss well, and season with a pinch or two of salt and pepper.

Mix in dressing. Serve with a little feta sprinkled over the top.

Friday, May 20, 2011

Kentucky Derby Pie

Today is a big day for me.

Today is my last day at my current job. A job I've been with for nearly four years. My first job out of college. My first taste of the real world.

While I am happy that I am embarking on a new journey on Monday, I can't help but feel a little sad that I am leaving a job and coworkers who have been a huge part of the last four years.

I am so thrilled that I got to work here while I did, and I am very thankful for the opportunities that this job has provided me. But, I am ready to take a leap of faith, and pave myself new path in a different direction. I am going to enjoy the journey, and I look forward to see where this decision will eventually take me.

And thank you, too, to all of you who have shown your support during this time. The decision-making process has not been an easy one, but sticking with my guns and following through with this has been so much easier knowing I have my friends and family backing me up.

You all are the best. The cat's meow. The bee's knees.


So how about we focus now on something sweet, tasty, and delicious?

There are quite a few people who have yet heard of the wonderful dessert called the Kentucky Derby Pie. I liken it would be similar to the love-child of a pecan pie and a chocolate chip cookie (though some people think the pie should have walnuts, I grew up with pecans, so I'm sticking with my guns here).


When I made desserts for the National Food Blogger's Bake sale, I wanted to make things that traveled easily, and tasted delicious. The fact that these mini-pies were absolutely cheek-pinchingly adorable was just an added bonus.


The only thing missing from the mini pies that I wish I could have found a way to package was the bourbon whipped cream that my family makes to serve the pie with. Essentially you whip up one cup of heaving whipping cream with one tablespoon of powdered sugar and 2 teaspoons (or one tablespoon if you're feeling rather daring!) of bourbon.

Nothing like a little bit of bourbon to cure what ails ya.


Kentucky Derby Pie
From our Family Recipe Box
Makes 1 - 9-inch pie or about 30 mini pies

Ingredients:


1/2 cup butter, melted
1 cup sugar
1/2 cup flour
2 eggs, slightly beaten
1 teaspoon vanilla
3/4 cup chocolate chips
3/4 cup pecans or 3/4 cup walnuts
9 inch unbaked pie crust

Directions

Line pie plate with pie crust.

Combine all remaining ingredients and mix with fork, whisk or hand mixer until well blended..

Bake in pie crust at 350 for 45 minutes, or until brown on top! (the mini pies baked in about 25 minutes)

Monday, May 16, 2011

Funfetti Cupcakes (and some news!)

I have been a terrible blogger. My apologies for that. I have been baking, I promise, and I have news to share (and hopefully it's a halfway decent excuse for my absence this past week!) First of all, this past weekend was the National Food Blogger Bake Sale. On Saturday, May 14, we sold baked goods at The Poison Cup (1128 W. Armitage Avenue) in Lincoln Park. The proceeds from the bake sale will be donated to Share Our Strength’s Great American Bake Sale!  We had a great time, despite the crummy weather, and I'm confident that we brought in a respectable amount of money for a great organization!

I ended up make black-bottom cupcakes and mini Kentucky Derby pies recipes which I will definitely be sharing soon! But the amount of baked goods (and people) that showed up to support this cause was amazing. Look at the tables upon tables of baked goods!


Kudos to Maris Callahan at In Good Taste for organizing such a great event!

The other part of the equation is that, aside from getting ready from the bake sale, we also said goodbye to two dear friends this weekend who are moving back to the DC area from Chicago. We had a great day with them, and we will miss them immensely, but I am so excited for them. They have two great opportunities ahead of them, and I see nothing but success in the future!

If that isn't enough, things have been really up in the air with me for a while now (like since February), but now that my plans are concrete, I am comfortable sharing! This is somewhat surreal to say, but this is my last week working as an engineer. Starting Monday, I am going back to school full time to earn my Master's Degree in Secondary Education so that I can become a high school math teacher. It's a gigantic change, but one I am 100% ready for and excited about. Last month, I had to take a 5-hour exam, similar to the SAT or ACT on steroids. There was a reading comprehension, language arts, math and essay section. I got a perfect score on the language arts section (woohoo!) but ended up missing one question on the math section. Of course, I'm the math person that always performs better on the English/language arts stuff. If I didn't pass this test (who average pass rate is 25% of the total test-takers) I would have had to take it again ASAP, as I couldn't register for classes at my school without a passing grade. Needless to say, this past month has been super-stressful waiting for results of this test and, essentially, my future.

Once I found out I passed, I paid my admission deposit and will now be registering for my classes this fall (I'm already set on my summer classes).

I am excited, anxious, nervous and ecstatic at the same time. I really hope to keep up with the blog and the posting, but I hope you can forgive if there is a lapse or two in postings as I'm transitioning to this new phase.

Today is my last Monday at work, so it is somewhat bittersweet. I've been here for nearly four years, and it was my first full-time job out of school. My mood has been happy, sad, elated and depressed, sometimes all at the same time. Call it a rut, a “mood” (complete with air-quotes) or a case of the “Mondays.” (props if you know that reference!)


No matter what the day brings, I don’t seem to be able to get past the fact that my alarm went off and I had to get out of bed. Did I mention my alarm goes off at 5:20 in the morning? The sun is not even awake at that hour, which begs the question…”Why am I?”


Days like these, I need to bring out the big guns to pull myself out of the weeknight doldrums. Those ‘big guns’ come in the form of itty-bitty sprinkles inside nothing other than a funfetti cupcake. I did not eat funfetti a lot as a kid, but the few times I did have it, I was in heaven. Light-as-air cake contains a rainbow of color throughout. How can you not be happy eating a rainbow?


I do not buy cake mix all that much, so I did not have a box of Funfetti on hand. But, I did have everything in my pantry, including the rainbow sprinkles, to bring them to life from scratch.


This recipe did not disappoint. The light almond flavoring gives this cake a little something special, which elevates it above your traditional vanilla cake. The cake itself is a little more dense than it’s boxed counterpart, but I’ll trade that any day for a homemade treat sans preservatives and other ingredients I cannot pronounce. The frosting is my first attempt at a cooked frosting, and I was so pleased with how it turned out.


Smoother and lighter than its eggless-uncooked buttercream sister, this frosting was reminiscent of marshmallow fluff, and a perfect counterpart to the nostalgic cake. A few sprinkles on top and, ta-da, the “Mondays” have all but vanished.


Bake yourself up a smile today.


You deserve it.


Homemade Funfetti Cupcakes
Makes one dozen cupcakes

Ingredients
1 1/4 cups AP flour
2 teaspoons baking powder
1/2 teaspoon salt
6 Tablespoons unsalted butter, at room temperature
1 cup sugar
3 large egg whites (room temperature)
1 teaspoon vanilla extract
1/4 teaspoon almond extract
1/2 cup milk
1/4 cup rainbow sprinkles

Directions
Preheat your oven to 350C. In a small bowl, whisk together your flour, baking powder, and salt. Set aside.

In a large bowl with an electric mixer, whip together your butter and sugar until fluffy. Add the egg whites, one at a time, until thick and white. Add your extracts and mix again.

With a spoon, slowly mix in your dry ingredients and milk/yogurt mix, alternating between the two. When everything comes together (taking care not to over mix), add the sprinkles and lightly fold in a couple times. Again, do not over mix.

Spoon in the batter to liners and bake for about 20 minutes or until your tester comes out clean. Set out to cool before icing.

Vanilla Swiss Buttercream
From CCakery

Ingredients
3/4 cup sugar
3 large egg white
18 tablespoons butter, softened
3/4 teaspoon pure vanilla extract
Extra sprinkles

Directions
Over a double boiler, whisk together the egg whites and sugar until the granules have a disintegrated. Pour the whites into a mixing bowl, careful not to get any condensation or water into it.

With an electric mixer, whip the whites until it forms soft peaks. Continue mixing and slowly add the butter, about 4 Tablespoons at a time and mix until completely incorporated. Mix well - after adding your butter, your buttercream will reach the "curdled stage". Don't worry, just keep mixing and it'll smooth out.

After everything has smoothed, add the extracts. When everything is incorporated, use buttercream to pipe over your cooled funfetti cupcakes. Add extra sprinkles on top. Enjoy!

Don't forget to stop by my Facebook site if you like what you see!

Friday, April 15, 2011

Tom Yum Quinoa and Lemongrass Shrimp

Before I met my husband, I had never heard of Tom Yum Soup, Sukiyaki, cow mu deng, penang curry, among numerous other things. I have since been lucky enough to go with my husband and his family to Thailand, and to taste these dishes and more firsthand. Thai food is special in the sense that, in one dish, it combines in perfect balance sweet, salty, sour, hot (spicy) and occasionally bitter elements.


One of the first thai dishes I ever tried was Tom Yum soup. It is a broth-based soup flavored with distinctly sour, sweet and spicy elements, thanks to ingredients like lemongass, kaffir lime leaves, sugar, galangal, lime juice, crushed chilies and fish sauce. If you aren’t used to the combination of flavors, the soup can really catch you off-guard. I remember the first spoonful I tried; I wasn’t sure if I loved it, or just tolerated it. Each subsequent spoonful was more and more appealing, and the flavor combinations started to really come together for me. Now, Tom Yum is a soup I crave, and I will typically order it any time we go to a Thai restaurant.


Lately, I’ve been delving into the world of alternative proteins, one of which is quinoa. After having the box sit around in my pantry for a week or two, I finally decided I’d make something with it to serve with shrimp. My husband and I have been loving finding new sauces and marinades, and one of our favorites has been a Thai lemongrass marinade. Because we had decided to marinate the shrimp in that sauce, I wanted to do something similarly themed for the quinoa.


As luck would have it, we had most of the ingredients for Tom Yum soup around. I cooked the quinoa with the soup ingredients, hoping the flavors would come through – and compliment the flavor of the shrimp. Aside from not making enough quinoa to satisfy my hubby’s appetite (sorry about that!), the flavor of this meal was spot-on.


The hubby enjoyed his first tastes of quinoa, as it was flavored with elements he was used to. And, for once, my kitchen experimentation has yielded a recipe worth sharing. I served it with a refreshing and easy cold cucumber side dish that you can whip up in under three minutes.


Most of the ingredients will be in your big-name grocery stores. Some of the ingredients, however, may be a little more difficult to find. But, if you have a good international market, chances are you should be able to find things like lemongrass pretty easily.


Tom Yum Quinoa and Lemongrass Shrimp
Serves one very hungry person or two as a light dinner

Ingredients
1/2 pound of medium-sized shrimp
Thai-style marinade, optional (I used a curry and lemongrass one)
1 stalk lemongrass
1 c chicken stock
1/2 c quinoa
2 serranos, halved
2 tsp fresh grated ginger
Zest of 1/2 a lime
Juice of 1/2 a lime
1 tsp sugar
2 tsp fish sauce
Cilantro for garnish

Directions
If your shrimp are already peeled and deveined, great.  If not, Peel your shrimp, leaving the tails on, and devein them if you desire (I always want my shrimp deveined, I’m not a huge fan of the little brown line running up the back!)

If you have a sauce you’d like to marinate your shrimp in, do so the night before and let them sit for eight hours. Otherwise, it’s ok to use plain shrimp and just salt and pepper them before cooking.

Remove the top few inches or so of the ‘dried grassy part’ of the lemongrass and dice the remaining portion very finely.

Rinse your quinoa thoroughly. This will help your quinoa stay fluffy (similar to washing rice before you cook it) . The water should run relatively clear by the time you finish washing it. (It may take a couple of minutes to clean it thoroughly)
In a medium bowl, combine everything but the chicken stock.

Transfer to a pot, add chicken stock and bring to a boil. Cover with lid, reduce heat, and simmer for 12-15 minutes.

Turn off heat but leave lid on for another 5 to 10 minutes.

While the quinoa is resting, heat a skillet or grill pan to medium heat with about a tablespoon of oil in it.

Cook the shrimp for about 2 minutes on each side. They will turn opaque and curl up slightly when they are done, and the tails will turn from blue to pink.

Fluff the quinoa with a fork and serve with shrimp. You can also serve with additional lime slices if you want a little more acidity with your meal. Top with a little washed cilantro and enjoy!
 
Sweet and Spicy Cucumbers

Ingredients
½ c rice wine vinegar
2 T oil
3 T sugar
1 medium cucumber
1 tsp thai pepper flakes (or you can use dried pepper flakes if you can’t find Thai pepper flakes)

Directions

Cut cucumber in half and, using a teaspoon, scrape the seeds from the middle.

Cut the sections in half lengthwise again (making four long slices) and then cut into bite-sized pieces.

Mix all ingredients in a medium bowl.

Serve and Enjoy!

Wednesday, March 30, 2011

Sicilian Sausage Soup

Soups are a great way for me to stay warm through the winter without packing on the pounds but, a lot of times, the soups that are the healthiest seem to lack a heartiness that I crave when the thermometer dips below 30 degrees (or 0 degrees, depending on the day). I want something that feels like stick-to-your-ribs comfort food without actually sticking-to-my-ribs (or worse yet, my hips).


This soup is the best of both worlds. The combination of orzo pasta and vegetables, including super-healthy kale, swimming around happily in a light chicken broth, leaves you satisfied without feeling guilty. The touch of light sausage and parmesan cheese really wakes up the flavor of this recipe. If you wanted to make this a vegetarian-friendly meal, all you would have to do is omit the sausage and sub out the chicken broth for veggie broth.


If at all possible, I would let this soup sit for a day after making it, as the flavors really seem to come together best after 24 hours but, if you simply can’t wait (like me, typically), it still tastes wonderful fresh out of the pot!


I always have saltines on hand to dip in the soup, though oyster crackers would be equally as delicious!


Sicilian Sausage Soup
Family Recipe

Ingredients 

1 lb. bulk sausage (we use low-fat)
1 medium yellow onion, chopped
2 cloves garlic, diced
1 green pepper, chopped
3 stalks of celery, chopped
1 tsp. pepper, 1 tsp. basil
1 small can condensed tomato soup
1 16 oz can diced tomatoes with liquid
6-8 c. chicken broth (up to 12 c. is fine) (or use 2, 49 ½ oz can)
up to 1 cup of kale (chopped, cooked, drained)
½ cup grated Parmesan or Romano cheese
1 cup orzo pasta

Directions
Brown sausage in large stock pot. (if making a vegetarian option, use about a tablespoon of olive oil or another oil of your choice instead of the sausage fat).
Add onion, celery and garlic to pan and sautĆ© a until slightly transparent, but it doesn’t have to be cooked all the way through. (The sausage, if low-fat, will not render a lot of fat, but it’ll be enough to give your veggies good flavor)
Add tomato soup, stir in spices, tomatoes, and broth.
Add cooked kale.
Cover and reduce heat and simmer for 1 hr.
Stir in orzo and cook for 45 mins more.
Garnish with cheese to serve.

Enjoy!

PS. - Don't forget to come find me over on Facebook if you like what you see!


Friday, March 18, 2011

Chicken Cordon Bleu

This is a more traditional Chicken Cordon Bleu recipe, as compared to my Pizza Chicken Roll-ups from before. The paprika and cayenne are totally optional, but we both like a little spice with our chicken.


While I can’t vouch for this meal’s authenticity in terms of a real cordon bleu…I know the components of the recipe, the rest was just eyeballed and estimated. In the end, I have a meal that looks like it should and tastes pretty good, and that’s what matters to me, even if it’s not 100% authentic. The chicken is moist and tender, and the saltiness of the ham and cheese really adds a depth of flavor missing from a basic baked chicken breast. The best part for me is the bread crumbs on top - slightly crunchy and totally delicious! I love that from the outside, it looks like nothing too special, but once you cut into it, the cheese starts to ooze out and the ham peeks out. Always nice to keep your dinner guests guessing!


Chicken Cordon Bleu

Ingredients
2 Chicken Breasts, pounded out to about 1/4" thick
1/2 c flour
1 tsp cayenne pepper, optional
1 tsp paprika, optional
1 egg, slighty beaten
1/2 c breadcrumbs, Italian seasoned (or add about 2 tsp each of dried basil and oregano)
4 thin slices of deli ham
2-3 slices of provolone or swiss cheese
Salt
Pepper

Directions
Pat chicken dry, and salt and pepper both sides.

Lay 1-2 slices of cheese in each chicken breast, and then add 2 slices of deli ham.

Roll chicken over the fillings and use toothpicks to keep it rolled shut.

In one bowl, mix the flour, cayenne pepper, and paprika. Have the egg in another bowl. In a third bowl, pour in your breadcrumbs.

Dredge each chicken roll in flour, tapping lightly to remove excess. Dip in egg mixture and then coat with breadcrumbs.

Put in a rimmed baking sheet (in case the cheese escapes) and bake at 350 for 30-35 minutes or until cooked through. Time will vary depending on the size and thickness of your chicken breast, so your best bet is to stab it with a knife and look at the chicken and juices to make sure it’s finished. Just go in from the bottom if you want it to still be pretty!)

Thursday, March 3, 2011

Easiest Green Beans Ever

With this recipe, you have no excuse not to eat your veggies – even on a work night!

This veggie dish is on your table in about fifteen minutes from start to finish and, with only five ingredients (or six if you want to get fancy), it’s super simple and easy to remember. This has been on our Easter table two years in a row, and graces our dinner table every so often throughout the rest of the year.

So put that steamer bag of frozen veggies down for one night and give fresh green beans a try! It is well worth the minimal effort you will put into it!

Easiest Green Beans Ever

Serves 4

1 lb fresh green beans
2-3 cloves of Garlic – diced fine or run through a garlic press
1 Tbsp Olive oil
1-2 Tbsp grated or flaked Parmesan Cheese (optional)
Salt
Pepper

Fill a medium saucepot 2/3 of the way with water, and put over high heat.

Clean beans under running water, snap off both ends (or only the stem end if you prefer) and set aside. Once the water is boiling, drop in green beans and let boil for five minutes.

Mince garlic (or run through the garlic press)

Strain beans and put into serving bowl. Drizzle with olive oil, toss in garlic and parmesan (if using) and season to taste with salt and pepper.

Serve!


Monday, February 28, 2011

Chocolate Pudding (and Variations on a Theme!)

I cannot even begin to tell you just how much of this pudding I have eaten in my lifetime. I know that when I got my wisdom teeth out, this pudding was the only thing I could stomach for about two days, meaning my mom had an endless supply waiting for me in the refrigerator. That time alone, I’m sure I ate close to a gallon of this stuff. Same story when I had my tonsils removed at the ripe old age of 20 (yuck!)


But, the absolute best thing about this pudding was that I could make it in the confines of my college dorm room. A few simple ingredients, a bowl and a microwave were all I needed to bring a little piece of home to my dorm – even if just for dessert.


A few nights ago, the hubs mentioned that we had some milk in our fridge that was ‘on its way out.’ He has never had this before, so I figured now would be a good time to make it. I made the first batch with regular unsweetened cocoa, but then for the second batch, I accidentally grabbed the Hershey’s Special Dark cocoa. What a wonderful mistake that was! The hubs, who typically prefers milk chocolate, did prefer the first batch, while I, who adores dark chocolate, gobbled up the second batch.


Then it happened… I found marshmallow fluff in my pantry and chocolate graham crackers. After the pudding set, I put the marshmallow fluff on top and crumbled on some graham crackers for a makeshift s’mores pudding dessert. It is amazing how simple pantry items can jazz up a relatively simple dish. The top picture has peanut butter drizzled on top of the whipped cream. Absolute heaven.


I will be the first one to admit, though, that I have been known to be caught with a spoon in hand and my head in the fridge, eating it straight from the bowl – though I promise I know it’s when I’m not sharing it!

Chocolate Pudding

Ingredients:
½ C. sugar
¼ C. cocoa (unsweetened powdered variety) – I accidentally used the Hershey’s Special Dark cocoa in one batch and LOVED it. But feel free to use the normal cocoa as well!
3 TBSP cornstarch
¼ tsp salt
2 1/4 C. milk (may use low fat or skim)
2 TBSP butter
1 tsp vanilla

Directions:
Combine sugar, cocoa, cornstarch, and salt in 8-cup glass measure. Gradually stir in milk, stirring until cornstarch is completely dissolved.

Cook on high (600 – 700 watts) for 7 – 10 minutes, stirring every 2 minutes. Stirring helps to keep the mixture smooth and to keep the milk from boiling over. Cooking is finished when mixture is cooked through and thickened. Stir in butter and vanilla. Pour into individual serving dishes. Cover with plastic wrap pressed down on pudding surface to prevent skin from forming over top. Refrigerate.

If you want it a little sweeter, use 2/3 cup sugar.
We use a 2 1/2 quart Pyrex bowl and don’t always put it into individual cups.

Friday, February 11, 2011

Meatloaf

I’m in the midst of a deep freeze here in Chicago. If it’s not snowing, it’s icy. We've had days where the wind chills are in the 20-below-zero range. We've had Snowmageddon. And I have had a bottle of water that was accidentally left in my car freeze solid.

On days like these, I refuse, kicking and screaming try to avoid leaving the warm embrace of my fleecy blanket, cuddled up on the couch watching a movie, Say Yes to the Dress, or Top Chef all while eating anything and everything I can get my hands on that will make me feel the slightest bit warmer!


As a kid, I turned my nose up at meatloaf, I always saw it as a ‘mystery meat’ platter. I don’t even recall whether I gave the poor slice of meat on my plate a chance before I tried to hide it in an air vent, or spread it around on my plate so that it looked like I at least tried some. Once I realized it was essentially a nicely seasoned, moist hamburger formed into a loaf, my prejudice vanished.


Few things are as easy or as comforting on a cold, snowy day than meatloaf. And, thankfully, this recipe is so easy, most people will have everything they need right in the freezer, fridge and/or pantry. If you don’t want to make two loaves, halve the recipe and make it in a single loaf pan. I usually make both loves, mainly because it freezes so well and if I can get two meals out of one prep period, I am going to do it.


This went perfectly with a side of parmesan garlic mashed potatoes, and sprinkled with just a bit of parsley.


Meatloaf

4 slices of bread, cut or torn into ~1/2” cubes
2 eggs
3/4 c milk
1 Tbsp Worcestershire
1/4 c celery
1/4 c onion
1/8 tsp pepper
1/4 tsp salt
1 1/2 tsp poultry seasoning
1 1/2 lb ground beef
1/2 lb ground pork

Glaze
¼ c ketchup
2 Tbsp light corn syrup

Directions
Preheat oven to 350 degrees F.

In a large bowl, soak bread crumbs in milk.

Add egg and beat with a hand mixer until well combined and few/if any chunks of bread remain.

Add celery, onion, Worcestershire, salt, pepper and poultry seasoning. Mix well.

Add beef and pork and mix gently but thoroughly.

Divide meat mixture in half and form into two loaves in two separate loaf pans or in one 8” x 8” pan.

Bake for 1 hour.

For the topping, mix together ketchup and corn syrup in a small bowl.

After 1 hour, top with ketchup/corn syrup mixture and bake for an additional fifteen minutes.

Serve.


Related Posts Plugin for WordPress, Blogger...