Showing posts with label chicken. Show all posts

Saturday, April 2, 2011

BBQ Chicken Pizza

If you remember from my previous pizza post, I mentioned how me making pizza dough from the pre-packed mixes usually ends up in disaster. And it’s typically because with mixes, I go on autopilot, figuring if I can make stuff from scratch, I don’t need to pay attention to the mix directions all that much – how hard can it be? Apparently, even using homemade dough, I’m not immune to near-catastrophes in the kitchen. My autopilot really needs a tune-up. Sheesh.


I had made my dough and was letting it rest while I preheated my oven and pizza stone. I typically use a combination of flour and cornmeal on the cutting board I use as a pizza peel to help the dough slide off onto the stone without a lot of resistance. Not sure what I was thinking, but after liberally flouring my board, I got out the cornmeal and proceeded to put some on my cutting board and, stupidly, my pizza stone. Yes, the pizza stone that is in a 475 degree oven.


I started to merrily make my pizza, stretching out the dough and putting on the sauces and cheese, when my husband joined me in the kitchen. He asks “is the oven supposed to be doing that?” Not even turning around, I said “of course it is, it’s preheating.” Imagine my shock when he said “so it’s supposed to be smoking like that?”


That got my attention, so I turned around and, sure enough, black smoke was pouring out of the oven vent. I opened the oven door to see a charred mass of what used to be cornmeal on the pizza stone. Grabbing the oven mitt, I tried to grab a nearly 500-degree pizza stone out of the oven and tried to dump the cornmeal into the sink. Fail. It was stuck. And I just realized that my oven mitt is not thick enough for a 475-degree pizza stone. Unfortunately, there is very few places in our house where you can put something that hot where it won’t cause serious damage – and our stovetop was covered with pots and pans from my topping preparation. After a little more floundering, I finally got the stone on the stovetop, freeing up both hands for a simultaneous forehead smack.


I finally enlisted the help of the hubby to hold the stone while I scraped off the burnt cornmeal. Thankfully, the stone is resilient, and once it was scraped clean, it went back in the oven and went on to cook a perfect pizza.


This recipe is adapted from my Neopolitan Pizza dough from the Cooking Light magazine, but I took some liberties because I didn’t have all night to let the dough slowly rise. I just let it hang out all day and just kept punching it down (every time it doubled in size or so) until I was finally ready to use it that evening. The pizza itself (as-in the topping combination) is something I’ve been making for a few years now, and never seems to get old. Whenever we’re trying to figure out what we feel like eating for dinner, this is always one of the suggestions. There’s probably good reason for that. This pizza is delicious and (especially if you use premade dough or a package of ‘just add water’ dough) easy.


I didn’t mention in the previous post, but I add in semolina flour because I like the chew it gives to my crust, you can easily use all bread flour instead. The garlic powder is optional as well, but it does seem to give my crust a flavor I felt was lacking the first few times I assembled the crust.
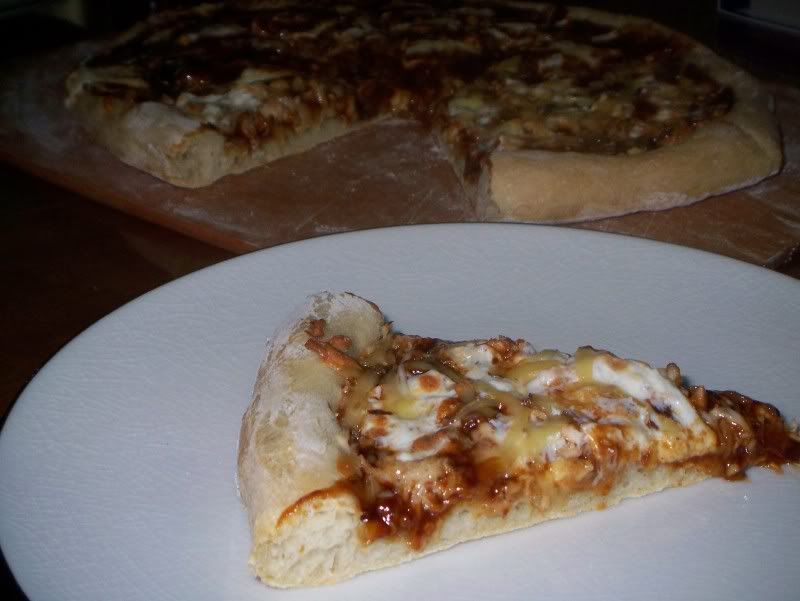
BBQ Chicken Pizza

Topping
2 Chicken tenderloins
2/3 c barbecue sauce
3 oz Mozzarella, sliced
1/4 c shredded Parmesan
3/4 c grated Smoked Gouda

Dough
1 1/2 c bread flour
1/2 c plus 2 Tbsp Semolina Flour
1 c Water
4 tsp Olive Oil
1 tsp kosher salt
2 tsp Garlic Powder

Directions
Salt and pepper chicken tenderloins and cook over medium heat, 3-4 minutes on each side, until cooked through. Remove to a cutting board and allow to cool. Chop chicken thoroughly once cooled. You can also add a tablespoon or two of the barbecue sauce to the chicken to impart a little more flavor as it’s hanging out in your fridge waiting to be used.

Pour 3/4 cup warm water in the bowl of a stand mixer with dough hook attached. Weigh or lightly spoon flour into dry measuring cups and spoons; level with a knife. Add flour to 3/4 cup water; mix until combined. Combine remaining 1/4 cup water and yeast in a small bowl; let stand 5 minutes or until bubbly. Add yeast mixture, oil, and 1/2 teaspoon salt to flour mixture; mix about 10 minutes. You should have a soft dough that is somewhat sticky (If it is too unruly, I’ll typically add another 2-3 Tbsp of flour and keep kneading). Place dough in a large bowl coated with cooking spray; cover surface of dough with plastic wrap lightly coated with cooking spray.

I turned my oven onto the proofing function (though on a draft-free countertop is fine as well) and just let my dough hang out for the day. If it got too puffy, I’d punch it back down. When you are about ready to use the dough, preheat your oven to 475 with your pizza stone on the lowest rack.

I use a big cutting board covered with a little flour and cornmeal as my pizza peel.

Form your dough into a circle, making a 1/2 inch rim around the edge for the crust.

Put on your barbecue sauce, chicken and three cheeses.

Bake at 475 for 10-15 minutes or until crust is cooked but still springy, and cheese is melted.
I *heart* pizza!

Monday, March 21, 2011

40 Clove Chicken

If you like garlic, this is the meal for you. Whoo-doggie.


The only hard part of this dish is having enough patience to peel 40 cloves of garlic (that’s about 3 heads worth). Thankfully, the trick of boiling the cloves for 60 seconds and then draining it makes the task a million times easier than trying to smash each clove and pick out all the paper from the mess. I also think there is a lot more visual impact to the dish when presented with whole cloves of garlic; that way there is no question as to what is in the dish.


If you hate garlic, I might steer away from this dish. But if you only think you don’t like it, I’d suggest giving this recipe a try. A lot of times people do not like garlic because they’ve either had it raw or burnt. I love raw garlic, but it is definitely a pungent taste, one which many people don’t enjoy. And burnt garlic, ick. There is no coming back from that one. But cooking the garlic over low heat for a long period of time is a beautiful thing. Roasted cloves will be brown, but not burnt, and the taste will transform from sharp to sweet as the sugars begin to caramelize. They also get soft – soft enough that you can grab a clove, put it on a piece of toast, and spread it with a knife as you would butter.


There are a lot of strong flavors in this dish, inclusive of the garlic, so I wouldn’t recommend eating this before meeting your blind date for the evening. This would be more of a third-date sort of meal.


Definitely serve this with some crusty bread, the sauce and garlic pieces are just too good to abandon on your plate.

40 Clove Chicken

Adapted From Ina Garten via FoodNetwork.com

Yield: 4 servings (serving size: about 4 ounces chicken, 2 tablespoons sauce, 5 garlic cloves, and 3 bread slices)
Ingredients 1 lb boneless, skinless Chicken Breasts, pounded thin
½ tablespoon butter
½ tablespoon extra virgin olive oil
½ Tbsp (1/2 teaspoon) salt
½ Tbsp Thyme
½ Tbsp Sage
½ Tbsp Rosemary
1 Bay Leaf
1 Tbsp Flour
1 ½ Tbsp Cognac/Brandy
1/2 teaspoon freshly ground black pepper
20 garlic cloves, peeled
(1 1/4 cups fat-free, less-sodium chicken broth)
¾ cup dry white wine
12 (1/4-inch-thick) slices diagonally cut French bread baguette
Chopped fresh flat-leaf parsley (optional)
Directions Boil garlic cloves for 60 seconds. Drain and Peel.
Remove and discard giblets and neck from chickens. Rinse chickens with cold water; pat dry. Trim excess fat; remove skin. Cut each chicken into 8 pieces.
Combine butter and oil in a 12-inch nonstick skillet over medium-high heat. Sprinkle salt and pepper evenly over chicken. Add half of chicken pieces to pan; cook 2 minutes on each side or until golden. Remove chicken from pan; keep warm. Repeat procedure with remaining chicken.
Reduce heat to medium. Add garlic; sautee garlic for 5-10 minutes until evenly browned. (cook 1 minute or until garlic begins to brown, stirring frequently.) (Arrange chicken on top of garlic.) Add wine and 1 Tbsp cognac/brandy, bring to a simmer and scrape bottom of pan (Add broth and wine;) Return chicken to pan, sprinkle with thyme, sage, rosemary and add 1 bay leaf, cover and simmer (cook) 15 (25) minutes or until chicken is done.
Remove chicken from pan; keep warm.
In a small bowl, whisk together flour and 1/4 cup sauce from pan then whisk it back into pan. Add remaining cognac. Cook 3 minutes and salt and pepper to taste. (Increase heat to medium-high; cook 10 minutes or until liquid is reduced to about 1 cup.) Serve sauce and garlic with chicken and bread. Garnish with chopped parsley, if desired.

Friday, March 18, 2011

Chicken Cordon Bleu

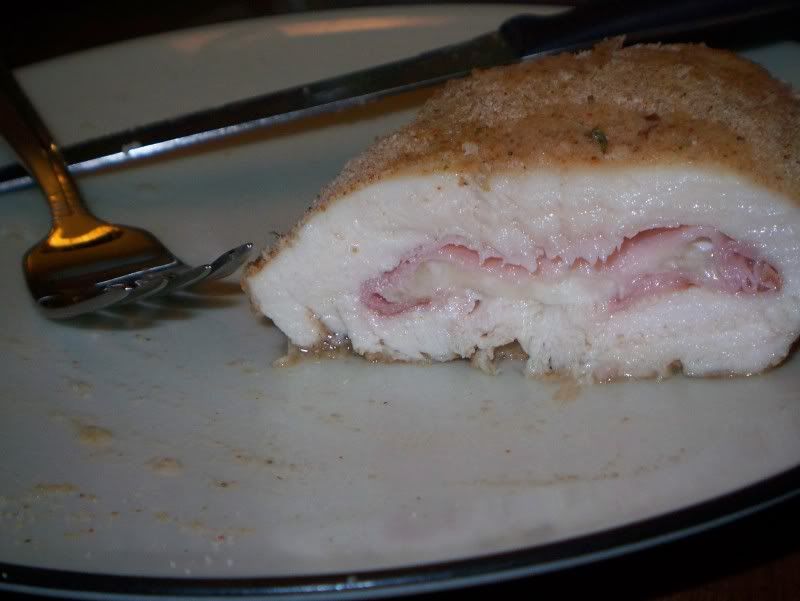
This is a more traditional Chicken Cordon Bleu recipe, as compared to my Pizza Chicken Roll-ups from before. The paprika and cayenne are totally optional, but we both like a little spice with our chicken.


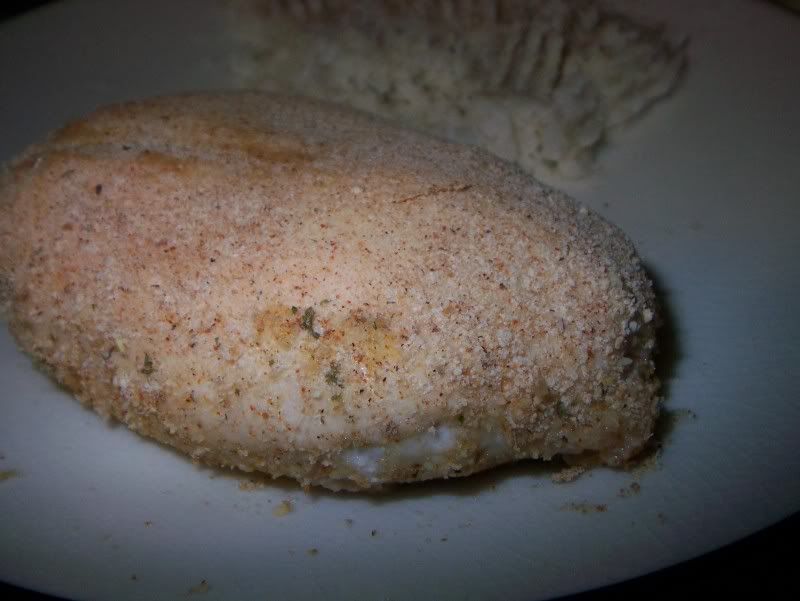
While I can’t vouch for this meal’s authenticity in terms of a real cordon bleu…I know the components of the recipe, the rest was just eyeballed and estimated. In the end, I have a meal that looks like it should and tastes pretty good, and that’s what matters to me, even if it’s not 100% authentic. The chicken is moist and tender, and the saltiness of the ham and cheese really adds a depth of flavor missing from a basic baked chicken breast. The best part for me is the bread crumbs on top - slightly crunchy and totally delicious! I love that from the outside, it looks like nothing too special, but once you cut into it, the cheese starts to ooze out and the ham peeks out. Always nice to keep your dinner guests guessing!


Chicken Cordon Bleu

Ingredients
2 Chicken Breasts, pounded out to about 1/4" thick
1/2 c flour
1 tsp cayenne pepper, optional
1 tsp paprika, optional
1 egg, slighty beaten
1/2 c breadcrumbs, Italian seasoned (or add about 2 tsp each of dried basil and oregano)
4 thin slices of deli ham
2-3 slices of provolone or swiss cheese
Salt
Pepper

Directions
Pat chicken dry, and salt and pepper both sides.

Lay 1-2 slices of cheese in each chicken breast, and then add 2 slices of deli ham.

Roll chicken over the fillings and use toothpicks to keep it rolled shut.

In one bowl, mix the flour, cayenne pepper, and paprika. Have the egg in another bowl. In a third bowl, pour in your breadcrumbs.

Dredge each chicken roll in flour, tapping lightly to remove excess. Dip in egg mixture and then coat with breadcrumbs.

Put in a rimmed baking sheet (in case the cheese escapes) and bake at 350 for 30-35 minutes or until cooked through. Time will vary depending on the size and thickness of your chicken breast, so your best bet is to stab it with a knife and look at the chicken and juices to make sure it’s finished. Just go in from the bottom if you want it to still be pretty!)

Sunday, March 13, 2011

Enchiladas Especiales Tacuba Style

Top Chef is one of those shows that the hubby and I can happily admit that we watch together. While Project Runway and Say Yes to the Dress are my domain, NBA and college hoops are his. Top Chef is just one of those shows that we can both look forward to sitting down and enjoying.

When Top Chef Masters was on for its inaugural season, it was my first introduction to Rick Bayless. Living in Chicago, I had heard of Frontera Grill, Topolobampo and Xoco, but I had never been able to put a face to the name. Watching him work in the kitchen was amazing, under pressure, he effortlessly put together a 30-ingredient mole sauce like it was nothing (that the judges raved about, later).

Though I haven’t been able to visit his restaurants (I would love to go to Frontera, but the waits there are insane!), I found that his website has recipes for the food he prepares on his public television show called Mexico: One Plate at a Time. These enchiladas looked both easy and satisfying.

They did not disappoint. The sauce takes a little bit of time to prepare, but for the relatively few ingredients this meal contains, the flavor is through the roof. The spinach is not something I would have expected in an enchilada sauce, but it just works, and the poblanos give ths sauce the most subtle heat that is so wonderful. Next time, I’ll probably add a touch more garlic, since we can never seem to get enough, but other than that, this meal was fantastic, and definitely one that we’ll be having over and over again at our house.

Enchiladas Especiales Tacuba Style
Serves 4 to 6
This recipe is from Season 7 Mexico - One Plate at a Time

Ingredients
2 fresh poblano chiles
1 cup (lightly packed) roughly chopped spinach leaves
2 cups milk
2 cups chicken broth
6 tablespoons (3 ounces) butter—or you can use vegetable oil
3 garlic cloves, peeled and finely chopped
1/2 cup flour
Salt
3 cups coarsely shredded cooked chicken (I usually use a rotisserie chicken or leftover grilled chicken)
12 corn tortillas
A little vegetable oil for brushing or spraying
About 1 cup Mexican melting cheese (Chihuahua, quesadilla, asadero or the like) or Monterey Jack, brick or mild cheddar
A little chopped cilantro for garnish

Directions

Make the sauce.  Roast the poblanos directly over a gas flame or on a baking sheet 4 inches below a very hot broiler, turning regularly, until the skins have blistered and blackened on all side, about 5 minutes for an open flame, about 10 minutes under the broiler. Place in a bowl, cover with a kitchen towel and, when handleable, rub off the blackened skin, tear open and pull out the seed pod and stem. Quickly rinse to remove any stray seeds or bits of skin. Roughly chop and put in a blender jar.  Add the spinach.

In a medium (3-quart) saucepan, combine the milk and broth, set over medium-low heat to warm.
In a large (4-quart) saucepan, melt the butter (or heat the oil) over medium.  Add the garlic and cook for a minute to release its aroma, then add the flour and stir the mixture for a minute.  Raise the heat to medium-high.  Pour in the warm broth mixture and whisk constantly until the sauce boils.  Reduce the heat to medium and simmer for 5 minutes.  Remove from the heat.

Pour half the hot sauce into the blender with the chiles and spinach.  Cover loosely (I remove the center part of the lid, secure the lid, then drape a cloth over the whole thing) and blend until smooth.  Pour the mixture back into the saucepan with the remaining sauce.  Taste and season with salt, usually about 2 teaspoons. 
Finish the enchiladas.  Heat the oven to 350 degrees.  Smear about 1/4 cup of the sauce over the bottom of each of four to six 9-inch individual ovenproof baking/serving dishes or smear about 1 cup of the sauce over the bottom of a 13x9-inch baking dish.  Stir 1 cup of the sauce into the chicken.

Lay half of the tortillas out on a baking sheet and lightly brush or spray both sides of the tortillas with oil; top each tortilla with another one and brush or spray those with oil.  Bake just to warm through and soften, about 3 minutes.  Stack the tortillas and cover with a towel to keep warm. 

Working quickly so that the tortillas stay hot and pliable, roll a portion of the chicken up in each tortilla, then line them all up in the baking dish(es).  Douse evenly with the remaining sauce and sprinkle with the cheese.  Bake until the enchiladas are hot through (the cheese will have begun to brown), about 20 minutes.  Garnish with the cilantro and serve without hesitation.

Saturday, January 29, 2011

Pizza Chicken Roll-Up

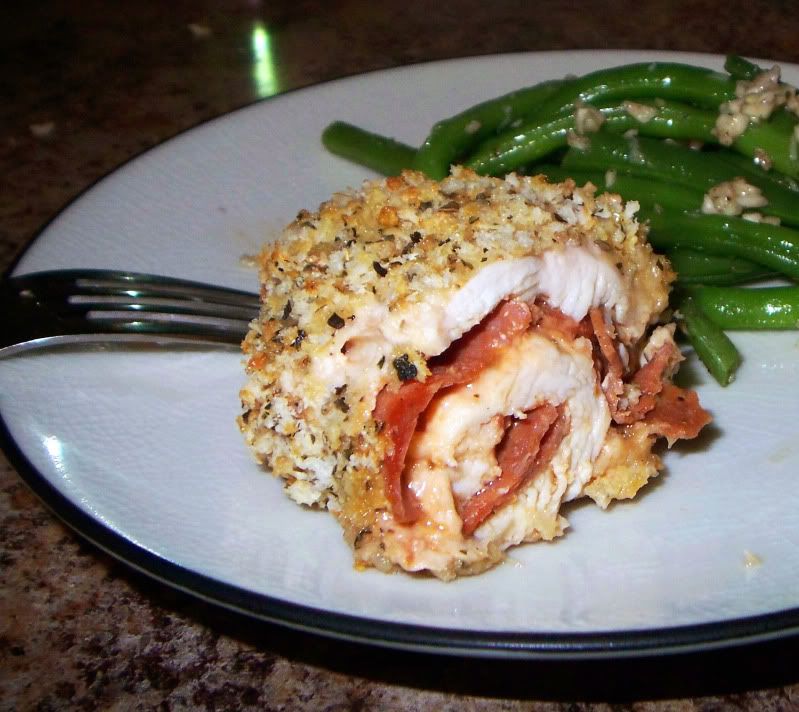
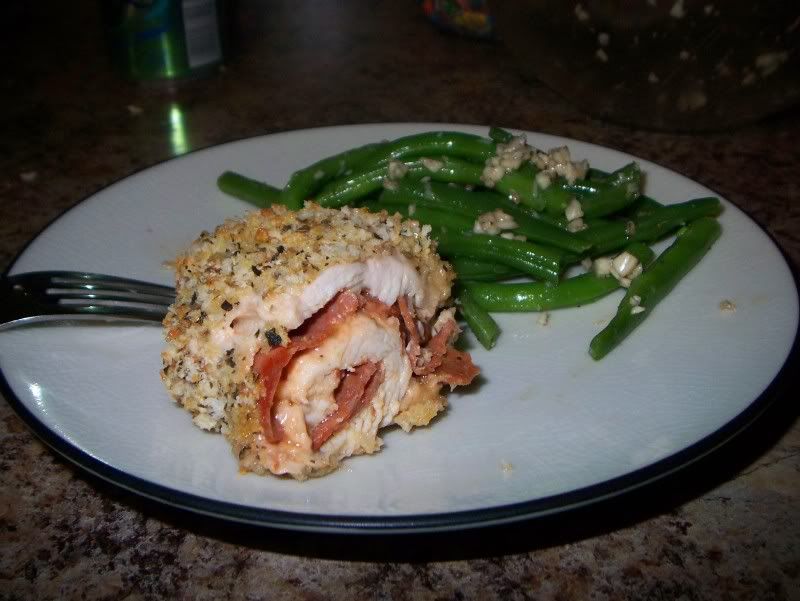
A surefire way to get out of a dinner rut is to think of some of your favorite meals, and then finding a way to use that flavor combination in a new way. One particular night, dinner ideas were impossible to come by. We wanted chicken, but couldn’t figure out if we wanted lemon pepper chicken, chicken and mushroom soup with couscous, chicken cordon bleu or something totally different. I knew we had some gruyere cheese in the fridge I didn’t want spoiling, so I asked if I could do a chicken roll-up in the spirit of a pizza. I no way proclaim that I am a pioneer in the kitchen in terms of the idea behind this dish, stuffing and rolling chicken is by no means a new idea, but I am very happy how this turned out, and it was something out of the norm for us.

And it actually looked interesting when it came out of the oven. But the important part was it tasted good. Success in the kitchen!

A couple of tips for pounding chicken thin:
1. Make sure your chicken is totally, thoroughly and completely thawed. Pounding out partially frozen chicken will make it fall apart even easier. Believe me, I know. And falling apart chicken is really hard to roll up.
2. Put plastic wrap on your cutting board, lay down your chicken, and then put another piece of plastic wrap on top.
3. Spritz a little water on top of the plastic wrap. This reduces the friction between your mallet/pan/brick/pounding utensil and the plastic wrap so you can more easily do step 4.
4. Instead of pounding straight up and down, hit the chicken with a diagonal downward force in the direction that you want the chicken to ‘stretch’ – so to speak. This will gradually pound the chicken down and out, instead of making it mush beneath your mallet.

Chicken Cordon Bleu meets Pizza

Our chicken breast was large enough that with all the stuffing, it was enough to serve both of us. You can easily adjust this recipe to feed more or less.

Ingredients
1 large chicken breast, pounded to ¼ inch thick
1/4-1/3 c tomato sauce
Pepperoni
1/4-1/3 c cheese of choice – I used gruyere
1/2 c panko breadcrumbs
3 Tbsp parmesan cheese
2 tsp Italian seasoning
1/4 c flour
1 egg, lightly beaten

My chicken breast fell apart a bit when it was pounded out, so mine was terribly messy – if you try it, yours probably will be, too. But it is delicious.

Preheat oven to 350 degrees.

Lay out the flattened chicken breast out, and spread on the sauce.

Sprinkle with grated cheese of choice and top with pepperoni.

Roll chicken breast and secure with toothpicks.

Mix breadcrumbs, Italian seasoning and parmesan in a bowl. Set aside.

Dredge chicken roll in the flour, shake off excess. Dip it into egg and then coat thoroughly with parmesan/panko mixture.

Place seam side down in a baking pan and bake for 20-25 minutes or until cooked through

Saturday, September 18, 2010

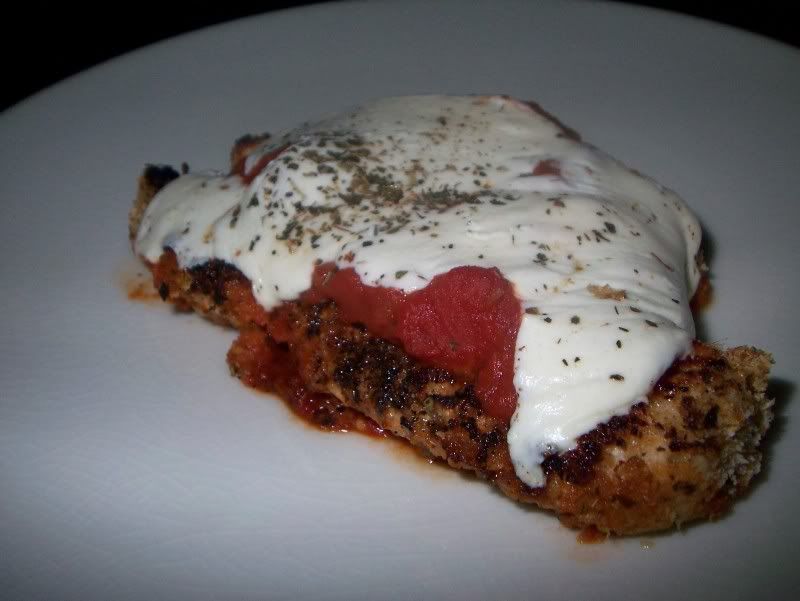
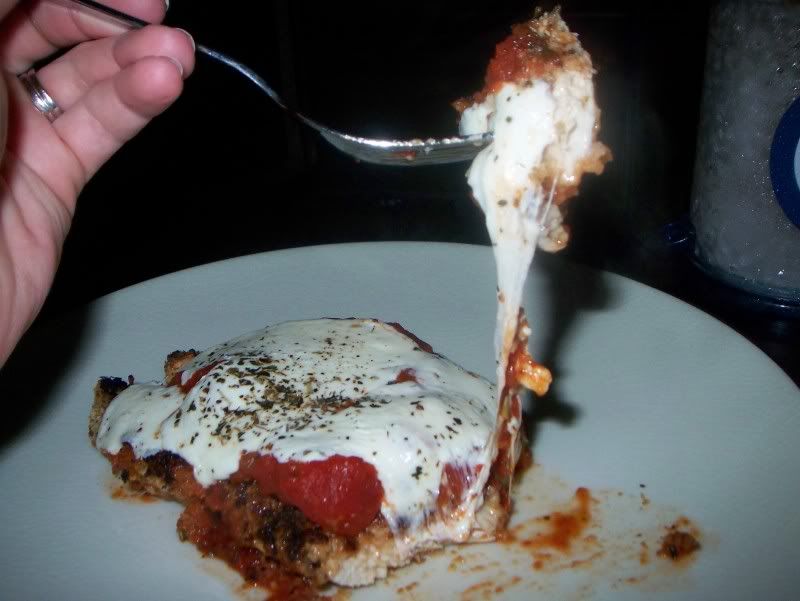
Chicken Parmesan

I finally saw “The Godfather” – parts one, two and three – for the first time recently. I see why these movies have such a following, they really sucked me in. In the first movie, it took me nearly the entire movie to finally accept that Michael Corleone was a young Al Pacino. I think it was a lack of wrinkles.

I did the math, and we watched Italian mobsters for nearly nine hours. No wonder I started talking like Marlon Brando with everything I said, and kept saying things about “an offer he couldn’t refuse.” Right?

Right?

Sigh.


Either way, this trilogy also really got me craving Italian food. This chicken parmesan recipe has been a work in progress for me. I usually get a decent crust on my chicken, but then when I bake it in the sauce, it loses its crispiness. By using less sauce when I bake it, and simply reserving some for dipping, I maintain the crispiness of the breading without sacrificing the sauce my husband loves oh-so-much. Also, by pounding the chicken thin, it cooks so much faster, so I can prepare this on a busy weeknight and feel like we’re really indulging in something that took a lot longer to make.

Once I had my chicken parmesan and strained my vocal cords enough to keep myself quiet for a while, we finally decided it was time to watch another movie. Can you guess what movie followed such a cinematic classic?

Hot Tub Time Machine.
Chicken Parmesan

1/4 c panko breadcrumbs
1/4 c regular bread crumbs
1/4 c grated parmesan cheese
1 Tbsp and 2 tsp Italian seasoning, divided (or use dried oregano and basil)
1 tsp cayenne pepper
Dash each of salt and freshly ground pepper
2 boneless skinless chicken breasts, pounded to 1/4-1/2-inch thickness
1 1/4 c Spaghetti sauce, plus ~1/2 c more for dipping (this equates to most of a 14 oz jar)
Fresh mozzarella cheese
2 Eggs
1 Tbsp canola oil

Preheat oven to 350 degrees F.

In a wide, shallow bowl, mix together panko, bread crumbs, parmesan cheese, salt, cayenne, black pepper and 1 Tbsp Italian seasoning.

In another wide bowl, gently beat eggs.

Dip chicken in eggs and then dredge in breadcrumb mixture until completely coated. Set aside.

Heat oil over medium heat in skillet large enough to hold the chicken.

Cook 3 1/2 minutes on each side until nicely browned on both sides. (I’ve used both tongs and a spatula to turn my chicken and found I have a lot less risk of damaging the crusty coating if I use a spatula. I always end up having my chicken slip out of my tongs and ripping off some of the breadcrumbs.)

In an 8 x 8 or 9 x 13 baking dish, spread a thin layer of spaghetti sauce. Lay your chicken breasts into the sauce. Top with more sauce.

Layer on slices of mozzarella cheese and sprinkle a tsp of the Italian seasoning on each breast.

Bake at 350 for 20 minutes, or until cheese is melty and chicken is completely cooked through.

Once you chicken comes out of the oven, heat up the additional half cup of spaghetti sauce in the microwave for dipping.

Thursday, August 5, 2010

Chicken Thighs with a Balsamic and Garlic Sauce

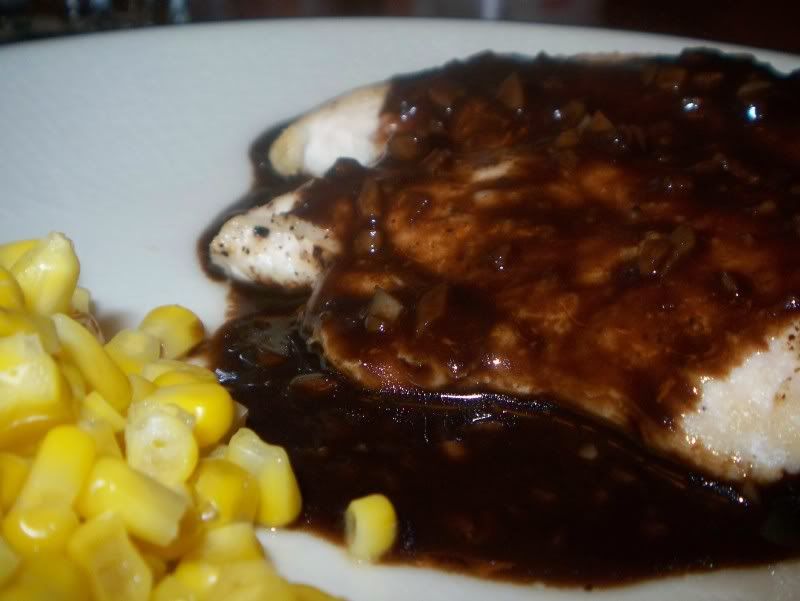
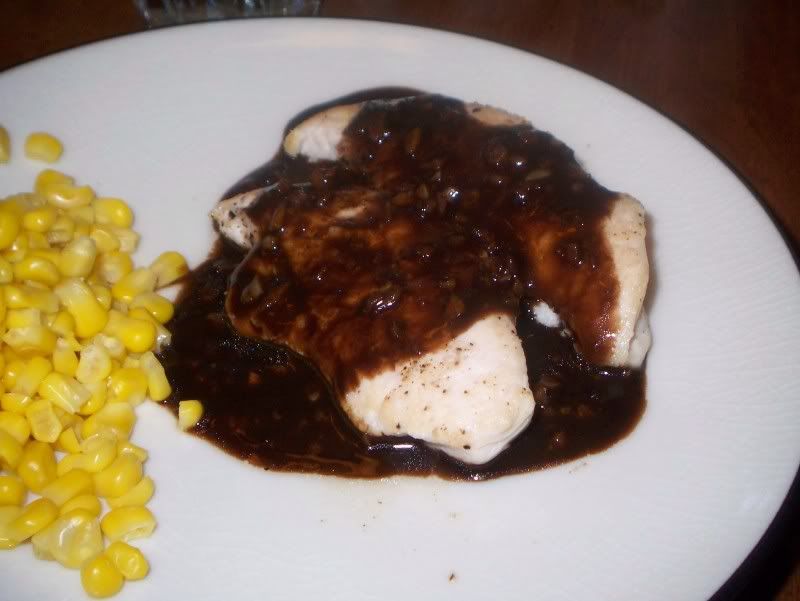
Ok, I really need to work on my photography skills. Only I could manage to make something that tastes delicious look so unappetizing.

But don’t let my bad photography skills deter you from trying this dish. It was very good. I have a new-found love for all things balsamic, especially when it’s cooked down to a nearly syrupy consistency. It loses much of its acidic bite, but keeps its unique flavor while also getting sweeter. I find it amazing that if you reduce plain balsamic vinegar down enough, it provides a perfect balance to fresh strawberries.

When you are reducing anything, quality is key. I live by the mantra “garbage in, garbage out” – both in engineering, and cooking. That’s why you always hear cooks and recipes beg and plead for you to cook only with wine you’d drink. If you cannot palate it in a glass, reducing it only concentrates the flavors you do not like in the first place. While I wouldn’t recommend drinking balsamic straight from the bottle, the same rule applies. Get a good brand, you’ll be rewarded.


Chicken Thighs with a Balsamic and Garlic Sauce
Adapted From:
For the Love of Cooking

2 boneless skinless chicken thighs, trimmed of any fat
1 tbsp olive oil
Sea salt and fresh cracked pepper to taste
1 tbsp flour
1 tbsp butter, softened
3 cloves of garlic, minced
1/3 cup of balsamic vinegar
1 cup of chicken broth

Preheat the oven to 350 degrees. Heat the olive oil in a large oven proof skillet over medium high heat. Season the chicken thighs with sea salt and fresh cracked pepper. Lay the chicken thighs smooth side down in the pan and cook until golden brown, about 4 minutes. Turn the chicken over and place in the oven. Cook for 8 minutes or until cooked through.

Remove chicken from oven and set aside on a platter to rest with a tinfoil tent to keep warm. Return the skillet to the stove over medium high heat (add more olive oil if needed) and add minced garlic. Cook, stirring constantly for 60 seconds then add the balsamic vinegar. Stir, scraping the browned bits from the bottom of the pan for about 1 minute. Add the chicken broth and bring to a boil. Mix the butter and flour together making a paste. Whisk in the flour and butter mixture and let the sauce return to a boil. Simmer until the sauce gets thick - about 1-2 minutes. Pour the sauce over chicken and serve. Enjoy.

Friday, July 23, 2010

Buffalo Wings

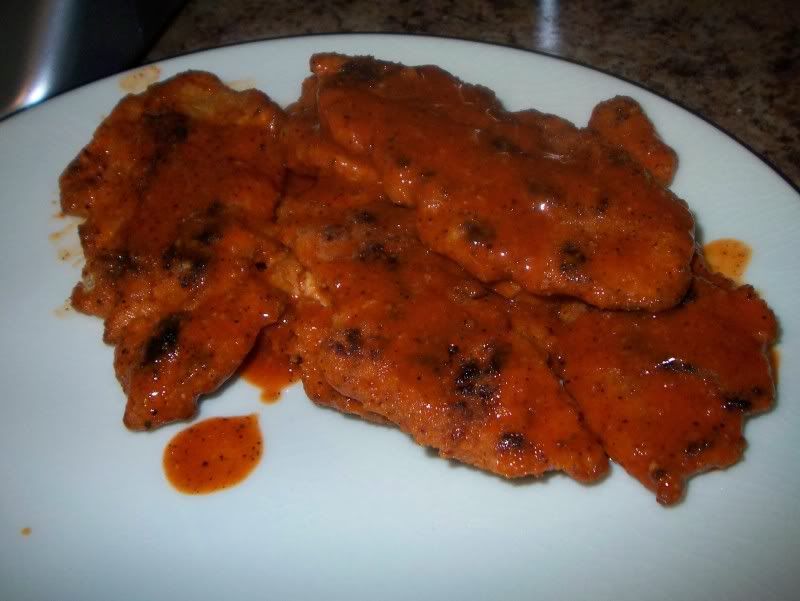
My husband and I are pretty predictable on our date nights. A trip to Buffalo Wild Wings consisting of a boneless wing appetizer spun in mango habenero sauce, a couple of beers and dinner. Our meal is then followed by a trip next door to the movie theater. It’s the perfect night for us. We do enjoy fancy dinners on occasion, but when we want to relax and not worry about doing dishes, B-Dubs is the place for us.

We haven’t been going out quite as much lately as we are saving for some pretty major home renovations, but that doesn’t mean we have to go without our wings. I must say, I enjoy the homemade version also because they are not deep-fried like their restaurant counterparts. If I wanted to get truly daring, I could evensplurge and purchase sauce from B-Dubs to get the real flavor, but the Frank’s Buffalo Hot Sauce fits the bill on a budget.

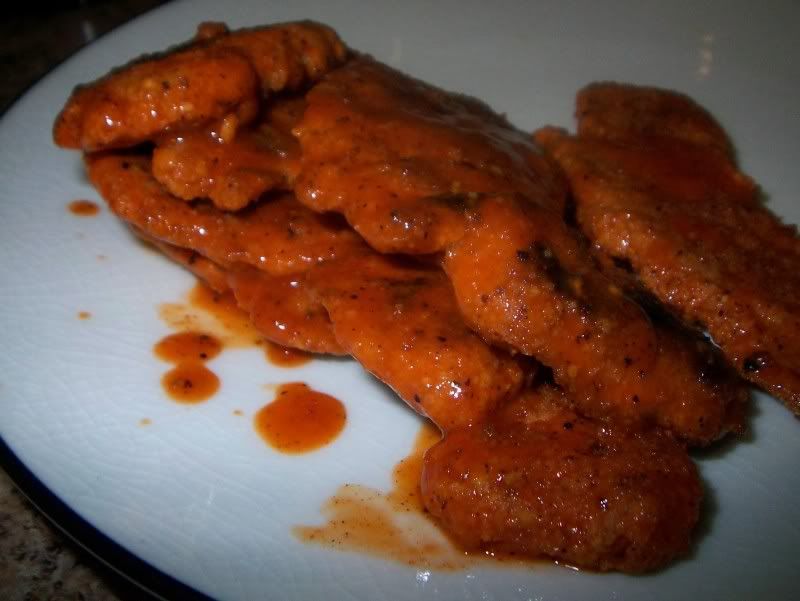
They do take a little time and prep-work to assemble, but I really enjoyed getting to have some hot wings at home. It’s classic bar food, but upgraded. I don’t feel quite as guilty after eating these, either.
I’ve tried double-breading the chicken tenders, but I think the extra step is completely superfluous. These wings are just as tasty with only one dredge through the bread crumbs, and you’ll get them on your table that much faster. If you want to double-coat, go ahead, but I’m sticking with a single layer from now on.

Buffalo Chicken Tenders

4 oz chicken tenderloins
1 c bread crumbs
3 eggs, lightly beaten
1/2 c flour
Cayenne Pepper
Salt
Pepper
1 c Franks Buffalo Hot Sauce
2-3 Tbsp Canola oil, for pan

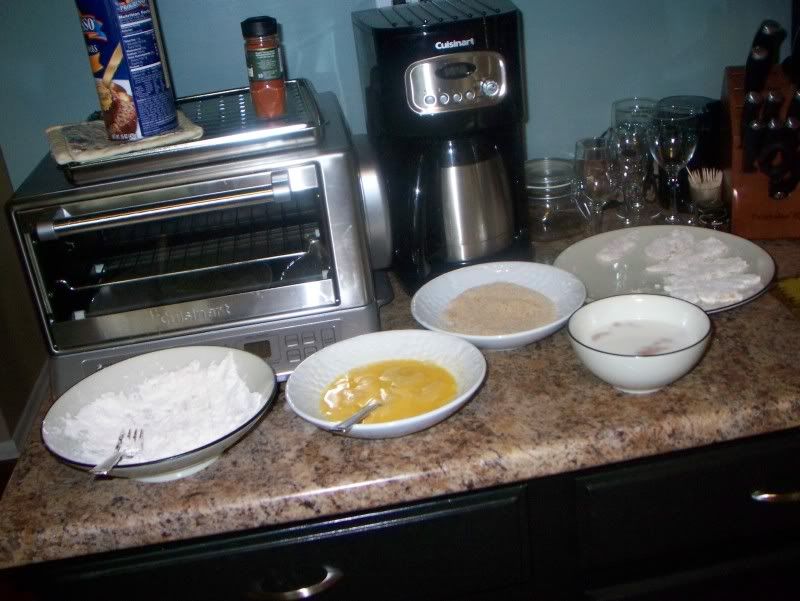
Get out three shallow serving bowls. Put flour in one. Mix in cayenne pepper, salt, pepper and paprika. In second shallow bowl, put your eggs. In last bowl, bread crumbs.

With a dry paper towel, pat your chicken dry. I like to cut my tenderloins into 2-3 pieces each, so each portion is a little more bite-sized. Lightly coat chicken with the flour, shake off excess and dip into eggs. Finally, coat your pieces with the breadcrumbs and set aside on a plate.

In a medium pan, heat up canola oil. Lightly pan fry the chicken pieces until golden brown and cooked all the way through. While waiting for the pieces to finish cooking, put about ¼ c of your hot sauce in the bottom of a bowl big enough to mix your chicken pieces. Add about half of your chicken, and layer on more hot sauce. Add the rest of your chicken, followed by the rest of the hot sauce. Shake, rattle, roll and stir your chicken until well coated.
Enjoy!

Saturday, July 3, 2010

Chili Chicken Wings

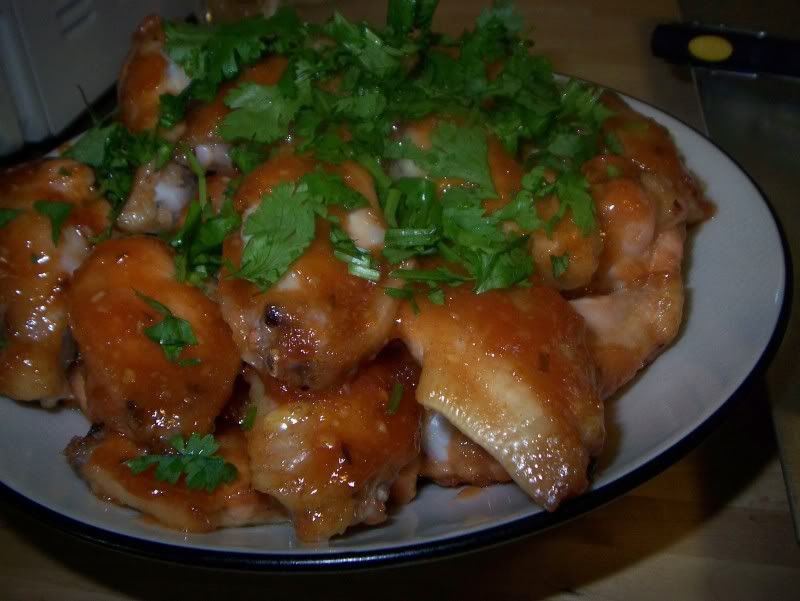
I’m glad these wings were good, because these nearly made me cry. If you have ever gotten raw ginger juice in your eyes, you know what I’m talking about. If you haven’t, take it from me – don’t. I always peel my ginger with a spoon, because I like to stand over the trash so the peel falls in, and I don’t have the manual dexterity to peel ginger skin with a knife without risking losing a pinky or needing stitches. I always thought it was safer to use a spoon, but when I got that squirt of fresh ginger juice in my eye, I just about would have sacrificed my whole hand to get the pain to stop. Ten minutes later, I was finally able to open my eye, only to have it tear up relentlessly. Thankfully, the more time that passed, the better my eye felt, and I no longer had to walk around the house with a permanent wink.

Minus the ginger incident, the rest of the dish came together really easily. I did use a little more cornstarch/water mixture than in the recipe, because I like my sauces a little thicker. Other than that, I kept everything the same, and they were delicious. I left the skin on the wings, so I don’t think I’d call these “health food,” but I did make a point to find a wing recipe that was baked, and not deep-fried (though this sauce would be great on fried wings as well). This was a great cookout food, and one that will certainly be gracing our table again in the future.


Chili Chicken Wings

From: Epicurious.com

For the sauce:
1 1/2 cups rice or cider vinegar
1 cup sugar
3/4 cup ketchup
6 tablespoons Chinese plum sauce
1 tablespoon hoisin sauce
2 tablespoons finely chopped garlic
2 tablespoons (or to taste) finely chopped fresh red, jalapeño or serrano chili, with seeds (I removed the seeds to keep the heat down a little bit)
3 tablespoons finely minced fresh ginger
1 teaspoon salt, or to taste
2 tablespoon cornstarch mixed with 2 tablespoon cold water

30 chicken wings (tips removed), rinsed and patted dry
2 tablespoons chopped cilantro, for garnish

Prepare the sauce: Combine all the sauce ingredients in a small, heavy saucepan. Bring to a boil over medium-high heat, reduce to medium-low and simmer, stirring constantly to blend the flavors, about 5 minutes. Remove from the heat and cool to room temperature. Puree in a food processor until nearly smooth. (Makes 3 cups.) Store, covered, in the refrigerator for up to 2 weeks.

Preheat the oven to 350ºF.

Using a sharp knife, separate the chicken wings at the joint. Set aside. (I also take the ‘pointy part’ off the end of the wing as well)

Place the chicken wings in a large bowl and toss well with 1 1/2 cups of the sauce.

Lay the chicken wings in a single layer on 2 or 3 baking sheets (do not overcrowd them). Bake for 45 to 50 minutes, basting once or twice with additional sauce. Place the wings on a platter, sprinkle with cilantro and serve.

Sunday, June 27, 2010

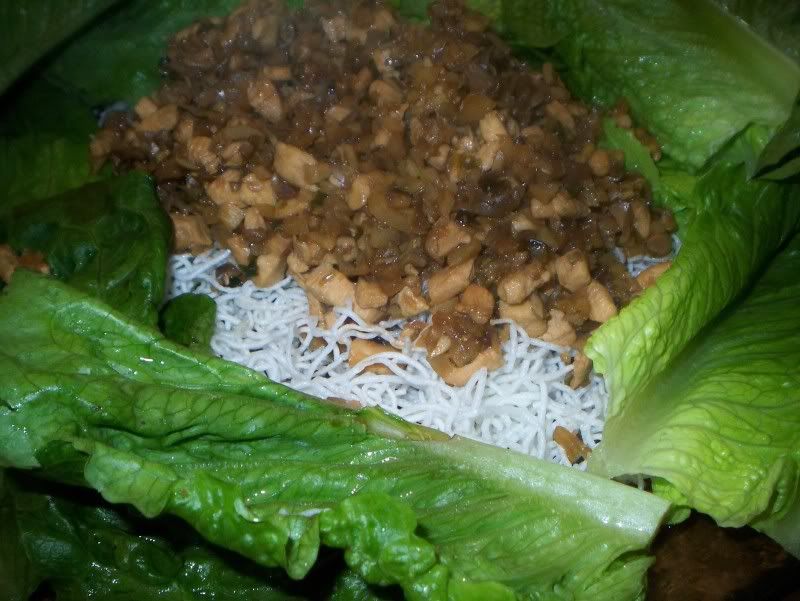
Asian Chicken Lettuce Wraps

This is a fantastic dish that almost had a tragic ending.

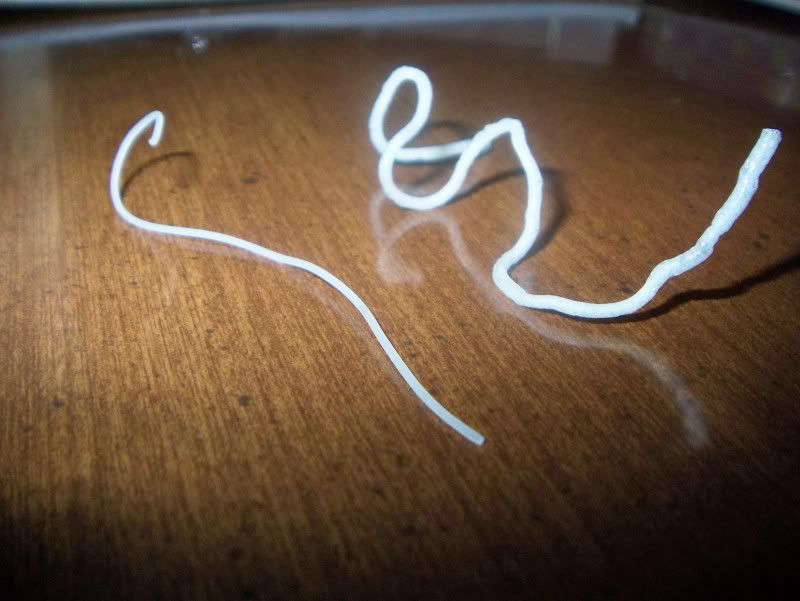
I made this meal for a picnic appetizer, since you need relatively few utensils to enjoy this dish. The only time I had to make it was the night before we were to leave for our picnic, and due to other obligations that night, I was able to start cooking around 10 pm. I started off frying up the maifun rice sticks. Let me tell you, at 1030, watching those suckers puff up is one of the coolest things I’ve seen. I never imagined that little translucent noodle would become those curly, puffy sticks.
Before (left) After (right)


After setting those aside, I then started cooking the chicken. This was where the fun began. We have a terrible blower on top of our stove, and it pretty much does nothing when you turn it on. Therefore, it typically receives very little use in our kitchen. This evening, however, I decided I’d turn it on, because sautéing the chicken was a little smoky, and I wanted to try and clear out the fumes from the kitchen. I’m not really sure what happened, but when I turned on the blower, bright pink insulation from our attic started shooting out the front of the blower housing into the kitchen. It looked like a cotton candy was snowing from our stove. Amidt cries of “Nooooooo!” and my furious attempts to cover my saucepan so that the insulation wouldn’t ruin my food (or be set ablaze by the gas burner), the smoke alarm in our living room was triggered.

The rest was a bit of a blur. My husband stepped in and managed to turn off the first smoke alarm, only to have another one down the hall start going off. He turned that one off, while I opened the window and the patio door to start airing out the kitchen. I turned off the blower and managed to get most of the insulation cleaned up.

Amazingly, the dish didn’t suffer at all. The smoke was only because I used olive oil by accident, which has a much lower smoke point than the vegetable oil I had intended on using. I guess that’s what happens when you’re cooking late at night. And when you have blizzard conditions in your kitchen thanks to insulation.
With all the excitement in preparing the dish, I hadn’t really thought about what to expect once the dish was finished. I was pleasantly surprised when I tasted it that it was reminiscent of the lettuce wraps at P.F. Changs. Truly a delight.
I have already made these a second time and thankfully had much less excitement. These are most likely becoming staple appetizer whenever we need one. Minus the smoke alarms and insulation, it is a relatively simple dish to prepare.

Enjoy!
Asian Chicken Lettuce Wraps
serves 2-3 as appetizer
Frying up Maifun Rice Noodles

Pour two inches of vegetable oil in a pan and heat until around 400 degrees F. Add maifun noodles, a little at a time and remove to a paper towl once puffed.

Filling
2 tsp Minced Ginger root
2 Tbsp Vegetable Oil
1 Large chicken breast, cut into small pieces(dime-sized)
1 c water chestnuts
2/3 c canned straw mushrooms
3 Tbsp green onion, chopped
3 cloves garlic, minced
Stir-fry sauce (see below)

Mince water chestnuts and straw mushrooms until the size of small peas. Set aside.
Bring two tablespoons of vegetable oil to high heat in wok or large frying pan. Saute cut up chicken until cooked through.
Add garlic, ginger, water chestnuts, straw mushrooms and green onion.
Add stir fry sauce to pan and saute 2-3 minutes or until hot.

Stir Fry Sauce
2 Tbsp Soy Sauce
2 Tbsp Brown Sugar
1/2 tsp Rice Vinegar

Mix in small bowl and set aside until needed.

Serving Sauce
1/4 c sugar
1/2 c water
2 Tbsp soy sauce
2 Tbsp rice vinegar
1 Tbsp lemon juice
1/8 tsp sesame oil

Dissolve sugar in water over low heat. Add soy sauce, rice vinegar, ketchup, lemon juice and sesame oil. Transfer to bowl and refrigerate until ready to use.

To serve:
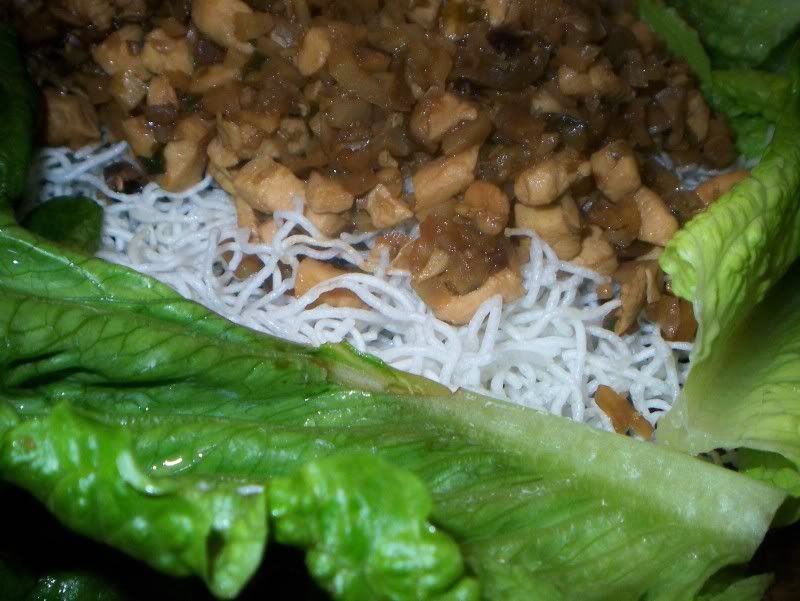
Serve filling on top of a bed of fried maifun rice noodles. Have lettuce cups ready. To eat, spoon filling, noodles and sauce into a lettuce cup, roll like a burrito and eat. And for what it's worth, it's usually pretty messy - Go with it!

Friday, May 21, 2010

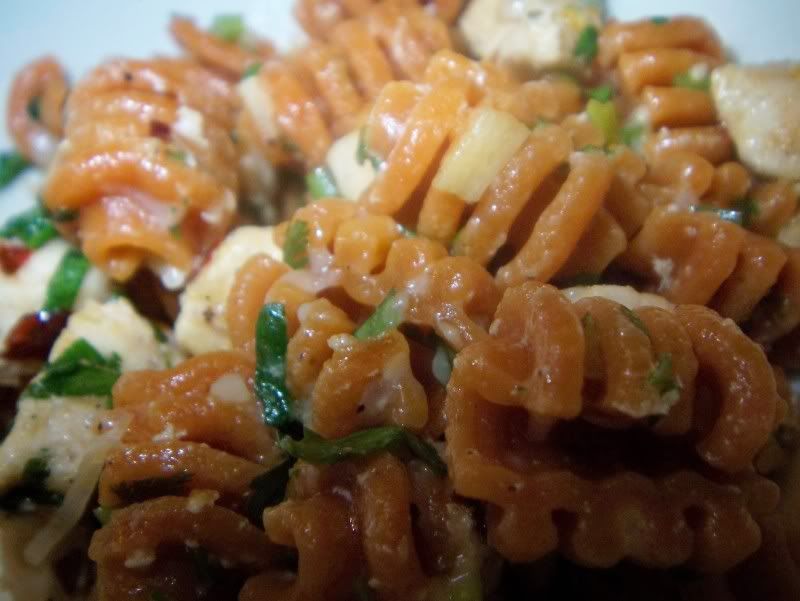
”Fired Up” Lemon Pasta with Chicken


A couple years back, when my parents were visiting me in Chicago, we decided to go to the farmers market near my apartment. Here we found a place called Pappardelle’s that sells nothing but pasta. There must have been thirty different kinds of flavor-infused pasta, from dark chocolate linguine to sweet potato orzo. I don’t even remember what we bought (I think it was a linguine that had sun-dried tomato in it), but I do remember it being such a wonderful change of pace from a traditional pasta. I also remember it was somewhat pricey for a pound of pasta compared to what you can get in the grocery store but, on the rare occasion I wouldd buy it, it was worth the splurge.

Since moving, I haven’t been able to go back to that Farmer’s Market, so my pasta has only been coming from the grocery store shelves. Last week, however, I ventured into the new
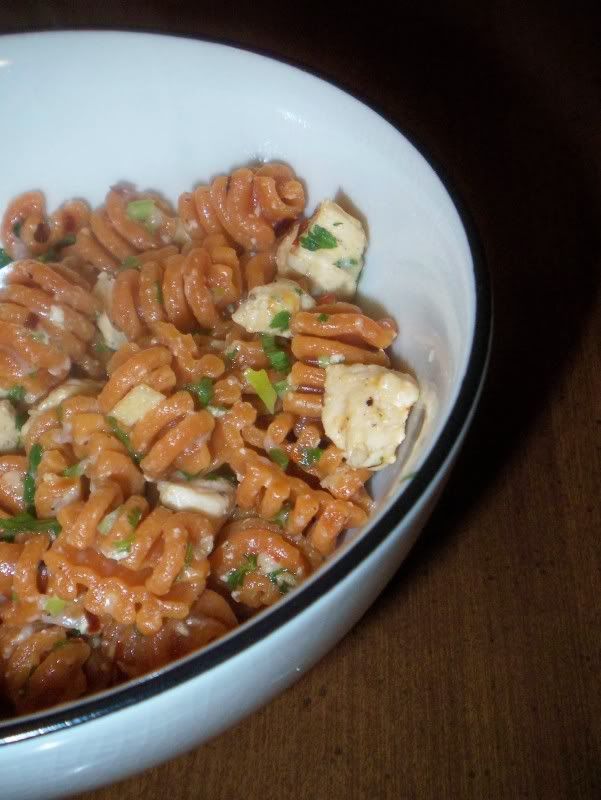
French Market at the Metra station to discover that Pappardelle’s has a distributor there. After perusing their choices, and trying a sample or two, I finally decided on a Wild Habanero Radiatori and a Chive shell.

The Habanero was too unique to pass up. Since the husband and I both enjoy spicy foods, I doubted it would overwhelm us. I did notice that even the dry pasta had a noticeable heat to it, so I was really looking forward to using it in a dish.


The recipe we finally decided on is supposed to highlight the pasta – complimenting it without overwhelming it. It’s actually a variation on a pasta we make many nights for our “Pasta Tuesdays.” Because Wild Habanero Radiatori is most likely not something in your pantry, I’m giving the recipe for the typical dish we make, and just highlight my adaptations in red.

And for the record, this pasta was hot! Not tongue-blistering, but it definitely smacks you in the face when you take a first bite. And, the more you eat, the more the heat accumulates. Unfortunately, we can’t afford to have this pasta all the time, but every once in a while I might bring home a meal’s worth to give us a little more variety. I’m looking forward to using the shells I purchased in the near future!

”Fired Up” Lemon Pasta with Chicken
Adapted from The Neelys Easy Lemon Pasta with Chicken from FoodNetwork.com
http://www.foodnetwork.com/recipes/down-home-with-the-neelys/easy-lemon-pasta-with-chicken-recipe/index.html

4 oz pasta (we used Pappardelle’s Wild Habanero Radiatori)
1 large chicken breast, chopped (or ¼ lb shrimp)
Salt and freshly ground black pepper
3 cloves garlic, sliced
2 teaspoon red pepper flakes
1 tablespoon olive oil
2 tablespoons roughly chopped fresh parsley, for garnish (I used cilantro for this dish because it’s what we had on hand and we hoped it would have a slight cooling effect when coupled with such a spicy noodle )
1 lemon, juiced
2 Tbsp grated Parmesan

Cook the pasta in a large pot of boiling salted water, until al dente. Drain well. (My pasta cooked in boiling water for 6 minutes.)

Season chicken with salt and pepper. Heat a large grill pan over medium high and add chicken. Sauté until cooked through. Remove to plate.

Add the garlic and red pepper flakes to a saute pan with 1 tablespoon of olive oil and sauté until fragrant. Add the cooked pasta and turn heat off. Mix all together.

Remove pasta to a large bowl. Add chicken to the warm pasta and season with salt and pepper. Sprinkle in chopped parsley. Add the lemon juice and mix. Before serving top with Parmesan.

Wednesday, May 12, 2010

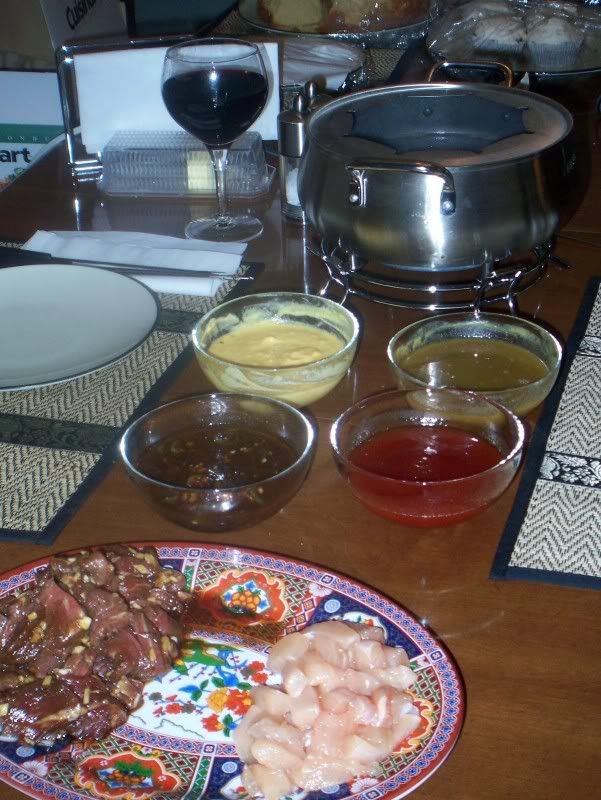
Fondue Night!

Typically my husband and I try to make meals that come together quickly because we are always starving by the time dinner rolls around on weeknights. The weekends, however, are a different story. I love taking an afternoon and putting together a nice meal that we wouldn’t have time to make and eat on a work night. We make these our date nights - A nice dinner, a bottle of wine and a movie from our Netflix queue. Even with the extra time on weekends, there are occasions that I like dinner preparation to be easy, but still special enough for our date night. I have found the perfect solution: Fondue.

For me, ‘fondue’ used to evoke images of VW buses and slug bugs, bell bottoms, shag carpets and lava lamps. I thought it was a novelty of the 70’s that had no real place on more contemporary tables. While most of these things are now distant memories of the past (well, minus the lava lamp, our guest room has my pink one as a night light…), fondue is fortunately making a modern comeback – just look at the success of The Melting Pot . After my first trip there for dinner, I now understand why fondue is making a return.

We are a part of a fast-paced culture where time is money, and as a result, we are becoming increasingly more focused on convenience foods and and less on the importance of sitting down as a family for a meal. Fondue transforms dinner into the social event I think it deserves to be, instead of just sitting at the table just long enough to stuff your face full of whatever is in front of you and then continuing on with life. I now associate ‘fondue’ with intimacy, family and relaxation because, while the food is important, the meal is more about slowing down and enjoying your company. If you really want to have fun with it, there are also cute little fondue traditions. One tradition says that a woman who drops food in the pot has to kiss the person next to her (sometimes all the men at the table). And since I am not a big fan of that one, I like the other tradition which dictates that the person who loses food in the pot buys a round of drinks or the next pot of fondue. That's more my speed.

As much as I love The Melting Pot, I still have a hard time justifying the cost of their meals. First, you are going there and paying a premium to cook your own food. Second, for about the cost of a two person dinner, you could easily invest in a little fondue pot and make your own in the comfort of your home for a fraction of the price. Let’s do a little comparison, shall we?

From the menu of my local Melting Pot, the least expensive entrée selection is 16 dollars a person. 32 dollars doesn’t sound too bad for diner, but don’t forget drinks, tax and tip! So for us, our overall dinner cost would be about 40 dollars. That’s being optimistic, because we would each almost certainly have a seven-dollar glass of wine as well. If you were to look at Bed Bath and Beyond, you would see that they have a good selection of at-home fondue pots, even some under 60 dollars. And you know you have some of those 20% off coupons sitting around that come all the time in the mail. So, for about eight dollars more than just your bare-bones dining experience at the Melting pot, you can have your own fondue, anytime. I particularly love our electric fondue pot because it takes a lot of guesswork out of the process and I can switch from broth to chocolate because it has a temperature dial.

Finally, the last big benefit of at-home-fondue is that you have the liberty customize your meal based on your likes, and aren’t limited to the options on a menu. The word “fondue” comes from the French word ‘fonder’ meaning “to melt” and originally referred to a cheese dish mixed with wine and eaten with bread. It has progressed to oil and broth bases used to cook entrees such as meats, seafood, and veggies, and now has even made its way into the dessert world with chocolate fondue for dipping fruits, marshmallows, pound cake or brownies. There's something for everyone.

Of all the options, I choose a broth-based cooking method versus oil, simply because I feel I can make the broth more flavorful and it’s healthier than essentially deep-frying everything. The menu is relatively simple, and easy to put together. Last time I even prepared everything but the veggies the night before. I also love mixing lots of dipping sauces, the last meal included sweet and sour, asian and honey mustard sauces.

I do have to caution that if you’re starving, fondue is not a quick fix. Dinner can take up to two hours. Imagine the look on my poor husband’s face when he told me he was hungry and I pulled out only two forks. He looked devastated. By the end of the night, he had convinced me to use all six forks in the pot: 2 for meat, 2 for potatoes and 2 for mushrooms.

If you do have a fondue pot collecting dust in your closet, I suggest you to give it a try. It's a long recipe, but easy. This is one of our favorite date nights, and I look forward to having friends over to share in my fondue love.

Fondue Broth
1 tbsp Vegetable oil
2 Garlic clove, crushed
1 Onion, finely chopped (I had one large scallion and 1/4 leftover onion which I subbed for this)
8 cups Water
Beef bouillon cubes or concentrate
1 Celery stalk, finely chopped
1 Tomato, finely chopped
1/2 tsp Freshly ground pepper
1/2 tsp Salt
1 Bay leaf
1 cup Red wine

1. In a large pot, warm the oil and cook the garlic and onion until soft.
2. Add the water, bring to a boil and add enough beef bouillon cubes for 2 L (8 cups) of broth.
3. Lower the heat and add the vegetables, spices and wine.
4. Cook on low heat for about 3 hours. Add more water as needed.
5. Filter the broth and refrigerate.
6. Prior to serving, remove the fat that has hardened on the surface.
7. Warm up the broth on the stove top.
8. Pour into your fondue pot and adjust the heat.

What to dip in your broth?
On average, you plan to have 1/3 lb of meat per person. I usually have several veggies on hand as well. Here is a standard list of options, but feel free to experiment!

Marinated Beef or pork tenderloin (see marinade recipe below)
Chicken Breast
Loin of Lamb
Regular sirloin
Button or Portabello Mushrooms cut into bite-sized pieces
Par-cooked Potatoes
Sausage
Shrimp
Lobster

Dipping Sauces

Honey Mustard Dip
1 cup Honey
1/2 cup Dijon mustard
Salt and pepper

Mix the ingredients and let chill for a day if possible.
Add salt and pepper to taste.
Serve at room temperature.

Sweet and Sour Sauce
1/2 cup ketchup
1/2 cup white vinegar
1/2 cup sugar
Combine all ingredients and heat until the sugar has dissolved. Serve warm or at room temperature. This sauce may be prepared a few days in advance and warmed before serving.

Asian Dipping Sauce
4 Tbsp Light Soy Sauce
3 Tbsp Lemon Juice
3 Green Chilis
3 Cloves Garlic, minced
2 tsp Sesame Oil
1 Tbsp Cornstarch
1 tsp Water, cold

Combine soy sauce, lemon juice, chilis, garlic and sesame oil in saucepan over low heat. In small bowl, mix cornstarch and cold water until thoroughly blended. Add cornstarch mixture to saucepan and bring to a boil until thickened. Serve warm or at room temperature.

Beef marinade
3 Tbsp Soy Sauce
2 tsp Minced Ginger
1 Tbsp Vegetable Oil
1 Tbsp Honey
1 Tbsp Water
2 Cloves garlic, minced
1/2 lb beef tenderloin, sliced thin or cut into bite-sized chunks.


Chocolate Fondue
Ingredients
12 oz. of semisweet chocolate chips (dark or milk chocolate may be substituted)
1/3 c. heavy cream
1/3 c. milk
2 TBSP liqueur (may be omitted) such as coffee, chocolate, mint or fruit flavored liquors. Rum and brandy also work well.
Combine all of the ingredients in a fondue pot, stirring constantly until the chocolate is melted and smooth. Spear and immerse assorted dipping items.

Dessert Dippers
Pineapple
Strawberries
Bananas
Pound Cake

Saturday, May 1, 2010

Chicken and Veggie Pesto Pasta

It wasn't until a few years ago I really started enjoying pesto. I don't know whether I just never gave it a chance when I was younger or if I was traumatized by a bad batch but, either way, I was missing out. I would never order pesto on any menu, and I'd avoid sandwiches with that as a condiment just because of some unknown and unfounded aversion. I don't even know how I got into eating it again, but I am so glad that I finally opened my mind (and my mouth) to pesto.

One of the most unlikely places we had great pesto was on our honeymoon in St. Lucia. They had an incredible buffet and one of their options was a "made to order" pasta station. Pick a pasta and a sauce, and they'll whip it out for you. My husband had a craving for pesto, so he ordered and watched them work. They cooked the pasta, added the meat and then did something I'd never seen before - they added the pesto to the saute pan and cooked it all together prior to serving. We sat down to our meals and it was only then we realized that cooking the pesto with everything else was genius. Cooking the sauce at the end mellows out the raw garlic flavor and ensures the parmesan melts, homogenizing all the flavors into one beautiful dish. This step is especially good for us because even though we adore garlic, the bite raw garlic possesses can still be overwhelming.

Once we got back from the honeymoon, it didn't take long for me to decide I wanted to try making my own pesto. Without a food processor, my only two options were using a blender or doing it by hand. I learned the hard way that the blender was not a good way for me to make pesto. The blade spun and spun, but the basil leaves would never drop low enough in the blender to chop. I always had to use too much olive oil and would end up with a broken sauce instead of a nice emulsion. I also learned that toasting the pine nuts in a small skillet versus trying to toast them in the oven was definitely the way to go. I had much more control over the pine nuts coloring evenly and the process went so much faster than it had when I tried the oven method.

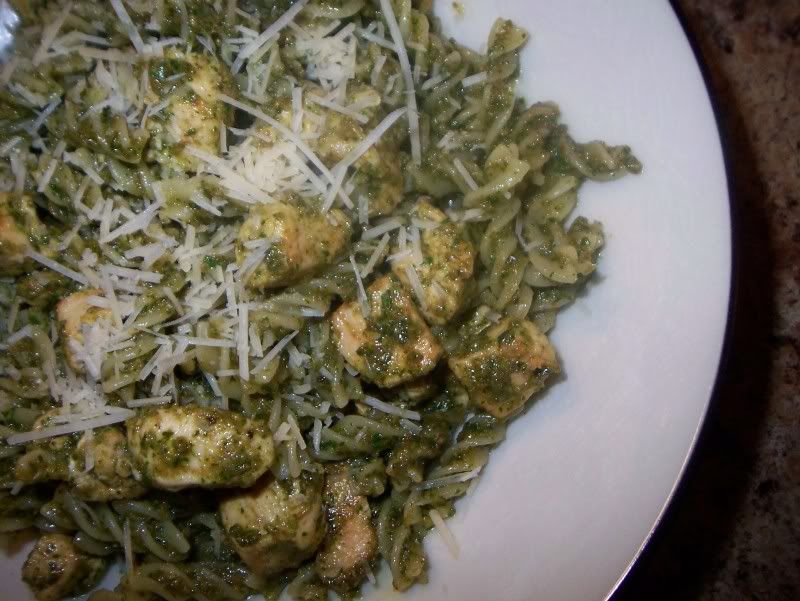
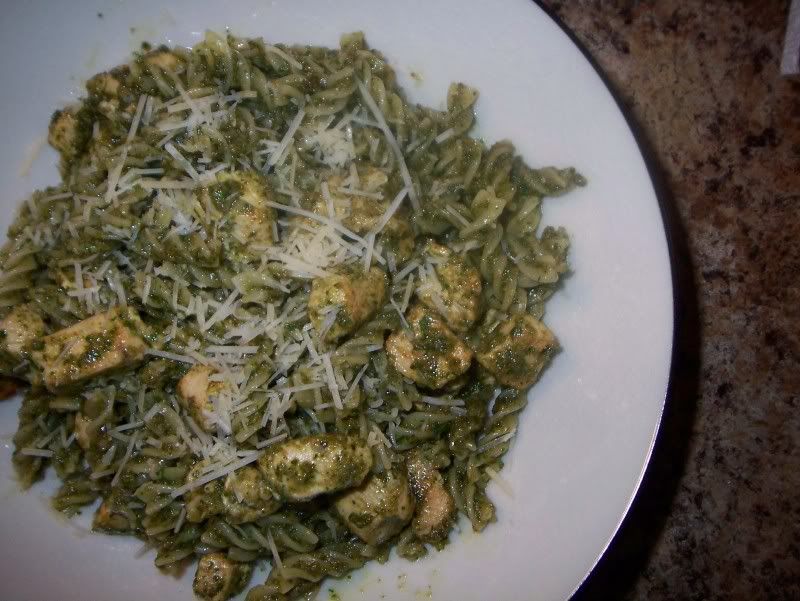
You may notice that even though the recipe calls for lots of veggies, they are strangely absent from the posted pictures. That was my fault. The last time I made the recipe, I did have all the veggies in it, but this time we simply hadn't gone to the store to pick them up, therefore it turned into simply a chicken pesto dish. The beauty of pesto is in it's versatility. I know several people who are allergic to nuts, and simply leave them out, while others don't have the love of garlic that my family has. Simple enough, just dial back the amount of garlic. And best of all - it's easy. Few dishes come together in such a short period of time with such big flavors.


Fresh Chicken and Veggie Pesto Pasta
Serves 2
1 boneless skinless chicken breasts, cut into bite size pieces
1/2 small zucchini
1/2 green pepper
1 tomato
4 oz. whole wheat pasta
For the pesto:
1 cups fresh basil
3 Tbsp toasted pine nuts
4 cloves garlic
2 Tbsp Parmesan cheese, grated or shredded
salt and pepper, to taste
1/3 c cup olive oil

Toast pine nuts in a saute pan over low heat until aromatic and browned. Set aside.
Put basil in food processor and pulse until chopped. Add pine nuts, parmesan, garlic, salt and pepper to food processor, pulsing until pine nuts are chopped and everything is well combined. Slowly drizzle the oil in while the processor is on. (You can decide if you want the full amount of oil in yours. The consistency of pesto is a personal preference, I prefer more of a paste thickness so I always add less oil than the recipe calls for.) For a thinner sauce, you can add more olive oil or a little water.
Cook pasta in salted boiling water. While the pasta cooks, saute the chicken in a pan with 1 T. olive oil until browned and done, about 5-8 minutes, depending on the size of the pieces. Remove the chicken from the pan and add the cut up zucchini, squash and pepper. Saute until crisp tender, about 5 minutes.
Drain pasta. In a large pot over low heat, combine the pasta, chicken, sauteed veggies and pesto. Cook for about 5 minutes while stir together until well combined. Add a bit of water if you pesto seems too. Add cut up tomato, stir to combine, plate and serve. Garnish with parmesan, if desired.

Related Posts Plugin for WordPress, Blogger...