Showing posts with label pasta. Show all posts

Tuesday, June 7, 2011

Summer Orzo Salad

Summer school has been such a refreshing experience. Not easy, though. I'm taking 11 credits this summer, aka 3 classes. One is a 4-week intense class, and the other two are 8-week classes. I'm doing well (thankfully), but that means there is a lot of classwork (lecture and online stuff), lots of homework and LOTS of studying. It's been a long time since I've had to study. Right now it's about rough endoplasmic reticulum, eukaryotes and meiosis/mitosis.

And yesterday (pardon if it's tmi) but we had an explosively sick puppy yesterday. I had my biology class, and came home after about an hour of studying so I could get lunch and let the puppy out (I had a bio midterm this morning). I was sitting down upstairs, and all of a sudden I hear our puppy getting sick on the chair upstairs. Then on the floor, and the rug. I quick rushed him outside, but of course he was done. I put him in his crate to keep him from getting too worked up, and then had the glorious job of cleaning all of the mess up. (I'm pretty sure the chair is beyond salvage. Darn.) I had to leave again for another class in the afternoon, the whole time feeling so sorry that I had to leave a sick puppy behind. Thankfully he was ok in the two hours I was gone. We kept him off food for the last 24 hours, and tonight just reintroduced him to a small portion of his food. So far, so good. And I think I did well on my test (thank goodness I studied the past few days as well and didn't save it until the last minute!) So, if you have any spare vibes for the puppy, we could sure use them!

So if you have happened to notice slight downward trend of posting, that's why. (And also tuition/books really tends to cut into the 'baking for fun' budget!) I haven't stopped baking or cooking, don't get me wrong, but most of the time when I would be posting, I am studying or doing homework. These classes go so fast that it's near-impossible to catch back up after getting behind. My bio class ends in two weeks, so hopefully I'll have a little bit more free time with only two classes to manage!

I also now have a part time job in retail to start bringing in some extra bucks, so, while that has been fun, it's also one more thing to consider! Whew!

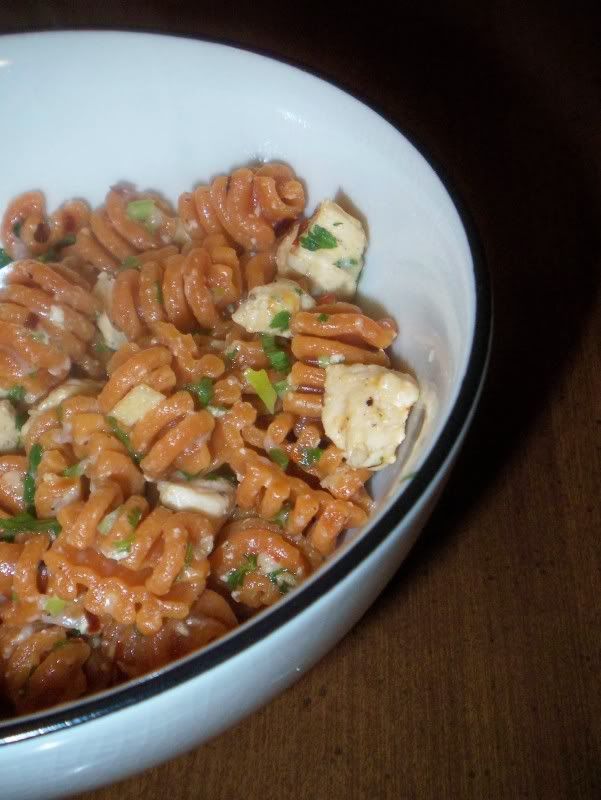
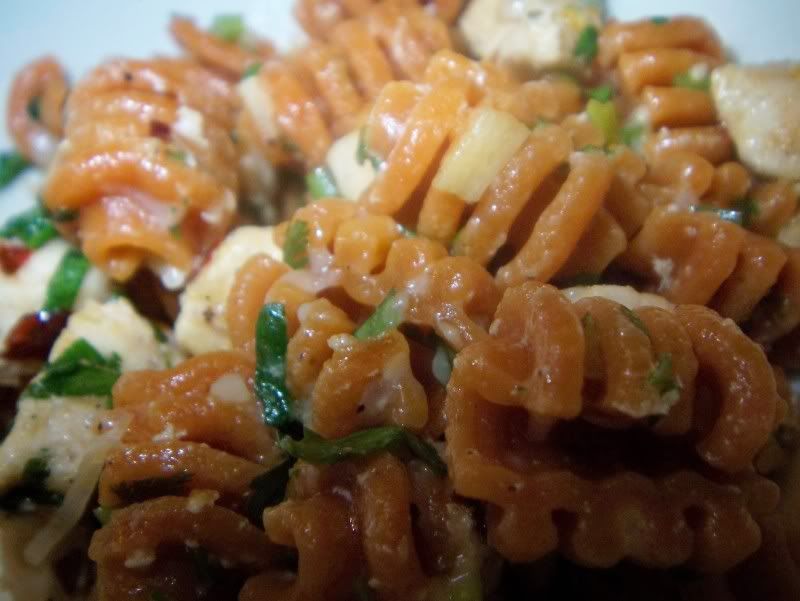
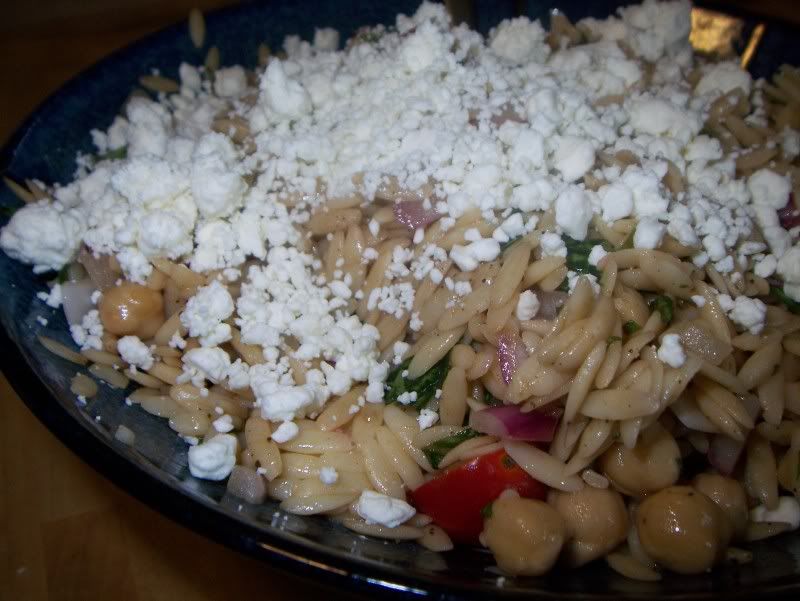
Anyway, there are days I don't really feel like making anything too complicated - I think you can see why now. This orzo salad is delicious and cool, perfect for these days where it is still 95 degrees at 7:30 pm. Like tonight. Craziness. If you notice, I went a little crazy with the feta - that's how much I love cheese. You don't have to put that much on!

Long gone are the days of heavy, mayonnaise-laden pasta salad made with elbow noodles, sitting on the picnic table under the sweltering sun. It seems that now, pasta salads are more and more taking advantage of the abundance of fresh and healthy ingredients available in the summer with only the lightest of oil and balsamic dressings serving only to enhance the natural flavors. This orzo salad has wonderfully fresh and light flavors, the basil adds a bright punch of flavor and the mint plays wonderfully off the sweetness of the tomatoes and the acidity of the balsamic. Even the textures in the salad were interesting. The red onion provided a slight crunch, the garbanzo beans were firm yet buttery little nuggets contrasting the softness of the tomatoes and orzo. I kept the salt at a minimum in the salad because the feta itself has a decent saltiness to it.

Summer Orzo Salad

Salad
4 cups vegetable broth
1 1/2 cups orzo
1 (15-ounce) can garbanzo beans, drained and rinsed
1 1/2 cups red and yellow teardrop tomatoes or grape tomatoes, halved
3/4 cup finely chopped red onion
1/4 cup chopped fresh basil leaves
1/4 cup chopped fresh mint leaves
salt and freshly ground black pepper
a few tbsp crumbled feta
Dressing
2 Tbsp red wine vinegar
2 Tbsp fresh lemon juice
2 Tbsp olive oil
1 tsp honey
1/2 tsp salt
a few pinches freshly ground black pepper

Directions
Bring the broth to a boil in a medium saucepan. Add the orzo and cook until tender, stirring frequently, about 9 minutes. Drain then transfer to a large bowl and cool completely.

Add the onion, beans, tomato, mint, and basil, toss well, and season with a pinch or two of salt and pepper.

Mix in dressing. Serve with a little feta sprinkled over the top.

Wednesday, March 30, 2011

Sicilian Sausage Soup

Soups are a great way for me to stay warm through the winter without packing on the pounds but, a lot of times, the soups that are the healthiest seem to lack a heartiness that I crave when the thermometer dips below 30 degrees (or 0 degrees, depending on the day). I want something that feels like stick-to-your-ribs comfort food without actually sticking-to-my-ribs (or worse yet, my hips).


This soup is the best of both worlds. The combination of orzo pasta and vegetables, including super-healthy kale, swimming around happily in a light chicken broth, leaves you satisfied without feeling guilty. The touch of light sausage and parmesan cheese really wakes up the flavor of this recipe. If you wanted to make this a vegetarian-friendly meal, all you would have to do is omit the sausage and sub out the chicken broth for veggie broth.


If at all possible, I would let this soup sit for a day after making it, as the flavors really seem to come together best after 24 hours but, if you simply can’t wait (like me, typically), it still tastes wonderful fresh out of the pot!


I always have saltines on hand to dip in the soup, though oyster crackers would be equally as delicious!


Sicilian Sausage Soup
Family Recipe

Ingredients 

1 lb. bulk sausage (we use low-fat)
1 medium yellow onion, chopped
2 cloves garlic, diced
1 green pepper, chopped
3 stalks of celery, chopped
1 tsp. pepper, 1 tsp. basil
1 small can condensed tomato soup
1 16 oz can diced tomatoes with liquid
6-8 c. chicken broth (up to 12 c. is fine) (or use 2, 49 ½ oz can)
up to 1 cup of kale (chopped, cooked, drained)
½ cup grated Parmesan or Romano cheese
1 cup orzo pasta

Directions
Brown sausage in large stock pot. (if making a vegetarian option, use about a tablespoon of olive oil or another oil of your choice instead of the sausage fat).
Add onion, celery and garlic to pan and sauté a until slightly transparent, but it doesn’t have to be cooked all the way through. (The sausage, if low-fat, will not render a lot of fat, but it’ll be enough to give your veggies good flavor)
Add tomato soup, stir in spices, tomatoes, and broth.
Add cooked kale.
Cover and reduce heat and simmer for 1 hr.
Stir in orzo and cook for 45 mins more.
Garnish with cheese to serve.

Enjoy!

PS. - Don't forget to come find me over on Facebook if you like what you see!


Tuesday, November 9, 2010

Garlic and Chive Sea Shell Pasta

If you remember, in an earlier post I made a “Fired Up” Lemon Chicken Pasta with a specialty habanero noodles from a pasta retailer called Pappardelle’s. The day I picked up those noodles, I also opted to purchase a Garlic and Chive Shell Pasta. The cashier told me she has used this in cold pasta salads, which I am sure is delicious, but I wanted to do a warm dinner dish with the noodles. Pappardelle’s is great, not only for their pasta, but also because their website has recipes for nearly any type of noodle or product you can purchase from them. It is fantastic when you’re suffering from a “cooking block” and have no idea what to do with what you’ve bought.

When I saw the recipe for these noodles, I had a bit of a ‘duh , why didn’t I think of that?’ moment, but it was the inspiration I needed to make dinner. I quartered the recipe since I was only cooking for two people, but I will include the recipe as written on their website This sauce would be good with a basic shell pasta as well, but I would probably add some garlic and chive to the sauce to embrace the flavors of the pasta.

Garlic Chive Sea Shells with Sauteed Mushrooms
From Pappardelle's

1 lb. Pappardelle's Garlic Chive Sea Shells
2 tablespoons fresh chopped parsley salt and pepper to taste
1 pound fresh mushrooms sliced evenly
1/2 cup white wine
1/4 cup butter
grated parmesan cheese
1 cup heavy cream
1. Saute mushrooms in melted butter until golden.
2. Stir in wine, parsley, salt and pepper.
3. Cook for 10 minutes on medium heat.
4. Add heavy cream and take off heat.
5. Serve over hot pasta with cheese on the side.
Serves 4 - 6

http://www.pappardellespasta.com
Copyright © 2010 by Pappardelle's Pasta Co.

Saturday, November 6, 2010

Potato Gnocchi

What do you consider the perfect gnocchi? I’ve been to Little Italy in both Baltimore and NYC, and I’ve ordered gnocchi in both places. In Baltimore, the gnocchi was somewhat dense, doughy and sturdy – but in a good way. It also had the what I consider the classic gnocchi ridges. In NYC, they were light as air, pillowy and delicate. They actually looked like little pillows, so I’m guessing they were just cut from a long roll of dough and thrown right into the water to cook.
I obviously don’t know what it’s supposed to taste like or what texture it should have, because I loved both of those plates of gnocchi. I have heard that ‘good’ gnocchi is very difficult to make, and that there is definitely a specific technique needed. I’ve also seen recipes saying things like ‘I don’t know why I never tried to make it before, it’s so easy! It just seems difficult!’
Now I’m confused.
Because I apparently am not very picky when it comes to carbs and I’ve yet to meet a gnocchi I didn’t like, I figured I’d give this potato pasta dish a try.
The process itself doesn’t seem to difficult.
Step 1: Cook potato.
Mash potato.
Add egg and flour to potato and mix.
Shape, cut and plop dough into boiling water until they float.


Easy, right?

Apparently, the devil is in the details. I’ve read so many things about gnocchi before even trying it, my head started spinning. I’ll give you a *short* recap of my inner monologue as I began to break down these four ‘simple’ steps. (PS - If this is too much writing for your eyes to take, you can always just skip to the end to hear about the result.)
Step 1: Cook potato. Boil or bake? Some sites say boiling puts too much water into the potato, yielding a much denser gnocchi. So maybe I’ll bake it to prevent excess water from entering the recipe equation. Other sites say it’s the classic way to cook the potato. So I should boil it like apparently all the Italian grandmothers do. If it works for them, it should work for me. Ok, step 1 = confusion. I ended up boiling my potatoes because it was easier for me than baking them (I had other stuff camping out in the oven)
Step 2: Mash potato. Pretty much everything I have read proclaims the potato ricer is the perfect tool for the job, and is a kitchen necessity if you want perfect gnocchi. Ok, so checking out some places to buy a ricer... Sur La Table (http://www.surlatable.com/p2p/endecaSearch.do?keyword=ricer) has three, the least expensive being 24 dollars. BBB (http://www.bedbathandbeyond.com/search/search.aspx/ricer/?sstr=ricer&dim=1&nty=1&) has one for 19.99, which I guess isn’t terrible, but I am in the same camp as Alton Brown with the concept of ‘Kitchen Unitaskers” – you know, the things in your kitchen that only serve one purpose? He believes the only unitasker in your kitchen should be a fire extinguisher. While I do have a few miscellaneous uni-taskers in the kitchen (love my pizza wheel!), I don’t have a lot of surplus drawer space for a ricer. I figure I’ll make do with a fork and my potato masher. Great. At least until I got to Step 3.
Step 3: Add egg and flour to potato and mix. Whole eggs or just the yolks? Not enough flour and the dough won’t hold together, too much flour and you’ll get a dense gnocchi. Apparently I’m supposed to know by the ‘feel’ of the dough when it’s ready. How do I know what it feels like if I’ve never made it before? Ok, so I’m going to have to go with my gut. Fine. I mixed everything together and started using my hands to mix the dough. That’s when I discovered little pea-sized pieces of unmashed potato in the bowl. While I don’t know what the dough should really feel like, I did know that chunks of potato would make a strange texture in the finished gnocchi. My solution? I found the next best thing to a ricer in my kitchen – my garlic press. Yes. You heard me. I put the entire mixture, essentially two tablespoons at a time, through my garlic press until all the lumps were gone. Italian grandmothers everywhere must be cringing by now.
Step 4: Shape, cut and plop dough into boiling water until they float. Finally! A step I understand! I was able to make little logs with the dough, and then I used my bench scraper to slice off my gnocchi. I decided to just keep them ‘pillow shaped’ because this process has been taking me long enough already – running each of those over the tines of a fork (or better yet, a gnocchi board) would take me until next week.
I also didn’t realize how many gnocchi this recipe would make. I filled 2 1/2 baking sheets with them. I froze some of them to use later, and the others I dumped into boiling water. Once they began to float, I took them out of the pot and dumped them into a bowl lined with sauce. Then just stir to coat the noodles, and serve!

Simple!

End Result

While the process did have my head spinning with all the variations I had read about, my gnocchi somehow managed to come out slightly pillowy, with just a minimal doughy chew. The best part? It was absolutely delicious. I actually really enjoyed making them, and look forward to trying it again, now having my inaugural attempt under my belt. It’s actually a relaxing process for me, even though it takes a while. It also makes a lot. But freezing the raw gnocchi works wonderfully, and you drop the frozen gnocchi into boiling water as your would fresh ones and you have a delicious, easy, homemade dinner.

Though, I may be adding a potato ricer to my list of unitaskers if I decide to try it again...

My husband likes his with your basic tomato sauce.
I like mine with parsley and fresh tomato.

Potato Gnocchi
Paraphrased From ZoomYummy
4 larger (1 kg) Baking Potatoes
1 egg
2 c AP Flour
1 tsp Salt

Place potatoes in a pot filled with water, bring to boil and let cook until the potatoes soften. You can check whether they are cooked by sticking a knife in their centers – if it runs smoothly and there’s no resistance, then it’s done. This process should take about 25-30 minutes.

Strain the potatoes and let them cool – just until they are cool enough to be handled with your hands.(You can speed up this process by placing the cooked potatoes into a pot of cold water for a couple of minutes.)

Peel the potatoes

Using a potato masher/ricer/fork (or in my case, garlic press) mash the potatoes.
Add the flour, egg and salt and combine with a rubber spatula.

Mix by hand until combined. Turn out onto a cutting board or counter top and knead the mixture by hand a couple of times until a compact ball forms. The dough is not going to be extra smooth so don’t worry about that.

Place the dough onto a well floured surface.

Then using a sharp knife, cut the dough into eight even pieces.

Form a ball from each piece and then roll each ball into this long skinny cigar-shaped log.

Cut the log into 3/4"-1? segments - however big you want your gnocchi to be.

Continue, until all of your dough is cut

Pour water into a large pot and bring to boil

Drop about 20 pieces of gnocchi into the boiling water, let cook and stir them gently once (so that they don’t get stuck to the bottom of the pot).

When the gnocchi float to the top, let them cook for additional 20 seconds

Remove them from the water and put into your favorite sauce.

Tuesday, November 2, 2010

Spaghetti Pie

On the night of another one of our Pasta Tuesdays, I decided I wanted to try something different. I’d see spaghetti pie done before on cooking shows, and knew it was just typically leftover spaghetti, eggs, and whatever fillings you want in it. I figured it didn’t look that difficult when I saw Giada, or Rachel, or Paula (or whoever it was) make it – so I’d just wing it and try to finally make my own spaghetti pie. (It looks like it was Giada after all - in 2007 nonetheless.)

For something that was a total experiment based off of a vague memory, this turned out really well. I am pleased with the fact I essentially threw something together with whatever was in my fridge and the result was what I was expecting, or at least was hoping for. It definitely adds a little flair to our typical pasta nights.
Spaghetti Pie

4 oz spaghetti, slightly undercooked
1 egg
Italian seasoning
Mozzarella
Parmesan
4 oz Ground Turkey
1 Tbsp Butter
2 tsp chopped adobe peppers in chipotle sauce
6 button mushrooms, sliced
Salt and pepper, to taste

Mix everything but spaghetti together. Add in spaghetti and put in a lightly buttered 9" glass pie dish.
Bake at 350 for 20 minutes, let sit for 5. Slice and serve.

Friday, May 21, 2010

”Fired Up” Lemon Pasta with Chicken


A couple years back, when my parents were visiting me in Chicago, we decided to go to the farmers market near my apartment. Here we found a place called Pappardelle’s that sells nothing but pasta. There must have been thirty different kinds of flavor-infused pasta, from dark chocolate linguine to sweet potato orzo. I don’t even remember what we bought (I think it was a linguine that had sun-dried tomato in it), but I do remember it being such a wonderful change of pace from a traditional pasta. I also remember it was somewhat pricey for a pound of pasta compared to what you can get in the grocery store but, on the rare occasion I wouldd buy it, it was worth the splurge.

Since moving, I haven’t been able to go back to that Farmer’s Market, so my pasta has only been coming from the grocery store shelves. Last week, however, I ventured into the new
French Market at the Metra station to discover that Pappardelle’s has a distributor there. After perusing their choices, and trying a sample or two, I finally decided on a Wild Habanero Radiatori and a Chive shell.

The Habanero was too unique to pass up. Since the husband and I both enjoy spicy foods, I doubted it would overwhelm us. I did notice that even the dry pasta had a noticeable heat to it, so I was really looking forward to using it in a dish.


The recipe we finally decided on is supposed to highlight the pasta – complimenting it without overwhelming it. It’s actually a variation on a pasta we make many nights for our “Pasta Tuesdays.” Because Wild Habanero Radiatori is most likely not something in your pantry, I’m giving the recipe for the typical dish we make, and just highlight my adaptations in red.

And for the record, this pasta was hot! Not tongue-blistering, but it definitely smacks you in the face when you take a first bite. And, the more you eat, the more the heat accumulates. Unfortunately, we can’t afford to have this pasta all the time, but every once in a while I might bring home a meal’s worth to give us a little more variety. I’m looking forward to using the shells I purchased in the near future!

”Fired Up” Lemon Pasta with Chicken
Adapted from The Neelys Easy Lemon Pasta with Chicken from FoodNetwork.com
http://www.foodnetwork.com/recipes/down-home-with-the-neelys/easy-lemon-pasta-with-chicken-recipe/index.html

4 oz pasta (we used Pappardelle’s Wild Habanero Radiatori)
1 large chicken breast, chopped (or ¼ lb shrimp)
Salt and freshly ground black pepper
3 cloves garlic, sliced
2 teaspoon red pepper flakes
1 tablespoon olive oil
2 tablespoons roughly chopped fresh parsley, for garnish (I used cilantro for this dish because it’s what we had on hand and we hoped it would have a slight cooling effect when coupled with such a spicy noodle )
1 lemon, juiced
2 Tbsp grated Parmesan

Cook the pasta in a large pot of boiling salted water, until al dente. Drain well. (My pasta cooked in boiling water for 6 minutes.)

Season chicken with salt and pepper. Heat a large grill pan over medium high and add chicken. Sauté until cooked through. Remove to plate.

Add the garlic and red pepper flakes to a saute pan with 1 tablespoon of olive oil and sauté until fragrant. Add the cooked pasta and turn heat off. Mix all together.

Remove pasta to a large bowl. Add chicken to the warm pasta and season with salt and pepper. Sprinkle in chopped parsley. Add the lemon juice and mix. Before serving top with Parmesan.

Saturday, May 8, 2010

Kickin' Mac N Cheese

Our dinner planning always starts the same way:
“What do you want for dinner?”
“I don’t know. What are you in the mood for?”
“I don’t care. What do you want? I asked you first.”


This back-and-forth banter continues for a bit, until we realize that we’re getting no closer to figuring out what to eat. We then realized that we actually default to a couple of some dinner-decision-making-tools that work for us.

Tool 1: Choose a protein. Choose a side. Decide from there how you want to prepare them. I’ve found it is so much easier for me to narrow down choices when I have specifics to focus on. Example: Protein = Beef and Side = Potatoes. This would give us a few options right off the bat – filet mignon and gilled potatoes, thinly sliced flank steak with hasselbeck potatoes, philly cheesesteaks and smashed potatoes or even jazzed up hamburgers with baked potato fries. And if none of those sound good, I’ll check any of a number of food blogs or recipe websites for new inspiration.
Tool 2: The elimination process. Decide what you don’t want to eat and figure out what’s left. Then, seeTool 1.

My husband was recently on a basketball team for his office which had games on Tuesdays. This meant we needed something quick and light so that he wouldn’t get halfway down the court then double over with indigestion. This came to mean Tuesday nights were almost always pasta nights. After the end of his league, we enjoyed this routine so much that we’ve since adopted Tool 3: “Pasta Tuesday.” By initiating “Pasta Tuesday” we’ve been able to remove more guesswork from menu planning. It’s a specific enough choice that it limits the options, but it’s broad enough that any flavors we crave can be incorporated into the meal.

This Mac n cheese will be a great addition to our ‘Pasta Tuesday” rotation. I’ve tried several recipes, and this is by far the tastiest that has come out of my kitchen. I found the original recipe on epicurious.com, and with a 3.5 fork rating and 130-some reviews, I figured I’d give it a try. And, I think the fact it includes one of my new favorite things:

tipped the scales in favor of this recipe. I only started cooking with chipotles maybe about a month ago, and I’m kicking myself that I didn’t start sooner. The smoky heat they add to pretty much everything is fantastic.

This recipe was a “make and bake” recipe, where you combined the cooked components into a casserole dish and let it finish up in the oven. I have really wanted to make a stove-top cheese sauce, so I adjusted the recipe even more to accommodate this. I will admit, though, I thought I had made a huge mistake by trying to make a stove-top sauce without ever having done it before. Because I also lightened the recipe up so that instead of whole milk and heavy cream I used 1% milk, I was terrified that I would curdle my cheese sauce again. Yes, again. Curdled cheese sauce is not pretty. I learned from my mistakes experience that fat is what keeps sauce from curdling, and the less fat you have, the greater chance of curdling. Temperature also plays a big role. 180 degrees F is a key temperature when working with lower-fat products. I never let the heat on my pot get up to “medium.” This is where patience pays off. I started low, but my cheese wasn’t melting entirely, so I’d get oily, cheesy strings attached to my whisk. Gradually I would increase the heat, stir some more, and check again. Eventually I found the magic temperature on my stove that melted all the cheese but didn’t curdle the milk. Also white wine or sherry was supposed to aid in keeping a creamy sauce together, so I popped open my bottle of sherry and dumped some in. What could it hurt? Alcohol makes everything better.

By the time I was finished, the cheese sauce melted nicely and thickened up. Look how beautiful it is.
The pasta then jumps in the pool with the cheese and transferred to a baking dish. If you like it really cheesy and saucy, I’d say skip the baking dish and eat right that second. The ten minutes of baking to toast up the bread crumbs on top also lets some of the cheese absorb, which results in a denser, less saucy mac and cheese.
This meal was delicious, and even the hubby said it was a great improvement over my last attempt which was definitely cheesy, but lacked any discernible flavor or zing. With three chipotles, this one definitely had zing. If you don’t like as much spice, or even any at all, you can reduce or omit completely the chipotles in this recipe. I might recommend a dash of cayenne pepper as a replacement just because I think the heat plays off the richness of the cheese and makes a more well-rounded dish.
My four-cheese mix consisted of extra-sharp cheddar, smoked gouda, Monterey jack and parmesan only because I was trying to use our cheese drawer remnants. Feel free to improvise and experiment with your own mixtures. Another good mix would be 3 oz Cheddar, 2.5 oz havarti, 1.5 oz gouda and 1 oz fontina, swiss or gruyere.


Kickin’ Mac-n-Cheese with Garlic Bread Crumbs
Adapted from Epicurious.com
http://www.epicurious.com/recipes/food/views/Macaroni-and-Cheese-with-Garlic-Bread-Crumbs-Plain-and-Chipotle-102738#ixzz0n9hESbMX
For bread crumbs:
1 1/2 teaspoons unsalted butter
1 1/2 teaspoons olive oil
2 large garlic cloves, finely chopped
1/2 cups bread crumbs
For macaroni:
1 to 1.5 tablespoons chopped chipotle chiles in adobo (I used 3 chilis)
1 Tbsp unsalted butter
1 Tbsp all-purpose flour
3/4 cups 1% milk
1-2 Tbsp sherry (I just opened and dumped it in, so this is just an estimate)
1 tsp dijon mustard
1/4 pound macaroni (4 oz)
1/2 pounds cheese blend of choice, grated (my blend was 3 oz cheddar, 1 oz monterey jack, 2.5 oz gruyere 1.5 oz parmesan)
Pepper to taste

Preparation
Make bread crumbs:
Heat butter and oil in a 10-inch heavy skillet over moderate heat until foam subsides, then cook garlic and bread crumbs, stirring, until crumbs are golden. Transfer to paper towels to drain and season with salt.

Make macaroni:
Preheat oven to 350°F. Chop chipotles.
Melt butter in a medium saucepan over moderate heat, then reduce heat to low add flour and cook, whisking, several minutes. This will not make a ton of roux, so don’t worry if you just have a couple little clumps whisking around the pan. That’s ok. Gradually whisk in milk, mustard and cook on low to med-low, whisking occasionally.
Cook macaroni in a large pot of boiling salted water until just tender (I undercooked mine ever so slightly so that they wouldn’t overcook when in the oven). Drain in a colander and transfer to a large bowl.
Over low heat, mix in ½ cup of cheese into your milk mixture until melted, stirring frequently. Continue adding half cup cheese at a time until all is used and thoroughly blended. Mix in pasta, pepper, and chipotles, if using.
Serve now or spoon into an 8x8 baking dish and sprinkle with bread crumbs. Bake in middle of oven for amount 10 minutes.

Here are the original oven directions from the recipe. I did not follow these so I can’t vouch for them. But it seemed like a lot of reviewers had success with it. This is from the point you finished the white sauce and cooked the pasta:
To the pasta, stir in white sauce, cheese, and salt to taste.
Stir chipotles (if using) into macaroni. Spoon into an 8x8 baking dish and sprinkle with bread crumbs. Bake casserole in middle of oven 15-20 minutes, or until bubbly.
Cook's note: • Macaroni and cheese may be made 2 days ahead, put into casseroles, cooled completely, and chilled, covered. Do not add bread crumbs until ready to bake. (Baking may take longer than 15-20 minutes if reheating from refrigerator.)

Saturday, May 1, 2010

Chicken and Veggie Pesto Pasta

It wasn't until a few years ago I really started enjoying pesto. I don't know whether I just never gave it a chance when I was younger or if I was traumatized by a bad batch but, either way, I was missing out. I would never order pesto on any menu, and I'd avoid sandwiches with that as a condiment just because of some unknown and unfounded aversion. I don't even know how I got into eating it again, but I am so glad that I finally opened my mind (and my mouth) to pesto.

One of the most unlikely places we had great pesto was on our honeymoon in St. Lucia. They had an incredible buffet and one of their options was a "made to order" pasta station. Pick a pasta and a sauce, and they'll whip it out for you. My husband had a craving for pesto, so he ordered and watched them work. They cooked the pasta, added the meat and then did something I'd never seen before - they added the pesto to the saute pan and cooked it all together prior to serving. We sat down to our meals and it was only then we realized that cooking the pesto with everything else was genius. Cooking the sauce at the end mellows out the raw garlic flavor and ensures the parmesan melts, homogenizing all the flavors into one beautiful dish. This step is especially good for us because even though we adore garlic, the bite raw garlic possesses can still be overwhelming.

Once we got back from the honeymoon, it didn't take long for me to decide I wanted to try making my own pesto. Without a food processor, my only two options were using a blender or doing it by hand. I learned the hard way that the blender was not a good way for me to make pesto. The blade spun and spun, but the basil leaves would never drop low enough in the blender to chop. I always had to use too much olive oil and would end up with a broken sauce instead of a nice emulsion. I also learned that toasting the pine nuts in a small skillet versus trying to toast them in the oven was definitely the way to go. I had much more control over the pine nuts coloring evenly and the process went so much faster than it had when I tried the oven method.

You may notice that even though the recipe calls for lots of veggies, they are strangely absent from the posted pictures. That was my fault. The last time I made the recipe, I did have all the veggies in it, but this time we simply hadn't gone to the store to pick them up, therefore it turned into simply a chicken pesto dish. The beauty of pesto is in it's versatility. I know several people who are allergic to nuts, and simply leave them out, while others don't have the love of garlic that my family has. Simple enough, just dial back the amount of garlic. And best of all - it's easy. Few dishes come together in such a short period of time with such big flavors.


Fresh Chicken and Veggie Pesto Pasta
Serves 2
1 boneless skinless chicken breasts, cut into bite size pieces
1/2 small zucchini
1/2 green pepper
1 tomato
4 oz. whole wheat pasta
For the pesto:
1 cups fresh basil
3 Tbsp toasted pine nuts
4 cloves garlic
2 Tbsp Parmesan cheese, grated or shredded
salt and pepper, to taste
1/3 c cup olive oil

Toast pine nuts in a saute pan over low heat until aromatic and browned. Set aside.
Put basil in food processor and pulse until chopped. Add pine nuts, parmesan, garlic, salt and pepper to food processor, pulsing until pine nuts are chopped and everything is well combined. Slowly drizzle the oil in while the processor is on. (You can decide if you want the full amount of oil in yours. The consistency of pesto is a personal preference, I prefer more of a paste thickness so I always add less oil than the recipe calls for.) For a thinner sauce, you can add more olive oil or a little water.
Cook pasta in salted boiling water. While the pasta cooks, saute the chicken in a pan with 1 T. olive oil until browned and done, about 5-8 minutes, depending on the size of the pieces. Remove the chicken from the pan and add the cut up zucchini, squash and pepper. Saute until crisp tender, about 5 minutes.
Drain pasta. In a large pot over low heat, combine the pasta, chicken, sauteed veggies and pesto. Cook for about 5 minutes while stir together until well combined. Add a bit of water if you pesto seems too. Add cut up tomato, stir to combine, plate and serve. Garnish with parmesan, if desired.

Related Posts Plugin for WordPress, Blogger...