Monday, March 21, 2011

40 Clove Chicken

If you like garlic, this is the meal for you. Whoo-doggie.


The only hard part of this dish is having enough patience to peel 40 cloves of garlic (that’s about 3 heads worth). Thankfully, the trick of boiling the cloves for 60 seconds and then draining it makes the task a million times easier than trying to smash each clove and pick out all the paper from the mess. I also think there is a lot more visual impact to the dish when presented with whole cloves of garlic; that way there is no question as to what is in the dish.


If you hate garlic, I might steer away from this dish. But if you only think you don’t like it, I’d suggest giving this recipe a try. A lot of times people do not like garlic because they’ve either had it raw or burnt. I love raw garlic, but it is definitely a pungent taste, one which many people don’t enjoy. And burnt garlic, ick. There is no coming back from that one. But cooking the garlic over low heat for a long period of time is a beautiful thing. Roasted cloves will be brown, but not burnt, and the taste will transform from sharp to sweet as the sugars begin to caramelize. They also get soft – soft enough that you can grab a clove, put it on a piece of toast, and spread it with a knife as you would butter.


There are a lot of strong flavors in this dish, inclusive of the garlic, so I wouldn’t recommend eating this before meeting your blind date for the evening. This would be more of a third-date sort of meal.


Definitely serve this with some crusty bread, the sauce and garlic pieces are just too good to abandon on your plate.

40 Clove Chicken

Adapted From Ina Garten via FoodNetwork.com

Yield: 4 servings (serving size: about 4 ounces chicken, 2 tablespoons sauce, 5 garlic cloves, and 3 bread slices)
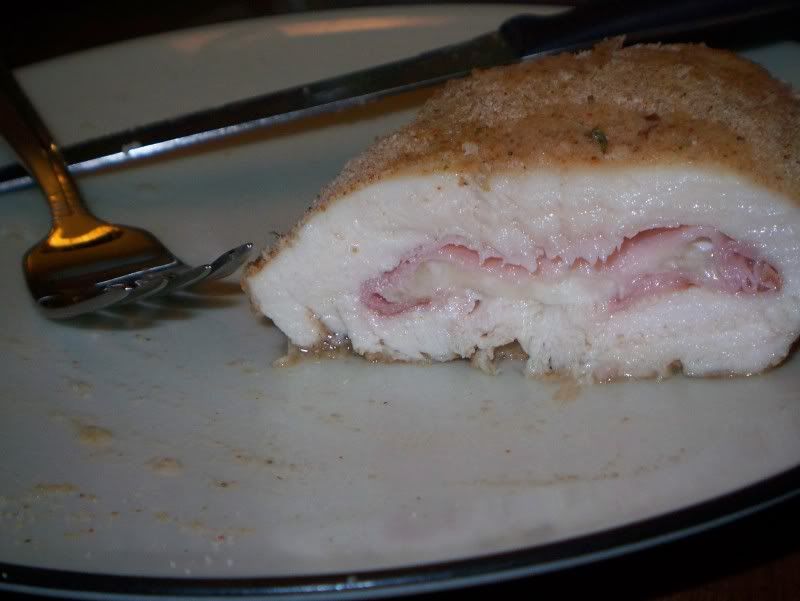
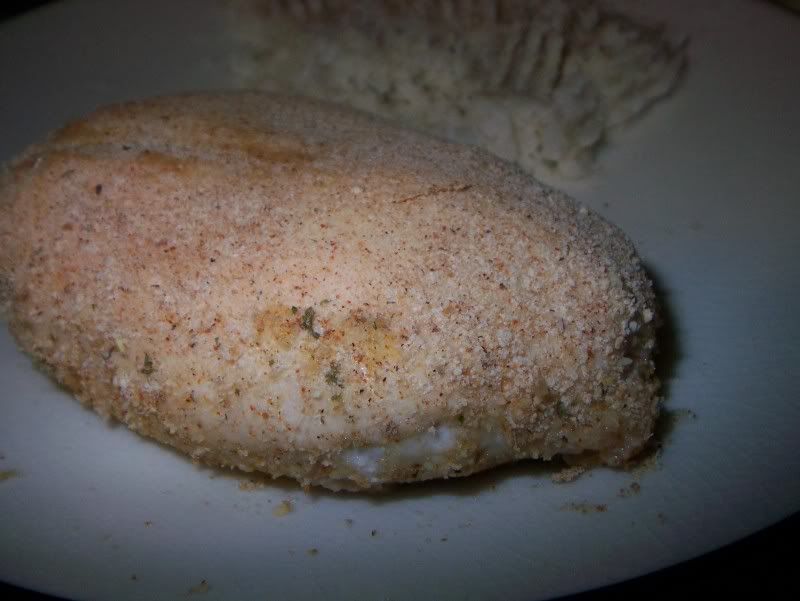
Ingredients 1 lb boneless, skinless Chicken Breasts, pounded thin
½ tablespoon butter
½ tablespoon extra virgin olive oil
½ Tbsp (1/2 teaspoon) salt
½ Tbsp Thyme
½ Tbsp Sage
½ Tbsp Rosemary
1 Bay Leaf
1 Tbsp Flour
1 ½ Tbsp Cognac/Brandy
1/2 teaspoon freshly ground black pepper
20 garlic cloves, peeled
(1 1/4 cups fat-free, less-sodium chicken broth)
¾ cup dry white wine
12 (1/4-inch-thick) slices diagonally cut French bread baguette
Chopped fresh flat-leaf parsley (optional)
Directions Boil garlic cloves for 60 seconds. Drain and Peel.
Remove and discard giblets and neck from chickens. Rinse chickens with cold water; pat dry. Trim excess fat; remove skin. Cut each chicken into 8 pieces.
Combine butter and oil in a 12-inch nonstick skillet over medium-high heat. Sprinkle salt and pepper evenly over chicken. Add half of chicken pieces to pan; cook 2 minutes on each side or until golden. Remove chicken from pan; keep warm. Repeat procedure with remaining chicken.
Reduce heat to medium. Add garlic; sautee garlic for 5-10 minutes until evenly browned. (cook 1 minute or until garlic begins to brown, stirring frequently.) (Arrange chicken on top of garlic.) Add wine and 1 Tbsp cognac/brandy, bring to a simmer and scrape bottom of pan (Add broth and wine;) Return chicken to pan, sprinkle with thyme, sage, rosemary and add 1 bay leaf, cover and simmer (cook) 15 (25) minutes or until chicken is done.
Remove chicken from pan; keep warm.
In a small bowl, whisk together flour and 1/4 cup sauce from pan then whisk it back into pan. Add remaining cognac. Cook 3 minutes and salt and pepper to taste. (Increase heat to medium-high; cook 10 minutes or until liquid is reduced to about 1 cup.) Serve sauce and garlic with chicken and bread. Garnish with chopped parsley, if desired.

Friday, March 18, 2011

Chicken Cordon Bleu

This is a more traditional Chicken Cordon Bleu recipe, as compared to my Pizza Chicken Roll-ups from before. The paprika and cayenne are totally optional, but we both like a little spice with our chicken.


While I can’t vouch for this meal’s authenticity in terms of a real cordon bleu…I know the components of the recipe, the rest was just eyeballed and estimated. In the end, I have a meal that looks like it should and tastes pretty good, and that’s what matters to me, even if it’s not 100% authentic. The chicken is moist and tender, and the saltiness of the ham and cheese really adds a depth of flavor missing from a basic baked chicken breast. The best part for me is the bread crumbs on top - slightly crunchy and totally delicious! I love that from the outside, it looks like nothing too special, but once you cut into it, the cheese starts to ooze out and the ham peeks out. Always nice to keep your dinner guests guessing!


Chicken Cordon Bleu

Ingredients
2 Chicken Breasts, pounded out to about 1/4" thick
1/2 c flour
1 tsp cayenne pepper, optional
1 tsp paprika, optional
1 egg, slighty beaten
1/2 c breadcrumbs, Italian seasoned (or add about 2 tsp each of dried basil and oregano)
4 thin slices of deli ham
2-3 slices of provolone or swiss cheese
Salt
Pepper

Directions
Pat chicken dry, and salt and pepper both sides.

Lay 1-2 slices of cheese in each chicken breast, and then add 2 slices of deli ham.

Roll chicken over the fillings and use toothpicks to keep it rolled shut.

In one bowl, mix the flour, cayenne pepper, and paprika. Have the egg in another bowl. In a third bowl, pour in your breadcrumbs.

Dredge each chicken roll in flour, tapping lightly to remove excess. Dip in egg mixture and then coat with breadcrumbs.

Put in a rimmed baking sheet (in case the cheese escapes) and bake at 350 for 30-35 minutes or until cooked through. Time will vary depending on the size and thickness of your chicken breast, so your best bet is to stab it with a knife and look at the chicken and juices to make sure it’s finished. Just go in from the bottom if you want it to still be pretty!)

Monday, March 14, 2011

Happy Pi Day! 3.14 = PI.E!

And, Happy 2nd Anniversary to my wonderful hubby! Yes, we got married on Pi day two years ago today, and had Pi-shaped sugar cookie favors. Last year we decorated our year-old piece of wedding cake with the pi symbol and ate a couple fresh-made pi sugar cookies.

This year we are celebrating with some apple pi(e)! The hubby's favorite dessert of all-time is pie, so it's only fitting that I made some on our anniversary! (If I would have thought about it, I would have made Pizza "Pi" for dinner, too!)


This is a 6 1/2 inch pie using my new fiestaware pie plate! I mostly eyeballed this recipe, so you'll have to adjust it to taste, but for me, this pie used 3 granny smith apples, about a 1 tbsp of cinnamon, 1 tsp of nutmeg, 1 tsp of lemon zest, 2 tsp lemon juice and a pie crust of your choice. I baked it at 350 for about 45 minutes, covering the edges about halfway through so they wouldn't over-brown.

Happy Pi Day!!!

(And happy anniversary to my dearest hubby!)


Sunday, March 13, 2011

Enchiladas Especiales Tacuba Style

Top Chef is one of those shows that the hubby and I can happily admit that we watch together. While Project Runway and Say Yes to the Dress are my domain, NBA and college hoops are his. Top Chef is just one of those shows that we can both look forward to sitting down and enjoying.

When Top Chef Masters was on for its inaugural season, it was my first introduction to Rick Bayless. Living in Chicago, I had heard of Frontera Grill, Topolobampo and Xoco, but I had never been able to put a face to the name. Watching him work in the kitchen was amazing, under pressure, he effortlessly put together a 30-ingredient mole sauce like it was nothing (that the judges raved about, later).

Though I haven’t been able to visit his restaurants (I would love to go to Frontera, but the waits there are insane!), I found that his website has recipes for the food he prepares on his public television show called Mexico: One Plate at a Time. These enchiladas looked both easy and satisfying.

They did not disappoint. The sauce takes a little bit of time to prepare, but for the relatively few ingredients this meal contains, the flavor is through the roof. The spinach is not something I would have expected in an enchilada sauce, but it just works, and the poblanos give ths sauce the most subtle heat that is so wonderful. Next time, I’ll probably add a touch more garlic, since we can never seem to get enough, but other than that, this meal was fantastic, and definitely one that we’ll be having over and over again at our house.

Enchiladas Especiales Tacuba Style
Serves 4 to 6
This recipe is from Season 7 Mexico - One Plate at a Time

Ingredients
2 fresh poblano chiles
1 cup (lightly packed) roughly chopped spinach leaves
2 cups milk
2 cups chicken broth
6 tablespoons (3 ounces) butter—or you can use vegetable oil
3 garlic cloves, peeled and finely chopped
1/2 cup flour
Salt
3 cups coarsely shredded cooked chicken (I usually use a rotisserie chicken or leftover grilled chicken)
12 corn tortillas
A little vegetable oil for brushing or spraying
About 1 cup Mexican melting cheese (Chihuahua, quesadilla, asadero or the like) or Monterey Jack, brick or mild cheddar
A little chopped cilantro for garnish

Directions

Make the sauce.  Roast the poblanos directly over a gas flame or on a baking sheet 4 inches below a very hot broiler, turning regularly, until the skins have blistered and blackened on all side, about 5 minutes for an open flame, about 10 minutes under the broiler. Place in a bowl, cover with a kitchen towel and, when handleable, rub off the blackened skin, tear open and pull out the seed pod and stem. Quickly rinse to remove any stray seeds or bits of skin. Roughly chop and put in a blender jar.  Add the spinach.

In a medium (3-quart) saucepan, combine the milk and broth, set over medium-low heat to warm.
In a large (4-quart) saucepan, melt the butter (or heat the oil) over medium.  Add the garlic and cook for a minute to release its aroma, then add the flour and stir the mixture for a minute.  Raise the heat to medium-high.  Pour in the warm broth mixture and whisk constantly until the sauce boils.  Reduce the heat to medium and simmer for 5 minutes.  Remove from the heat.

Pour half the hot sauce into the blender with the chiles and spinach.  Cover loosely (I remove the center part of the lid, secure the lid, then drape a cloth over the whole thing) and blend until smooth.  Pour the mixture back into the saucepan with the remaining sauce.  Taste and season with salt, usually about 2 teaspoons. 
Finish the enchiladas.  Heat the oven to 350 degrees.  Smear about 1/4 cup of the sauce over the bottom of each of four to six 9-inch individual ovenproof baking/serving dishes or smear about 1 cup of the sauce over the bottom of a 13x9-inch baking dish.  Stir 1 cup of the sauce into the chicken.

Lay half of the tortillas out on a baking sheet and lightly brush or spray both sides of the tortillas with oil; top each tortilla with another one and brush or spray those with oil.  Bake just to warm through and soften, about 3 minutes.  Stack the tortillas and cover with a towel to keep warm. 

Working quickly so that the tortillas stay hot and pliable, roll a portion of the chicken up in each tortilla, then line them all up in the baking dish(es).  Douse evenly with the remaining sauce and sprinkle with the cheese.  Bake until the enchiladas are hot through (the cheese will have begun to brown), about 20 minutes.  Garnish with the cilantro and serve without hesitation.

Thursday, March 10, 2011

For the Dogs

With all the baking and cooking that goes on in the kitchen, it didn’t take Cody long to figure out that if he sits patiently next to me as I prepare food, he will most likely get a scrap or two. While we are still working on some manners, he is learning that, in the kitchen at least, he will be rewarded (albeit unintentionally) for sitting quietly while the hubby or I work.


I’ve seen many recipes for making dog treats at home, and was really curious how Cody would like them. Then I realized – what’s not to like? Cheese, beef flavor...all his favorite things in one bite.


I used my mini cookie cutters I got this year for Christmas and I have to say these are some of the cutest doggie treats I’ve seen! Cody gets to eat elephants, pigs, frogs and crabs. This recipe makes a lot of cookies; I had enough for Cody for a good long time, as well as enough to give away to two friends who have puppies of their own.


For the record, I tried one of them too and, while they aren’t terrible, I think I’ll let Cody keep these for himself!


Dog Treats

Ingredients
1 cup rolled oats
1/3 cup margarine
1 cup boiling water
3/4 cup cornmeal
2 teaspoons white sugar
2 teaspoons beef bouillon granules
1/2 cup milk
1 cup shredded Cheddar cheese
1 egg, beaten
3 cups whole wheat flour

Directions
Preheat oven to 325 degrees F (165 degrees C). In a large bowl, combine rolled oats, margarine, and boiling water. Let stand 10 minutes. Grease cookie sheets.

Thoroughly stir in cornmeal, sugar, bouillon, milk, Cheddar cheese, and egg. Mix in flour, 1 cup at a time, until a stiff dough has formed.

Knead dough on a lightly floured surface (I just kneaded with the hook attachment in my KitchenAid), mixing in additional flour as necessary until dough is smooth and no longer sticky. Roll or pat out dough to 1/2″ thickness. Cut with cookie cutter and place 1 inch apart onto the prepared cookie sheets.

Bake 35 to 45 minutes in the preheated oven, until golden brown. Cool before serving. Store in a loosely covered container.

Monday, March 7, 2011

Chocolate Mint Chip Cookies

I was always curious why mint is associated with St. Patty’s Day. Is it because the color green makes us think of mint? Or did Saint. Patrick just have minty fresh breath all the time?

Whatever the reason, I’m a-ok with it. Anything that is mint-flavored will usually get my attention. So when I saw Andes Crème de Menthe baking chips in the baking aisle at my local grocery store, I had no choice but to throw them in my cart and daydream of all the wonderful things I could do with them.

When you love chocolate, and cookies, and cakes, and practically anything with sugar in it, it is difficult to find a balance between eating healthily and satisfying my sugar cravings. With cookies, I can make the dough for an entire batch, but only bake the ones I want to have around, freezing the other cookie balls to have my own ‘instant cookies’ later. And I’m glad I didn’t bake all of these at once. They are so good, I would have eaten every last one of them.

The chip’s mint flavor really permeates through the cookie and, if I hadn’t known otherwise, I would have thought that the dough itself might have been flavored with mint, it’s that pronounced. If the hubby liked darker cocoa, I would have used my Hershey’s Special Dark cocoa powder, but, since he’s more of a milk chocolate fan, I used the regular unsweetened baking cocoa. The cookies come out of the oven pretty loose, so be sure to let them cool on the baking sheet as instructed; they will fall apart to mush, otherwise. Delicious, minty chocolaty mush, but mush nonetheless. When the cookies set, they will be soft, but not chewy, and the outermost edges will be the slightest bit crisp, without being crunchy.

The best part to me about these cookies is that you can eat the cookie dough! There are no eggs in the batter, so you could easily omit the baking powder and make mint chocolate cookie dough truffles or, do what I did, and just eat it straight from the bowl. Obviously, I opted for straight from the bowl.

Chocolate Mint Chip Cookies
Makes 2 1/2 dozen

Ingredients
1-1/4 cups flour
1 teaspoon baking powder
1/2 teaspoon salt
2/3 cup dutch-process cocoa-make sure to use dutch process for a rich/dark flavor
1/2 cup (1 stick) unsalted butter, cubed and room temp
1/2 cup white sugar
1/2 cup dark brown sugar
1-1/2 teaspoons vanilla
1/3 cup milk
1 - 10 bag of chips (I used Andes crème de menthe chips, but any mint chip would do – or go crazy and try peanut butter or white chocolate.. yum!)

Directions
Preheat oven to 325 degrees F and line baking sheets with silicone baking mat or parchment paper.
Whisk together flour, salt, baking powder and cocoa, and set aside. Beat the butter on medium-high until light and add sugars, creaming well. Add the vanilla and beat until smooth. Add the flour mixture in 2 batches, alternately with the milk in one batch, mixing well. Stir in the mint chips. Chill dough for at least 15 minutes. You can make the dough a few hours or 2 days before baking and it will be fine. Just wrap it up and keep in the fridge.
Scoop the dough onto a parchment- or silpat-lined cookie sheet, press down on them slightly, and bake for 14-15 minutes…for a normal size cookie. Let the cookies cool completely on the cookie sheet, they will set up as they cool. Store in an air-tight container, they will stay fresh for a couple of days.

If Freezing: Scoop the dough as you would when baking it and line up as many of the dough balls on a baking sheet that will fit. Then place the baking sheet in the freezer until all of the dough balls are completely frozen. At that point, you can put all of the dough balls into a freezer bag. To bake from frozen, extend the baking time to 15-17 minutes. And, even if they are underbaked, it's ok, no egg!

Thursday, March 3, 2011

Easiest Green Beans Ever

With this recipe, you have no excuse not to eat your veggies – even on a work night!

This veggie dish is on your table in about fifteen minutes from start to finish and, with only five ingredients (or six if you want to get fancy), it’s super simple and easy to remember. This has been on our Easter table two years in a row, and graces our dinner table every so often throughout the rest of the year.

So put that steamer bag of frozen veggies down for one night and give fresh green beans a try! It is well worth the minimal effort you will put into it!

Easiest Green Beans Ever

Serves 4

1 lb fresh green beans
2-3 cloves of Garlic – diced fine or run through a garlic press
1 Tbsp Olive oil
1-2 Tbsp grated or flaked Parmesan Cheese (optional)
Salt
Pepper

Fill a medium saucepot 2/3 of the way with water, and put over high heat.

Clean beans under running water, snap off both ends (or only the stem end if you prefer) and set aside. Once the water is boiling, drop in green beans and let boil for five minutes.

Mince garlic (or run through the garlic press)

Strain beans and put into serving bowl. Drizzle with olive oil, toss in garlic and parmesan (if using) and season to taste with salt and pepper.

Serve!


Monday, February 28, 2011

Chocolate Pudding (and Variations on a Theme!)

I cannot even begin to tell you just how much of this pudding I have eaten in my lifetime. I know that when I got my wisdom teeth out, this pudding was the only thing I could stomach for about two days, meaning my mom had an endless supply waiting for me in the refrigerator. That time alone, I’m sure I ate close to a gallon of this stuff. Same story when I had my tonsils removed at the ripe old age of 20 (yuck!)


But, the absolute best thing about this pudding was that I could make it in the confines of my college dorm room. A few simple ingredients, a bowl and a microwave were all I needed to bring a little piece of home to my dorm – even if just for dessert.


A few nights ago, the hubs mentioned that we had some milk in our fridge that was ‘on its way out.’ He has never had this before, so I figured now would be a good time to make it. I made the first batch with regular unsweetened cocoa, but then for the second batch, I accidentally grabbed the Hershey’s Special Dark cocoa. What a wonderful mistake that was! The hubs, who typically prefers milk chocolate, did prefer the first batch, while I, who adores dark chocolate, gobbled up the second batch.


Then it happened… I found marshmallow fluff in my pantry and chocolate graham crackers. After the pudding set, I put the marshmallow fluff on top and crumbled on some graham crackers for a makeshift s’mores pudding dessert. It is amazing how simple pantry items can jazz up a relatively simple dish. The top picture has peanut butter drizzled on top of the whipped cream. Absolute heaven.


I will be the first one to admit, though, that I have been known to be caught with a spoon in hand and my head in the fridge, eating it straight from the bowl – though I promise I know it’s when I’m not sharing it!

Chocolate Pudding

Ingredients:
½ C. sugar
¼ C. cocoa (unsweetened powdered variety) – I accidentally used the Hershey’s Special Dark cocoa in one batch and LOVED it. But feel free to use the normal cocoa as well!
3 TBSP cornstarch
¼ tsp salt
2 1/4 C. milk (may use low fat or skim)
2 TBSP butter
1 tsp vanilla

Directions:
Combine sugar, cocoa, cornstarch, and salt in 8-cup glass measure. Gradually stir in milk, stirring until cornstarch is completely dissolved.

Cook on high (600 – 700 watts) for 7 – 10 minutes, stirring every 2 minutes. Stirring helps to keep the mixture smooth and to keep the milk from boiling over. Cooking is finished when mixture is cooked through and thickened. Stir in butter and vanilla. Pour into individual serving dishes. Cover with plastic wrap pressed down on pudding surface to prevent skin from forming over top. Refrigerate.

If you want it a little sweeter, use 2/3 cup sugar.
We use a 2 1/2 quart Pyrex bowl and don’t always put it into individual cups.

Friday, February 25, 2011

Polenta Bread

 I received this recipe from a coworker in November 2009, and it has taken me this long to make it! Sad, isn’t it? But I’m also glad I procrastinated, because I did not have a blog back then, and that means I couldn’t share this simple and delicious bread recipe with you! The inside is soft and tender, and the outside has a wonderful, golden crust. It was “practically perfect in every way” (Bonus points if you know the movie that is from!)

This bread is perfect for French toast, bread puddings, panini or even simply toasted with a slight smear of jam or butter. I loved it the first day when the crust was nice and crunchy, but I think the hubby liked it better on the second day, when the crust had softened up a little.

The only changes I made were that I added vital wheat gluten to my dough, and I used active dry yeast instead of the quick rise yeast. That just meant that I added my yeast to the warm water solution instead of to the dry ingredients.


Polenta Bread
From Simple Italian Cooking
(also on the Williams Sonoma Website http://www.williams-sonoma.com/recipe/polenta-bread.html)
Ingredients:
3 cups unbleached bread flour
1/2 cup finely ground, quick-cooking Italian
polenta, plus more for baking sheet
2 tsp. quick-rise yeast
1 tsp. salt
1 1/3 cups warm tap water
1 Tbs. extra-virgin olive oil
1 egg, beaten with 1 Tbs. water
Directions:
In a large bowl, combine the flour, the 1/2 cup polenta, the yeast and salt. Using a wooden spoon, stir to mix well. Add the warm water and olive oil and stir until all of the flour has been absorbed and a dough has formed.

Using your hands, gather the dough into a ball and transfer to a well-floured work surface. Knead the dough until soft and elastic and no longer sticky, about 10 minutes. Work more flour into the dough if needed to reduce stickiness; be sure to keep the work surface well floured. The dough should remain in a rounded shape and not flatten out when left on a work surface for a minute or two. If not, work a little more flour into the dough. Place the dough in a warmed, lightly oiled bowl, turning several times to coat it with oil. Cover with plastic wrap and let rise in a warm place until doubled in bulk, 45 to 75 minutes.

Sprinkle a little polenta on a baking sheet and set aside. Punch down the dough, return it to the lightly floured work surface and knead a few times. Form the dough into a round ball or an oval shape and place on the prepared baking sheet. The dough should retain its shape and not flatten out. Cover loosely with plastic wrap and let rise in a warm place until doubled in bulk, 30 to 40 minutes. While the dough is rising, position a rack in the middle of an oven and preheat to 425°F.

When the dough has risen, using a very sharp, thin-bladed knife or single-edge razor blade, carefully make a slash 1/2 inch deep across the top. Brush the surface with the egg mixture. Bake for 15 minutes. Reduce the oven temperature to 375°F and continue to bake until golden and crusty, 30 to 35 minutes more.

Transfer the loaf to a wire rack and let cool.
Makes 1 round or oval loaf; serves 6 to 8.

Tuesday, February 22, 2011

Mozzarella Sticks

My very first summer in the Midwest, before I started working, my then-boyfriend, now-husband decided it would be fun to go to the Wisconsin Dells for an extended weekend to get in our last summer kicks in before buckling down and joining the ‘real world.’


Before moving to Illinois, I had never heard of the Dells. The hubby would try to explain it to me, but nothing could prepare me for when we drove down the main street with water parks on either side, and having a military-grade Duck pull up beside us with its tour group in tow.


The trip itself was wonderful. We went on our very own Duck tour of the Dells, visited the water parks (including a ride on a water slide that was 10 stories tall), attended a magic show and went to the famous Tommy Bartlett Air and Water Show, they’re famous for the pyramid of water skiers.


We’ve been back to the area several times since then – but only once was it to visit the water parks. The other times we just happened to be passing though and had to make our obligatory stop at a famous local restaurant and micro-brewery called Moosejaw. According to the hubs, if you go to the dells, you go to this place to eat.


On my first visit, I knew that this place had to be good. There was a line out the door and around their porch. Thankfully we could camp out at the downstairs bar and had gotten there early enough that we were seated by the time we actually got hungry.


I have never had a better mozzarella stick than the ones they serve at Moosejaw. They’re prepared almost in an eggroll style, instead of the more traditional breading of other mozzarella sticks. And, maybe it’s because we were in Wisconsin, but the cheese was just worlds above any other stick I’ve ever had.


If we know we are passing through the dells on a trip, we will usually plan the timing so that we can stop at Moosejaw for a meal. I’m not a huge fan of mozzarella sticks, but these? These I can’t get enough of.


Since most days it just isn’t practical to drive 3 hours each way just for dinner, I’ve been experimenting with making my own mozzarella sticks to try and satisfy my craving. After a few batches, I have finally made something that works for us, even if it isn’t exactly like my beloved Moosejaw’s.


Mozzarella Sticks

Ingredients:
Package of Egg roll wrappers (20 in the package I used)
1 egg, slightly beaten with a tablespoon of water, until frothy
16 oz packaged Mozzarella (mine is shaped like a log, cut the log in half across the short width, and then each half cut into ten strips along the long direction.)

2 eggs
1.25 c Bread crumbs
1 Tbsp Dried oregano
1 Tbsp Dried basil
½ c grated parmesan

Directions:
To wrap the mozzarella:

Place an eggroll wrapper on the countertop with a point facing you. Place the mozzarella horizontally on the lower third of the wrapper.

Roll the corner closest to you over the filling. Moisten the top point with a little bit of the egg wash.

Fold the sides over the filling.

Roll the eggroll shut, and press to seal. Repeat with remaining wrapper and cheese.

I let these sit in my fridge for a little bit on a cooling rack in a sheet pan to let the egg really seal the seams well. Do not stack the mozzarella sticks – they will stick together!

For the breading:

Mix dry ingredients together in a medium bowl.

Pu the two eggs in a medium bowl and mix until mostly broken up and there are no clumps of egg white visible.

Using one hand. dip your wrapped mozzarella sticks in the egg wash, shake to remove the excess egg.

Drop into the breadcrumb mixture and, using your ‘non-eggy’ hand, coat the eggroll wrapper thoroughly with the breadcrumbs. Place back on the cooling rack until all the mozzarella sticks are breaded.

Meanwhile, I get my mini deep fryer heating to 375 degrees (you could also do this in a deep, wide pan with oil).

Once the oil gets up to temperature, fry the mozzarella sticks, 3-4 at a time, until golden brown. Remove to a paper towel to drain slightly.

Serve with marinara sauce, if desired.
Related Posts Plugin for WordPress, Blogger...