Friday, May 28, 2010

Chocolate Chip Cookies - Nestle Tollhouse

Happy Month-a-versary!! (ok, I promise this won't be a trend, but it gave me one small milestone to celebrate so far)

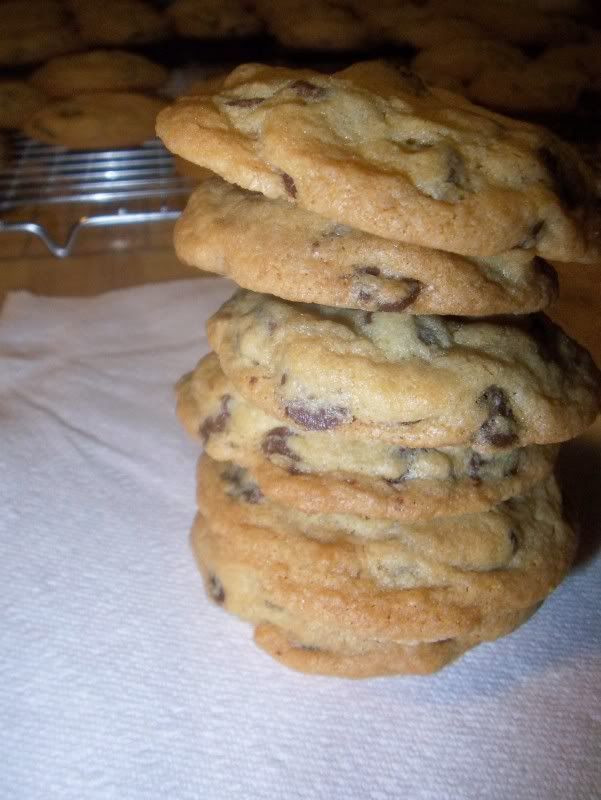
No matter what, sometimes the best foods are the ones that make you nostalgic. Take the humble chocolate chip cookie. I’ve seen so many different recipes for chocolate chip cookies (all of which I want to try!); some that include dried fruit, some with oats, some with melted butter and some with pudding mixes. And while I’m sure they are all delicious, nothing yet has topped the recipe on the back of the Nestle Tollhouse chocolate chip bags for these classic cookies.

Slightly chewy, never gooey, these are the cookies I turn to when life gets me down. The smell wafting through the house brings me back to my childhood and the many memories I have of my mom (and dad!) and I working together to turn out a batch of cookies.

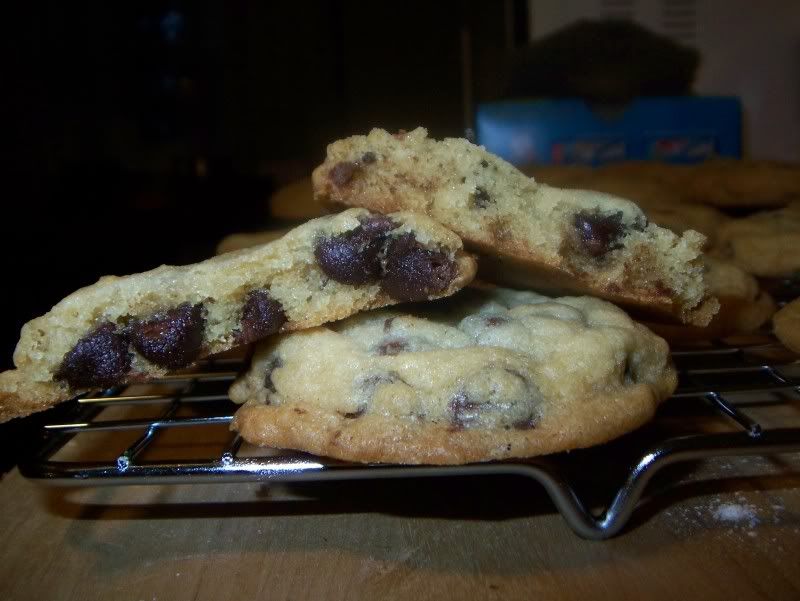
These cookies are fantastic fresh out of the oven, perfectly soft with the chocolate chips still molten inside. I love them the morning after they’re baked (and don’t think I don’t eat these for breakfast when they’re around). They chocolate sets up, and the cookies themselves are slightly chewy when you first take a bite, and then nearly melt in your mouth leaving behind the faintest residual flavors of the brown sugar and butter.

Online the recipe says it yields 60 cookies. I like my cookies a little larger, using my cookie scoop, decreasing my yield to approximately 40. I also omitted the nuts in the recipe, but if you want to add them, go ahead – I’ve included a link to the original recipe.
Nestle Tollhouse Chocolate Chip Cookies
Source

Ingredients
2 1/4 cups all-purpose flour
1 teaspoon baking soda
1 teaspoon salt
1 cup (2 sticks) butter, softened
3/4 cup granulated sugar
3/4 cup packed brown sugar
1 teaspoon vanilla extract
2 large eggs
2 cups (12-oz. pkg.) Semi-Sweet Chocolate Chips
1 cup chopped nuts (optional)

Directions
PREHEAT oven to 375° F.

COMBINE flour, baking soda and salt in small bowl. Beat butter, granulated sugar, brown sugar and vanilla extract in large mixer bowl until creamy. Add eggs, one at a time, beating well after each addition. Gradually beat in flour mixture. Stir in morsels and nuts. Drop by rounded tablespoon onto ungreased baking sheets.

BAKE for 9 to 11 minutes or until golden brown. Cool on baking sheets for 2 minutes; remove to wire racks to cool completely.

Tuesday, May 25, 2010

New Comfort Foods

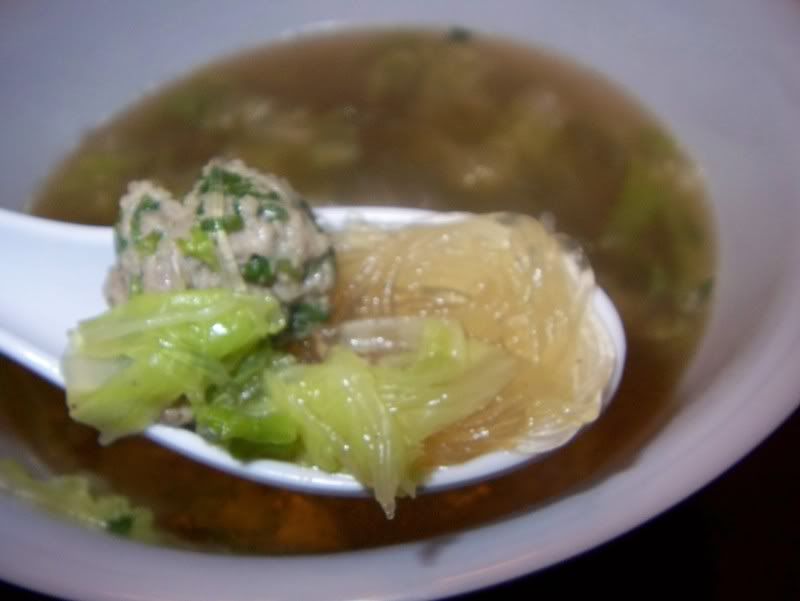
I’ve been feeling sick the past few days. Just a head cold, but it has been really can really taking a toll. These are the days when I want to curl up on the couch, watch some TV and hopefully fall asleep for a couple of hours. I also feel bad because when I am under the weather, my appetite is the first thing to go, which means cooking a meal is not high on my priority list (though baking is another story). My list of comfort foods is the typical chicken soup, grilled cheese and tomato soup, and anything with chocolate (hey, there are antioxidants in chocolate, so it’s not all bad!) Thanks to my husband, who so graciously made dinner last night, I have a new one to add to the list: Napa soup.

This soup features a chicken bouillon based broth with cilantro and soy sauce pork balls, mung bean threads and chopped napa cabbage. He was able to whip up the whole meal in just over 20 minutes and was exactly what the doctor ordered. It’s comforting in the way chicken noodle soup is, but with a decidedly asian flair. And it’s light enough that you can eat a decent sized bowl without feeling overstuffed.

I’m feeling better already.

My husband doesn’t follow a recipe, he goes by taste. The preparation is simple enough. The following recipe is just a guide, as this recipe is mostly determined by taste.


Napa Soup
To make the Pork Balls:
6 oz Ground Pork
Cilantro
1 Tbsp Sugar
Pepper
1 tsp Fish Sauce
1 tsp Maggi
2 tsp White Soy Sauce
2 tsp Regular Soy Sauce

Take ground pork, a small handful of chopped cilantro, sugar soy sauces, fish sauce and maggi and mix until combined. Divide into small balls.

To make the soup:
Small Handful Mung Bean threads
1 cube Chicken Boullion
Pork Balls (see above)
5 leaves of Napa
3-4 c boiling water
pepper
Fish Sauce
Soy Sauce

Stir chicken bouillon into water and wait until dissolved. Add pork balls and bring back to boil. One pork balls float, add noodles, then napa. Season to taste using pepper, fish sauce and regular soy sauce.


Come join Soup-a-Palooza at TidyMom and Dine and Dish sponsored by Bush’s Beans, Hip Hostess, Pillsbury and Westminster Crackers

Friday, May 21, 2010

”Fired Up” Lemon Pasta with Chicken


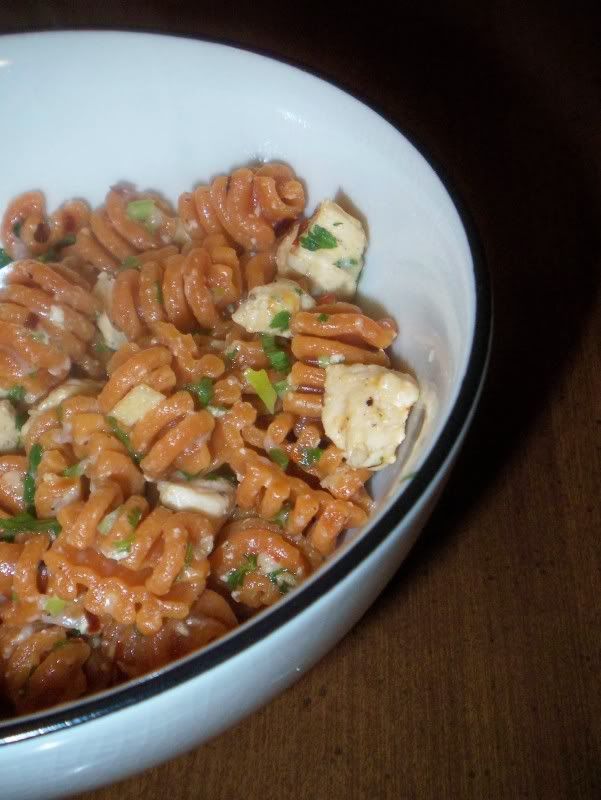
A couple years back, when my parents were visiting me in Chicago, we decided to go to the farmers market near my apartment. Here we found a place called Pappardelle’s that sells nothing but pasta. There must have been thirty different kinds of flavor-infused pasta, from dark chocolate linguine to sweet potato orzo. I don’t even remember what we bought (I think it was a linguine that had sun-dried tomato in it), but I do remember it being such a wonderful change of pace from a traditional pasta. I also remember it was somewhat pricey for a pound of pasta compared to what you can get in the grocery store but, on the rare occasion I wouldd buy it, it was worth the splurge.

Since moving, I haven’t been able to go back to that Farmer’s Market, so my pasta has only been coming from the grocery store shelves. Last week, however, I ventured into the new
French Market at the Metra station to discover that Pappardelle’s has a distributor there. After perusing their choices, and trying a sample or two, I finally decided on a Wild Habanero Radiatori and a Chive shell.

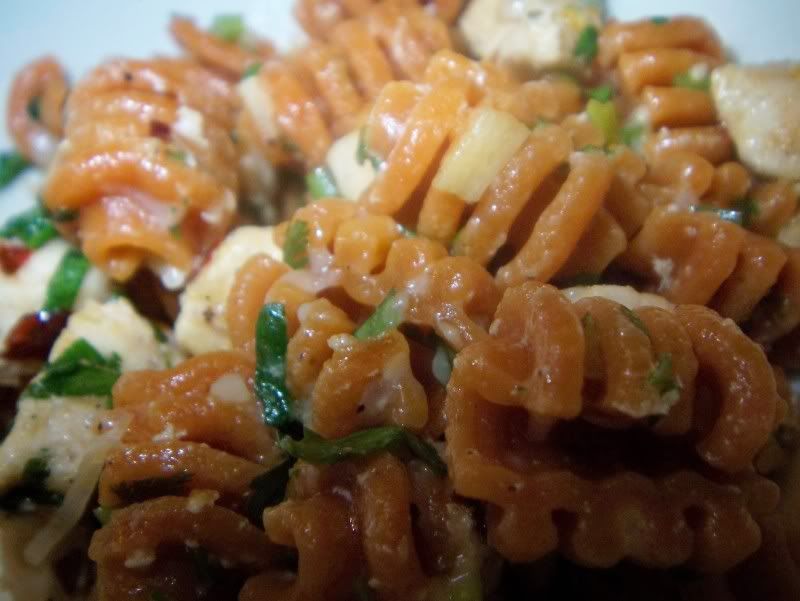
The Habanero was too unique to pass up. Since the husband and I both enjoy spicy foods, I doubted it would overwhelm us. I did notice that even the dry pasta had a noticeable heat to it, so I was really looking forward to using it in a dish.


The recipe we finally decided on is supposed to highlight the pasta – complimenting it without overwhelming it. It’s actually a variation on a pasta we make many nights for our “Pasta Tuesdays.” Because Wild Habanero Radiatori is most likely not something in your pantry, I’m giving the recipe for the typical dish we make, and just highlight my adaptations in red.

And for the record, this pasta was hot! Not tongue-blistering, but it definitely smacks you in the face when you take a first bite. And, the more you eat, the more the heat accumulates. Unfortunately, we can’t afford to have this pasta all the time, but every once in a while I might bring home a meal’s worth to give us a little more variety. I’m looking forward to using the shells I purchased in the near future!

”Fired Up” Lemon Pasta with Chicken
Adapted from The Neelys Easy Lemon Pasta with Chicken from FoodNetwork.com
http://www.foodnetwork.com/recipes/down-home-with-the-neelys/easy-lemon-pasta-with-chicken-recipe/index.html

4 oz pasta (we used Pappardelle’s Wild Habanero Radiatori)
1 large chicken breast, chopped (or ¼ lb shrimp)
Salt and freshly ground black pepper
3 cloves garlic, sliced
2 teaspoon red pepper flakes
1 tablespoon olive oil
2 tablespoons roughly chopped fresh parsley, for garnish (I used cilantro for this dish because it’s what we had on hand and we hoped it would have a slight cooling effect when coupled with such a spicy noodle )
1 lemon, juiced
2 Tbsp grated Parmesan

Cook the pasta in a large pot of boiling salted water, until al dente. Drain well. (My pasta cooked in boiling water for 6 minutes.)

Season chicken with salt and pepper. Heat a large grill pan over medium high and add chicken. Sauté until cooked through. Remove to plate.

Add the garlic and red pepper flakes to a saute pan with 1 tablespoon of olive oil and sauté until fragrant. Add the cooked pasta and turn heat off. Mix all together.

Remove pasta to a large bowl. Add chicken to the warm pasta and season with salt and pepper. Sprinkle in chopped parsley. Add the lemon juice and mix. Before serving top with Parmesan.

Tuesday, May 18, 2010

Put the (Key) Lime (Cheesecake) in the Coconut (Tartcakes) and Eat 'Em All Up

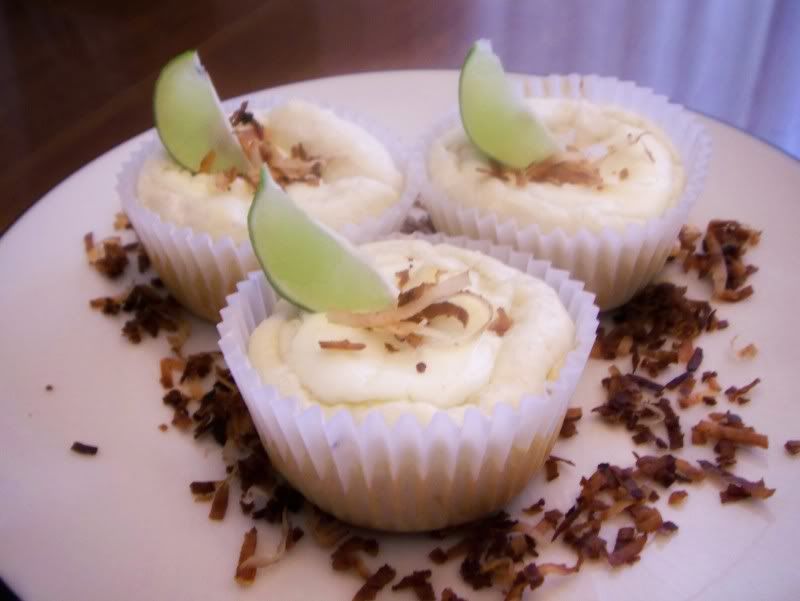
Prompted by a contest by Coconut and Lime, I decided to try my hand at coming up with a recipe that incorporates both coconut and lime as key ingredients. I enjoy Black Bottom Cupcakes, but rarely do you see any variations on the chocolate base with chocolate-chip cheesecake-like filling. My quest was to make a coconut cupcake filled with a key lime cheesecake filling. Without getting into the gory details, I will say that the first batch was, without sugarcoating it, a disaster. Since I was experimenting, I decided to not only make my ‘creation’ but also the original version of a black bottom, as a ‘control’ if you will. I discovered a few things. Halving a wacky cake recipe doesn’t work – the vinegar and baking soda are in specific proportions in the original recipe and my cupcakes ballooned out of their respective tins, only to collapse in on themselves and never truly set up. I also found out I like chocolate a little too much. I forgot to adjust the amount of chocolate chips from the original recipe and the result was a melted chocolate pool in the bottom of each cupcake that I’m sure also contributed at least partially to the cupcake collapse. Finally, wacky cake is a thin batter meaning the coconut that I so lovingly toasted and mixed into the batter sunk straight to the bottom instead of remaining suspended like I had expected. Oops. I didn’t take pictures because I was too busy trying to mitigate the damage to my muffins tins. After a good two hour soak and scrub they are mostly back to normal.

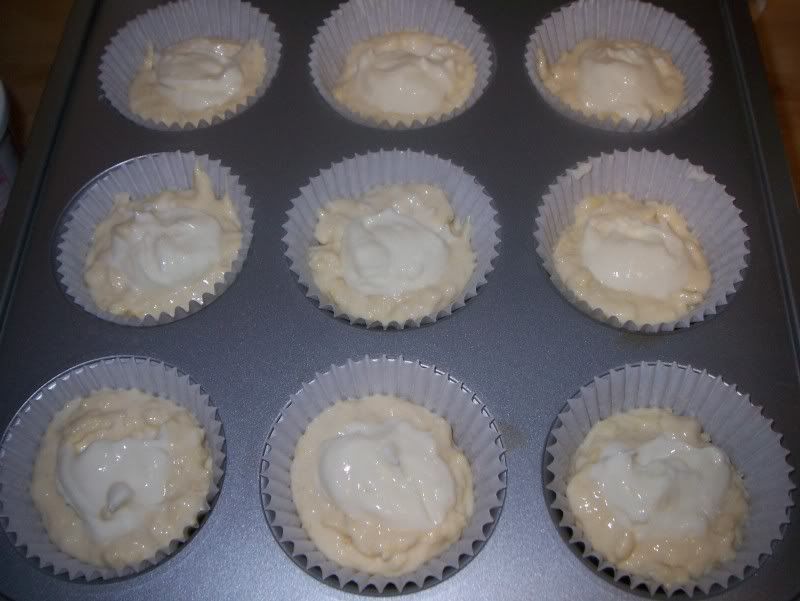
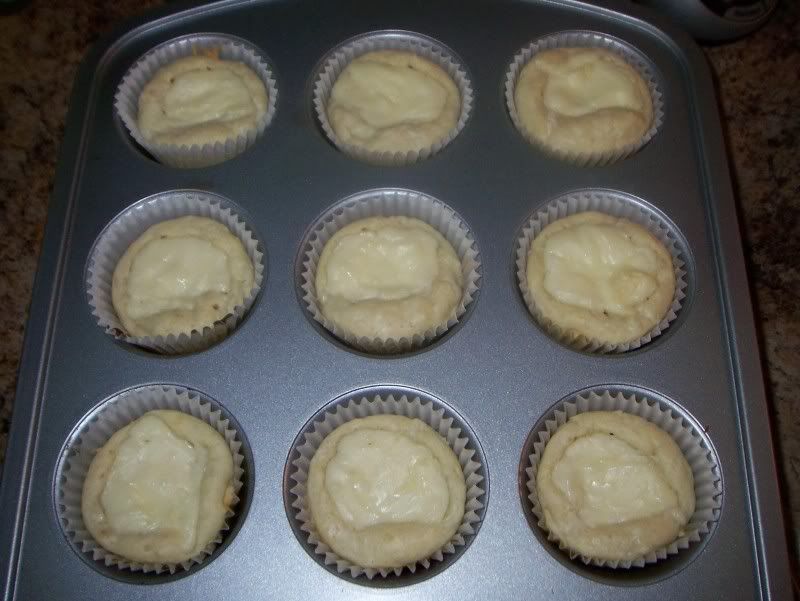
After those unsuccessful trials in the kitchen, I took a new approach. I decided to ditch the wacky cake batter in favor of a true coconut cupcake and then spoon in the filling. Success! Well, mostly. The cupcake came out a little more dense than anticipated, but it was still good. It seemed like what you would get if a tart shell and cupcake had a love-child filled with key lime cheesecake. It wasn’t quite a cupcake because it wasn’t as fluffy as you’d expect, but it wasn’t a tart, either. The tartcake was born!

The hubs - who doesn’t like coconut – offered to be a taste-tester for me, but only had one bite because, go figure, he didn’t like that it tasted like coconut. He couldn’t even make it to the key lime filling. But don’t feel bad because he didn’t like the cupcake. There was some extra filling leftover, so I put that in a ramekin and baked it off for a little bit so he was able to get a crustless mini key lime cheesecake out of the deal. That, for the record, he did enjoy.

After having one, I am pleasantly surprised at my first black-bottom inspiration attempt. Just because it wasn’t exactly what I was envisioning didn’t make it any less delicious. A coconutty cupcake with a tangy, creamy key lime cheesecake filling.

Thanks to Coconut and Lime for hosting this contest, and even if I don’t win the contest, I’m a winner because I go the confidence to try something totally new, and to persevere even after my initial miserable failure! (Which is a miracle considering what a pain in the rear juicing those itty bitty key limes is! I’m glad I have my juicer!)

Next time I try these I may try a different cupcake recipe to see if the density was a result of the cupcake recipe or a result of adding in the cream cheese filling and consequently changing how a normal cupcake would have baked.

Put the (Key) Lime (Cheesecake) in the Coconut (Tartcakes)
Adapted From
Domestic Diva Mysteriesand Cookie Madness

Filling
5 oz cream cheese
2 Tbsp plus 2 tsp Sugar
1 Tbsp key Lime Juice
1 Egg White
2 tsp Sour Cream

Cupcakes:
1 cup flour
1 teaspoon baking powder
1/4 teaspoon salt
1/2 cup plus 2 tablespoons sugar
1 egg
¼ c milk and 1/3 cup milk, divided
1/3 cup heavy cream
1/2 cup shredded coconut
½ tsp coconut extract

Directions
Preheat the oven to 350 degrees. Place cupcake liners in the cupcake pan.

Make the filling: Beat the cream cheese, sugar and salt until smooth. Add the egg white and stir or beat on low speed just until mixed; stir in the sour cream and lime juice. Set aside.

Make the tartcake: Combine the flour, sugar, baking powder, shredded coconut, and salt, and mix with a fork.
Separate the egg. Beat the egg white until it forms gentle peaks, but isn't dry. Set aside.

Beat the egg yolk briefly, slow the mixer and add add ¼ c of milk. Slowly add some of the flour mixture. Alternate adding the liquids and the rest of the flour mixture.

Spoon one tablespoon of cheesecake mixture into each liner, making sure to sink the filling down a little into the cupcake.
Bake on center rack for 22-25 minutes.
Let cool in cupcake pan for 30 minutes and then transfer to the refrigerator to chill.

This made 11 cupcakes for me with a little filling leftover.

Sunday, May 16, 2010

Spicy Hoisin Salmon

While I love seafood, for some reason, I’m not a huge fish eater. I’m not really sure why. It’s not that I don’t enjoy it, I just rarely order it in a restaurant when presented with other options. Maybe its my fear of getting fish that’s less-than-fresh, because seafood seems to be a lot more sensitive to storage times and spoilage. And I’ve noticed too that if I’m ordering fish for dinner, it’s going to most likely be ahi tuna, tilapia or salmon. For a long time, our fish consumption was almost entirely limited to eating out at seafood restaurants.

I don’t know what prompted my husband and I to start buying salmon. Maybe it had to do with the fact that we found frozen 6 ounce portions for a good price. Maybe it had to do with my suggestion that we should cut down on our red meat intake and consequently needed to find a satisfying substitute. Either way, I’m glad we’ve started including it in our diets. Salmon is a great source of healthy omega-3 fatty acids: eicosapentaenoic acid (EPA) and docosahexaenoic acid (DHA) (source), which have demonstrated benefits at reducing heart disease. They also have high levels of vitamin d, protein, and vitamins B3 and B12. The American Heart Association recommends two servings of salmon or other oily fish a week.

How often is something so healthy also delicious? I’m looking at you, lima beans.
My mother in law found this recipe and it was an immediate hit with our family. We enjoyed it so much that we now have the recipe and prepare it often.

Be good to your heart (and your taste buds!) and give this recipe a try. You won't be sorry!
Spicy Hoisin Salmon
Adapted From Parents Magazine
Serves two

1/4 c hoisin sauce
2 Tbsp soy sauce
2 tsp rice vinegar
1/2 tsp ground ginger
1/4-1/2 tsp red pepper flakes
2 pieces salmon, about 6 oz each
2 green onions, trimmed and thinly sliced

Heat oven to 450 degrees. Coat a baking dish with nonstick spray.

In a small dish, stir together the hoisin, soy sauce, vinegar, ginger and red pepper flakes. Place salmon in prepared dish and spead top of each fillet with half of hoisin mixture.

Roast at 450 degrees for 10 minutes. Spread remaining hoisin mixture over the salmon and top with sliced green onions. Roast an additional 5-10 minutes (ours usually take 10) or until salmon is done.

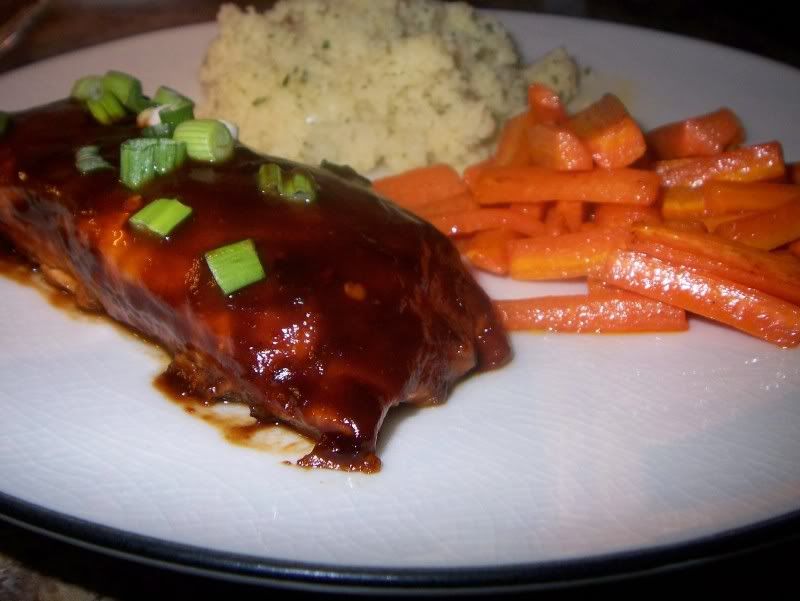
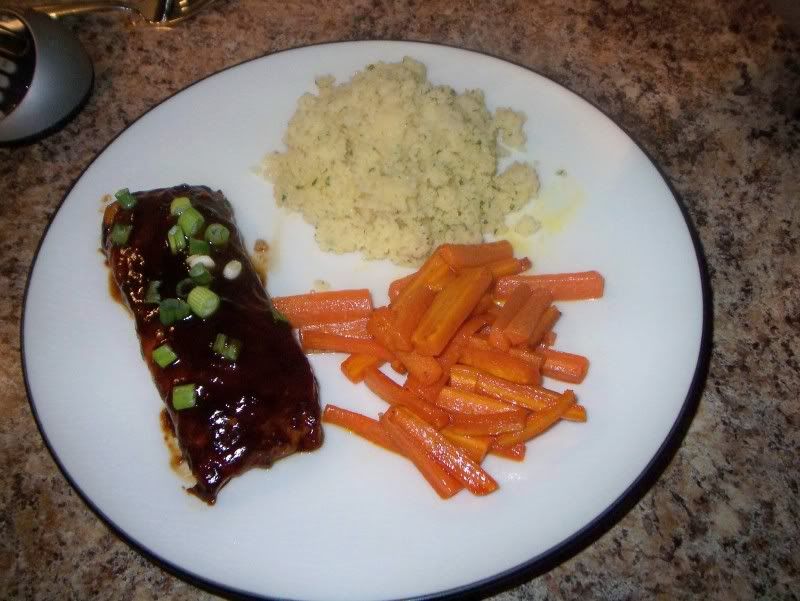
I served it with a mushroom and herb couscous and roasted carrots.

Saturday, May 15, 2010

Spiced Yogurt Muffins

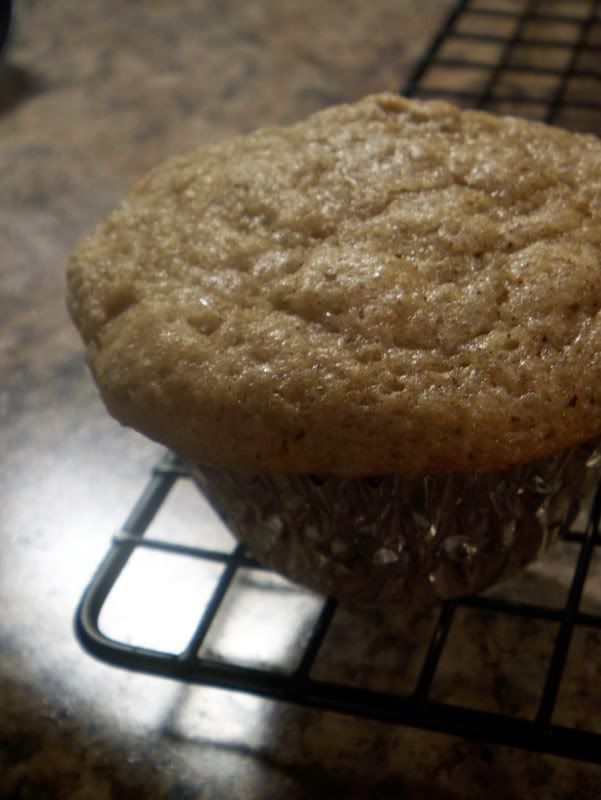
It always bugged me that spice cake and gingerbread are always considered ‘holiday foods’ or ‘seasonal favorites.’ The end of the holidays always depress me because not only do the lights and decorations come down and get packed away for next season, but it is no longer socially acceptable to crave these foods. My substitutions of late are Starbuck’s Chewy Molasses Cookies. While I love these cookies, I have read the nutrition labels, and that is usually what deters me from purchasing one. Sure, I could make molasses cookies or gingersnaps, but I wanted to find a way to satisfy my spice cake cravings with a more ‘seasonally acceptable’ food for springtime.

As luck would have it, I had plain yogurt in my refrigerator on the brink of expiration, which of course meant I started looking for recipes using this as an ingredient. I found this muffin and was immediately drawn to the use of
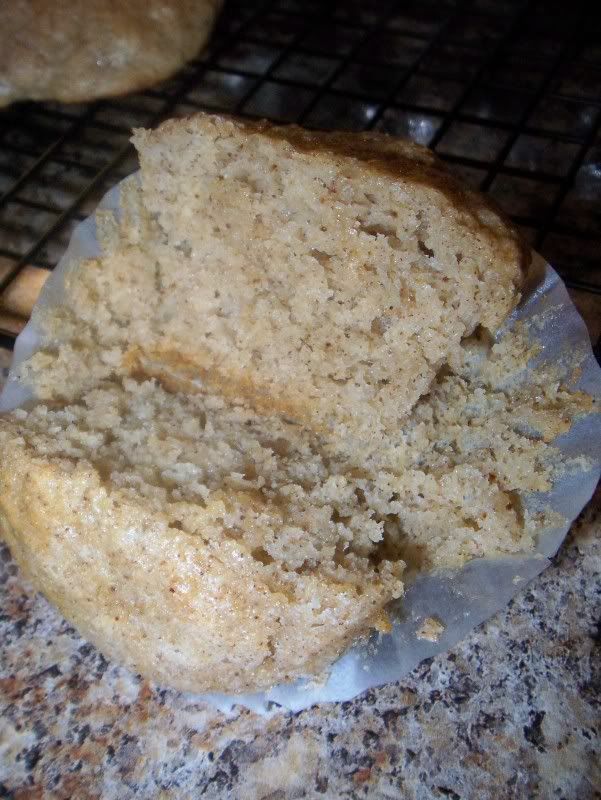
classic gingerbread spices in a non-molasses base. These are packed with a wonderful spice flavor yet won’t be confused with your holiday favorites. These muffins are very light and airy, not heavy or dense like gingerbread, so I feel perfectly content eating these in the beginning of May. And yes, those are muffin tops in that picture! I love my muffin top pan.

Even better? According to the source, each muffin contains only 140 calories and 3g of fat. A great treat for those still trying to keep up with their resolutions! Warm from the oven, they were a little difficult to get out of the wrappers, but they were so delicious warm. Once they cooled to room temperature, the wrappers were a lot easier to remove. Muffins are best kept at room temperature for a few days, else frozen after they were made.
Spiced Yogurt Muffins
From:Novemeber 2008 issue of Food & Wine

Ingredients
2 cups all-purpose flour
1 cup light brown sugar
1 tablespoon baking powder
1/2 teaspoon baking soda
1/2 teaspoon salt
1 teaspoon ground cinnamon
1/2 teaspoon ground allspice
1/2 teaspoon ground cloves
3/4 teaspoon freshly grated nutmeg
2 large eggs, at room temperature
1 1/4 cups plain low-fat yogurt
4 tablespoons unsalted butter, melted
1/4 cup unsweetened applesauce
1 teaspoon pure vanilla extract
1 tablespoon granulated sugar

Directions
Preheat the oven to 375°. Line 18 muffin cups with paper or foil liners. Lightly spray the liners with vegetable oil spray or use muffin liner papers.
In a large bowl, mix together the flour, brown sugar, baking powder, baking soda, salt, cinnamon, allspice, cloves and 1/2 teaspoon of the nutmeg and pulse to blend. In a medium bowl, whisk the eggs, yogurt, butter, applesauce and vanilla. Fold the yogurt mixture into the dry ingredients until just blended.
Spoon the batter into the prepared muffin cups. Sprinkle the granulated sugar and remaining 1/4 teaspoon nutmeg over the muffins. Bake for 18 minutes, until the muffins are springy; let cool in the pans for 5 minutes, then transfer to a wire rack. Serve warm or at room temperature.
Makes 12-18 muffins.


Friday, May 14, 2010

Classic Pound Cake

Sometimes simple is better.

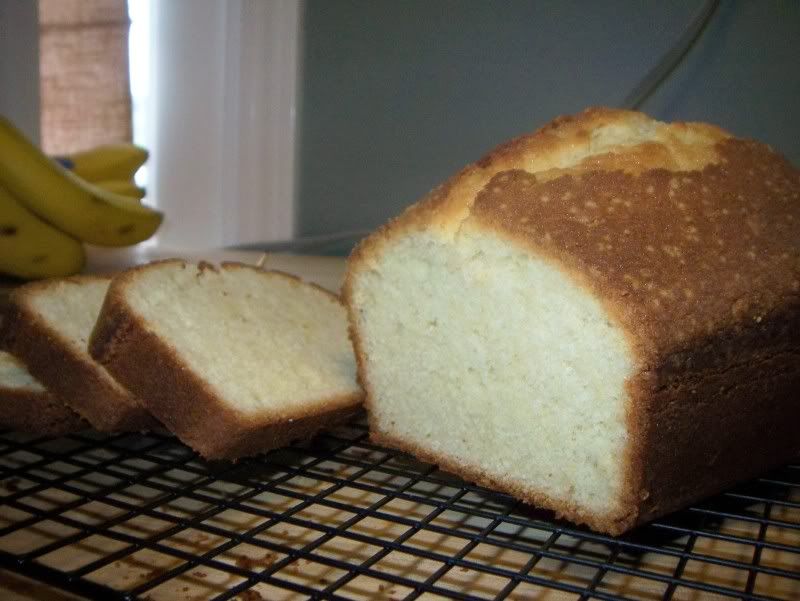
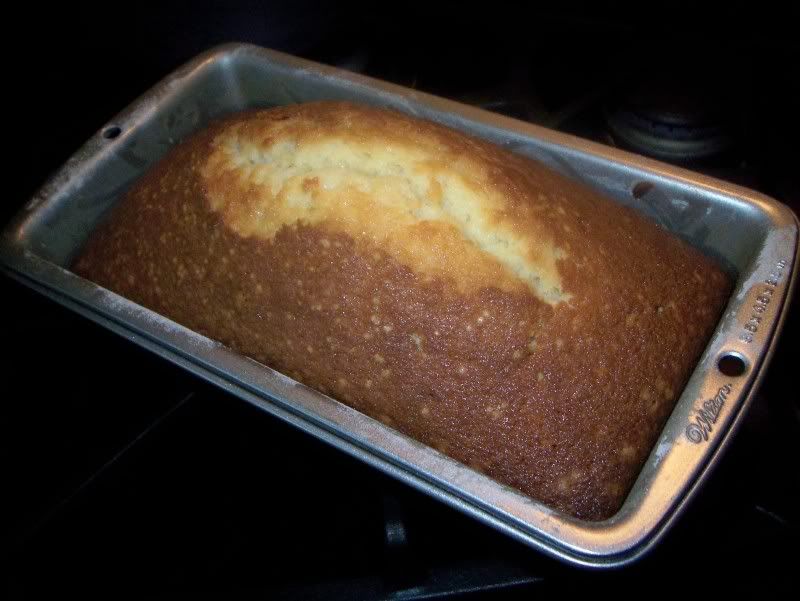
A pound cake is incredibly simple, yet totally satisfying. And it's a basic recipe that I think everyone should have in their dessert arsenal. A slice topped with whipped cream and strawberries? Oh yes.

This cake is moist without being wet, and has a sturdy yet incredibly tender crumb. I love the almond extract in this, but I could definitely see it being a little overwhelming for some people. So experiment with your palate. I think it'd be great also if you remove the almond extract and added some lemon zest to the batter. Or even some blueberries, too. That would really brighten it up for the springtime. Also, you could easily double this recipe to transform it from a loaf cake to a bundt cake.
Old-Fashioned Pound Cake Loaf

Ingredients
1 1/2 cups all-purpose flour
1 1/2 cups white sugar
1/2 cup butter
1/2 cup 1% milk
3 eggs
1 pinch baking soda
1 tsp real vanilla extract
1/2 tsp real almond extract

Directions
Preheat oven to 375 degrees F. Grease and flour a loaf pan.
In a large bowl, cream butter and sugar until light and fluffy. Add milk and eggs one at a time until completely incorporated. Add extracts.
Add flour and pinch of soda, mix well. Pour into loaf pan.
Bake at 375 degrees F for 1 hour, or until a toothpick inserted into center of cake comes out clean.

Wednesday, May 12, 2010

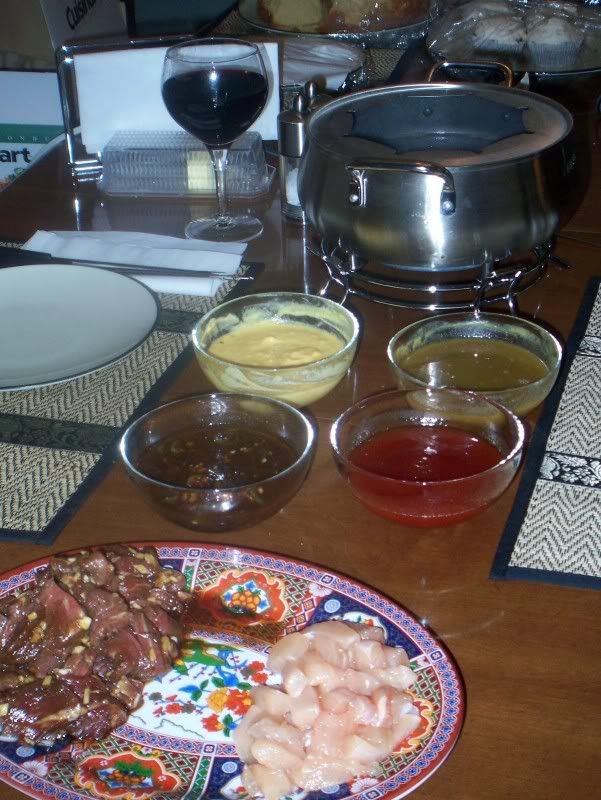
Fondue Night!

Typically my husband and I try to make meals that come together quickly because we are always starving by the time dinner rolls around on weeknights. The weekends, however, are a different story. I love taking an afternoon and putting together a nice meal that we wouldn’t have time to make and eat on a work night. We make these our date nights - A nice dinner, a bottle of wine and a movie from our Netflix queue. Even with the extra time on weekends, there are occasions that I like dinner preparation to be easy, but still special enough for our date night. I have found the perfect solution: Fondue.

For me, ‘fondue’ used to evoke images of VW buses and slug bugs, bell bottoms, shag carpets and lava lamps. I thought it was a novelty of the 70’s that had no real place on more contemporary tables. While most of these things are now distant memories of the past (well, minus the lava lamp, our guest room has my pink one as a night light…), fondue is fortunately making a modern comeback – just look at the success of The Melting Pot . After my first trip there for dinner, I now understand why fondue is making a return.

We are a part of a fast-paced culture where time is money, and as a result, we are becoming increasingly more focused on convenience foods and and less on the importance of sitting down as a family for a meal. Fondue transforms dinner into the social event I think it deserves to be, instead of just sitting at the table just long enough to stuff your face full of whatever is in front of you and then continuing on with life. I now associate ‘fondue’ with intimacy, family and relaxation because, while the food is important, the meal is more about slowing down and enjoying your company. If you really want to have fun with it, there are also cute little fondue traditions. One tradition says that a woman who drops food in the pot has to kiss the person next to her (sometimes all the men at the table). And since I am not a big fan of that one, I like the other tradition which dictates that the person who loses food in the pot buys a round of drinks or the next pot of fondue. That's more my speed.

As much as I love The Melting Pot, I still have a hard time justifying the cost of their meals. First, you are going there and paying a premium to cook your own food. Second, for about the cost of a two person dinner, you could easily invest in a little fondue pot and make your own in the comfort of your home for a fraction of the price. Let’s do a little comparison, shall we?

From the menu of my local Melting Pot, the least expensive entrée selection is 16 dollars a person. 32 dollars doesn’t sound too bad for diner, but don’t forget drinks, tax and tip! So for us, our overall dinner cost would be about 40 dollars. That’s being optimistic, because we would each almost certainly have a seven-dollar glass of wine as well. If you were to look at Bed Bath and Beyond, you would see that they have a good selection of at-home fondue pots, even some under 60 dollars. And you know you have some of those 20% off coupons sitting around that come all the time in the mail. So, for about eight dollars more than just your bare-bones dining experience at the Melting pot, you can have your own fondue, anytime. I particularly love our electric fondue pot because it takes a lot of guesswork out of the process and I can switch from broth to chocolate because it has a temperature dial.

Finally, the last big benefit of at-home-fondue is that you have the liberty customize your meal based on your likes, and aren’t limited to the options on a menu. The word “fondue” comes from the French word ‘fonder’ meaning “to melt” and originally referred to a cheese dish mixed with wine and eaten with bread. It has progressed to oil and broth bases used to cook entrees such as meats, seafood, and veggies, and now has even made its way into the dessert world with chocolate fondue for dipping fruits, marshmallows, pound cake or brownies. There's something for everyone.

Of all the options, I choose a broth-based cooking method versus oil, simply because I feel I can make the broth more flavorful and it’s healthier than essentially deep-frying everything. The menu is relatively simple, and easy to put together. Last time I even prepared everything but the veggies the night before. I also love mixing lots of dipping sauces, the last meal included sweet and sour, asian and honey mustard sauces.

I do have to caution that if you’re starving, fondue is not a quick fix. Dinner can take up to two hours. Imagine the look on my poor husband’s face when he told me he was hungry and I pulled out only two forks. He looked devastated. By the end of the night, he had convinced me to use all six forks in the pot: 2 for meat, 2 for potatoes and 2 for mushrooms.

If you do have a fondue pot collecting dust in your closet, I suggest you to give it a try. It's a long recipe, but easy. This is one of our favorite date nights, and I look forward to having friends over to share in my fondue love.

Fondue Broth
1 tbsp Vegetable oil
2 Garlic clove, crushed
1 Onion, finely chopped (I had one large scallion and 1/4 leftover onion which I subbed for this)
8 cups Water
Beef bouillon cubes or concentrate
1 Celery stalk, finely chopped
1 Tomato, finely chopped
1/2 tsp Freshly ground pepper
1/2 tsp Salt
1 Bay leaf
1 cup Red wine

1. In a large pot, warm the oil and cook the garlic and onion until soft.
2. Add the water, bring to a boil and add enough beef bouillon cubes for 2 L (8 cups) of broth.
3. Lower the heat and add the vegetables, spices and wine.
4. Cook on low heat for about 3 hours. Add more water as needed.
5. Filter the broth and refrigerate.
6. Prior to serving, remove the fat that has hardened on the surface.
7. Warm up the broth on the stove top.
8. Pour into your fondue pot and adjust the heat.

What to dip in your broth?
On average, you plan to have 1/3 lb of meat per person. I usually have several veggies on hand as well. Here is a standard list of options, but feel free to experiment!

Marinated Beef or pork tenderloin (see marinade recipe below)
Chicken Breast
Loin of Lamb
Regular sirloin
Button or Portabello Mushrooms cut into bite-sized pieces
Par-cooked Potatoes
Sausage
Shrimp
Lobster

Dipping Sauces

Honey Mustard Dip
1 cup Honey
1/2 cup Dijon mustard
Salt and pepper

Mix the ingredients and let chill for a day if possible.
Add salt and pepper to taste.
Serve at room temperature.

Sweet and Sour Sauce
1/2 cup ketchup
1/2 cup white vinegar
1/2 cup sugar
Combine all ingredients and heat until the sugar has dissolved. Serve warm or at room temperature. This sauce may be prepared a few days in advance and warmed before serving.

Asian Dipping Sauce
4 Tbsp Light Soy Sauce
3 Tbsp Lemon Juice
3 Green Chilis
3 Cloves Garlic, minced
2 tsp Sesame Oil
1 Tbsp Cornstarch
1 tsp Water, cold

Combine soy sauce, lemon juice, chilis, garlic and sesame oil in saucepan over low heat. In small bowl, mix cornstarch and cold water until thoroughly blended. Add cornstarch mixture to saucepan and bring to a boil until thickened. Serve warm or at room temperature.

Beef marinade
3 Tbsp Soy Sauce
2 tsp Minced Ginger
1 Tbsp Vegetable Oil
1 Tbsp Honey
1 Tbsp Water
2 Cloves garlic, minced
1/2 lb beef tenderloin, sliced thin or cut into bite-sized chunks.


Chocolate Fondue
Ingredients
12 oz. of semisweet chocolate chips (dark or milk chocolate may be substituted)
1/3 c. heavy cream
1/3 c. milk
2 TBSP liqueur (may be omitted) such as coffee, chocolate, mint or fruit flavored liquors. Rum and brandy also work well.
Combine all of the ingredients in a fondue pot, stirring constantly until the chocolate is melted and smooth. Spear and immerse assorted dipping items.

Dessert Dippers
Pineapple
Strawberries
Bananas
Pound Cake

Tuesday, May 11, 2010

Asiago Cheese Semolina Bread

Last week I ventured back into the world of risotto with a recipe out of the current Cooking Light magazine. It called for a small amount of asiago cheese which, of course, meant we had to buy a wedge that was four times more than what was needed for the recipe. Before the cheese even landed in my basket, I already knew how I would use the excess.

I love pretty much any bread plus asiago cheese combination, and the leftover cheese was just dying to be mixed into a loaf of bread. Inspired by King Arthur Flour's baking blog, which featured a loaf of Three-Cheese semolina bread, I created somewhat of my own recipe to make the bread with the ingredients I had on hand. I ventured on my own after mistakenly using semolina flour instead of semolina, and just went on my own tangent from there. I also don't use instant yeast, so I had to re-vamp the recipe slightly to allow my yeast to bloom before using in the recipe.

Bread is a pretty simple formula - water, yeast, flour, sometimes salt, and whatever add-ins you want. Recently I bought semolina flour for use in my pizza dough, but have wanted to see what affects it would have on my breads as well. So not only does this recipe use bread flour, but it calls for semolina flour, too. The grated asiago cheese adds a nice saltiness to the dough, but I think the best surprise in this recipe is the garlic-infused olive oil. It adds another depth of flavor that makes this bread so wonderful. Next time I may roast the garlic first, so that I can mix all the garlic and olive oil in with the dough.

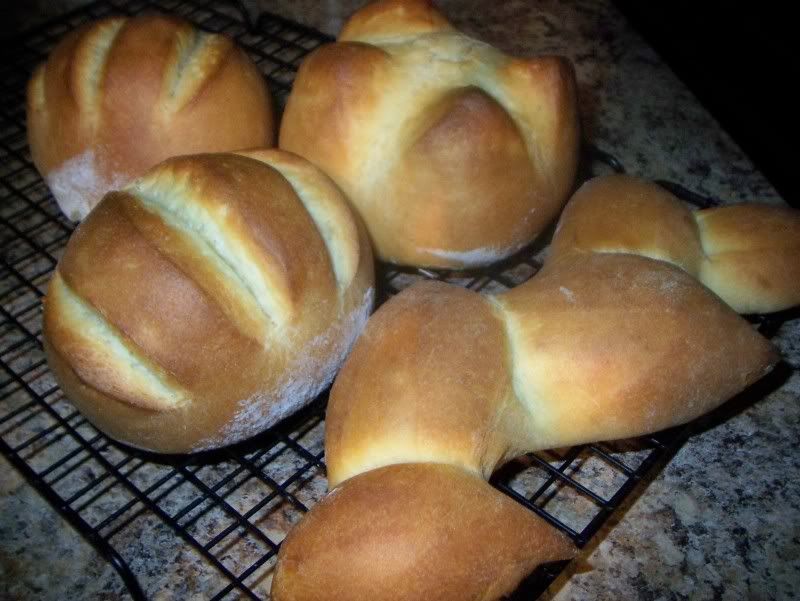
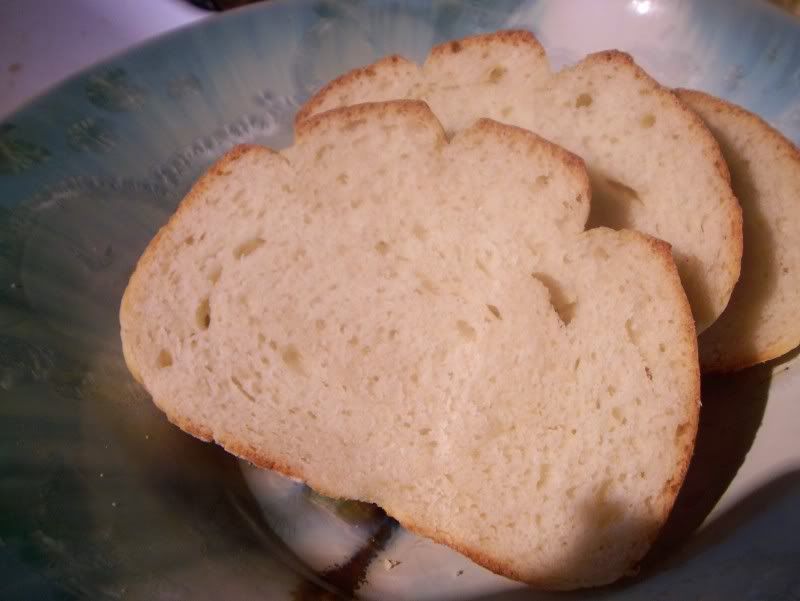
The bread has a soft exterior and is wonderfully soft inside, without being airy. There are some 'extra large' holes throughout the bread are little cheesy pockets of goodness. I will have to make sure that next time I'm not so insane with the knife when I'm slicing the tops of the loaves prior to baking. I sliced them a little too deep. At least it doesn't affect the flavor of the bread, but it does make for some funny-shaped slices.

Already I have eaten it toasted with butter, and topped with pizza sauce, fresh mozzarella, oregano and basil. I think some of the leftovers are destined to be cut into cubes and toasted for some killer croutons.

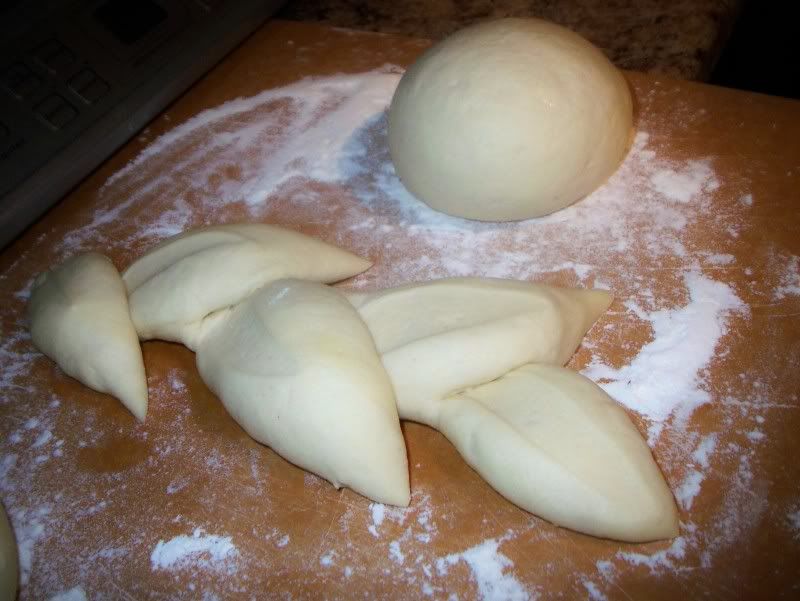
The recipe calls for one large loaf or two smaller loaves, but I divided my dough into four, making three small, grapefruit sized boules and one epi style loaf. It makes more reasonable sandwich slice sizes for me, and I can also give away a whole loaf without it being an indecent amount of bread.

Asiago Cheese Semolina Bread
Makes 1 large loaf or two smaller loaves

2 c Bread Flour
1 c Semolina flour
2 tsp Active dry yeast
1 tsp salt
2 Tbsp oil
3 cloves garlic, peeled and slightly smashed
1 c and 1/4 c water, divided
3 c grated asiago cheese
flour or cornmeal for sprinkling

In a small saucepan, put olive oil and three cloves of garlic. Keep over low heat until aromatic, about 5 minutes. Remove from heat, remove garlic cloves from oil and set aside.
In a small bowl, mix yeast and 1/4 c water (which should be around 110-115 degrees F). Let sit for 5 minutes.
In the bowl of your stand mixer, mix bread flour, semolina flour, and salt until combined.
Add yeast mixture, garlic-infused oil and 1 c water until dough comes together. Your stand mixer will most likely start struggling once the dough starts coming together. Switch over to the dough hook and let it go for 15-20 minutes on medium. The dough will become smooth and elastic.
Put dough in a lightly greased bowl covered with lightly greased plastic wrap and let sit for about 2 hours, or until doubled in size.
Line a baking sheet with parchment paper. Sprinkle flour or cornmeal onto the pan.
Gently deflate the dough and shape it into whatever you want. Tent lightly with plastic wrap and let rise for about an hour, or until puffy. Preheat the oven to 425 degrees when the rise time is nearly complete.
Remove the plastic wrap and spray loaf or loaves with water. Using a sharp knife, slash loaves in whatever design you want in the top.
Bake for 30 minutes and then check the internal temperature. The bread is done when the temperature reaches 190 to 200 degrees F.
Put bread on rack to cool completely.
Sunday, May 9, 2010

Brown Sugar Pecan Sticky Buns

I am so fortunate – I won the mom lottery. Not only do I have my mother who is a constant source of strength and inspiration but I also have a mother-in-law who is supportive, caring and has warmly welcomed me into the family since day one.

I know that there was a time I took my mom for granted. I assumed she would always be there for me, offering advice and supporting me no matter what path in life I chose. What I didn’t realize was that this was a luxury, not a given. I had a reality-check several years ago when my mom was diagnosed with cancer. The thought of losing her made me painfully aware of the fact that I should be appreciating what I have on a daily basis, and not just blindly thinking that we’ll always have tomorrow. Thankfully, as a result of her fighting spirit coupled with her treatment, she is now cancer-free. I hope that I inherited her optimism, grace and resiliency if ever faced with such hardship.

Sometimes it’s hard having my mom is on the East Coast while I’m out here in the Midwest. I can send cards, flowers and sentiments, but I still miss the days when I could hug her and say “Happy Mother’s Day, I love you” in person. For the most part, my hugs are now ‘oven baked.’ I occasionally send care packages to my family of sweets and treats that I think they’d enjoy.

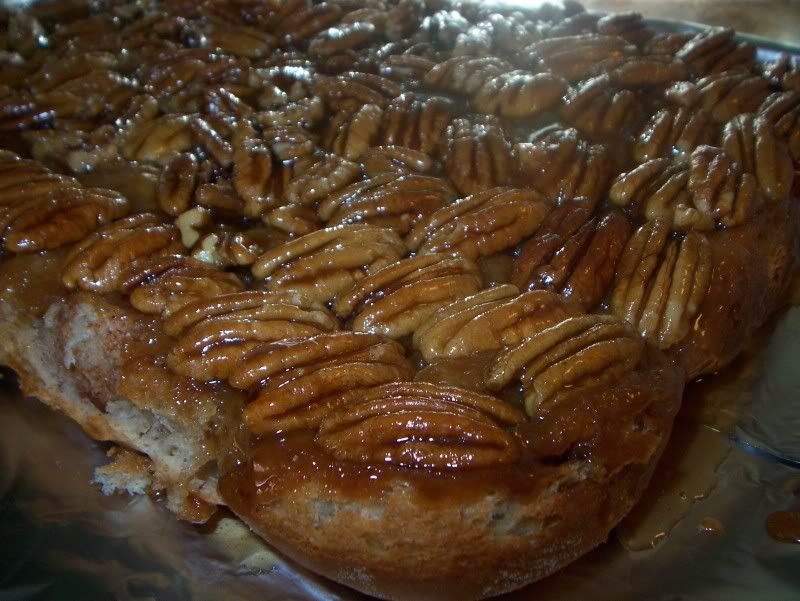
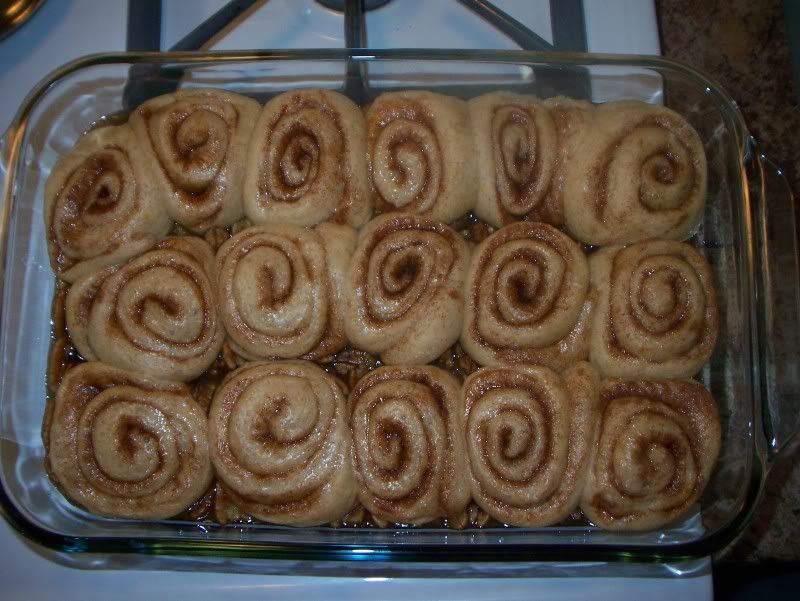
My mom is a lover of pecans. And caramel. This recipe jumped out as something that seems very ‘her.’ Though I’d never had sticky buns (versus glazed cinnamon buns), this looked like a promising recipe. This called for a sweet, spiced dough rolled with cinnamon, butter and sugar with a caramelized sugar and pecan topping.

The aroma of these buns baking is intoxicating. Fresh out of the oven, the topping is somewhat loose, but once it’s given a chance to set up, it somewhat resembles having a cinnamon bun topped with a pecan caramel toffee.

So if you’re like me and can’t say “I love you” in person, say it with buns. Buttery, sugary, pecan buns.

And just think, the more you eat, the bigger ‘hug’ you’ll get each time you put on your jeans!

Happy Mother’s Day, Mom! I love you!


Spiced Sweet Dough
From: Bon Appetite Magazine, December 2009. Yields dough for 30

Ingredients:
1 c Warm milk (105°-115° F)
2 pkg Active dry yeast
¼ tsp plus 2/3 c White sugar
1 ½ tsp Finely grated Orange peel
3 ¾ c AP Flour
2 tsp Ground cinnamon
1 ¼ tsp Salt
1 tsp Ground ginger
1 Large Egg
1 Large Egg Yolk
½ c (1 stick) Unsalted butter, room temperature
Directions:
Stir milk, yeast, and 1/4 teaspoon sugar in small bowl. Let stand until mixture bubbles, about 6 minutes. Stir again.
Mix remaining 2/3 cup sugar and orange peel in medium bowl.
Add flour, cinnamon, salt, and ginger to bowl of heavy-duty stand mixer fitted with paddle attachment; mix on low speed. Add yeast mixture; mix on medium-low speed until dry shaggy mass forms, scraping down bowl occasionally, about 2 minutes. Add egg and egg yolk; beat on medium speed until well blended. Add sugar mixture; beat until moist soft dough that resembles thick batter forms, about 3 minutes.
Add butter by 1 1/2 tablespoonfuls; beat on medium-low speed until almost incorporated before adding more, about 2 minutes (dough will be sticky). Beat dough on medium-high 2 minutes longer. Let dough rest in bowl 10 minutes (dough will become less sticky).
Scrape dough out onto work surface; gather together. Place in large buttered bowl. Cover with plastic wrap; let rise at room temperature until almost doubled, about 2 hours. Punch dough down; cover with plastic wrap and chill overnight.


Brown Sugar Pecan Sticky Buns
From: Bon Appetite Magazine, December 2009. Yields 30.

Ingredients:
Topping
1 ½ c Packed golden brown sugar
¾ c (1 ½ sticks) Unsalted butter, diced
¾ c Honey
3 c Pecan halves
Filling
½ c Sugar
6 Tbsp Golden brown sugar
1 Tbsp Ground cinnamon
Spiced Sweet Dough
4 Tbsp (1/2 stick) Unsalted butter, room temperature
Directions:

Topping
Butter two 13x9x2-inch glass baking dishes. Whisk sugar, butter, and honey in small saucepan over medium-low heat until smooth and bubbling around sides. Divide hot syrup between prepared baking dishes, allowing topping to cover bottom of each dish. Place pecan halves, rounded side down, in syrup, dividing equally. Cool.

Filling
Whisk both sugars and cinnamon in small bowl.
Turn cold Spiced Sweet Dough out onto floured surface; sprinkle with flour. Divide dough in half. Roll out dough to two 15x12-inch rectangles. Using fingers, spread 2 tablespoons butter evenly over each rectangle. Sprinkle cinnamon sugar over each. Starting at 1 long side of each dough rectangle, tightly roll up dough jelly-roll style, enclosing filling. Using large knife, cut each roll crosswise into fifteen 1-inch-thick slices. Arrange 15 dough slices, cut side down, atop cooled syrup and pecan halves in each baking dish, spacing evenly apart. Cover with waxed paper; let rise in warm draft-free area until buns are puffy and doubled, about 1 hour 45 minutes.
Position 1 rack in top third and 1 rack in bottom third of oven; preheat to 375°F. Line 2 rimmed baking sheets with parchment; place dishes with sticky buns on baking sheets. Bake buns until deep golden brown and filling is barely bubbling around edges, about 25 minutes. Let buns stand 2 minutes. Cut around sides of buns to loosen. Place large rimmed platter atop each baking dish. Using oven mitts, firmly hold baking dish and platter together and invert buns onto platter. Cool at least 45 minutes. Serve slightly warm or at room temperature.
Tip: You can roll, cut and assemble ahead. Put in freezer until ready to use. Night before, move from freezer to refrigerator and let sit overnight. Let sit on the counter for an hour before baking, then bake as directed.
Related Posts Plugin for WordPress, Blogger...