Friday, April 30, 2010

Red Wine Poached Pears with Mascarpone Filling

Mascarpone was always something I heard Giada or Michael Chiarello talking about on their shows. I love the way they say it "MAH-scar-PO-nay" - I always just said "MAR-scah-PONE" - how is that?

All that aside, somehow I got it into my head that I wanted to make a dessert using the cheese. And pears are healthy, right? I know that this is a pretty classic dessert and, thanks to Google, Michael Chiarello's version of this dish. The reviews were out of this world, but nearly all of them mentioned that the original recipe makes way too much filling. So, I kept the recipe as-is, but I did halve the filling. I'm glad I did, because I still had quite a bit leftover. I don't know what breed of giant pears he was using to develop a recipe with that much filling. This recipe also interested me because it gave me the chance to work with whole vanilla beans and cinnamon sticks, something I haven't done in a long time. And then I realized there is a reason I haven't worked with vanilla beans in a long time - they EXPENSIVE! But I also forgot what an amazing flavor those little wrinkly beans have when compared to extracts. Sometimes you just have to use the real deal, and this is one of those recipes.

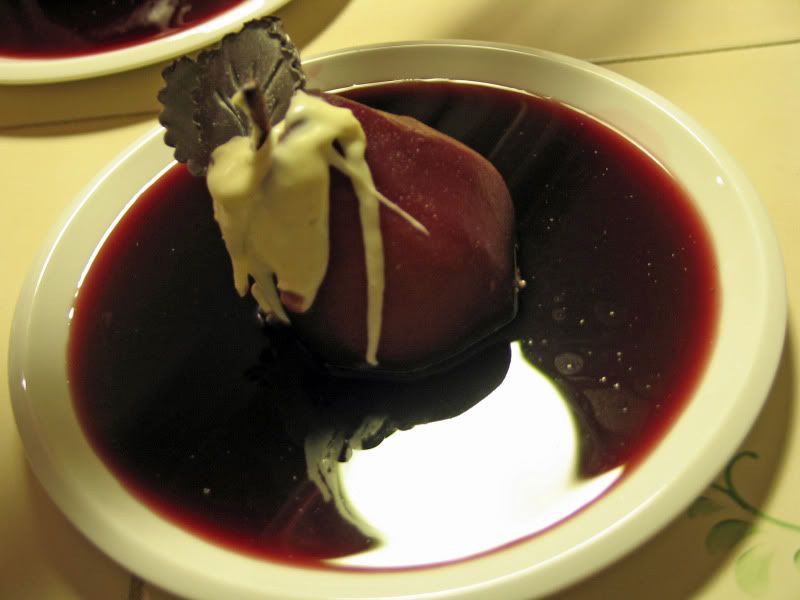
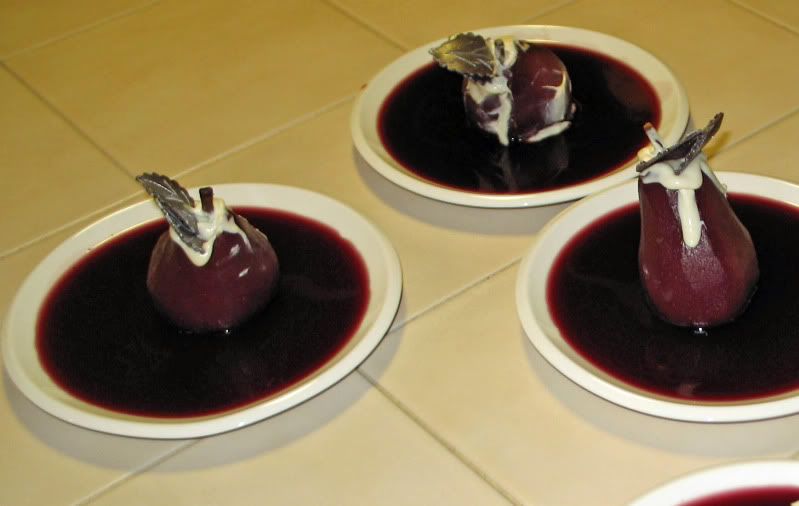
The process itself is pretty straightforward, and came together pretty quickly. I made the pears the night before I planned to serve them, as a lot of the reviews mentioned that they are ten times better after they essentially marinate in the red wine sauce overnight. Our home smelled amazing while the pears poached in their wine bath. I do have to give this high marks for the 'wow' factor as well - the pears turned such a beautiful ruby red after soaking overnight. If I was any better at plating or food styling, they would have been magazine cover-worthy. That is, until I filled them.

The recipe says to use a piping bag or tightly wrapped wax paper to fill the pears. I had a ziplock bag and I had cheese filling everywhere by the time I was done. And I mean everywhere - counterops, plates, hands. I had the slippery pear in one hand and the limp ziplock baggie in another. I would try to fill the pear, and the bag would fold over on itself, causing all the filling to ooze out of the pear from every direction.

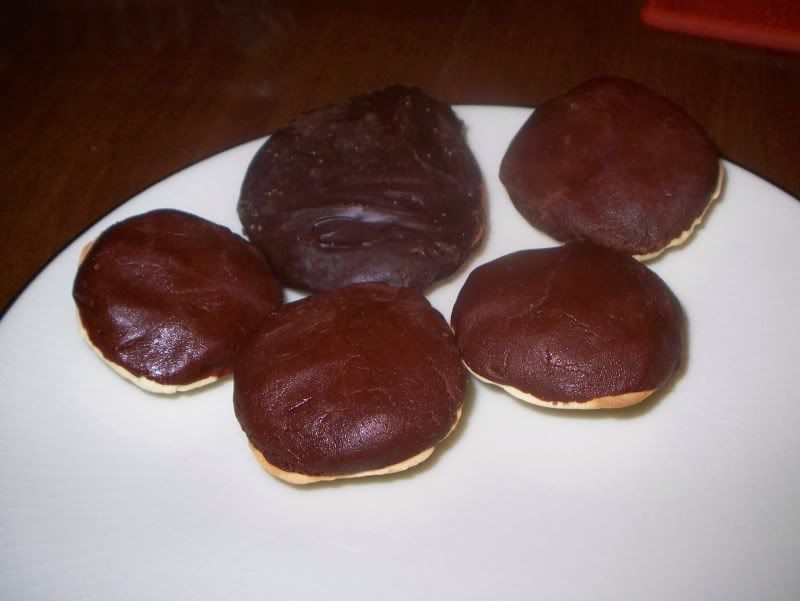
As my own little touch, I made little chocolate leaves dusted with a little silver luster dust to make them even a little more appealing to the eye, since it looked like they spewed mascarpone filling everywhere. And who can say no to chocolate?

Red Wine Poached Pears with Mascarpone Filling
Recipe adapted from Michael Chiarello
Serves: 6
Ingredients
6 firm Bartlett pears (I only had 5 but kept everything else the same)
1 bottle red wine
1 vanilla bean, whole
2 cinnamon sticks
2 bay leaves
2 cups sugar
1 (8 ounce) container mascarpone cheese, softened
1/4 cup heavy cream
Pinch cinnamon
1/4 cup powdered sugar
1 tablespoons butter

Directions
Peel pears and leave stem intact. In a large saucepan, bring wine and an equal amount of cold water to a simmer. Split vanilla bean lengthwise and add to wine and water mixture. Add cinnamon sticks, bay leaves and sugar, to taste. Add pears to liquid and simmer for about 20 minutes or until tender. Cool pears in wine mixture to room temperature. You can refrigerate them in the poaching liquid until you're ready to fill them. I refrigerated them overnight. I actually recommend it, as the coloring get richer the longer they sit in the wine sauce.

Remove stems from pears and set stems aside. Leaving the pear whole, core with an apple corer. I don’t have an apple corer, so I just used a paring knife and inserted it into the pear 4-5 times, making a square or pentagonal hole versus the pretty round one you’d get with the corer.

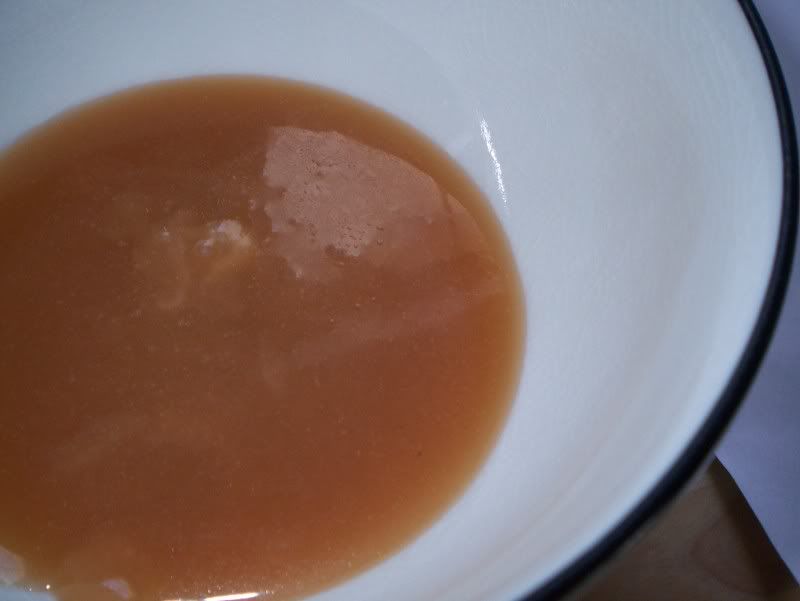
Whisk together mascarpone cheese, heavy cream, pinch cinnamon and powdered sugar until smooth. Transfer to a pastry bag, or if you do not have one, use wax paper tightly wrapped into a cone with the corner snipped off. Note: Let the wine sauce drain adequately from your pears. Some of mine were a little wet inside when I filled them which loosened up the mascarpone filling and left a little cheese puddle underneath each pear. After filling cored pears, finish by putting the stems gently into the mascarpone filling on top of the pears.

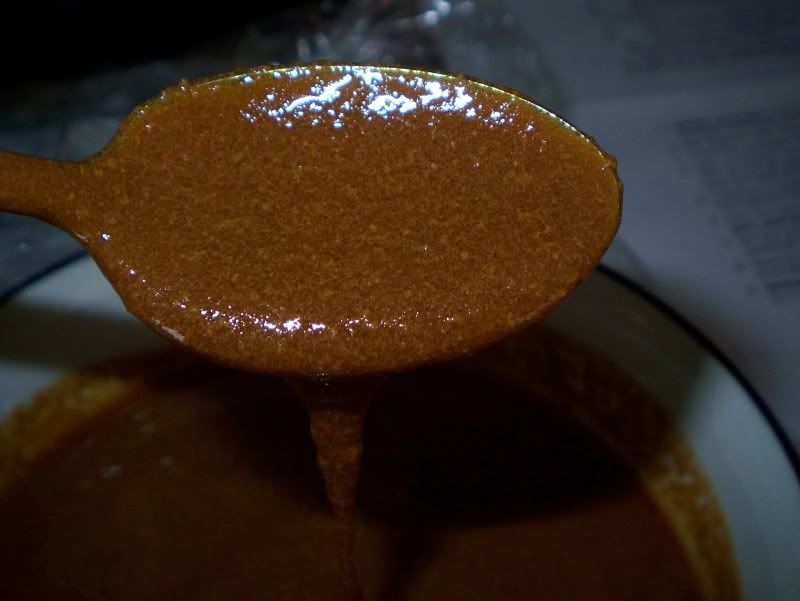
Bring sauce up to a simmer and reduce by half. Add butter to reduced sauce and stir until combined. Spoon generously over pears. Cool to room temperature before serving.


Car Bomb Cupcakes

Guinness stout cupcakes, whiskey chocolate ganache, Baileys buttercream frosting. Oh my.

I saw this recipe a while ago on Smitten Kitchen, and have been wanting to make them ever since. The opportunity came when the hubs and I were invited to a Bachelor/Bachelorette the weekend of St. Patty’s day. I may not enjoy chugging (aka choking down) the curdled shot that is a real Irish Car Bomb, but a cupcake that is inspired by it? Yes, please.

I've seen so many blogs that say this cake/cupcake recipe is their go-to recipe for a no fail chocolate cake. I can see why. These were some of the moistest cupcakes I've ever tried, and remained so even when kept in the fridge for several days. The alcohol is essentially baked out during the cooking process so, while the Guinness did add a little ‘something’ to the cupcake itself, I really don’t think anyone would be able to tell there was beer in it.

The cupcakes were supposed to be filled with a ganache spiked with whiskey, but used bourbon as my weapon of choice because that’s all I had. I put it all in a gallon-sized ziplock bag and snipped the end off to fill the little cavity I created in the cupcakes. It was pretty fun to watch the cupcakes begin to bulge and swell as they were filled to capacity with chocolate. The ganache itself was a pretty solid nugget when the cupcakes were cold, and only a little less solid when it came to room temperature. You could easily bite through it, but I think I was picturing a more truffle-like filling and may alter the recipe next time to reflect that. It was still amazingly tasty, and I’d make it again in a heartbeat. The alcohol is raw in the ganache, but it wasn't overpowering as I expected, it just added a nice touch of flavor.

The Baileys buttercream was the pièce de résistance, and it was my favorite part of the cupcake. I do think I may have licked some directly from the bowl. One of the tricks from Smitten Kitchen was to add the powdered sugar a little at a time, and that really seemed to work for me. The Baileys frosting definitely has the biggest punch of any of the cupcake components, but I loved it. However, if that isn’t your thing, go ahead and use half milk/half Baileys, or all milk if you want to omit the alcohol completely.

This is not a complicated recipe by any means, but the 'wow' factor is definitely there.

For the record, my friends had a wonderful party, and even got to see the Chicago River dyed mutant green. I really hope they enjoyed their treats!

Best wishes to them both for a long and happy marriage!

Chocolate Whiskey and Beer Cupcakes
Adapted from: Smitten Kitchen
Makes 20 to 24 cupcakes

Guinness Chocolate Cupcakes

1 cup stout (such as Guinness)
1 cup (2 sticks) unsalted butter
3/4 cup Dutch-process cocoa
2 cups all purpose flour
2 cups sugar
1 1/2 teaspoons baking soda
3/4 teaspoon salt
2 large eggs
2/3 cup sour cream

Ganache Filling

8 ounces bittersweet chocolate
2/3 cup heavy cream
2 tablespoons butter, room temperature
1 to 2 teaspoons Irish whiskey (optional, I used 2 teaspoons of bourbon, and a little more may have ‘accidentally’ dripped into the bowl.)

Baileys Frosting

3 to 4 cups confections sugar
1 stick (1/2 cup or 4 ounces) unsalted butter, at room temperatue
3 to 4 tablespoons Baileys (milk, heavy cream, or combination)

Directions
Preheat oven to 350°F. Line 24 cupcake cups with liners. Bring 1 cup stout and 1 cup butter to simmer in heavy large saucepan over medium heat. Add cocoa powder and whisk until mixture is smooth. Cool slightly.

Whisk flour, sugar, baking soda, and 3/4 teaspoon salt in large bowl to blend. Using electric mixer, beat eggs and sour cream in another large bowl to blend. Add stout-chocolate mixture to egg mixture and beat just to combine. Add flour mixture and beat briefly on slow speed. Using rubber spatula, fold batter until completely combined. Divide batter among cupcake liners, filling them 2/3 to 3/4 of the way. Bake cake until tester inserted into center comes out clean, rotating them once front to back if your oven bakes unevenly, about 17 minutes. Cool cupcakes on a rack completely.

Make the filling: Chop the chocolate and transfer it to a heatproof bowl. Heat the cream until simmering and pour it over the chocolate. Let it sit for one minute and then stir until smooth. (If this has not sufficiently melted the chocolate, you can return it to a double-boiler to gently melt what remains. 20 seconds in the microwave, watching carefully, will also work.) Add the butter and whiskey (if you’re using it) and stir until combined.

Fill the cupcakes: Let the ganache cool until thick but still soft enough to be piped. I used a grapefruit knife and grapefruit spoon to cut the centers out of the cooled cupcakes. You could easily use a paring knife as well. You want to go about 2/3 of the way down the cupcake but not cut through the bottom. Feel free to eat those centers. Or wait to dip them in any leftover frosting. Then eat them. Put the ganache into a piping bag with a wide tip and fill the holes in each cupcake to the top. (Here I just used a quart sized ziplock baggie with the tip cut off)

Make the frosting: Whip the butter in the bowl of an electric mixer, or with a hand mixer, for several minutes. You want to get it very light and fluffy. Slowly add the powdered sugar, a few tablespoons at a time.

When the frosting looks thick enough to spread, drizzle in the Baileys (or milk) and whip it until combined. If this has made the frosting too thin (it shouldn’t, but just in case) beat in another spoonful or two of powdered sugar.

Ice and decorate the cupcakes.

Do ahead: You can bake the cupcakes a week or two in advance and store them, well wrapped, in the freezer. You can also fill them before you freeze them. They also keep filled — or filled and frosted — in the fridge for a day. (Longer, they will start to get stale.)

Thursday, April 29, 2010

Twix Cupcakes

I have a soft spot for all things chocolate. And caramel. And cookie. That’s probably the reason one of my favorite candies is the Twix bar. A little shortbread cookie, topped with caramel and then enrobed in milk chocolate. I was really in the mood to make cupcakes recently, but I wanted to do something special. So I decided to make a chocolate cupcake topped with homemade caramel, chocolate ganache, and circular shortbread cookie with a caramel buttercream frosting. It’s hard to see in that picture, but I promise you, it’s all there.

Though I’ve made cupcakes before, this was my first time making buttercream, shortbread, caramel and chocolate ganache. And what an experience that was. First things first. When a recipe says "heavy cream" or "whole milk" DO NOT, I repeat DO NOT use fat-free half and half by mistake. Lets take a look at what happens, shall we?

Bad Ganache (top) versus Good Ganache (bottom)

Bad Caramel (top) versus Good Caramel (bottom)
Fat-free half and half curdles much easier than its full-fat counterparts. The fat in real cream allows it to withstand both simmering and any acidity it may encounter in certain sauces, which is not true for the fat-free version. You can see the little flecks of curdled cream, especially in the caramel (not to mention the caramel may or may not have gotten slightly overcooked as well which was just another reason to start over). The second attempt was much better than the first, especially when I double-checked that I was indeed using heavy cream this time around. I also diligently watched my caramel this time; I did not want to make it a third time simply because I let it burn again. (As an aside, the amount in the above picture is what was left over after removing the 1 cup portion for the frosting.) My husband can attest to the fact I get ridiculously excited when things work the way they are supposed to. I must have made him look at my bowl five or six times because I couldn’t believe I successfully made caramel. It even thickened like it was supposed to – which meant I called him over again to specifically point that out. He’s a good sport.

The cupcake recipe was from Martha Stewart’s website; I used the ever popular "One Bowl Chocolate Cupcake" recipe from the Cupcakes book. This batter was easy to throw together, though I had a really hard time figuring out how to transfer the incredibly loose batter from my bowl to the cupcake wrappers. They baked just fine, and surprisingly flat. While this was a good cupcake, I definitely will not stop looking for the ‘perfect chocolate cupcake.’ I have since found another recipe from one of Martha’s Baking Handbook that is named the same thing, but has a different list of ingredients, and word on the street says it's even better than this recipe. I’ll have to try it next time.

I do have to say that the cupcakes themselves were a little difficult to eat because of the shortbread cookie on top, but I don’t think that discouraged anyone from digging right in. These are not dainty cupcakes. These are dive-in-head-first-get-frosting-all-over-your-nose-and-face cupcakes. Or, if you’re civilized, you can definitely cut one in half and eat it that way. But why dirty more dishes than you have to?
I also tried making these as mini cupcakes, but the shortbread was so hard to make that small that the ‘twix’ aspect was mostly lost.
This recipe is incredibly long, I’m warning you now. Because there are five distinct components to this cupcake, it does take a while to make. But it is so worth it.
Twix Cupcakes

Caramel
Adapted from Cheryl Porro
4 Tbsp Water
1 c Sugar
2 Tbsp Light Corn Syrup
½ c Heavy Cream
2 Tbsp Butter
½ tsp Lemon Juice

Combine the water, sugar, and the corn syrup in a deep saucepan and cook over medium heat.
Stir together with a wooden spoon until the sugar is incorporated.
Cover the saucepan and let it cook over medium heat for 3 minutes.
After 3 minutes, remove the lid, increase the heat to medium-high, and bring to a boil. Do not stir from this point on, but it is important to carefully shake the pan so that one area of the caramel doesn’t burn.
Continue to cook until the caramel turns an even amber color then remove from the heat and let stand for about 30 seconds.
Pour the heavy cream into the mixture. Wear oven mitts, stand away from the pan, and be careful. The mixture will bubble up significantly.
Stir the mixture, again being careful. Add the butter, and lemon juice. Stir until combined.
Measure 1 cup into a Pyrex measuring cup. Stirring occasionally, allow to cool until thick like molasses and warm to the touch, about 20 minutes. The 1 cup that was set aside goes into the buttercream frosting with leftovers will be used on top of the cupcakes themselves.

Caramel Buttercream Frosting
Adapted from Cheryl Porro
2 sticks Butter
8 oz Cream cheese
5-6 c Confectioner’s Sugar
1 c Caramel

Bring butter to room temperature by letting it sit out for 1 or 2 hours.
Beat butter and cream cheese at medium speed until creamy.
Sift 3 cups of powdered sugar into the butter/cream cheese mixture and beat to combine.
Add 1 cup of caramel and beat to combine.
Sift 2-3 cups of powder sugar, in 1 cup increments and beating between each, until you arrive at the thickness and sweetness you desire. (I used 6 cups)

Shortbread
Adapted from Taste of Home
1 stick + 3 Tbsp Butter, softened
1/4 c Sugar
2 c Cake Flour
2 Tbsp Ground rice (processed rice grains in food processor or coffee grinder, do not use rice flour)

With a rack in the lowest portion of the oven, preheat to 350. Spray a 9×13″ baking pan with cooking spray, line with parchment paper, then spray the paper.
In a stand mixer with the paddle attachment, or with a hand mixer, cream the butter and sugar together on medium speed for about 2 minutes. It should be fluffy.
Gradually add in the flour and the rice until the dough comes together.
Press the dough into the bottom of the prepared pan and bake for 12 minutes. Rotate the pan and continue to bake for another 8 minutes. The shortbread should be a deep golden brown. Cool on a rack to room temperature, still in the pan.

Chocolate Cupcakes
Adapted from Martha Stewart’s Cupcakes Book. Yield: 12 cupcakes.

Ingredients:
¾ c Unsweetened Cocoa Powder
1 ½ c AP Flour
1 ½ c Sugar
1 ½ tsp Baking Powder
¾ tsp Salt
2 Large eggs
¾ c Warm Water
¾ c Buttermilk (I substituted 3/4 c milk mixed with 2 ½ tsp lemon juice, after letting it sit for 5 minutes)
3 Tbsp Canola oil
1 tsp Vanilla
Directions:
Preheat oven to 350F. Line 2 cupcake tins with liners and set aside.
Sift together cocoa powder, flour, sugar, baking soda, baking powder, and salt into a large bowl. Add eggs, warm water, buttermilk, oil, and vanilla, and mix until smooth, about 3 minutes. Scrape down the sides and bottom of bowl to ensure batter is well mixed.
Divide batter evenly among muffin cups (I poured into a funnel with the end of a wooden spoon as my stopper, lifted the spoon until batter filled the cups then replaced it to stop the flow of batter.), filling each 2/3 full. Bake until tops spring back when touched, about 20 minutes, rotating pan once if needed. Transfer to a wire rack; let cool completely.

Chocolate Ganache
From Joy of Baking

8 oz. Bittersweet Chocolate
¾ c Heavy Whipping Cream
2 Tbsp Unsalted Butter
1 Tbsp Cognac or Brandy (optional)
Directions:
Place the chopped chocolate in a medium sized stainless steel bowl. Set aside.
Heat the cream and butter in a medium sized saucepan over medium heat. Bring to just a boil.
Immediately pour the boiling cream over the chocolate and allow to stand for 5 minutes.
Stir with a whisk until smooth. Add liqueur if desired.

Assembling the Cupcakes

Make caramel. Allow to cool completely.
Make cupcakes and allow to cool completely.
Cut out pieces of shortbread using a round cookie cutter that is slightly smaller than the diameter of the cupcake. Set aside.
Make Caramel Buttercream frosting.
Make chocolate ganache. Spread thin coating on each cupcake and let set up a little bit.
Spread thin layer of leftover caramel on each cupcake (this can be hard with the ganache already on the cupcake, but it’s easier if you let the ganache set slightly first.)
Top each with a shortbread disk.
Frost each cupcake with your Caramel Buttercream.


Quilt Cookies!

I love cooking and baking, but I also love to sew. I could probably start another whole blog on some of the projects I’ve undertaken in the past few years, but, for now, I’ll stick with one at a time. Sewing can be so relaxing, and definitely gratifying when I see something in a store that I know I can make for 1/10th the price. Because my husband and I are still saving money for essential things and putting money into our house, we spend very little on non-essential, frivolous things. Aside from the generous holiday gifts from family, our only decorations for our house are things that I've made. I take great pride in the fact I can put little touches in our house to make it our 'home' but I don't have to buy out a department store or Kohl's to do so. My love for sewing started with a small, hand sewn lap quilt I made during a summer I interned in Indiana. As I got better, ventured into larger quilts with smaller patterns, and finally purchased my sewing machine - which is a godsend. I’ve made birthday quilts, wedding quilts and quilted pillow covers. Here’s a small idea of some of the projects I’ve completed.The first two photos are the fronts and backs of pillows I made for my brother’s Christmas gift. We are huge fans of Nintendo, and still have the old NES console with the cartridges. You know, the ones you have to blow into the bottom before you put it into the machine. Duck Hunt, Super Scope, Mario Bros. 1,2 and 3. All the classics. His favorite character of course is one that only appears in Super Mario Bros. 2 - a bird named “Tweeter” (this was also the name of our first parakeet as children), so I made sure to include that on the pillow. Each pillow has 361 blocks that are ¾” square when finished. Yes, in total, these pillows have nearly 1450 pieces.

Next is a pillow I made for my dad out of an oversized t-shirt he got when he was inducted into the Sports Hall of Fame at his college several years ago. He couldn’t wear the shirt so I made it into something useful that he could still enjoy using the colors of his alma mater.

The second quilt I ever made was pieced together little by little during my last few semesters at college. I learned the hard way about making sure you have everything you need when you start, as the large diamond center was designed after running out of enough fabric to continue the outer pattern throughout the rest of the quilt.

The last quilt is especially meaningful to me. Several years ago, my mom was diagnosed with breast cancer but thankfully has been cancer-free since her surgery and subsequent treatments. I found a great pink ribbon fabric, and though a quilt would be a great way to celebrate such great news.

I feel that quilts and food provide similar comforts. Quilts make you feel warm and cozy on the outside while food works its magic from the inside. I guess I just love providing comfort!

Recently, the opportunity arose to join the first ever National Food Blogger’s Bake Sale benefitting
Share our Strength, an organization which strives to eliminate childhood hunger in the United States. I figured this would be a great time to try something new, especially considering it's for a such good cause. I don't know why, or how, but an idea immediately popped into my head – quilted sugar cookies. My plan revolved around coloring the dough itself and assembling the cookies one by one, essentially trading my quilting squares for dough. The more I researched though, the more I found plain square sugar cookies that were decorated with colored royal icing, which led me to think that this idea, while creative, was not pragmatic.

Not one to be discouraged easily, I decided to just try it. I made my trusty sugar cookie dough again, and this time divided it equally among several colors, including leaving some colorless. After chilling the dough for an hour or two, I pulled them out and attempted to roll each color a uniform thickness. Once they were rolled, the dough needed to chill again. It was tricky because the dough needs to be cold and firm to cut sharp cornered squares and triangles, but then it has to warm up after cutting so that a good bond is created between the seams of the different dough segments. Funny enough, I also enlisted the help of my cutting mat I use for fabrics because the grid on it ensured I’d get uniformly sized, straight pieces. I just placed my dough on parchment paper and then on the cutting mat.

After cutting a bunch of squares and triangles, I started assembly. If I had thought about it, I would have definitely only made one cookie at first, to make sure my idea was even possible. Halfway through my sixth cookie or so, my husband asked me if I knew they were going to work and maybe I should bake a tester.
By that point, I had already invested too much time in the cookies that were already made, so I decided I’d soldier on and either succeed totally or fail miserably. It was too late to test. In the picture below, you can see what the cookies look like prior to baking. Once assembled, I used my bench scraper to ‘re-square’ the cookies and flatten out the edges so they looked like quilt blocks, and not quilt amorphous blobs. They looked good, but I still had no idea if they would hold together after baking.

In the end, I was able to make 17 cookies. You only see 16 because I got too excited to play around with one fresh out of the oven. Don’t do that. These cookies are super soft when they first come out of the oven. Be patient. Let them cool. Or else the seams split and it falls apart. (The broken one was the green and orange one in the center of the tray in the picture on the right) I say it just let me do ‘quality assurance’ for taste. While ‘pretty’ is a main goal for my food and baked goods, taste is just as important. Sure, they're attractive on a plate, but if they aren’t delicious, what's the point? If no one is going to eat it, you might as well just have a picture.

In the end, I think they turned out really well and I was proud to have them among the other goodies available for sale. The Chicago bake sale raised $885.00. Thanks again to Maris at
In Good Taste for organizing and letting me be a part of something great.

My Cookie Love -Slice and Bake Hokie Cookies

I love Virginia Tech. Even though I graduated nearly three years ago, I am still always yearning to visit again - especially Lane Stadium. Our football games are something else. With "Enter Sandman" by Metallica blaring in the stadium, 66,000 of your closest friends start jumping up and down and screaming at the top of their lungs in the bleachers awaiting the entrance of the football team. No wonder ESPN.com dubbed us #2 on their "Top 10 Scariest Places To Play.".

Despite being such a large school, Virginia Tech really does possess small-town charm. Blacksburg residents, Virginia Tech students, staff, faculty, and alumni all have strong sense of pride in the University. One of the main reasons I chose Virginia Tech was because I distinctly remember feeling as though I was in a community, not just on a campus. Even after graduates leave Tech for the ‘real world,’ their pride remains. I'm continually amazed at how many Tech graduates I run into in Chicago on a regular basis and how it is almost implied that we are already friends because of our one common denominator, Virginia Tech. I am forever blessed to be part of a school that has such a sense of community. I learned just how important that can be after the tragic events of April 16, 2007. At this point, most people know the story but, if you are curious, here is the Wikipedia link - April 16th.

Friday, April 16, 2010 marked the third anniversary of this event. While dealing with what happened is an everyday struggle for me, the anniversaries (and days surrounding them) are always the most difficult. During these days, I try to keep myself busy, but also try to slow down and take time to be incredibly grateful for my blessings. I also cook and bake – those are my main coping mechanisms. My husband and I had the day off work and planned a picnic in southwestern Michigan and planned to visit several of the local wineries. I prepared all the food for our picnic, including granola bars, stuffed buns, lettuce wraps and strawberry shortcakes on cream scones, but I still wasn't satisfied. My fellow Hokies were on my mind too much. So, I decided to make a cookie dedicated to them. Little did I know it would be one of my favorite things to ever come out of my oven.

I knew I wanted to do something Hokie or Virginia Tech themed, and an orange and maroon swirl cookie would be too easy. If you know one thing about me, it’s that I swing for the fences when I want to try something new. Eventually I decided to go with the iconic Hokie bird because it was a little more intricate than the VT logo. The real difficulty was figuring out how to translate a 2-dimensional image into a cookie without having to individually assemble each cookie like a puzzle. My solution? Slice and bake cookies! I have seen the pre-packaged slice and bake cookies in the store, and thought I would replicate the idea for my own creation.

I whipped up my favorite batch of sugar cookie dough – the same dough we used to make our wedding favors last year. It’s so versatile and, better yet, tasty. I’m sure you’ll be seeing it again in the near future. With my handy-dandy food scale, I weighed my dough, and then portioned it into four different bowls for coloring. The weights were based on the percentage of the total image that was a specific color (and yes, I actually measured, I didn’t want to run out of a color and have to try and match it later). My palette: plain (1/2), black (1/8), maroon (1/4) and orange (1/8). This also let me try out my new black food coloring with which I am now totally smitten.

The first step is attempting to picture what a 2-D image would look like extruded into a 3-D shape. The process is essentially creating and stacking logs so that each cross section will result in your image on each side of the cookie. I worked for approximately 3 hours the first night - and that doesn’t include making or coloring the dough. Did I mention how long that takes when using bright bold colors you don’t want mixing and only have one bowl for your KitchenAid?
Yeah, that takes a while. After stacking 3 or 4 logs with a thin layer of black dough in between, I had to let them chill in the refrigerator overnight to let the dough harden again before adding more layers. I repeated this process, including the overnight chilling, 3 more times. This is not a fast cookie. It took me four days to assemble the dough of the cookie, with no guarantee that they would even look anything like I was hoping. The eyes were by far the most difficult part of the cookie to do – roll a log of plain dough, make a slice down the length of the dough and separate the edges, then roll another, smaller log in black, and try to fit that little snake in the plain dough slit. Not counting the black outlining, I believe there ended up being 14 different pieces to this cookie. I was a little worried because the ends of my Hokie logs looked a little distorted. Did I just spend 4 days on a cookie that will just look like a maroon and orange blob?

Something magical happened when I finally sliced the deformed ends off the dough – I saw a little Hokie bird face emerge. Soon, a small army of Hokie birds were lined up on my cookie sheets, ready to bake.

These are some of my favorite cookies to date, and I can't wait to apply this technique to other images! The possibilities are truly endless.

This is for all my fellow Hokies out there. Ut Prosim.

Live for 32.

Wednesday, April 28, 2010

"Philly" Cheesesteak Subs

I say "Philly" Cheesesteak because I've never actually had a true Philly Cheesesteak. From what I've heard, they typically have Cheese Whiz and peppers and onions on a soft, chewy bun. While it sounds good, it also sounds a little greasy for my everyday dinners. Therefore, my version is nothing like that, but it is a tasty combination of steak, sauteed peppers, onions, mushrooms and topped with melty provolone cheese. Even though it's not a true Philly Cheesesteak, it is still a wonderfully versatile steak sandwich that can be easily made on a busy work night to suit pretty much any taste.

I made two sandwiches, but this recipe can easily be halved or doubled. My husband and I have a little different approach to veggies in our meals, but that's the beauty of this sandwich. This is a base recipe that you can change any night of the week to suit your personal taste. I was able to have my peppers, mushrooms and onions while my husband's sandwich had only mushroom. In the sandwiches below, the sandwich bursting at the seams would be more 'normal sized' if the husband wanted some of the peppers and onions I had prepared. There were definitely enough veggies for two. He also likes things a lot cheesier, so his sandwich had 3 slices of provolone while mine only had one. It is also important to very thinly slice your beef against the grain. This ensures your beef is nice and tender and you don't end up with little beef shoestrings in your teeth. The last step of letting them bake in the oven gets the cheese perfectly melty (though in a pinch, the microwave can work, too)
Ph-aux Philly Cheeseteaks

1/2 green pepper, sliced thin
4 slices of sweet or yellow onion
8 button mushrooms, sliced
1 tsp Worcestershire
2 tsp Cayenne pepper, divided
Salt
Pepper
1/2 lb beef thinly
sliced
2-4 slices provolone per sandwich, cut in half
2 chewy sub rolls

Preheat your oven to 275 degrees. Mix thinly sliced beef with Worcestershire and 1 tsp cayenne pepper.

In a skillet over medium heat start cooking the peppers and onion, stirring occasionally. Season with salt, pepper and 1 tsp cayenne pepper. Let them cook for 3 minutes or so. Add mushrooms, season again with salt and pepper, cook for an additional 5-7 minutes or until cooked through.

You'll go from this:To this:
Heat a smaller skillet over medium heat with a little bit of canola oil. Saute the beef for 3-5 minutes, or until cooked.

Slice the rolls lengthwise, and line the buns with provolone. (I also dig a little bit of the bread out of the rolls to make a little larger cavity for the filling so that it doesn't ooze out after the first bite.) Fill your each sub roll with half of the beef and half of the vegetables.

Roll each sub in aluminum foil and bake in the oven for 5-10 minutes, or until the cheese is melted.

Unwrap, slice if desired, and enjoy!
Serves two.

We usually have a simple side like a salad or corn as an accompaniment.


The Berger Cookie Experiment

If you have been to Baltimore or the nearby surrounding area, then you should know what a Berger cookie is. If you don't, shame on you. There is even a Facebook page devoted to the local cookie. Go to your nearest Shoppers, Giant or other grocery store and pick yourself up a box today. They even ship. Go on. I'll wait.

For those who don't know, Berger cookies are a soft, dense but not 'cakey' cookie with a thick layer of a fudgy icing on top. I hesitate to call it 'icing' because it's not like any buttercream, swiss meringue or royal frosting you will ever taste. It is pure fudge heaven. The recipe was brought over with the Berger family and has been relatively unchanged since its modest beginnings in the early 1800's.

These cookies are still hand frosted to this day, which gives them the "homemade" charm that is lacking in a lot of baked goods today. Every single one is different. My "ideal" Berger cookie has about a 1.5:1 ratio of icing to cookie (or more!), but because the icing process is not automated, the amount of icing can vary greatly from cookie to cookie. I'm always eyeing up the box before buying to make sure there are at least a few cookies with a heavy fudge layer because, I'll be honest, I'm also the one picking the abandoned frosting chunks out of the box after all the cookies are gone. It's that good. If I didn't risk a nasty paper cut from the box, I'd totally lick it.

You could always tell who your true friends are by the way they distribute their Berger cookies. Best friends will let you choose your own straight out of the box; they're willing to sacrifice the fudgiest cookie because they love you that much. For good friends, you'll pick through the box once for your perfect cookie, and then you'll let them select from the leftovers. Acquaintances will have their cookie picked for them, typically the one with a nearly equal frosting to cookie ratio. And that's if you share with them at all.

Since moving to Chicago, the only thing that compares to the withdrawal symptoms of a bushel of steamed Maryland Blue Crabs or the lack of UTZ chips are the pangs of Berger Cookie hunger. We are so lucky that when my family comes to visit they bring us loads of Berger cookies (as well as UTZ - crabs don't travel that well. Don't think it hasn't come up).

Ever since we ran out of our last box, I've been trying to replicate the cookie for myself. I don't find the ingredient list itself odd, but I do find the ingredient list surprising because of the relative amounts of certain ingredients in the cookie. Cornstarch is a main ingredient with milk being way down on the list. Also complicating matters, fudge as I know it is typically made with milk or cream, but for this cookie I have been working with a "Water Fudge" recipe in an attempt to stay true to the ingredients in the cookie. Knowing what the cookie and frosting texture should be, and armed with only the ingredient list in descending order of weight in the product, I began formulating my recipe for my own Berger Cookie. I even have my own little notebook to write down all my recipes and notes.

It's not easy, though. Throwing together a dinner with no recipe is difficult, but not impossible. Trying to make the perfect cookie based on your 'mind ideal' is not. I know what it's supposed to taste like and what texture it's supposed to have. And I'm picky. I'm about to begin "Cookie Trial 3" and "Fudge Trial 4" at the current moment. You can see I'm starting to get something resembling the real deal. Can you spot the impostor?
My problem now is with texture. While the fudge is pretty close, the cookie still leaves something to be desired for texture. I'm planning to try again in the near future, in hopes that the cookie will be more like I think it should be.

This is an ongoing project, and I'll be sure to be posting updates as I have more trials.

Wish me luck! If you're nice, maybe I'll even consider sharing.

Up and running...

No matter how much creativity goes into it, cooking is an art. Or perhaps I should say a craft. It abides by absolute rules, physics, chemistry, etc. and that means that unless you understand the science you cannot reach the art. We're not talking about painting here. Cooking's more like engineering. I happen to think that there is great beauty in great engineering.
ALTON BROWN, interview, Sep. 12, 2002

Oh my gosh. How many ways can I love Alton Brown and his approach to food? He is the perfect combination of science nerd and food gourmet with a little (or a lot) nuttiness sprinkled in. He nearly always has reliable recipes and I feel that is mainly due to the fact that he understands why food does what it does and how recipes work from a science and chemistry standpoint. Sure, sometimes his examples are a little, should I say, juvenile, and he can be a little over the top but he gets his point across.

I don’t think it comes as a huge surprise that I feel engineering and cooking/baking go hand in hand. As in any engineering project, a systematic approach is paramount. The same is true with cooking and especially with baking. A recipe is your golden ticket to success more times than not. I buy magazines, cookbooks and love blogs and websites that detail the recipes as well as any problems or changes made during the process. I generally find I lean towards reproducing recipes with positive feedback versus the ones floating around in cyberspace simply because I have a better chance of success with the recipes if it has already worked for someone else.

Also, as in engineering, there are times you can improvise, and times where you must stick with the process. I find that the main difference between cooking and baking. When I cook dinner, I tend to season things as I like (namely with spicy foods and herbs) and typically haphazardly throw things in the pot when I think it’ll work. With baking, however, you’re messing around with chemistry. While you can typically improvise with add-ins without compromising the final product, nearly all the base ingredients and their amounts are in that recipe for a very specific purpose. Even in something as ‘simple’ as bread, with only three basic ingredients (water, yeast, and flour), the ratio of these ingredients to each other can drastically change you final product. How batters are prepared before baking makes a difference (muffin method, creaming method, combination method, etc).

And finally, as in engineering, even the best laid out plans (or recipes) fail, despite your best efforts.

I have had several unmitigated disasters in my kitchen. Some require overnight pot soaking to make a dent in the cemented remnants of an incinerated dish. Some require removing the batteries from all 4 upstairs smoke alarms in the house because even though the smoke is billowing out of the kitchen, the house isn’t burning down. I think the failures motivate me as much as the successes. And I’ve managed to flambé when I had no intention of doing so. That was an exciting evening. My eyebrows disagreed.

When I fail, I want to know why - At least, aside from the obvious “in over my head” excuse. I feel like knowing ‘why’ is taking one more step towards my own success the next time around (and when I fail, there is always a next time. I refuse to give up). If I do a little research, I feel like success will not have been as much by chance as by taking the time to educate myself as to what should be happening with my food and discovering why I failed the first time. Also, by knowing what to expect, I can ideally replicate a successful recipe over and over again, and not just rely on blind luck.

And because I’m not too proud at admit my failures...

Having never made candy before, I had this insatiable desire to make fudge. I mean, seriously, how hard could it be? You add some ingredients to a pot, cook until it reaches a certain temperature and then you stir the bejeezus out of it until it’s ready to put in a pan and cool. The very first recipe I attempted had less-than-clear directions (first mistake, especially with candy). There I was, with a 245-degree chocolatey-sugary concoction that I was stirring until my arm was ready to fall off, then dumping it into a buttered pan to wait for it to cool. I hovered over that so-called fudge, feeling the pan every couple of minutes waiting for it to cool so that I could try my first creamy, silky, melt-in-your-mouth bite. Finally, it was time. I cut off a little piece with my knife and smugly held up a piece of my masterpiece, thinking to myself “and they said this was hard.” I put what I was expecting to be a scrumptious piece of fudge in my mouth and was rewarded with feeling like I had just licked the shores of a chocolate beach. Instead of the creamy delectable bite I was expecting, I got a gritty, sandy chocolate mess. Needless to say, my sore arm and I were unhappy. Not to mention each batch of fudge can take several hours from start to finish because of the cooking and cooling times required. It's frustrating to have to wait so long and not be happy with the end result.

Instead of being discouraged with my failure, however, I resolved to try again. This time, I researched more recipes, looking for details and clues as to what happened. I found out that I started stirring way too soon, and consequently I initiated the sugar recrystallization process too early, which created the textural nightmare in my mouth. Needless to say, my second batch of fudge was supremely better than my first.

Now, I’m not saying I’m going to be writing about all the science behind everything, I don’t pretend to know it all. Not to mention, I wouldn’t want to put Alton Brown out of a job. He just seems too nice. But that won’t stop me from throwing an interesting tidbit or two every once in a while. For me, cooking is a lot of experimentation and sometimes it works, sometimes it doesn't. You can expect that I will be posting things I make, and my experiences in the kitchen, disaster or not, in the hopes that you will be inspired to find a new favorite or, even better, avoid the mistakes I make.

Enjoy.
Related Posts Plugin for WordPress, Blogger...