Saturday, September 25, 2010

Wild Mushroom Tartlettes

When I host a get together, I make a point to develop a menu that features food that will satisfy most appetites. While some people can subsist on brats, burgers and hot dogs alone, I can’t. I have to have lighter options to pair with the heavier foods, or else by the end of the party, I feel so bogged down by the weight of what I’ve eaten that I nearly have to roll out of the door. I also try to keep in mind that not everyone eats meat, so I try to have delicious vegetarian options that give non-meat eaters something on the menu that is more substantial than chips and salsa.

These tartlettes were a hit as an appetizer with both the vegetarians and carnivores alike. The mushrooms made these babies substantial, and the prepacked fillo shells made them a snap to assemble. I made the filling the night before the party, so all I had to do was fill the shells and heat them up the next day. Perfect when you want to spend your time with your guests, instead of in the kitchen.

If you wanted to add meat to this dish, a nice touch might be to fry up a couple pieces of bacon in a pan, remove and crumble up the bacon, and cook the mushrooms in the bacon fat, instead of using the better called for in the recipe. Then just add the crumbled bacon in with the mushrooms and serve. That would definitely kick it up a notch.


Wild Mushroom Tartlets Recipe (halved recipe)
By Woman's Day Kitchen from Woman's Day

Recipe Ingredients
1 T bsp butter
3 Tbsp chopped shallots
8 oz sliced assorted wild mushrooms, roughly chopped (8 oz – crimini, shitake, baby bellas and button mushrooms)
2 T bsp dry sherry, white wine or water
1 tsp chopped fresh thyme leaves
Pinch each salt and pepper
2 Tbsp reduced-fat cream cheese
15 mini–fillo shells (I used Athens Brand)
Garnish: small thyme sprigs


Recipe Preparation
1. Heat oven to 350ºF. Melt butter in a large nonstick skillet over medium-high heat. Add shallots; cover and cook 3 minutes until softened.

2. Stir in mushrooms. Sauté 5 minutes or until tender. Stir in sherry, thyme, salt and pepper until mixture simmers. Simmer 1 minute. Stir in cream cheese until melted.

3. Fill each fillo cup with 1 Tbsp mushrooms. Place on baking sheet. Heat about 5 minutes to heat cups.

Tip: The mushroom filling can be made a day ahead and reheated in the microwave (you may need to stir in a Tbsp or so of water if mixture seems too thick). To have the tartlets ready to bake, fill them up to 2 hours ahead.

Friday, September 24, 2010

Paninis (AKA Asiago Cheese Bread Part Two)

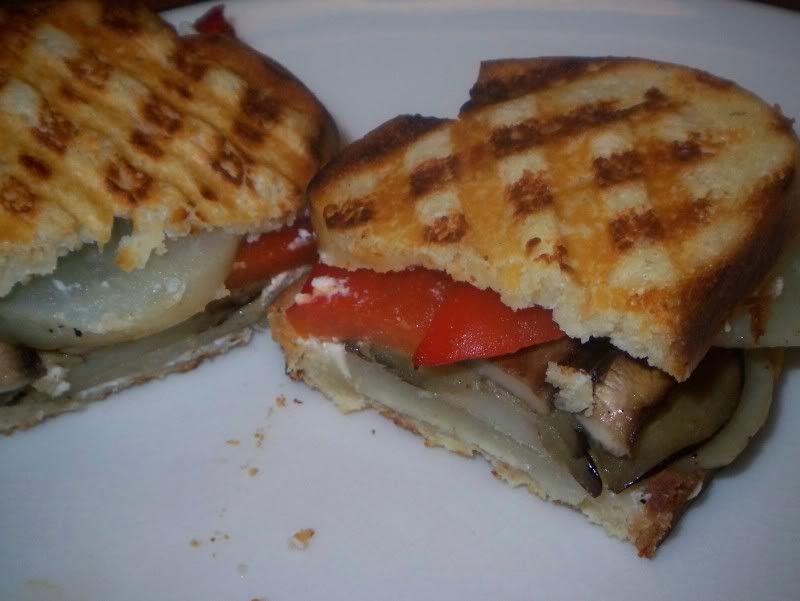
If you remember the Asiago Cheese Bread I posted a bit ago, I finally pulled some of it out and made good use of it, as requested by the husband. Every so often, for a quick, easy and versatile dinner, we will make a couple of Panini. He suggested that instead of the crusty artisan bread we buy for it, we should try using the cheese bread. He’s a genius, I tell you.

Ironically, my first panini sandwich was from a quick service restaurant in Paris. I had no idea that it was even Italian in origin. It had ham and cheese and was grilled to perfection between the plates of a panini press. The press grills both sides evenly and at the same time, and squishes the sandwich down. The result is a thin, crispy, melty sandwich that haunted my dreams for years. Ok, maybe that’s a little overdramatic, but it was definitely a step above your ordinary grilled ham and cheese. When I returned from Paris, I wanted to recreate the sandwich, but I thought it would be impossible without a panini press.

I tried a few ‘pressing’ options, some with more success than others. First attempt ever, my hand. Hot butter, hot cheese and a hot pan. Ouch. You’d think I would have stopped to consider maybe that wasn’t such a great idea. But that is how mesmerizing a good Panini is! Next I tried a pan on top of the sandwich. It worked better, but was still a little unwieldy. And I was terrified I would somehow scratch the nonstick cooking surface. My personal favorite was my last attempt. A rock. Literally a five-pound rock my mom had brought back years ago from a trip she took to Arizona. With a little aluminum foil, I transformed it from a lowly doorstop into a makeshift Panini press.

Finally, several years later, we were given our griddler. It’s a griddle, indoor grill and, you guessed it, Panini press! What a glorious day when I could finally make my first ‘real’ Panini without the use of a rock!

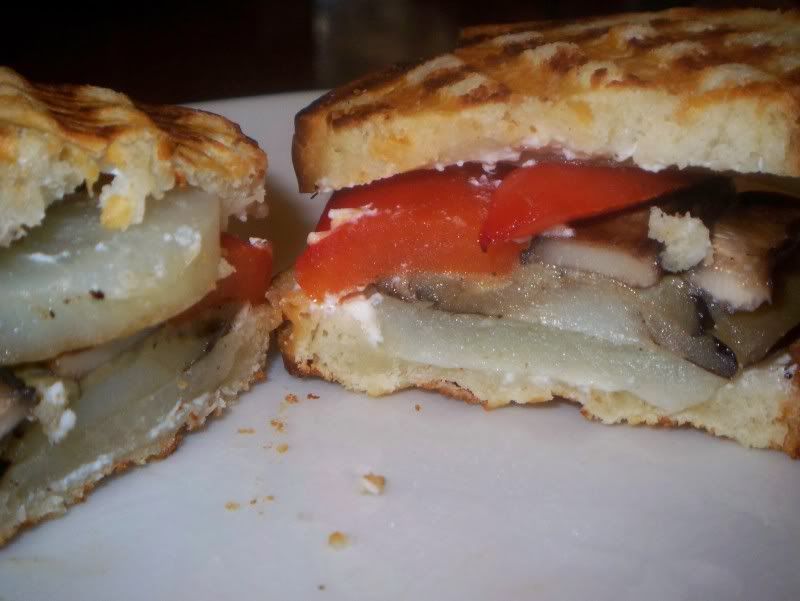
If you don’t have a Panini press, you can still make a Panini, you just need to find something weighty to press your sandwich down. The fillings are endless. My husband, the carnivore, loves pepperoni, salami and capiccola ham with marinara sauce and provolone cheese. I take roasted potato, zucchini, eggplant and mushrooms and some goat cheese for mine. I love that we can satisfy our individual cravings for dinner without actually having to cook two entirely different meals.

Panini

There isn't really a recipe for panini, it is more of a method. I preheat my griddler to the 'sear' setting, aka as hot at it can get. If you're using your stovetop, I'd venture that medium would be good since you don't want to burn your bread.

Layer anything delicious between two slices of bread, lightly brush with olive oil or spread with a little butter, and press! I usually leave them in for about a minute and a half, then rotate ninety degrees for the cross-hatched grill marks. I leave it on for another minute or two, until the cheese is melty and it's all heated through.

You can fill as suggested above, choose your own, or even make a dessert panini with nutella and bananas.


My mouth is watering.

Some Happy News! (AKA Tastespotting accepted one of my pictures!)

It doesn't take very much on a friday to make me happy, but I am ecsatic that one of my photos submitted to the Tastespotting website was picked for the front page! It's photo 101634, not that I'm counting :)

Even better, it's of the birthday cake I made for my hubby, so I'm proud that I actually made him a cake that tasted delicious and apparently was pretty enough to be featured on Tastespotting!

Yay and Happy Friday!

(PS, remember the
Asiago Cheese Bread from a while ago? There's a Part II post coming tonight. Be excited!)

Saturday, September 18, 2010

Chicken Parmesan

I finally saw “The Godfather” – parts one, two and three – for the first time recently. I see why these movies have such a following, they really sucked me in. In the first movie, it took me nearly the entire movie to finally accept that Michael Corleone was a young Al Pacino. I think it was a lack of wrinkles.

I did the math, and we watched Italian mobsters for nearly nine hours. No wonder I started talking like Marlon Brando with everything I said, and kept saying things about “an offer he couldn’t refuse.” Right?

Right?

Sigh.


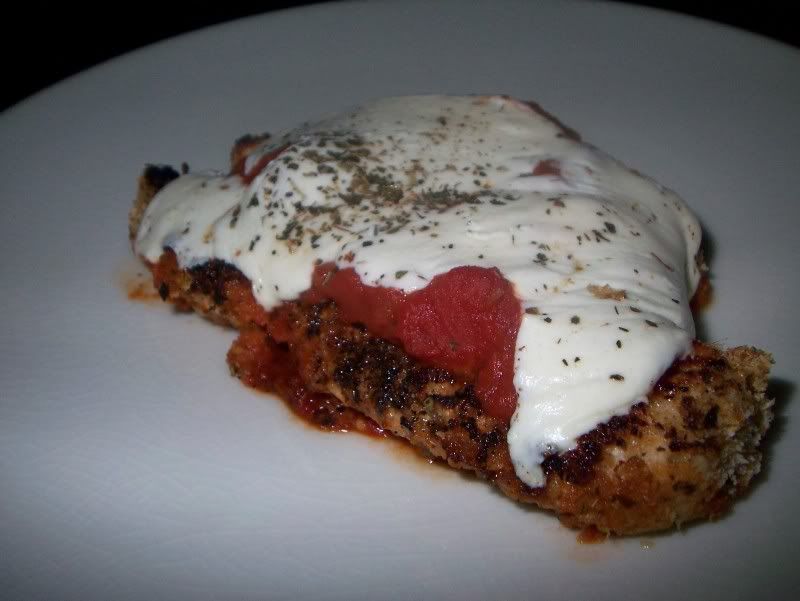
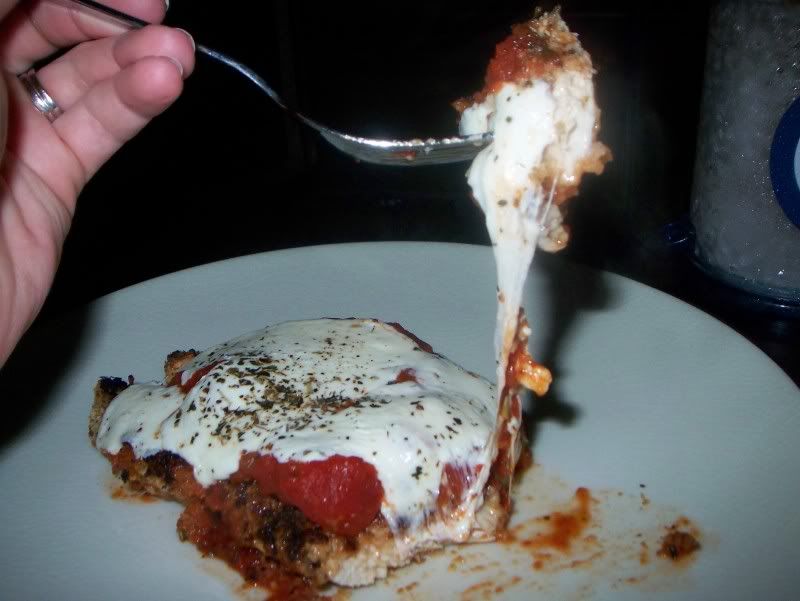
Either way, this trilogy also really got me craving Italian food. This chicken parmesan recipe has been a work in progress for me. I usually get a decent crust on my chicken, but then when I bake it in the sauce, it loses its crispiness. By using less sauce when I bake it, and simply reserving some for dipping, I maintain the crispiness of the breading without sacrificing the sauce my husband loves oh-so-much. Also, by pounding the chicken thin, it cooks so much faster, so I can prepare this on a busy weeknight and feel like we’re really indulging in something that took a lot longer to make.

Once I had my chicken parmesan and strained my vocal cords enough to keep myself quiet for a while, we finally decided it was time to watch another movie. Can you guess what movie followed such a cinematic classic?

Hot Tub Time Machine.
Chicken Parmesan

1/4 c panko breadcrumbs
1/4 c regular bread crumbs
1/4 c grated parmesan cheese
1 Tbsp and 2 tsp Italian seasoning, divided (or use dried oregano and basil)
1 tsp cayenne pepper
Dash each of salt and freshly ground pepper
2 boneless skinless chicken breasts, pounded to 1/4-1/2-inch thickness
1 1/4 c Spaghetti sauce, plus ~1/2 c more for dipping (this equates to most of a 14 oz jar)
Fresh mozzarella cheese
2 Eggs
1 Tbsp canola oil

Preheat oven to 350 degrees F.

In a wide, shallow bowl, mix together panko, bread crumbs, parmesan cheese, salt, cayenne, black pepper and 1 Tbsp Italian seasoning.

In another wide bowl, gently beat eggs.

Dip chicken in eggs and then dredge in breadcrumb mixture until completely coated. Set aside.

Heat oil over medium heat in skillet large enough to hold the chicken.

Cook 3 1/2 minutes on each side until nicely browned on both sides. (I’ve used both tongs and a spatula to turn my chicken and found I have a lot less risk of damaging the crusty coating if I use a spatula. I always end up having my chicken slip out of my tongs and ripping off some of the breadcrumbs.)

In an 8 x 8 or 9 x 13 baking dish, spread a thin layer of spaghetti sauce. Lay your chicken breasts into the sauce. Top with more sauce.

Layer on slices of mozzarella cheese and sprinkle a tsp of the Italian seasoning on each breast.

Bake at 350 for 20 minutes, or until cheese is melty and chicken is completely cooked through.

Once you chicken comes out of the oven, heat up the additional half cup of spaghetti sauce in the microwave for dipping.

Sunday, September 12, 2010

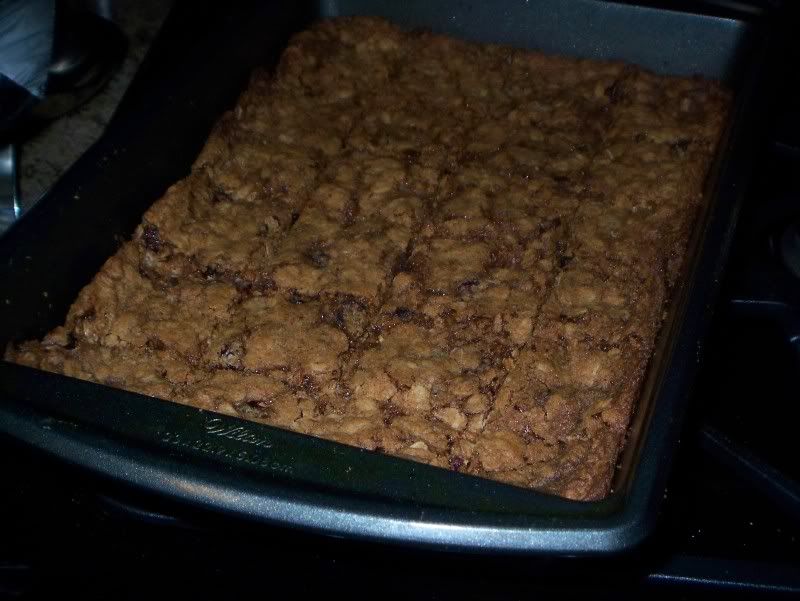
Oatmeal Craisin Cookie Bars

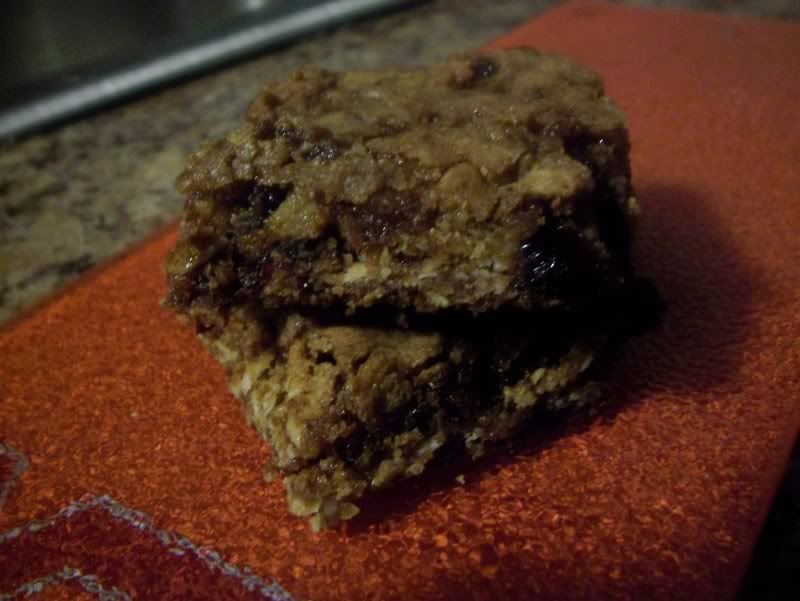
Another week of softball and another week of goodies. This week I was not sure what I was going to make. Thankfully one of my coworkers mentioned that he enjoyed oatmeal craisin cookies. It’s been a long time since I’ve had a homemade oatmeal cookie and I realized that I had all the ingredients readily available in my pantry, so I decided that would be what I’d make. Because these treats commute by car, train, and foot to get to the office, I decided to make them into cookie bars, instead of individual cookies. The cookie bars travel well in my 9 x 13 pan carrier, and I don’t have to worry about the cookie crumblies in the bottom of a bag if I used a ziplock instead.

I’m apparently becoming known as “the baker” on my morning train. Every week I board the train with my cupcake carrier or my 9 x 13 pan, and the regulars always ask two questions: 1) What did I make and 2) Did I bring enough to share with everyone. I told them I made Oatmeal Craisin Cookie Bars and before I could say another word, the engineer of the train popped out from behind the door of his engine room, looked back and said “COOKIES?!” It was so sudden and unexpected that it startled us as first. Then we all broke out into laughter - apparently the only other thing that gets a reaction from the conductor besides people running past the train gates are cookies. Yes, cookies will elicit that type of response from just about anyone.

While I did not have enough to share with them this week, I promised them, all of them, that in the near future that I will bring a treat especially for them.

I got this recipe off of AllRecipes.com, and adapted it based on the comments it has received. I’m still somewhat skeptical of the original 10-12 minute baking time in the recipe. I pulled the pan out of the oven at 12 minutes, and let the still-incredibly loose bars cool in the pan. I tried cutting them after cooling, and they were still soft and wet, on the verge of gummy, instead of chewy. I turned my oven back on and put them in for another ten minutes, part of that time while the oven was still preheating.

This time it worked. I was worried they would get too dark, but they finally set up once I added more bake time. The bars will still be quite soft once they are removed from the oven, but they will not be jiggly. And they will set up into wonderfully chewy bars once they get to room temperature.

I didn’t have self-rising flour, so I used an AP flour/baking powder/salt replacement in this recipe.

I’m glad I made something that had oats and craisins and will stand up to the upper-90 degree temperatures we’re expecting tonight for our game.

Oatmeal Craisin Cookie Bars
Adapted From
AllRecipes

Ingredients
1/2 cup butter, softened
1/2 cup white sugar
1/2 cup brown sugar
1 egg
1 teaspoon vanilla extract
3/4 c AP flour
1 teaspoon baking powder
1/2 teaspoon baking soda
1 tablespoon ground cinnamon
3/4 teaspoon salt
1 1/2 cups quick cooking oats
1 cup craisins
Directions
Put craisins in a bowl with about 1/2 – 3/4 c water. Cook on high for 5 minutes. When finished, let sit for another 10 or so while assembling rest of the bars.

Preheat oven to 350 degrees F. Grease a 9x13 inch pan.

In a medium bowl, cream together the butter, brown sugar and white sugar, until smooth. Beat in the egg then stir in the vanilla. Combine the flour, baking soda, cinnamon and salt: stir into the creamed mixture. Fold in the quick oats and raisins. Spread evenly into the prepared pan.

Bake for 20-22 minutes in the preheated oven. Let cool in pan before cutting into bars.

Monday, September 6, 2010

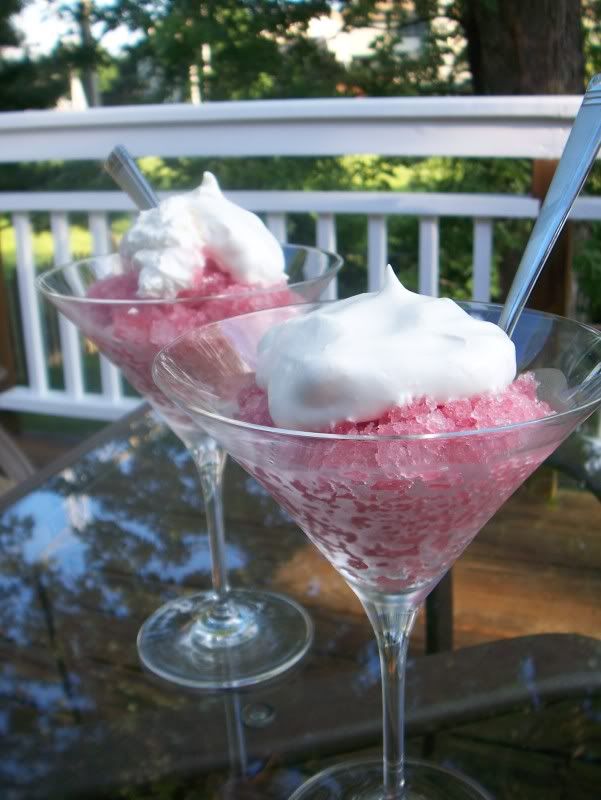
Hibiscus Leaf Tea Granita

Happy Labor Day!!

This recipe is my attempt at clinging onto summer just a little bit longer. I'm not ready for autumn, much less winter, yet.

This year marked the 30th anniversary for the Taste of Chicago, a quintessential summer event here. This year, they did things a little differently. There were fewer vendors, and the layout changed from previous years. Instead of the vendors going right up the middle of the street, they now are only on the sides of the road, leaving a much more open area in the middle for walking, eating and scoping out your next bite. One of the perks of working in downtown Chicago is that a group of us hit the taste for lunch one day. We get there right as it opens, usually mid-week, so that we avoid the lunch/weekend-rush that the Taste is infamous for.

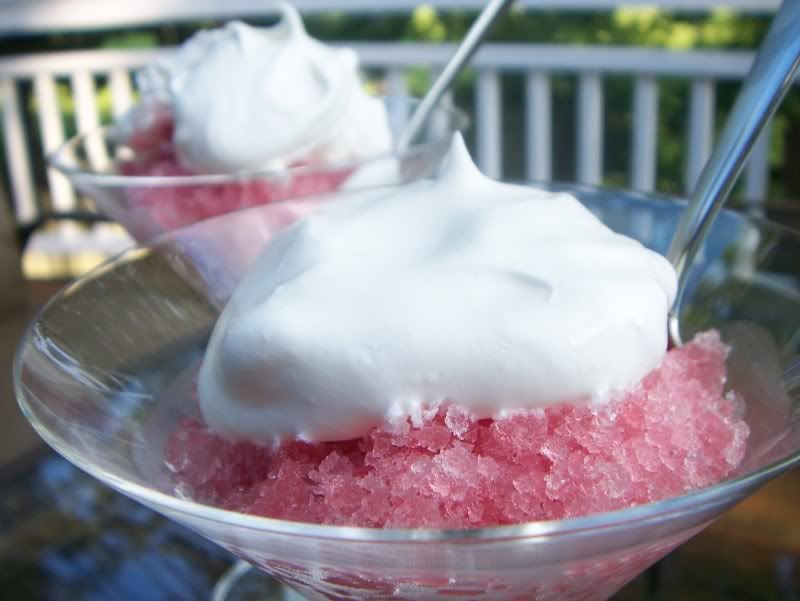
If you are not from Chicago, I can see going to the Taste and getting an Italian sausage, deep dish pizza slice or a ‘garden dog,’ but for me, I use the Taste as an excuse to sample anything I have not tried before. Last year I had shark and curried goat. This year I had my first ever fresh pierogies, a jibarito sandwich and something called bissap sorbet. The sorbet was described as a hibiscus leaf tea sorbet served with a dollop of whipped cream. It was such a refreshing, light dessert in the hot, humid weather and left me feeling satisfied without feeling too guilty (hey, at least it wasn’t a slice of cheesecake!) I left the Taste thinking that I would buy a quart of that if I could, it was a perfect summer treat.

As luck would have it, that weekend my family and I went to Chicago’s Chinatown, and we stumbled upon a store that sold nothing but tea. As we were shopping around for green teas (they had some there that retailed for 124 dollars a pound!), the cashier came by with samples of some of their other tea varieties. One was hibiscus tea. As soon as I tasted it, I grabbed a box, paid for it, and left with a plan to recreate the sorbet from the Taste.

Because I do not have an ice cream maker, I decided to make a granita instead. It’s a little more coarse than sorbet, but finer than Italian ice, so I figured that would be a good compromise. It took forever for the granita to freeze. There is patience required in waiting for the hot water to cool enough to put in the freezer, and then you have to babysit it for as long as necessary, scraping the sides of the bowl down so you get granita and not a giant pyrex-bowl-shaped popsicle.

While it did take forever, the results were definitely worth it. It is light, refreshing and practically guilt-free. I used a 1/2 cup of sugar in mine, which is the only ingredient other than the tea in this recipe. The four cups of water yields probably a good 8-10 servings (we’ve already finished six and still have quite a bit left). One serving has a maximum of approximately one tablespoon of sugar, or 15 calories. It can’t get much better than that. Ok, well if you want the twenty-five calories you get from the additional two tablespoons of cool whip, still not a diet-buster.

Hibiscus Tea Granita


3 Hibiscus leaf tea bags
½ c sugar
4 c water, divided (2 cups can be cool/room temperature)

Put two cups of water and sugar in pot over medium heat. Heat, while stirring, until sugar dissolves into water. Drop in tea bags and let steep for 5-7 minutes, or until a dark raspberry color. Add in the additional two cups of water and let sit for a few more minutes. Remove tea bags and let sit on counter until room temperature. Place mixture in freezer and let sit for 1.5-2 hours. Scrape down sides with a fork. Let sit in freezer again for another hour to hour and a half. Scrape down sides. Repeat process until liquid is all frozen. Serve plain or with a small dollop of cool whip or whipped cream.
Related Posts Plugin for WordPress, Blogger...