Wednesday, June 30, 2010

Red, White and Blue Strawberry Bouquet

I had a lot of fun making my own version of an edible arrangement. With some strawberries, skewers, candy melts and colored sugars, you can make your own festive fruit bouquet. After washing your strawberries, dry them thoroughly (I like to leave the green leaves on, though). I also let them sit out for a little bit to make sure the surface is as dry as can be.

Following the directions on the candy melts, melt them in the microwave. Dip your strawberries, and let the excess drop back off into the bowl. Sprinkle sugar on, if desired, or leave plain. I used white candy melts for a red-white-blue themed bouquet, but chocolate would be just as delicious! Wait until they are dried to skewer the berries. I put a little bit of styrofoam (can use floral foam as well) in the bottom of the pot, then arranged my skewered strawberries in bouquet form.
I covered this with plastic wrap and refrigerated for a few hours before serving, but I would be careful about that, mine started to sweat once they started warming up. Luckily we ate them fast enough for it not to be a problem, but that is something to watch out for.

This dessert is easy, delicious, and can be made to suit any occasion. It doesn’t hurt that it looks impressive as well!

Sunday, June 27, 2010

Asian Chicken Lettuce Wraps

This is a fantastic dish that almost had a tragic ending.

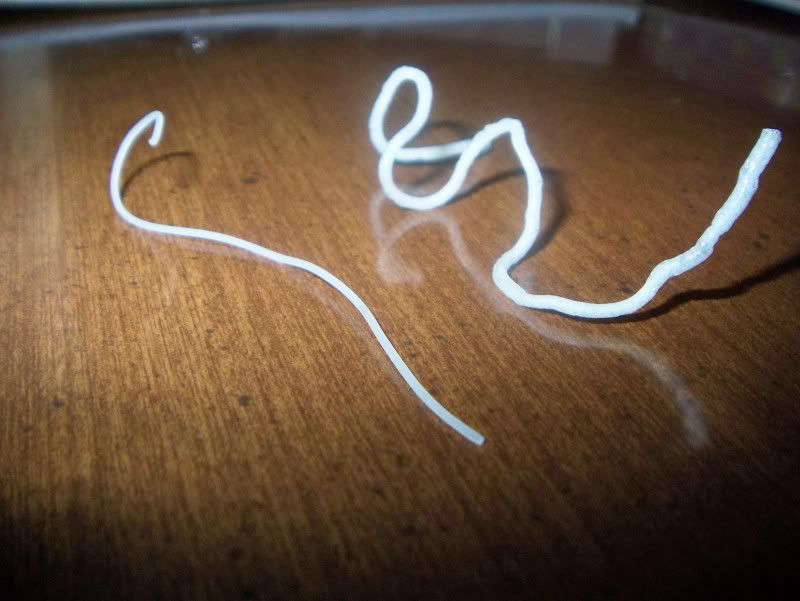
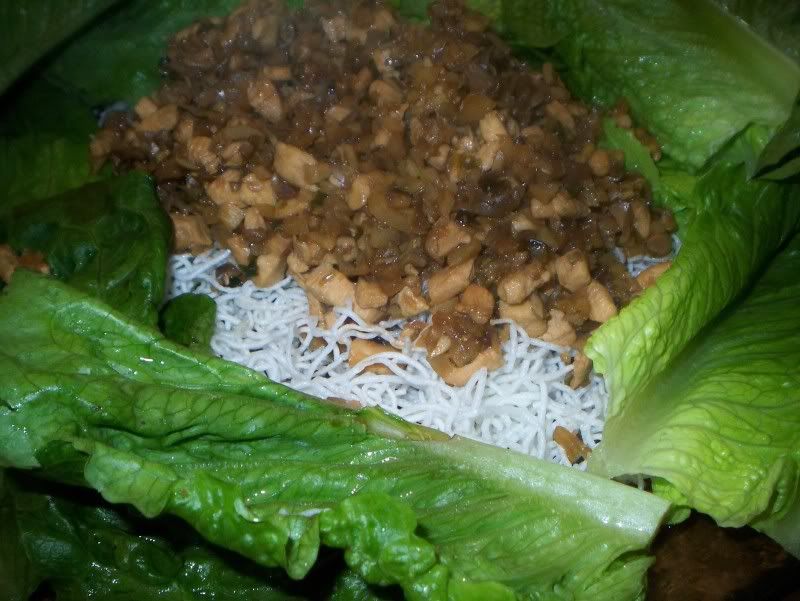
I made this meal for a picnic appetizer, since you need relatively few utensils to enjoy this dish. The only time I had to make it was the night before we were to leave for our picnic, and due to other obligations that night, I was able to start cooking around 10 pm. I started off frying up the maifun rice sticks. Let me tell you, at 1030, watching those suckers puff up is one of the coolest things I’ve seen. I never imagined that little translucent noodle would become those curly, puffy sticks.
Before (left) After (right)


After setting those aside, I then started cooking the chicken. This was where the fun began. We have a terrible blower on top of our stove, and it pretty much does nothing when you turn it on. Therefore, it typically receives very little use in our kitchen. This evening, however, I decided I’d turn it on, because sautéing the chicken was a little smoky, and I wanted to try and clear out the fumes from the kitchen. I’m not really sure what happened, but when I turned on the blower, bright pink insulation from our attic started shooting out the front of the blower housing into the kitchen. It looked like a cotton candy was snowing from our stove. Amidt cries of “Nooooooo!” and my furious attempts to cover my saucepan so that the insulation wouldn’t ruin my food (or be set ablaze by the gas burner), the smoke alarm in our living room was triggered.

The rest was a bit of a blur. My husband stepped in and managed to turn off the first smoke alarm, only to have another one down the hall start going off. He turned that one off, while I opened the window and the patio door to start airing out the kitchen. I turned off the blower and managed to get most of the insulation cleaned up.

Amazingly, the dish didn’t suffer at all. The smoke was only because I used olive oil by accident, which has a much lower smoke point than the vegetable oil I had intended on using. I guess that’s what happens when you’re cooking late at night. And when you have blizzard conditions in your kitchen thanks to insulation.
With all the excitement in preparing the dish, I hadn’t really thought about what to expect once the dish was finished. I was pleasantly surprised when I tasted it that it was reminiscent of the lettuce wraps at P.F. Changs. Truly a delight.
I have already made these a second time and thankfully had much less excitement. These are most likely becoming staple appetizer whenever we need one. Minus the smoke alarms and insulation, it is a relatively simple dish to prepare.

Enjoy!
Asian Chicken Lettuce Wraps
serves 2-3 as appetizer
Frying up Maifun Rice Noodles

Pour two inches of vegetable oil in a pan and heat until around 400 degrees F. Add maifun noodles, a little at a time and remove to a paper towl once puffed.

Filling
2 tsp Minced Ginger root
2 Tbsp Vegetable Oil
1 Large chicken breast, cut into small pieces(dime-sized)
1 c water chestnuts
2/3 c canned straw mushrooms
3 Tbsp green onion, chopped
3 cloves garlic, minced
Stir-fry sauce (see below)

Mince water chestnuts and straw mushrooms until the size of small peas. Set aside.
Bring two tablespoons of vegetable oil to high heat in wok or large frying pan. Saute cut up chicken until cooked through.
Add garlic, ginger, water chestnuts, straw mushrooms and green onion.
Add stir fry sauce to pan and saute 2-3 minutes or until hot.

Stir Fry Sauce
2 Tbsp Soy Sauce
2 Tbsp Brown Sugar
1/2 tsp Rice Vinegar

Mix in small bowl and set aside until needed.

Serving Sauce
1/4 c sugar
1/2 c water
2 Tbsp soy sauce
2 Tbsp rice vinegar
1 Tbsp lemon juice
1/8 tsp sesame oil

Dissolve sugar in water over low heat. Add soy sauce, rice vinegar, ketchup, lemon juice and sesame oil. Transfer to bowl and refrigerate until ready to use.

To serve:
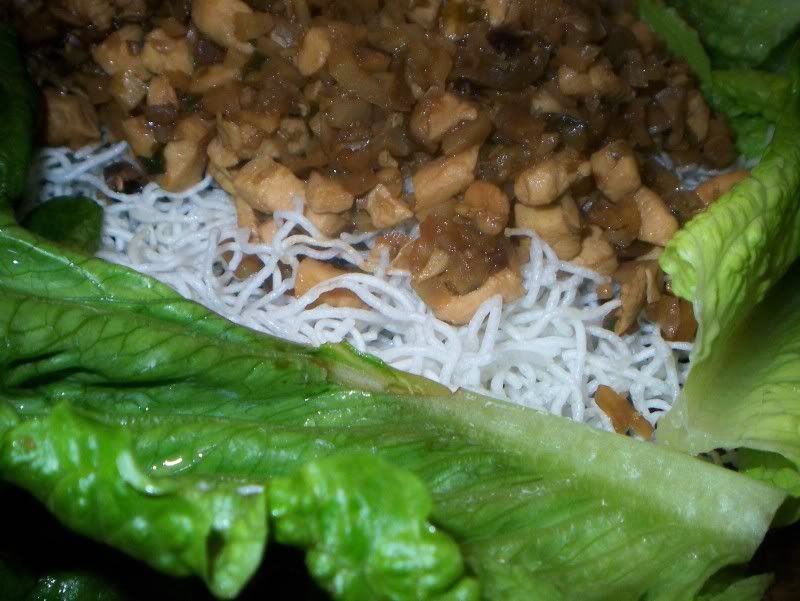
Serve filling on top of a bed of fried maifun rice noodles. Have lettuce cups ready. To eat, spoon filling, noodles and sauce into a lettuce cup, roll like a burrito and eat. And for what it's worth, it's usually pretty messy - Go with it!

Friday, June 25, 2010

Chocolate Souffle!

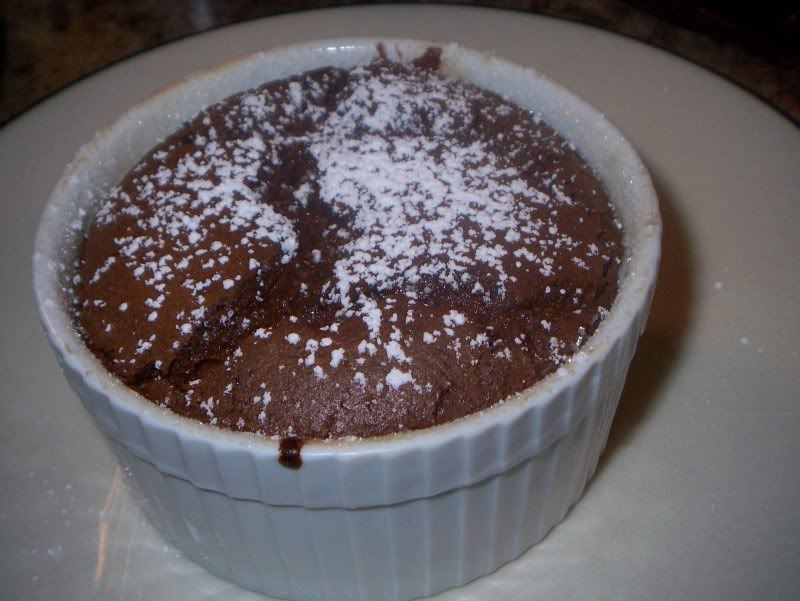
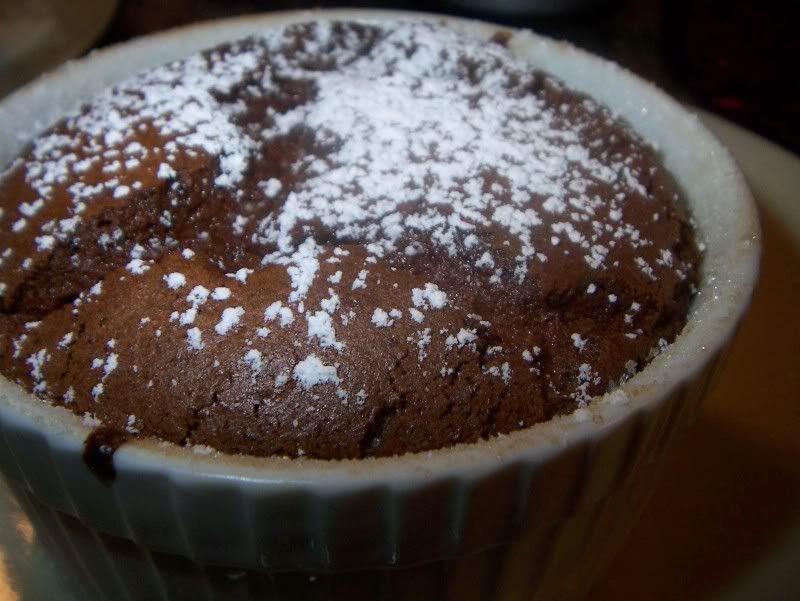
Souffle always sounds so exotic. Like one of those desserts you only get when you’re in an expensive restaurant. I’ve only had maybe two or three in my life, but that didn’t stop me wanting to try it for myself. All-in-all, I think it was an ok recipe, but I think I had two flaws – 1. I didn’t have the classic ‘molten center.’ They’re really hard to tell when they are finished, so I’m pretty sure mine baked a little too long. 2. I didn't get the huge "pouf" over my ramekins because mine were 50% larger than the ones specified in the recipe. I may have also overbeaten my eggs slightly.

It was actually fun to turn on the light and watch these puppies puff up in the oven. Even though they didn’t bloom over the tops of the ramekins, the amount of rise was still rather astonishing. It actually rises fast enough that you can see it moving! They climb the sides of the ramekins ever so steadily until they finally set up.

While it was a successful souffle, it wasn't what I'd call a 'home run' in the flavor department. So because of that, and because I think I still need to work on my technique a bit, you can count on another souffle coming out of my kitchen eventually.


Bittersweet Chocolate Souffle
Makes 4

15 g flour
100 g bittersweet chocolate
15 g butter, plus more for greasing ramekins
2 egg yolks
4 egg whites
125 ml milk
15 g sugar, plus more for coating ramekins
1 tsp vanilla extract
10 ml rum
Confectioners sugar

Preheat oven to 400 degrees F.

Coat 4 (6-ounce) ramekins with butter, and sprinkle with granulated sugar.

Over a bain marie, melt chocolate over low heat. Do not stir until melted. In a pan, heat flour and butter until mixture thickens. Add the milk and whisk for about two minutes. Remove the mixture from heat and add to melted chocolate. Gradually stir in vanilla, rum and egg yolks, one at a time. Spoon chocolate mixture into a large bowl; cool.

Place egg whites in a large bowl; beat with a mixer at high speed until foamy. Gradually add 1/4 cup granulated sugar and cream of tartar, beating mixture until stiff peaks form. Gently stir one-fourth of egg white mixture into chocolate mixture; gently fold in remaining egg white mixture. Spoon into prepared ramekins.

Reduce the heat to 375°F and bake for 10-12 minutes or until puffy and set. Sprinkle with confectioners' sugar.

Makes 4 individual soufflés

Sunday, June 20, 2010

Pao Doce

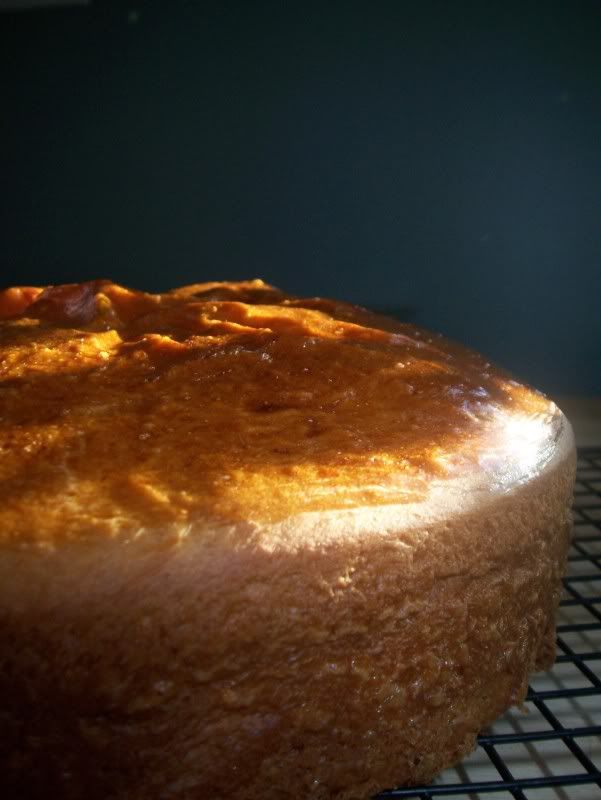
Pao Doce is a Portuguese sweet bread that many say resembles King’s Hawaiian Sweet bread. I love trying foods from all different cultures, so the fact that this should resemble something I’m familiar with tempted me to try it out. At least I figured I could somewhat tell if it didn’t turn out right, despite never having eaten (much less baked) Pao Doce before.

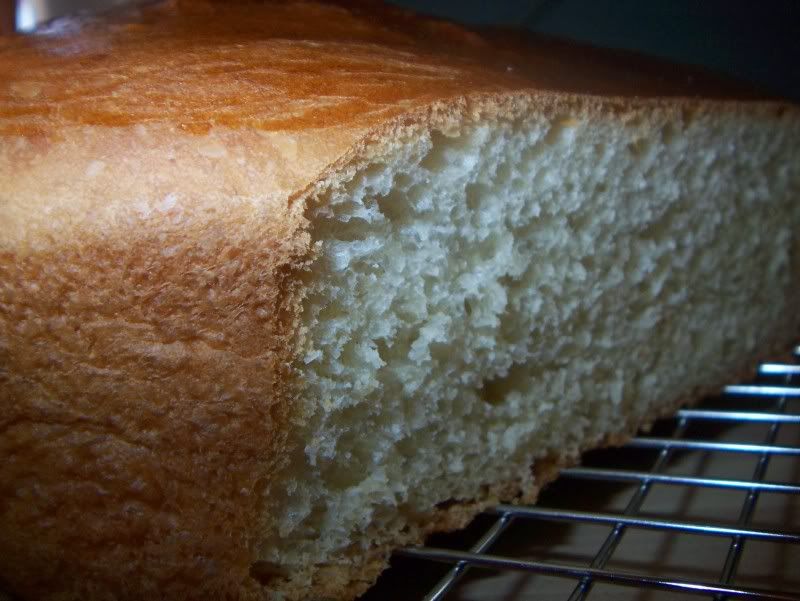
As with most yeast breads dough itself comes together easily, and has quite a bit of inactive rise time. Whereas Kings Hawaiian Sweet Bread is soft and spongy, this pao doce is a little on the drier side and a tad more dense. It is definitely lighter and has a more uniform crumb than your typical artisan loaf and because it’s a little drier than the King’s Hawaiian Sweet Bread, the pao doce makes a killer french toast. The recipe says it makes two large loaves, and it certainly does. We’ve managed to finish off a loaf and a half so far (with the help of family and friends), but we still have one remaining half in the freezer.

I think now I have to schedule myself a trip to Brazil to see how close to the real thing it actually is. Who is up for a field trip??
Pao Doce
From: New Betty Crocker International Cookbook. Yield: 2 - large loaves.

Ingredients:
2 Tbsp Active Dry Yeast
¼ c Warm Water
1 c Lukewarm milk (scalded, then cooled)
¾ c Sugar
1 tsp Salt
3 Eggs
½ c Butter, room temperature
5-6 c AP Flour
1 Egg
1 tsp Sugar

Directions:
Dissolve yeast in warm water in a large bowl.
Stir in milk, 3/4 cup sugar, 3 eggs, salt, margarine or butter, and 3 cups of flour. Beat until smooth.
Stir in enough of the remaining flour to make the dough easy to handle.
Knead dough on a lightly floured surface until smooth and elastic - about 5 minutes.
Place in a greased bowl and let rise in a warm place until it is double in size - about 1 1/2 to 2 hours.
Punch down dough and divide in half.
Shape each half into a round slightly flat loaf.
Place each loaf into a well greased round 9" x 1 1/2" pan. Allow to rise for 1 – 1 ½ hours or until double in bulk.
Heat oven to 350°F.
Beat 1 egg and brush over tops of loaves. Sprinkle with one teaspoon of sugar.
Bake until loaves are golden brown, about 35-45 minutes.

Wednesday, June 16, 2010

Banana Bread

So many incarnations of banana bread have exited my kitchen that for once, I wanted to try just a basic banana bread recipe. No frills, no gimmicks, no healthyfying. Good old banana bread. I scoured through many of my cookbooks, and found two options. One was in a Southern Living cookbook from 1985 which included a half cup of shortening in the recipe. Hmm. Though I am not looking for a ‘healthy’ version (aka applesauce instead of oil, whole wheat flour, etc) a half cup of shortening in one loaf is a little too much for me to be comfortable eating. The other recipe was in a Bride and Groom cookbook from our wedding. It was called Unbelievable Banana Bread. Sounds promising, right? From the recipe, there are two main changes. First, because I did not need two loaves of banana bread sitting around my house, the recipe was cut in half. Second, the nuts were omitted because I was just too darn lazy to go to the store and buy them. How’s that for honest?

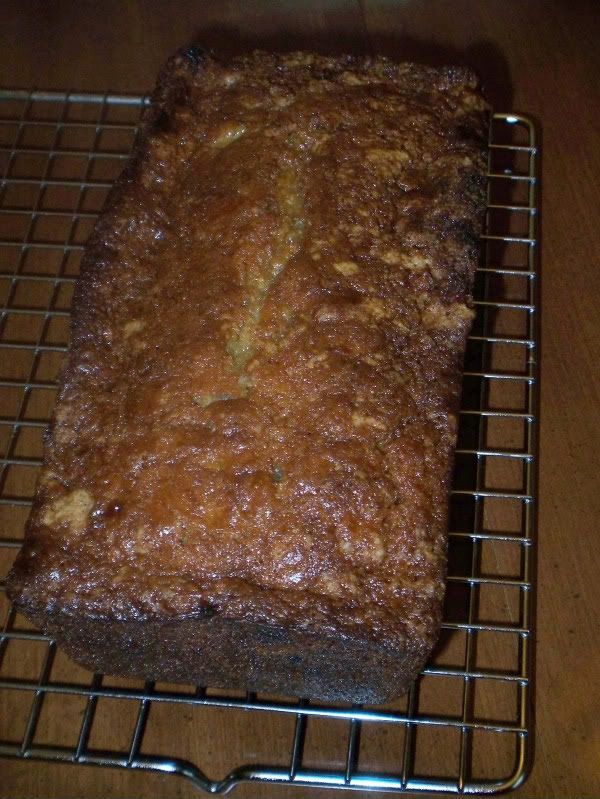
Another honest truth? This banana bread was delicious. Like, I-keep-sneaking-pieces-even-though-I-know-no-one-is-watching delicious. And despite my resolution not to ‘healthyfy’ it, this recipe isn’t all that terrible for you. I was a little concerned watching it bake because it doesn’t get a lot of lift, and I was half expecting to pull a banana brick from the oven. I was also noticing how quickly the outsides of the loaf started to brown, and thought it would burn on the outsides before it set up inside. I was expecting to be writing a post about ‘The Ultimate Banana Bread Failure.’

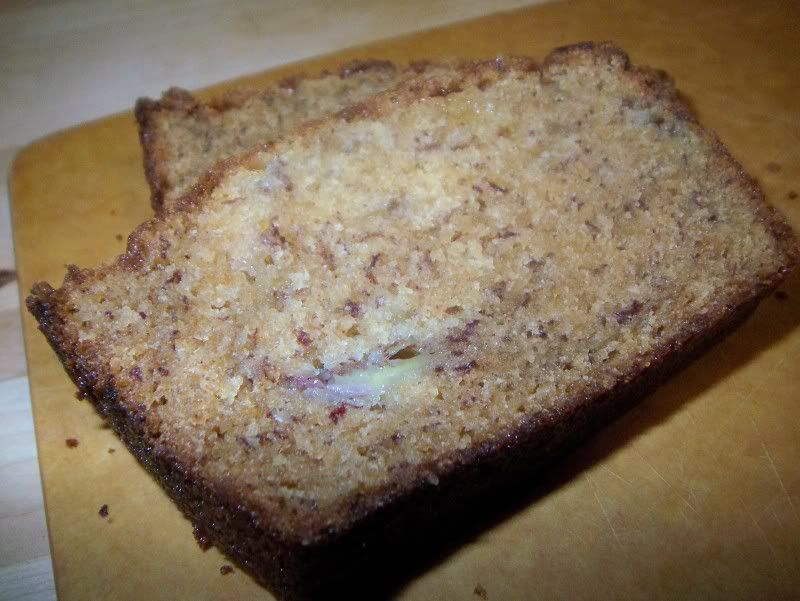
Instead, the loaf came out of the oven and had a wonderful somewhat chewy/crunchy crust on the outside resulting from the banana and brown sugar caramelizing in the oven. It didn't burn. Nor did rise up like I expected, but it was a dense yet soft intensely banana-flavored loaf. I love that I cut through it and can see little chunks of banana.

This is definitely my go-to Banana Bread recipe.

Ultimate Banana Bread
Adapted from Bride and Groom Cookbook

1 c and 2 Tbsp AP Flour
1 tsp Kosher Salt
1/4 tsp Ground Cinnamon
1/4 c and 1 Tbsp Vegetable Oil
1 c and 2 Tbsp Sugar
1 egg, lightly beaten
3/4 tsp vanilla
3/4 tsp Baking Soda
1/4 c buttermilk or 1% milk mixed with 1-2 tsp lemon juice
1 c very ripe mashed bananas (about 2 medium)

Position a rack in the center of the oven and preheat to 350 degrees.

Spray a 9 x 5 pan with vegetable oil cooking spray.

Stir together flour,salt and cinnamon in medium bowl. Set aside.

Combine the oil and sugar in a bowl until combined. Add egg and vanilla and beat until incorporated, about 1 minute.

Stir baking soda into buttermilk(or milk and lemon mixture)in measuring cup or small bowl. Add one third of the dry ingredients, followed by half of the buttermilk mixture. Mix until combined. Add next third of dry ingredients and rest of buttermilk mixture. Stir until combined. Add last of dry ingredients and combine.

Add banana and mix until just incorporated. Don't overmix.

Pour batter into prepared pan. Bake until the bread is golden brown and a toothpick inserted in the center comes out clean. 55 minutes to 1 hour.

Let pans cool on racks for 5 minutes. Then remove loaves from pan and let sit on racks for at least 10 minutes until serving.

Sunday, June 13, 2010

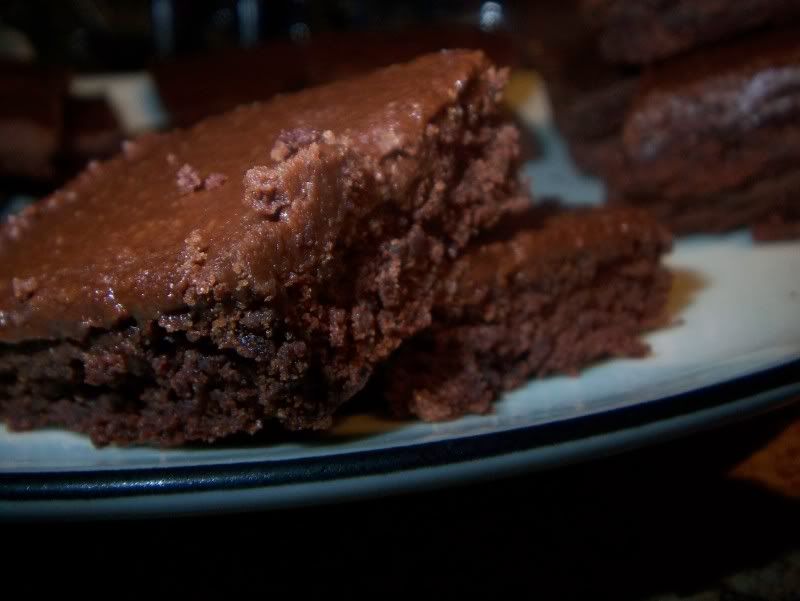
Julie’s Chewy Cocoa Brownies - A Learning Lesson

Which brownie camp are you in? Fudgy? Cakey? Plain? Iced? Nuts? I am definitely in the fudgy, no nuts camp. Jury’s still out on whether icing is needed. I feel like a good brownie for me should be dense and fudgy and can hold its own without needing any icing. But I also know my affection for the Little Debbie brownies, you know the ones with nuts on top ? They were perfect, and they did have icing. I do have lots of brownie recipes, lots of good ones, however, I have yet to find the replacement for those treats.

I found this recipe for a chewy cocoa brownie and figured I’d give it a try. Well, two. After my first attempt at this recipe, I had to try again. Curious why?

I present to you, Exhibit A:

Remind you of anything in particular?

(Does anyone remember this show?)


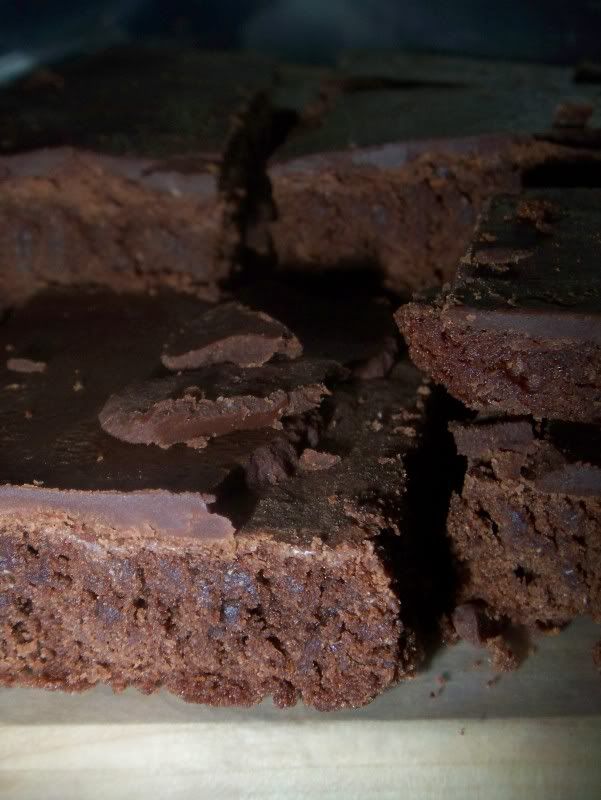
Seriously? What was this nonsense? I could not believe what was happening in front of my eyes when I went to frost these brownies. The chocolate set up so fast that I couldn’t even cover the brownies. My solution was simple, heat the oven up to 250 degrees, put the pan in to soften up the chocolate and keep spreading until the brownies were covered. Mind you, this took about 20 minutes until I was happy with how they were covered.

I then let them sit on the counter like a patient little baker so that they would set up and I could slice and remove them from the pan. What a disaster. The chocolate was so hard and brittle that as soon as I’d try to cut through with my knife, huge chunks would break and fall right off the top of the brownie.

Big. Fat. Fail.

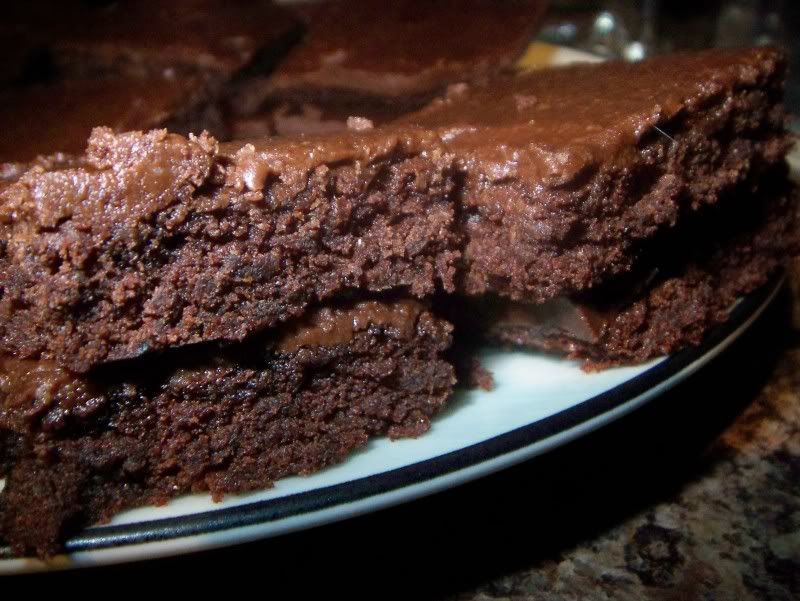
Not to be deterred, I tried again the next weekend. I baked the brownies just a tad shorter, and they were noticeably softer and slightly chewier. The biggest difference was in the frosting. It’s amazing how overcooking the frosting for even the shortest amount of time transforms it from a soft, luscious icing to the Agro Crag.

Take 2:


These still aren’t the perfect brownies, but they are pretty darn good. I'm not sure I'd make them a third time, but they were delicious while they lasted.

The search continues...

Julie’s Chewy Cocoa Brownies
From Laura Flowers

1 ½ cups granulated sugar
½ cup unsalted butter, softened to room temperature
½ teaspoon salt
4 large eggs, lightly beaten
1 teaspoon real vanilla extract
1/2 cup unsweetened cocoa powder
1 cup whole wheat flour or white whole wheat flour
1 cup chopped nuts of your choice (I use walnuts), optional

Preheat the oven to 325 degrees. Grease a 9x13 inch pan lightly with butter.
In a stand mixer or with a hand mixer, cream together the sugar, butter and salt. Add the eggs and vanilla extract and beat until combined. Mix in the cocoa powder and flour just until incorporated, then mix in nuts if using.
Spread the mixture into the pan. Bake for 35 to 40 minutes until the sides start to pull away from the pan and the brownies are no longer wet looking.
Cool brownies to room temperature before icing.

Brownie Icing Two Ways
3 tablespoons milk
3 tablespoons butter
1/3 cup granulated sugar
½ cup semi-sweet chocolate chips
A small pinch of salt if using unsalted butter

Bring the milk, butter, sugar, and salt if using to a simmer stirring often. Bring to a boil and boil for 2 full minutes stirring often. Remove the pan from the heat and stir in the chocolate chips until smooth.

For Matte Fudge Topping: Spread the hot icing over the brownies with a spatula until even. Cool completely to set.

For Shiny Glaze Topping: Pour the hot icing onto the brownies. Roll icing around the brownies by tilting the pan to coat, but do not spread with a spatula. Cool completely to set.

Tuesday, June 8, 2010

Spicy Asian Burgers

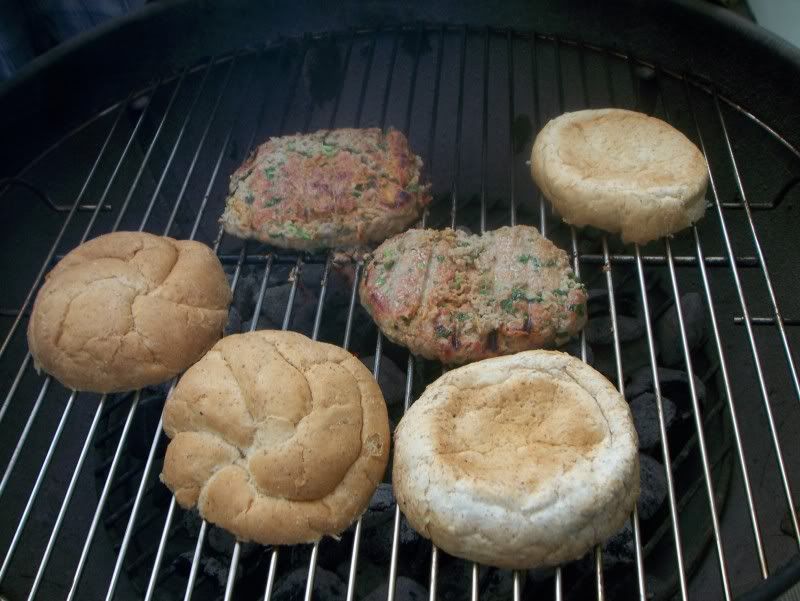
As much as I love a good burger, sometimes the classic beef patty can use a little ‘pick me up.’ When I first thought of suggesting a burger with an Asian flair, I thought it was going to be a hard sell. Most of the time, when I want a burger, I want a burger. A juicy, quarter-pound of beef with Worcestershire sauce, salt and pepper grilled over hot coals to perfection. To my surprise, however, the idea was well-received, and our burgers got a one way ticket to Asia.

I am familiar with cilantro, fresh ginger, lemon, soy sauce and sriracha being in some classically asian dishes, but I have to admit I scratched my head for a bit when I saw apple in the recipe. I did think for a short second that I’d omit it, because it seemed like such a strange addition to the burger. But, in a moment of culinary derring-do, I decided to go for it, and include the apple. What’s the worst that could happen? After all, it wouldn’t have been the first time a new recipe has landed us in a fast-food drive-through.

In the finished burger, the lemon, ginger and cilantro are the key players to its flavor. The apple didn't adversely affect the flavor as I was expecting and I feel like it is the reason we ended up with such an incredibly moist and tender burger.

One thing you need a warning about - these are delicate. There is no egg to serve as binder, and only a little bit of bread crumb. The original recipe instructed to cook the burgers in a heavy bottomed pan or cast iron skillet as a way to be a little more careful with the burger, I’m guessing. We chose to throw caution to the wind and grill ours. It takes a little bit of skill, and we still break one in half every once in a while, but it still tastes great, even if it’s in a couple of pieces.

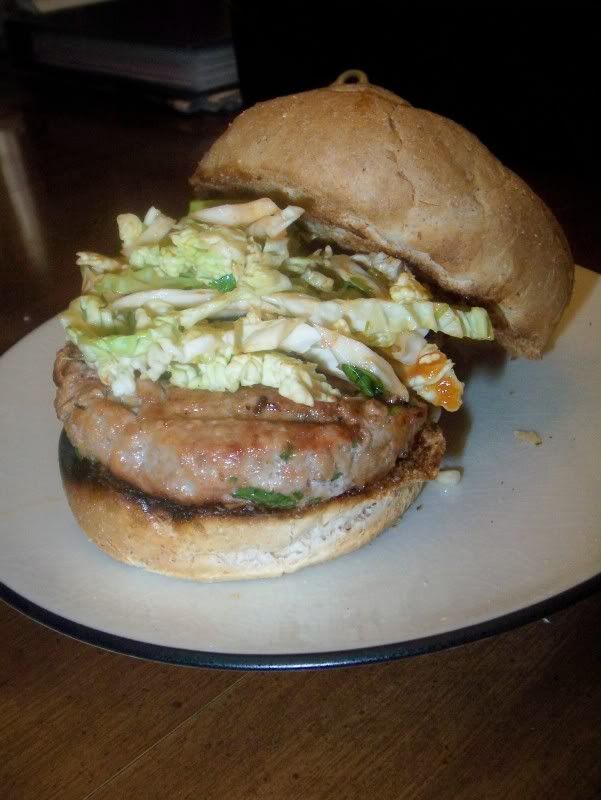
The slaw which accompanies the burger couldn’t be easier. Considering how little effort is needed to make it, I’m definitely putting this in my arsenal for weeknight sides. I used my mandolin slicer to finely slice a half head of cabbage, and even that was too much for us. My picture does show the slaw on top of my burger, however, I decided to eat it as a side dish, as did my husband. I topped my burger with a little bit of fresh, chopped cilantro and a good slathering of sriracha.
Spicy Asian Burgers
Adapted from Once Upon a Plate

Important: At least an hour before planning to cook them make patties as directed and refrigerate for at least 1 hour, up to 8 hours. *

Ingredients:
6 oz lean ground pork, chicken or turkey
1 tablespoons Panko (dry Japanese bread crumbs)
1/2 small to medium size Granny Smith apple, peeled, and very finely diced or coarsely shredded
1 tablespoon finely grated fresh ginger root ~ do not substitute (omit if unavailable)
Pinch ground pepper
2 teaspoons hot chili sauce (Sriracha), more if you like spicy
1 garlic clove, finely minced
1/2 tablespoon fresh lemon juice, and 1/2 teaspoon grated zest
2 teaspoon soy sauce
1 1/2 teaspoons scallions, thinly sliced (white and green parts)
2 tablespoons cilantro leaves (or flat leaf parsley), finely chopped


For the Slaw:
Mix together at the last minute while burgers cook as it quickly wilts)
2 cups finely shredded cabbage (lightly packed - less than half a head)
1 tablespoon cilantro leaves, chopped
1 tablespoon scallion (white and green parts), thinly sliced
2 to 3 teaspoons (or to taste) Sweet Chili Sauce

Optional Garnishes:
Additional Cilantro leaves
Chopped Cashews or Peanuts
Drizzles of dark, flavorful Sesame oil
Additional hot sauce, or sweet chili sauce

To make the patties:
Place the ground meat of choice in a medium mixing bowl. Add the remaining ingredients, mix thoroughly so ingredients are evenly distributed through the meat. Shape into two regular size burgers. Chill in refrigerator for at least 1 hour(up to 8 hours) This step is necessary to firm the patties so they hold their shape while cooking.

To cook:
Preheat a heavy frying pan (well seasoned cast iron works great) over medium heat until hot (or use your grill like we did, just be careful!). Add about 1 tablespoon vegetable oil. Add meat patties to hot oil (don't crowd). Cook for 6 to 7 minutes per side (depending upon how thick the burgers are), turning once, until meat is thoroughly cooked. Remove to a plate and allow to rest for 5 minutes; keep warm by tenting loosely with foil.

Thursday, June 3, 2010

Hasselback Potatoes

I’m a potato lover. Fried, baked, stuffed, scalloped, mashed, tater tot-ed..?... you name it, I love it.

The humble potato is a master of disguise, transforming from a lowly tuber into a variety of dishes, suitable for any time of the day. I love all types of potato, but the most common type on my table is either baked or mashed. The preparation is easy, and it takes little time to prepare. Not to mention I always seem to have a potato or two in my pantry threatening to sprout if I don’t use them soon.

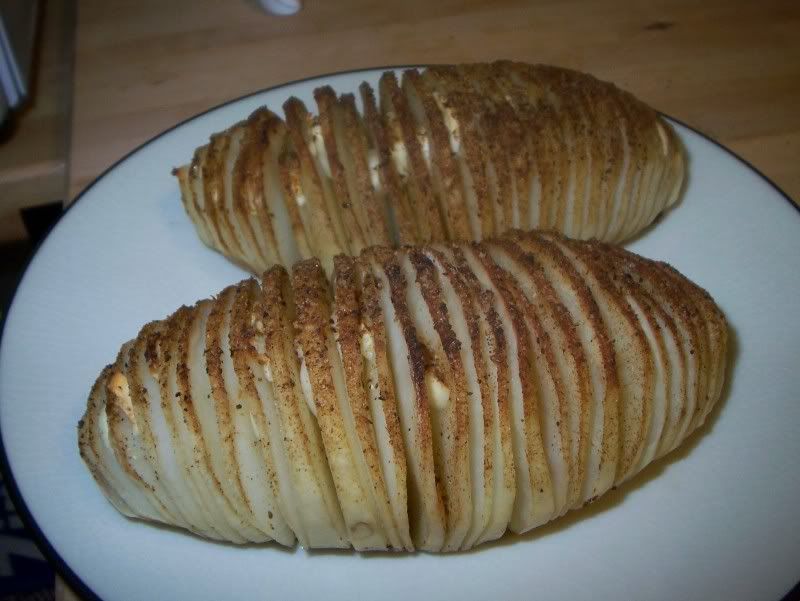
If your basic baked potato is an ugly duckling on your plate, the Hasselback Potato is your swan. A few slices of a knife, lots of garlic, some olive oil and seasoning, and you have a potato diva that refuses to take a back seat to your main course.

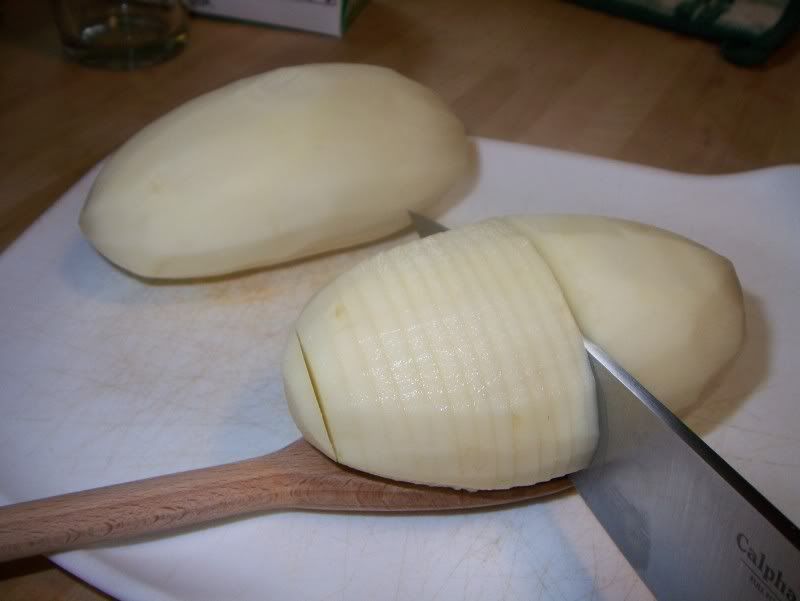
The easiest way to actually slice the potato without going through it is to either put chopsticks down on either side of the potato as ‘stoppers’ or to put the potato in a wooden spoon and use the edge of the spoon to stop your knife. It’s a little strange and takes some getting used to, but it does work. And I inevitably slice one or two slices a little too close, and I end up cutting out a small wedge or two of potato. I usually just look around to make sure no one saw me, stick it right back in, and just don’t tell anyone (except you, of course).
As another tip, my hubby and I love garlic. So much so that every crevice in the potato has garlic in it. If you don’t like a lot of garlic, or have any desire to be in public within the next few hours, you can dial it back. I do think it’s pretty how the garlic holds the slices of the potato open, though.
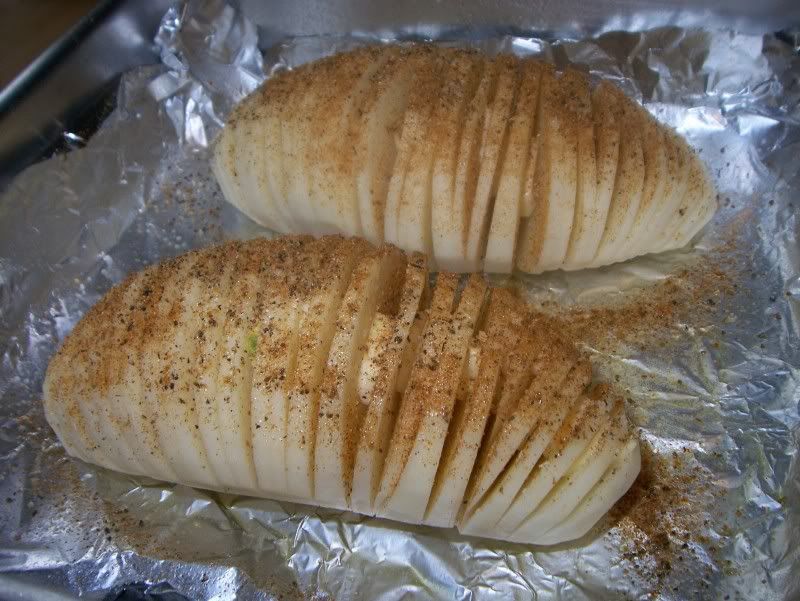
Here you can see the potatoes just before sticking them into the oven. Some olive oil, salt, pepper and of course, my version of these potatoes wouldn’t be complete without a sprinkling of the magical fairy dust of the east. The east coast that is - Old Bay. That’s another love story, for another day.
Hasselback Potatoes
2 Medium Russet Potatoes
4 cloves of garlic, thinly sliced
Olive Oil
Salt
Pepper
Old Bay
Parmesan (optional)

Preheat oven to 425 Degrees.

Put the potato on a cutting board (or wooden spoon) and cut nearly all the way through the potato, at about 3-4 mm intervals.

Arrange the potatoes in a baking tray and insert garlic between the slits. I used Pam Olive Oil spray to lightly coat the potatoes. Sprinkle with salt, pepper and old bay.

Bake for approximately 40 minutes or until the potatoes turn crispy and the flesh is soft.
Related Posts Plugin for WordPress, Blogger...