
 I love making cakes. And decorating them. And especially eating them. I have finally started to understand why cupcakes are all the rage. They are essentially portion-controlled cakes. I will admit that biting into a cupcake is not nearly as satisfying to me as taking a nice big slice out of a layer cake and plopping a big hunk of vanilla ice cream on top. I find a beauty in cakes, their construction, the balance of cake, filling and frosting, and in their decorations. But with only two people in our house, both of whom are fairly conscious of our daily diets, having surplus cake around is a problem. Which is unfortunately why I do not make them very much.
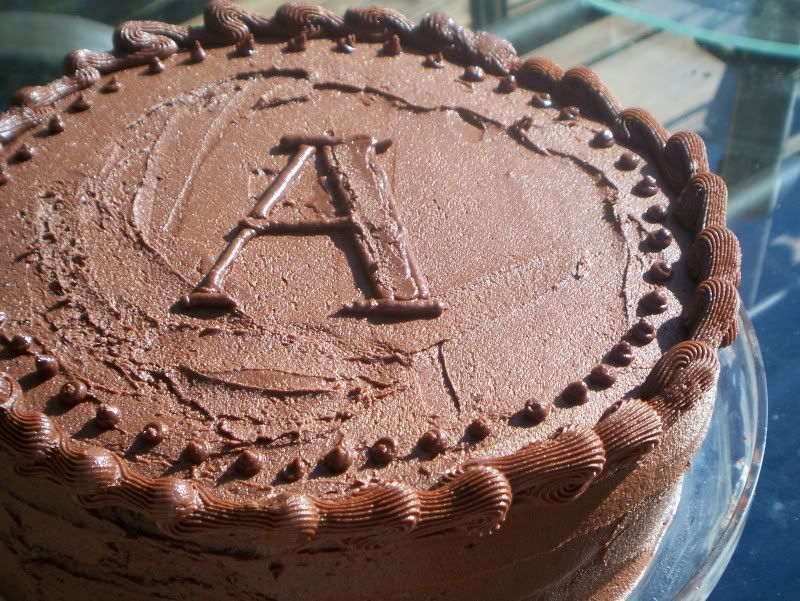
My husband’s birthday was recently and he requested and all-chocolate cake to celebrate. So, not only do I get my cake, I get chocolate, too! This is an ultimate chocolate layer cake. It’s a chocolate cake, chocolate ganache and chocolate buttercream. I decorated it simply because I didn’t want to go overboard girly on his cake.
The cake was Martha’s one bowl chocolate cupcake recipe baked into two round cake pans. I made the batter, weighed it in my pans and started to bake them off. I set my timer and came back when it beeped. When I opened my oven door, the cakes didn’t even look close to finished. I started to panic, wondering if Martha had set me astray. I persisted, put more time on the timer and prayed I didn’t mess it up. It would have helped if I read the instructions again. What took me a while to realize was that I followed the recipe instructions for the cupcakes, including the bake time. If I had read the footnote about ”If making a two-layer cake... I would have saved myself the moment of panic, because these cakes were done just when Martha said they’d be.
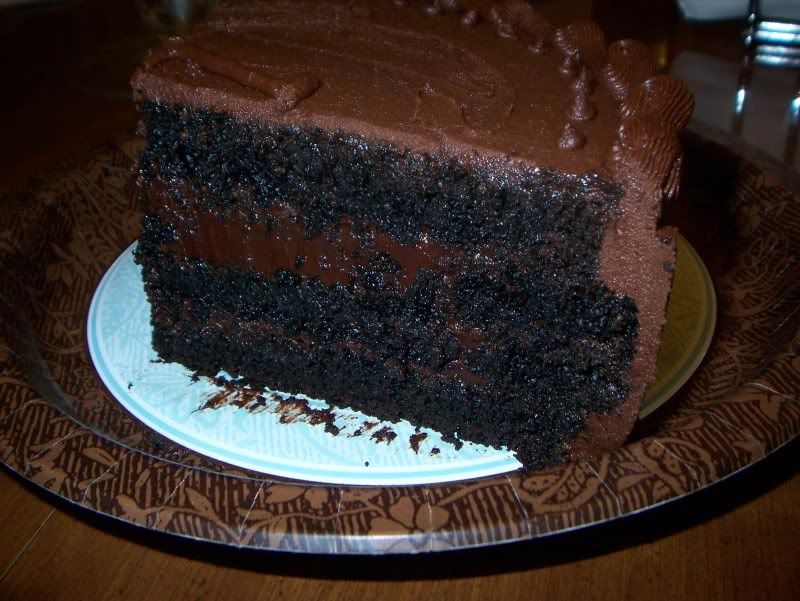
The ganache is a basic chocolate ganache, and so far my favorite, with the perfect proportions of chocolate to cream and butter. It was smooth and set enough so that when the cake was sliced into, the ganache held its shape but soft enough that when you ate a piece, it enrobed your tongue luscious chocolate.
The frosting is a new recipe, and a keeper if I do say so myself. It’s different because it uses melted butter instead of just room temperature, but the rougher, drier texture of the frosting when combined with the silken filling and the soft, moist, airy cake was absolutely to die for.
The cake assembly itself was probably the most difficult for me. I cut each layer in half, so I was working with relatively thin layers of cake. Oh, the things I do to make sure more ganache is in the cake...
While the bottoms of both layers were easily sturdy enough to stack, the tops were a different story. They were much softer and much more delicate. I got the first two layers assembled without incident. And then I went for the third layer. Somewhere in between picking the cake up off of the wax paper and laying it on top of the ganache, it broke into three pieces. Two stayed in my hands while one unceremoniously fell onto the table, which broke that piece into two pieces. I now have four pieces of cake, and a relatively slippery ganache layer in between. The math didn’t add up, but I persisted anyway. I reassembled my cake jigsaw puzzle on top of the ganache, layered more ganache on top, and then put on my top layer. That’s when the problem started.
I walked away to get my frosting, and when I came back, I noticed a little lump of cake bulging out the side. I used my finger to poke it back in, which then squeezed a little lump out of the opposite side. Hoping that when the ganache set up it would hold the layers better, I swaddled my cake in plastic wrap and threw it in the fridge.
While not perfect when it came out, I figured the frosting would bind it all together. I squeezed the couple cake protrusions back in and frosted the sides before they had a chance to bulge again. Success! A non-bulgy cake!
I really enjoyed this recipe, and hope to make it again in cake form – though I will most likely at least be making the one-bowl cupcake recipe again in the near future, and this time in cupcake form.
Frosting and Ganache From A Spicy Perspective
Cake from Martha Stewart's One Bowl Chocolate Cake Recipe (not posting due to copyright but a google search will give you the recipe)
Ganache Filling
12 oz. heavy cream (about 1 ½ cups)
12 oz. baking chocolate ( I use Ghirardelli dark chips)
2 Tb. butter
2 Tb. sugar
Frosting
1 stick butter, melted (1/2 cup)
2/3 cup cocoa powder
3+ cups powdered sugar
1/3 cup cream (or milk)
1 tsp. vanilla extract
1 tsp. instant coffee
After baking your two 8-9" cakes: Allow the cakes to cool for 10 minutes, then use the edge of the pan as a guide to cut of the round top. This makes a great mid-cake-baking snack!
Run a knife around the edges and flip out onto a cooling rack. I like to “slam” the cakes out of pan to (hopefully) insure they come out in one piece! Once totally cooled, carefully slice through the middle to make 4 thin round disks. Stack with wax paper in between, then wrap in plastic wrap. Freeze, until ready to assemble. Frozen cakes are SO much easier to handle while frosting. It also helps to keep the frosting from getting crumby!
For the ganache: Place the chocolate chips in a glass bowl.
Heat the cream, butter and sugar in a small pan. Once the cream is just barely simmering, pour it over the chocolate and allow it to sit for 5 minutes.
Then whisk until perfectly smooth. Allow the ganache to cool another 10-15 minutes before assembling layers.
For the frosting: Heat the cream in the microwave until hot to the touch, then add the instant coffee to it and mix. Place the cream in the freezer for a few minutes to cool rapidly. Using an electric mixer, mix the melted butter, vanilla and cocoa powder until well combined. Alternate, adding the cooled coffee-cream and powdered sugar until smooth. Add a little more cream or powdered sugar until desired consistency is reached.
To assemble: Take the cakes out of the freezer. Slather 1/3 of the ganache in between each layer, until all four layers are stacked.
Press the top of the cake to level it. Using a large spreader, smooth the frosting around the sides. Then frost the top and re-smooth the edges.
Use a damp paper towel to clean up the edges of the cake stand. Place the last bit of the frosting in a piping bag to “fancy-up” the edges, if you want!
Leave the cake out, at room temperature so the insides can thaw. Cake taste better when the frosting and filling are room temperature and soft!
8 comments:
yummy! i want cake now and it is only 8 am!! :P
Great cake! It looks delicious. I'm in Chicago NW suburb, good to meet you!
I'm glad the cake looks delicious - it certainly tasted delicious! It's never too early for cake, 8am included!
Pam, great to meet you! Thank you so much for the compliment on the cake, and great to meet another person in the NW burbs!
OMG!! This looks fantastic! Soooo decadent! I love how you described every step when making it as well!!
Would you mind checking out my blog? :D ajscookingsecrets.blogspot.com
I figured it was worth describing how it was assembled, especially since it was a less-than-spectacular process. It doesn't always go as planned, but that doesn't mean it still can't look and taste wonderful!
I'm definitely hungry for some cake now!
Your cake looks fantastic...so dense and chocolaty! I love how you decorated it in all chocolate, and I love the monogram-it's perfect!
Peggy - stop on by, we always have leftovers!
Sue - thank you so much! When the hubby said he wanted a pure chocolate cake, I took that very literally! The monogram was about as much decoration as I could manage, but I'm so happy how well it turned out!
Post a Comment