Showing posts with label turkey. Show all posts

Saturday, December 4, 2010

Healthier Shephard's Pie

I’ve been lucky enough to have many amazing people in my life. One of those people was my Aunty Pat. My brother and I grew up with her and my Uncle Kenny only a short fence-hop away from our yard. They entered our lives somewhat by chance, as my parents needed someone to babysit their kids and they were nearby and available. Over the years, we grew closer and closer to them, with them coming to family functions, holiday parties and visiting them on a near daily basis.

My Aunty Pat and Uncle Kenny would always let my brother and I have a sip of their coffee, which we loved probably because it looked more like chocolate milk than coffee. At our house, my Aunty Pat would always laugh at my mom’s tiny little sugar spoon, put the spoon aside, and simply grab the sugar bowl to pour the sugar into her mug, because it would have taken her three weeks otherwise.

I remember fondly feeding Charles the Squirrel outside their screened porch door, my first experiences fishing off of a small boat in the local reservoir, painting ceramics she had fired in the kiln in her basement, and having sleepovers a little before Christmas to ‘help’ them set up and decorate their Christmas tree.

One of my more vivid food memories when I was younger involves my Aunty Pat telling me to grab a stick of butter, reach deep into the turkey sitting on the counter, and rub ever last surface with my hands. (And for the record, butter does make everything taste better, as much as I hate to admit it!)

She was always the person that brought some sort of decadent dessert when invited for dinner (something along the lines of a chocolate and peanut butter Reese Cup cheesecake). She was also the first one over with comfort food when our family suffered a loss. You could always count on her food to be three things: rich, delicious, and comforting.

Sadly, our family lost Uncle Kenny in October of 2001 and Aunty Pat in February of 2009. While I miss both of them every single day, cooking certain foods helps me remember some of my favorite moments with them. My Auntie Pat had made us Shepherd’s Pie in the past to help us cope with a recent family loss, and it was comfort food at its best. You could really taste the love that went into making that meal.

Though this recipe is not quite as heavy and stick-to-your-ribs as I know my Aunty Pat’s original version was, I always feel like they’re both a little bit closer to me when the smell of the Shepherd’s Pie starts wafting through the kitchen. I’m taken back to their front porch, the sweeter-than-sin coffee, and being elbow deep in the southern end of a northbound turkey.

This is one of those occasions where instead of halving the recipe for the two of us, I make this full-sized recipe for the filling, and halve the amount of mashed potatoes. The filling freezes well, so for the effort of one meal, we get instant gratification of dinner that night, and then in the future, when we’re feeling especially lazy, we’ll pull the other half of the filling out of the freezer for an encore of this delicious meal.


Cheddar Topped Shepherd’s Pie
Adapted from Everyday Food's October 2008 Issue.
Yield: 4 Servings.

Ingredients:
1 lb Baking potatoes, peeled and thinly sliced
1 Tbsp Canola Oil
5 Medium Carrots, halved lengthwise and thinly sliced
4 Celery stalks, thinly sliced
1/2 c Chopped Onion
2 Garlic Cloves, minced
1/2 tsp Dried Thyme
4 oz button mushrooms
3/4 c frozen Corn
2 Tbsp AP Flour
2 Tbsp Tomato Paste
2 tsp Worcestershire Sauce
1 lb Ground Turkey
1/2 c Beef Broth or water
1/2 c Milk
3 oz Shredded sharp or white cheddar cheese, divided

Directions:
Preheat oven to 450 degrees.

In a large saucepan, add potatoes and enough water to cover - season generously with salt. Bring to a boil - reduce heat to a simmer and cook until potatoes are tender, about 12 to 18 minutes.

Meanwhile, in a large Dutch oven, heat oil over medium-low heat. Stir in onion and garlic. Cook, stirring constantly until soft and translucent, about 5-8 minutes. Add mushrooms and cook until soft, about 5 minutes.

Increase heat to medium/medium-high. Stir in carrots, celery, corn and thyme - cook until the vegetables are tender, about 8 to 10 minutes.

Stir in flour, Worcestershire and tomato paste - cook, stirring, 1 minute.

Add turkey - cook, stirring to crumble, until the beef has cooked through, about 6 to 8 minutes. Add broth (or water) - bring mixture to a boil and let simmer for 1 minute. Remove pot from the heat and set aside.

When the potatoes are done, drain well and place back into the hot pot. Cook over medium heat, stirring, until any excess liquid evaporates, about 1 minute. Remove from the heat and add milk and 2 ounces (1/2 cup) cheese. Mash to desired consistency - season with salt and fresh ground black pepper

Scoop the beef mixture into a 8" by 8" baking dish coated with cooking spray (or into individual ramekins) - spread to an even layer. Drop dollops of the mashed potatoes all over the top and spread smooth with an off-set spatula. Scatter the top with the remaining cheese (~1/4 c) - place into the oven and bake until the potatoes have browned and the filling is hot, about 20 minutes. Remove and let cool slightly before serving.

Thursday, November 25, 2010

Happy Thanksgiving! {Roasting a Turkey}

Happy Thanksgiving everyone!!!

Hope you have a wonderful Thanksgiving filled with good food, delicious drinks and fantastic friends and family.

Since this year we are having Thanksgiving over at my in-laws, I figured now would be a good time to share the story about my first time hosting turkey day, which was just last year. This was our first major holiday we were hosting, our first as a married couple, and the first in our new house! Needless to say, I wanted everything to be perfect. We had put a lot of money into home renovations (heck, we still are to this day!) but that meant that our funds for any decorations were somewhat limited. So, I decided I would make the necessary decorations for our house. I was a busy bee a few weeks before the holidays so that I could finish all my projects on time.

I made:

Festive plush pumpkins for the house:

Turkey trivets for the table:


and embroidered napkin rings for our table.


I am lucky enough that I have a set of fine china that was passed down from my grandmother, to my mother, to me. They really are beautiful. And you can also see the reversible Thanksgiving/Christmas placemats I made to go underneath each place setting here.

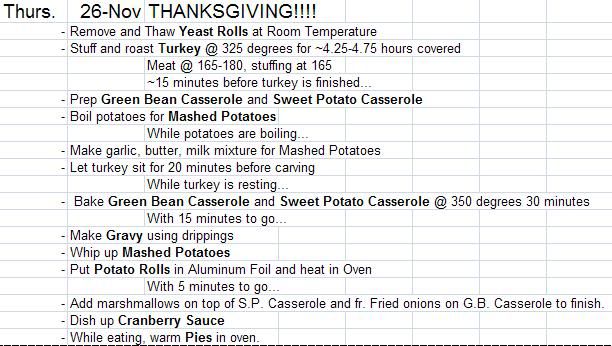
Once the non-food items were taken care of, the few days leading up to thanksgiving was filled with a lot of planning and preparation. Our entire oven would be in use most of the day to roast the turkey, so I had to have a plan in place as to how to schedule everything else that needed oven-time.


Enter the turkey day prep-schedule.

My schedule started the Saturday before thanksgiving, planning out the dishes I could prep beforehand and freeze or refrigerate so that I could make sure that everything would be complete by the time Thanksgiving rolled around. I also had a pretty detailed schedule for the day of, to make sure I wouldn’t forget something important like gravy or reheating a dish. So you can really get a grasp of how much of a planner I am, I’ll give you a snapshot of the schedule. This doesn’t even include the hand-written one that details the day by time. That was my master list for the day.

Why yes, I am a list person. Why do you ask?

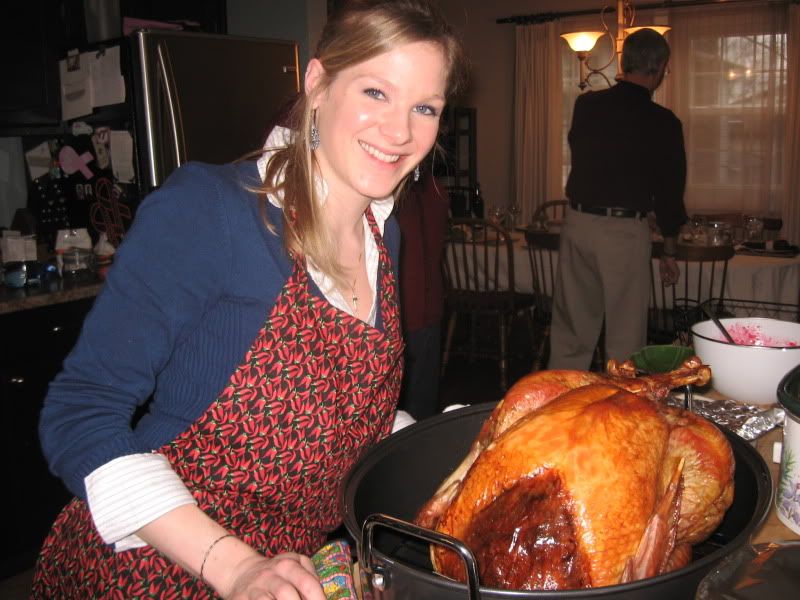
The turkey was the first thing to be taken care of in the morning. I had to get it out of the brine, rinsed, stuffed, and in a 325 degree oven before 8 am if I was to stick to my schedule. And be advised, my schedule is based on having a fresh turkey. If you get a frozen turkey, be sure to give it plenty of time to thaw in the fridge before T-day. And I don’t mean hours, I mean days. Nothing is worse than realizing your turkey is still 80% frozen when you go to stuff it.

After the turkey was in the oven, things went pretty smoothly. I checked the bird around 9:30 am, and noticed it was already looking pretty browned. I figured I would let it go a little longer and see what happened. Sure enough, 10 am rolls around and the turkey is getting even darker, not burnt, thankfully, but dark. I decided to loosely tent the bird with foil to protect the skin from getting much darker, especially since it wasn’t even halfway finished. I had planned to have the turkey come up to temperature around 12:30-1:00 pm, but when I checked the temperature at 11:45, it was still only at about 140 degrees.

The meat (and stuffing if you stuffed your bird) should register at a temperature of 165 degrees to be considered safe from any food-borne illnesses. At 12:30 pm, I finally increased the oven temperature to 375 degrees, hoping to speed up the process.

It still took another one and a half hours for the bird to come to temperature, and by that point, I was starting to have visitors in the kitchen every few minutes – they made it seem like they were coming in to chat, but I know they were checking on the status of the turkey! We were all starving!

At 2:00 pm the bird is finally out of the oven, but it still has to rest before it’s carved, and I still had to finish up the gravy, mashed potatoes, sweet potato and green bean casseroles and reheat the dinner rolls I had made earlier in the week.

We ended up eating right around 3:00 pm, about two hours later than anticipated. The wait was worth it, though. Despite having spent longer in the oven than anticipated, the brine kept the turkey - even the white meat - moist, juicy and flavorful. This definitely converted me into a brine supporter. I was so proud that the turkey turned out as good as it did.


Hosting my first Thanksgiving was a success, but definitely not without its challenges. I felt terrible that the turkey was so late coming out of the oven, but there are only so many things that are under your control. Just always make sure to have some snacks or appetizers ready, just in case!

In the end, I do not dwell on the fact that things didn’t go exactly according to plan. I was just thankful that we were able to spend time as a family in front of a wonderful (albeit late) meal and truly appreciate the good things in life. I am looking forward to many more Thanksgivings, Christmases, dinner parties and yes, even dinner disasters, because even when everything else goes wrong in the kitchen, I at least know I’m surrounded by friends and family (and that we have lots of wine in our house – that always helps!)

Have a Happy Thanksgiving!!!


Saturday, October 30, 2010

Hobgoblin Stew and Broomsticks


Every year around this time it is the same thing; the closer it gets to Halloween, the greater portion of my relatively healthy, balanced diet is replaced by Snickers, Milky Way, Reese Cups, Starburst, or any baked good containing cinnamon, nutmeg, allspice or pumpkin. And while I do make sure to get an apple a day, if I had my way, each one would be liberally coated with caramel and nuts.

Most of this change is simply due to the fact that the get togethers, parties and potlucks around this time are Halloween or autumn themed, and aside from Thanksgiving Dinner, most people relate autumn and Halloween to spice cakes, apple or pumpkin pies or candy out of the bag. I must say that I fall into this category as well, save for one thing – squash. It is one of the few healthy autumn indulgences that I have, so I get really excited when I see it go on sale.

After making butternut squash and shrimp risotto, butternut squash soup and just eating it plain, I wanted to try something different for an office potluck. Chili is always a great chilly-weather comfort food, and this recipe allowed me to incorporate leftover butternut squash. Because it uses ground turkey and has tomatoes, hominy, kidney beans and the squash, this is a comfort food that you can feel good about eating.

As the chili cooks, it smells a little like tacos because of the cumin. It has been a long time since I’ve had hominy, and never in chili, but this seemed like the perfect chance to use it, and I didn’t regret it. If you can’t find it, you can always substitute corn, but I love how the soft, almost al-dente texture of the hominy mirrors that of the roasted squash, and that won’t be exactly the same if you substitute corn kernels for it. The squash lends a delicate sweetness to the chili, which also has quite the kick, thanks to the jalapenos, cayenne and chili powder.
As an added ‘cute’ factor, I made broomsticks out of breadsticks. I thought it would be fitting for the occasion. These were made simply by purchasing the pre-packaged breadstick dough in the refrigerated section. I cut a small section off of the end for the band around the broom, and then I cut 4 inch-long slits in the bottom of each breadstick. After cutting the bristles, I pinched right above there and wrapped it with the small piece I cut off earlier for the band. Move them onto your baking sheet, then twist the handles like you would normal breadsticks. Bake them as directed on the packaging.
Hobgoblin Stew and Broomsticks
Adapted From AllRecipes.com

Ingredients

2 tablespoons olive oil
1 onion, chopped
2 cloves garlic, minced
1 pound ground turkey breast
1 pound roasted butternut squash
1 cup chicken broth
1 (4.5 ounce) can chopped jalapenos
2 (14.5 ounce) cans petite diced tomatoes (you can use plain, but I used the ones with celery and onion)
1 (15 ounce) can kidney beans with liquid (I used dark red, but you can use light red or even just black beans)
1 (15.5 ounce) can white hominy, drained
1 (8 ounce) can tomato sauce
1 tablespoon chili powder
1 tablespoon ground cumin
2 tsp Cayenne Pepper
3 Tbsp Brown Sugar
2 tsp Allspice
Salt
Pepper

Directions

1.To roast the butternut squash: heat the oven to 425 degrees. Peel the squash, remove the seeds and cut into 3/4-inch to 1-inch dice. Season with a little olive oil, salt and pepper, and roast in a baking pan for 25-35 minutes, or until soft. Set aside.
2. Heat the olive oil in a large pot over medium heat. Stir in the onion and garlic; cook and stir for 3 minutes, then add the turkey, and stir until crumbly and no longer pink.
2.Add the butternut squash, chicken broth, green chilies, tomatoes, kidney beans, hominy, and tomato sauce; season with chili powder, cumin, and garlic salt. Bring to a simmer, then reduce heat to medium-low, cover, and simmer until the squash is tender, about 20 minutes.

Come join Soup-a-Palooza at TidyMom and Dine and Dish sponsored by Bush’s Beans, Hip Hostess, Pillsbury and Westminster Crackers

Saturday, July 31, 2010

Enchiladas!

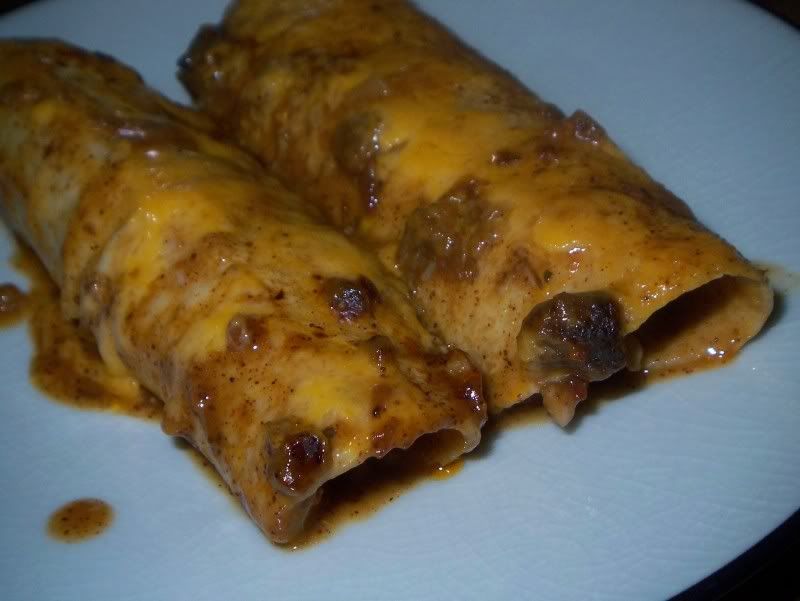
Mexican food is one of those things that I will eat out more often than I make it at home, simply because there are so many local places with delicious food at really reasonable prices. While I know it’s definitely less expensive to make it at home, I still have a difficult time replicating my favorite flavors.

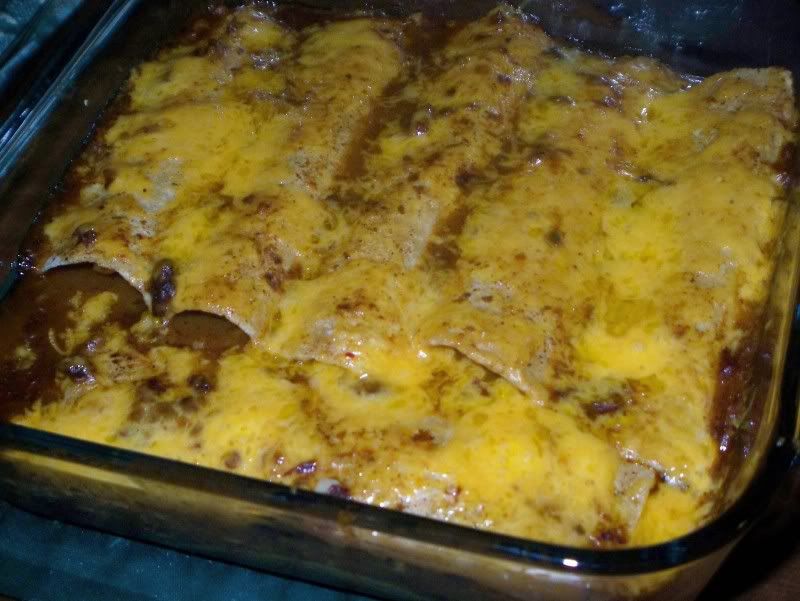
I finally decided to try my hand at homemade Mexican food. While it did taste really good, I will mention that I did have a problem with my flour clumping. Not sure what happened there, but no amount of whisking would get all the lumps out. Thankfully, with the help of a strainer, I was able to get out most of them, and it really didn’t compromise the flavor of the dish at all – I guess it just meant my sauce was a little runnier than the recipe had anticipated. I think it was mainly because of the way the flour was added, so I may amend the recipe next time around to not add dry flour to a hot liquid. The resulting meal was saucy, cheesy, melty and absolutely delicious. It may not be the meal from my favorite restaurant, but it definitely curbed the craving (and probably three-day's worth of sodium!). We realized after this baked that our cilantro was no good, so we had to eat them without, I'd definitely recommend it if you have it, as that would add a nice, crisp flavor that would beautifully compliment the sauce and cheese.


I am notorious for halving recipes since we do not typically need food for four on our dinner table. This time, however, I made all eight, but reserved two for freezing and made six to eat that night. I froze the enchiladas along with a little container of sauce, with the instructions written on the tinfoil, so when it comes time to eat, there will be no lost sauce and no scrambling to find the instructions for reheating them.


Tex-Mex Beef Enchiladas
Adapted from
Everyday Food

1 tablespoons olive oil
1/4 cup all-purpose flour (spooned and leveled)
1 1/2 tablespoons chili powder
1 teaspoon dried oregano
1 garlic clove, minced
1/2 teaspoon coarse salt
1 can (14 1/2 ounces) reduced sodium chicken broth
1 small chipotle chile in adobo, minced, plus 1 tablespoon sauce (from a small can)
1 tablespoon apple cider vinegar
1 small onion, finely chopped
2 garlic cloves, minced
3/4 pound lean ground turkey
1 teaspoon oregano
2 tsp cumin
2 tbsp chili powder
1 tbsp cayenne pepper
Coarse salt and ground pepper
8 flour tortillas
3/4 cup shredded cheddar cheese

Make sauce: In a medium saucepan, mix flour, chili powder, oregano, garlic, and salt into broth, then pour into pan, stirring to remove all lumps. Put the saucepan over medium heat and add chipotle, adobo sauce and 3/4 cup water, and vinegar; bring to a boil, whisking constantly. Reduce heat, and simmer until lightly thickened, about 10 minutes.
Make filling: In a 10-inch nonstick skillet, heat remaining 1 tablespoon oil over medium-high. Add onion, garlic, cayenne, cumin, chili powder, oregano, and beef; season with salt and pepper. Cook, stirring, until cooked through, about 8 minutes.
Preheat oven to 350 degrees. (If freezing, don't place any sauce in baking dish.) Spoon 1/4 cup sauce in bottom of an 8-inch square baking dish. Set aside. Make enchiladas: Stack tortillas; wrap in foil, and warm in oven, 10 minutes. Fill each with a heaping 1/4 cup beef mixture (and this was for 6-inch corn tortillas, which I don't even think I did for 10-inch flour tortillas, so do whatever works for you) and 2 tablespoons cheese; tightly roll up.
Raise oven heat to 450 degrees. Arrange enchiladas, seam side down, in baking dish. Top with remaining sauce; sprinkle with cheese. Bake, uncovered, until hot and bubbly, 15 to 20 minutes. (I sprinkled the cilantro on top a few minutes before end of cooking time) Let cool 10 minutes before serving. Serve garnished with cilantro and, if desired, a green salad.
To freeze: make sauce and enchiladas; arrange enchiladas in baking dish without sauce (so tortillas don't become soggy). Place sauce in an airtight container. Cover dish with plastic wrap and foil. Label, date, and freeze enchiladas and sauce. Use within 2 months; bake without thawing.To bake from frozen: Thaw sauce in refrigerator overnight. Preheat oven to 450 degrees. Remove foil and plastic wrap from baking dish. Pour sauce over top, and sprinkle with cheese; cover with foil. Bake 30 minutes. Uncover; bake until lightly browned and bubbly, about 15 minutes. Let cool 10 minutes; serve.If baking right away: Spoon 1/4 cup sauce in the bottom of baking dish; pour the rest over the enchiladas.


Tuesday, June 8, 2010

Spicy Asian Burgers

As much as I love a good burger, sometimes the classic beef patty can use a little ‘pick me up.’ When I first thought of suggesting a burger with an Asian flair, I thought it was going to be a hard sell. Most of the time, when I want a burger, I want a burger. A juicy, quarter-pound of beef with Worcestershire sauce, salt and pepper grilled over hot coals to perfection. To my surprise, however, the idea was well-received, and our burgers got a one way ticket to Asia.

I am familiar with cilantro, fresh ginger, lemon, soy sauce and sriracha being in some classically asian dishes, but I have to admit I scratched my head for a bit when I saw apple in the recipe. I did think for a short second that I’d omit it, because it seemed like such a strange addition to the burger. But, in a moment of culinary derring-do, I decided to go for it, and include the apple. What’s the worst that could happen? After all, it wouldn’t have been the first time a new recipe has landed us in a fast-food drive-through.

In the finished burger, the lemon, ginger and cilantro are the key players to its flavor. The apple didn't adversely affect the flavor as I was expecting and I feel like it is the reason we ended up with such an incredibly moist and tender burger.

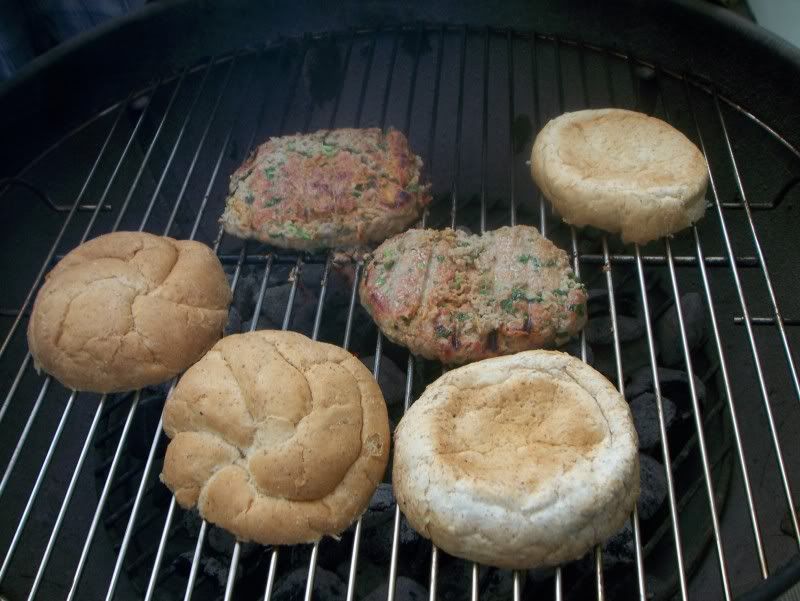
One thing you need a warning about - these are delicate. There is no egg to serve as binder, and only a little bit of bread crumb. The original recipe instructed to cook the burgers in a heavy bottomed pan or cast iron skillet as a way to be a little more careful with the burger, I’m guessing. We chose to throw caution to the wind and grill ours. It takes a little bit of skill, and we still break one in half every once in a while, but it still tastes great, even if it’s in a couple of pieces.

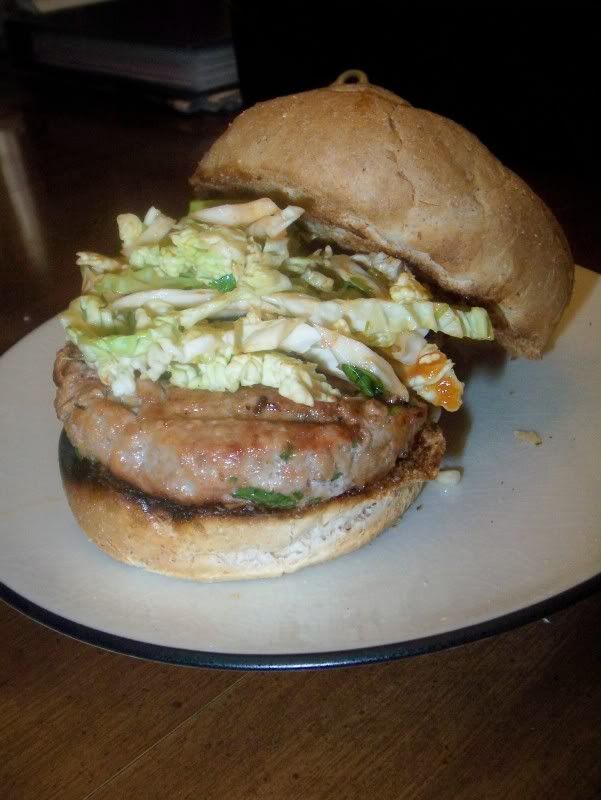
The slaw which accompanies the burger couldn’t be easier. Considering how little effort is needed to make it, I’m definitely putting this in my arsenal for weeknight sides. I used my mandolin slicer to finely slice a half head of cabbage, and even that was too much for us. My picture does show the slaw on top of my burger, however, I decided to eat it as a side dish, as did my husband. I topped my burger with a little bit of fresh, chopped cilantro and a good slathering of sriracha.
Spicy Asian Burgers
Adapted from Once Upon a Plate

Important: At least an hour before planning to cook them make patties as directed and refrigerate for at least 1 hour, up to 8 hours. *

Ingredients:
6 oz lean ground pork, chicken or turkey
1 tablespoons Panko (dry Japanese bread crumbs)
1/2 small to medium size Granny Smith apple, peeled, and very finely diced or coarsely shredded
1 tablespoon finely grated fresh ginger root ~ do not substitute (omit if unavailable)
Pinch ground pepper
2 teaspoons hot chili sauce (Sriracha), more if you like spicy
1 garlic clove, finely minced
1/2 tablespoon fresh lemon juice, and 1/2 teaspoon grated zest
2 teaspoon soy sauce
1 1/2 teaspoons scallions, thinly sliced (white and green parts)
2 tablespoons cilantro leaves (or flat leaf parsley), finely chopped


For the Slaw:
Mix together at the last minute while burgers cook as it quickly wilts)
2 cups finely shredded cabbage (lightly packed - less than half a head)
1 tablespoon cilantro leaves, chopped
1 tablespoon scallion (white and green parts), thinly sliced
2 to 3 teaspoons (or to taste) Sweet Chili Sauce

Optional Garnishes:
Additional Cilantro leaves
Chopped Cashews or Peanuts
Drizzles of dark, flavorful Sesame oil
Additional hot sauce, or sweet chili sauce

To make the patties:
Place the ground meat of choice in a medium mixing bowl. Add the remaining ingredients, mix thoroughly so ingredients are evenly distributed through the meat. Shape into two regular size burgers. Chill in refrigerator for at least 1 hour(up to 8 hours) This step is necessary to firm the patties so they hold their shape while cooking.

To cook:
Preheat a heavy frying pan (well seasoned cast iron works great) over medium heat until hot (or use your grill like we did, just be careful!). Add about 1 tablespoon vegetable oil. Add meat patties to hot oil (don't crowd). Cook for 6 to 7 minutes per side (depending upon how thick the burgers are), turning once, until meat is thoroughly cooked. Remove to a plate and allow to rest for 5 minutes; keep warm by tenting loosely with foil.
Related Posts Plugin for WordPress, Blogger...