Showing posts with label asian. Show all posts

Friday, April 15, 2011

Tom Yum Quinoa and Lemongrass Shrimp

Before I met my husband, I had never heard of Tom Yum Soup, Sukiyaki, cow mu deng, penang curry, among numerous other things. I have since been lucky enough to go with my husband and his family to Thailand, and to taste these dishes and more firsthand. Thai food is special in the sense that, in one dish, it combines in perfect balance sweet, salty, sour, hot (spicy) and occasionally bitter elements.


One of the first thai dishes I ever tried was Tom Yum soup. It is a broth-based soup flavored with distinctly sour, sweet and spicy elements, thanks to ingredients like lemongass, kaffir lime leaves, sugar, galangal, lime juice, crushed chilies and fish sauce. If you aren’t used to the combination of flavors, the soup can really catch you off-guard. I remember the first spoonful I tried; I wasn’t sure if I loved it, or just tolerated it. Each subsequent spoonful was more and more appealing, and the flavor combinations started to really come together for me. Now, Tom Yum is a soup I crave, and I will typically order it any time we go to a Thai restaurant.


Lately, I’ve been delving into the world of alternative proteins, one of which is quinoa. After having the box sit around in my pantry for a week or two, I finally decided I’d make something with it to serve with shrimp. My husband and I have been loving finding new sauces and marinades, and one of our favorites has been a Thai lemongrass marinade. Because we had decided to marinate the shrimp in that sauce, I wanted to do something similarly themed for the quinoa.


As luck would have it, we had most of the ingredients for Tom Yum soup around. I cooked the quinoa with the soup ingredients, hoping the flavors would come through – and compliment the flavor of the shrimp. Aside from not making enough quinoa to satisfy my hubby’s appetite (sorry about that!), the flavor of this meal was spot-on.


The hubby enjoyed his first tastes of quinoa, as it was flavored with elements he was used to. And, for once, my kitchen experimentation has yielded a recipe worth sharing. I served it with a refreshing and easy cold cucumber side dish that you can whip up in under three minutes.


Most of the ingredients will be in your big-name grocery stores. Some of the ingredients, however, may be a little more difficult to find. But, if you have a good international market, chances are you should be able to find things like lemongrass pretty easily.


Tom Yum Quinoa and Lemongrass Shrimp
Serves one very hungry person or two as a light dinner

Ingredients
1/2 pound of medium-sized shrimp
Thai-style marinade, optional (I used a curry and lemongrass one)
1 stalk lemongrass
1 c chicken stock
1/2 c quinoa
2 serranos, halved
2 tsp fresh grated ginger
Zest of 1/2 a lime
Juice of 1/2 a lime
1 tsp sugar
2 tsp fish sauce
Cilantro for garnish

Directions
If your shrimp are already peeled and deveined, great.  If not, Peel your shrimp, leaving the tails on, and devein them if you desire (I always want my shrimp deveined, I’m not a huge fan of the little brown line running up the back!)

If you have a sauce you’d like to marinate your shrimp in, do so the night before and let them sit for eight hours. Otherwise, it’s ok to use plain shrimp and just salt and pepper them before cooking.

Remove the top few inches or so of the ‘dried grassy part’ of the lemongrass and dice the remaining portion very finely.

Rinse your quinoa thoroughly. This will help your quinoa stay fluffy (similar to washing rice before you cook it) . The water should run relatively clear by the time you finish washing it. (It may take a couple of minutes to clean it thoroughly)
In a medium bowl, combine everything but the chicken stock.

Transfer to a pot, add chicken stock and bring to a boil. Cover with lid, reduce heat, and simmer for 12-15 minutes.

Turn off heat but leave lid on for another 5 to 10 minutes.

While the quinoa is resting, heat a skillet or grill pan to medium heat with about a tablespoon of oil in it.

Cook the shrimp for about 2 minutes on each side. They will turn opaque and curl up slightly when they are done, and the tails will turn from blue to pink.

Fluff the quinoa with a fork and serve with shrimp. You can also serve with additional lime slices if you want a little more acidity with your meal. Top with a little washed cilantro and enjoy!
 
Sweet and Spicy Cucumbers

Ingredients
½ c rice wine vinegar
2 T oil
3 T sugar
1 medium cucumber
1 tsp thai pepper flakes (or you can use dried pepper flakes if you can’t find Thai pepper flakes)

Directions

Cut cucumber in half and, using a teaspoon, scrape the seeds from the middle.

Cut the sections in half lengthwise again (making four long slices) and then cut into bite-sized pieces.

Mix all ingredients in a medium bowl.

Serve and Enjoy!

Friday, January 14, 2011

Bao Buns - Part II

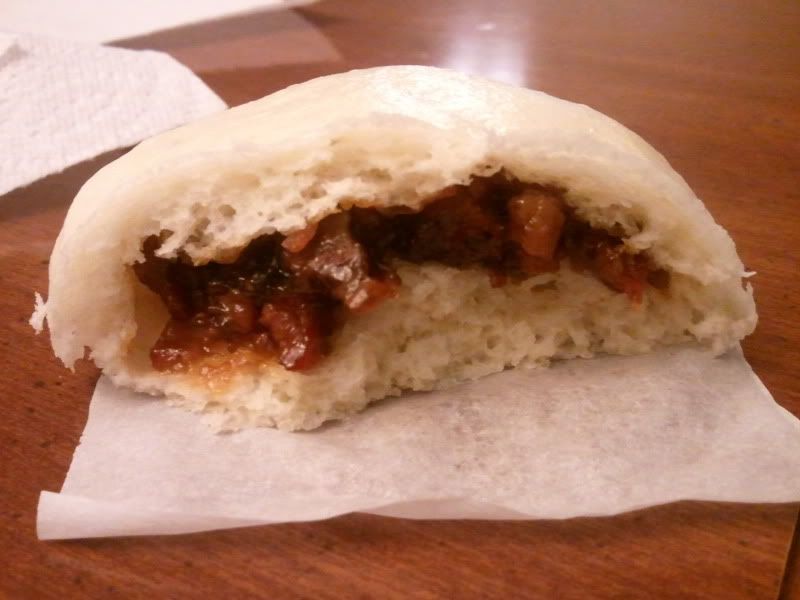
I’ve posted a char siu bao (Chinese BBQ pork bun) recipe on here previously, but I was less-than-ecstatic with the results when I opened the steamer. It appeared that my dough didn’t rise, which should have been a clue to start over, but I soldiered on. The end result was more of a dumpling than a bun and while it was salvaged because the filling was so delicious, it fell painfully short of what I had hoped they would be.

After watching an episode of Top Chef where they had to make dim sum for the lunch rush in Chinatown, I had a strong desire to try my hand at the bao buns again.

Armed with a new recipe (and live yeast!) I started making the sponge for my bao. This had to sit for 30 minutes before incorporating the other ingredients, which also gave me the chance to see proof that my yeast was alive. All excited, I misread the recipe and put a cup, yes a CUP of vegetable oil into the sponge – the recipe only calls for a tablespoon. I am not sure how I misread that, even after double-checking, but when I had an oily mess on my hands, I knew something was wrong. After reading the recipe, I sheepishly had to tell my hubby that we might be eating a little later than anticipated, since I had to start from scratch. Oh well, it happens.

Second time around, I started my sponge, measured out one tablespoon of melted lard this time (in keeping with the recipe) and had a beautiful dough. I ended up needing less than a half cup of water to bring the dough together, so add slowly. As the recipe says, don’t overhydrate your dough.


The interesting part of this recipe was that a teaspoon of baking powder is kneaded directly into the dough after its first rise. This was definitely not in the first recipe I attempted. I took that to be a good sign.

After filling the buns and letting them sit for another 15 minutes or so, I got the steamer ready.

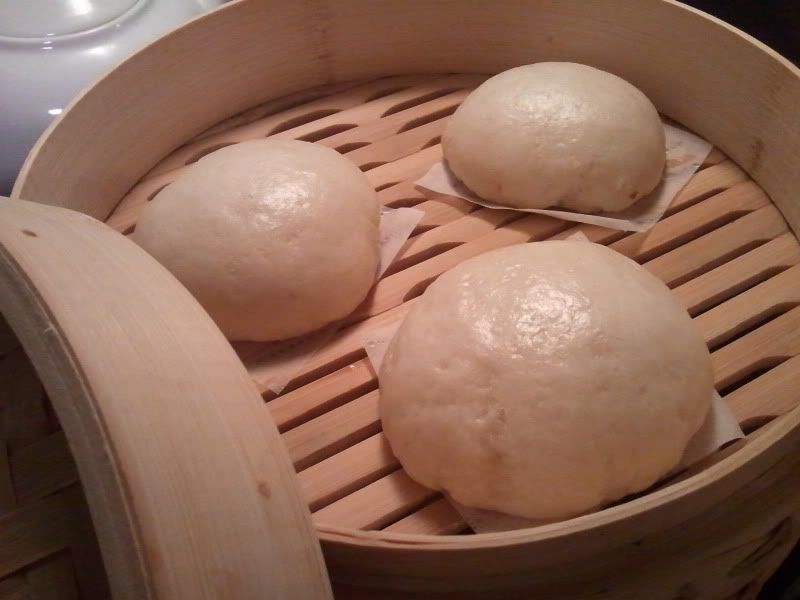
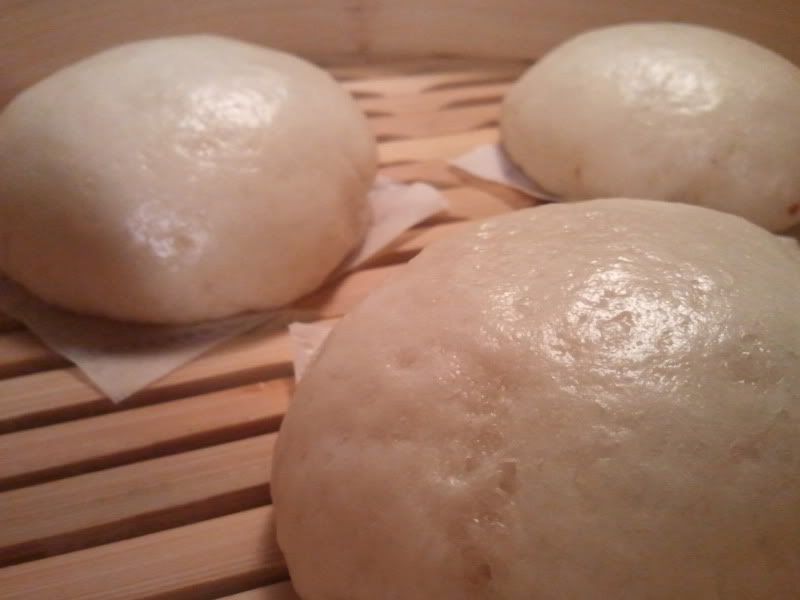
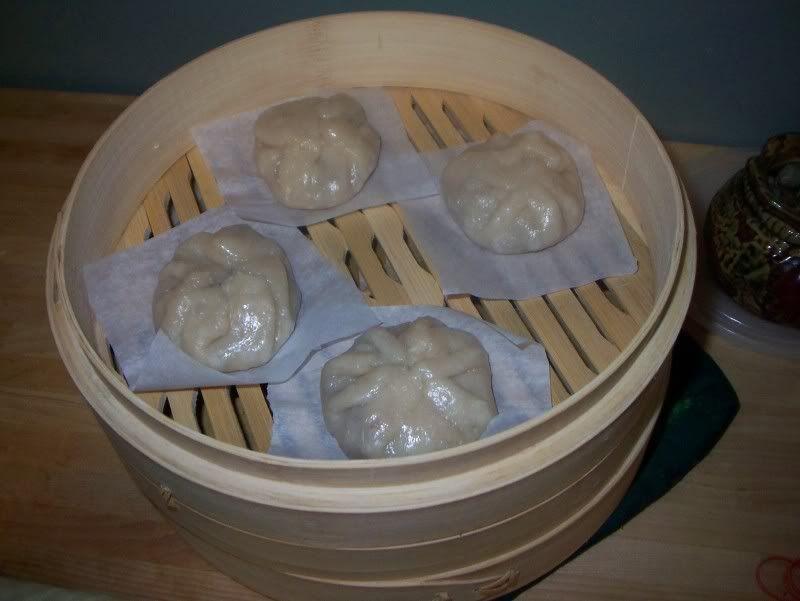
I put three buns on the top steamer basket, leaving the bottom one empty (as suggested by the original poster of the recipe). 11 minutes later, I took the lid off of my steamer basket and squealed with delight that I had made bao!

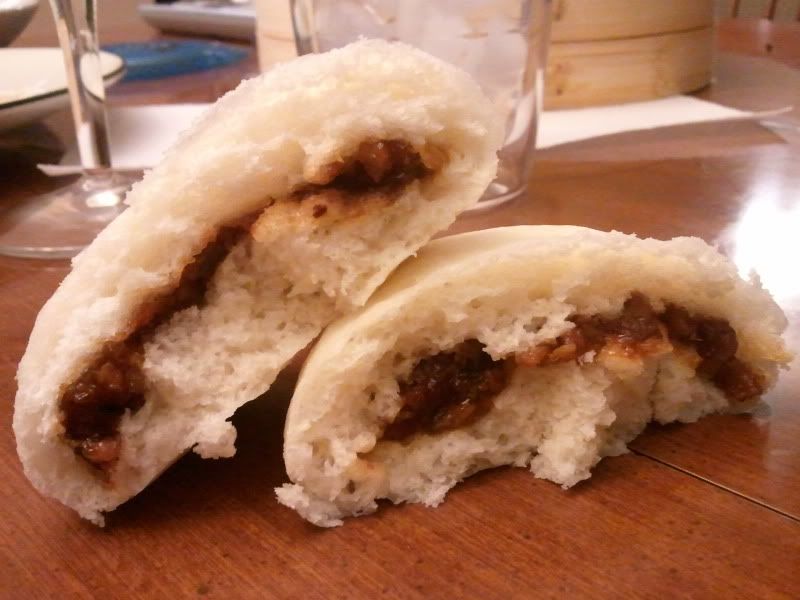
The buns were fantastic, and the dough was soft and airy, but still substantial. Oh man, I am so excited to make these again.


I used a specific bao flour I found in Chinatown, but I am not sure I’ll need to purchase it every time I make bao – the original recipe suggested using a combination of AP flour and cake flour (since cake flour has a lower protein content). I will probably make them using that combination when I run out of my bao flour.

Now that I have finally found a dough recipe that works, I can’t wait to experiment with fillings! Any suggestions?


Plain Chinese Steamed Buns
(Makes 12 buns)
Published on and copyrighted by shesimmers.com
(My comments are in italics and these are mostly paraphrasing tips and suggestions on the Shesimmers website.)

Sponge Starter:
1/3 cup lukewarm water
1/3 cup all-purpose flour
1 tablespoon active dry yeast
2 teaspoon sugar

Dough:
1 1/2 cups all-purpose flour (for lighter texture use 3/4 cup all-purpose flour plus 3/4 cup cake flour)
2 teaspoons baking powder, divided
1/2 teaspoon salt
2 1/2 tablespoons sugar
1 tablespoon of vegetable oil (or melted lard or vegetable shortening)
Enough lukewarm water to create a smooth dough, approximately 1/2 cup

Filling - see original post for filling recipe.

You'll also need:
A steamer - Note: Shesimmers mentioned a preference for the metal steamers, I used my bamboo one just fine, but I only used the top rack and steamed three buns at a time
12 3"x3" waxed paper square


In a large mixing bowl, mix together all the sponge ingredients and let it stand about 30 minutes (up to 2 hours)

Once the sponge is ready (it should puff up and have holes on the surface), add the flour, 1 teaspoon of baking powder, salt, sugar, and oil to the sponge bowl.

While your dominant hand is stirring the dough, add lukewarm water to the mixture a little bit at a time with your non-dominant hand. (Do I have to be this specific about the hand thing?) The moment you feel you can get a smooth dough that wipes the bowl almost clean, stop adding water.

Knead the dough right in the bowl, if you don't want to clean your kitchen counter afterwards. But if you need room to groove, feel free to dump the dough onto a large surface and let go of all your kneading inhibitions.

Once you have a smooth, satiny dough (after about 3-4 minutes), put the dough back into the mixing bowl, if you took it out, and cover tightly with a piece of plastic wrap. Let it rise for 3 hours in a warm spot.

You have three hours to get ready, so prepare your steamer and make the waxed paper squares.

After three hours, sprinkle the remaining 1 teaspoon of baking powder all over the surface of the dough and knead it in, lightly but well.

Roll the dough into a long log and cut into 12 equal pieces. If you are steaming plain buns, shape each piece into a ball by pinching and stretching. Place each dough ball, seams-side down, on a piece of waxed paper.

If you plan on filling the buns, after dividing the dough, flatten each piece into a circle approximately 4 inches in diameter. Add about two tablespoons of filling, pinch circle closed around filling. Place each filled ball seam side down on waxed paper.

Cover the buns with a kitchen towel and let them rise once more for 30 minutes to an hour. You know the buns are ready when they have puffed up and the tops look smooth and taut.

Gently lower the buns into the steamer using the corners of the wax/parchment paper squares, positioning them in such a way that allows for expansion. They should not touch each other or the sides of the steamer.

Steam the buns for 10 minutes. Remove the buns from the steamer and let them cool under a kitchen towel.


Monday, July 12, 2010

Bao Buns

My first experience with dim sum was with my in-laws at a now-closed restaurant called Triple Crown Seafood. It was next to this great Chinese supermarket where we could stock up on everything we would need for my husband to cook all his specialties. It is so much fun to sit down at a table and have cart after cart filled with bamboo steamer baskets pass with every type of dim sum imaginable – bao buns, pork shu mai, even chicken feet. There are no menus, you simply order by sight and smell.

Dim sum is so dangerous for me – there are three to four dumplings in each steamer basket, and after a while, I always seem to lose track of how many steamer baskets have been cleared off of our table. I know I should stop eating because I’m getting full, but I can’t stop because the food is just so amazingly delicious. I really need to work on my willpower.

My favorite dim sum is a Bao Bun. The bun itself is very light, but has a slight chew to it. It encases a small portion of filling, most classically one using Chinese barbecue pork. But there is a restaurant in Chicago serving the classic Char Siu Bao as well as the buns filled with anything from curried chicken to coconut custard. And let me tell you, the coconut cream filling is killer.

At a Chinese supermarket downtown, I found an entire aisle dedicated to flour. Glutinous rice flour, bao flour, dumpling flour, all types. Because I couldn’t read the labels, I bought a flour that had a picture of the bao bun on front, hoping it would work for me. We had also picked up some barbecue pork on this trip, so I found a filling recipe that incorporated this.

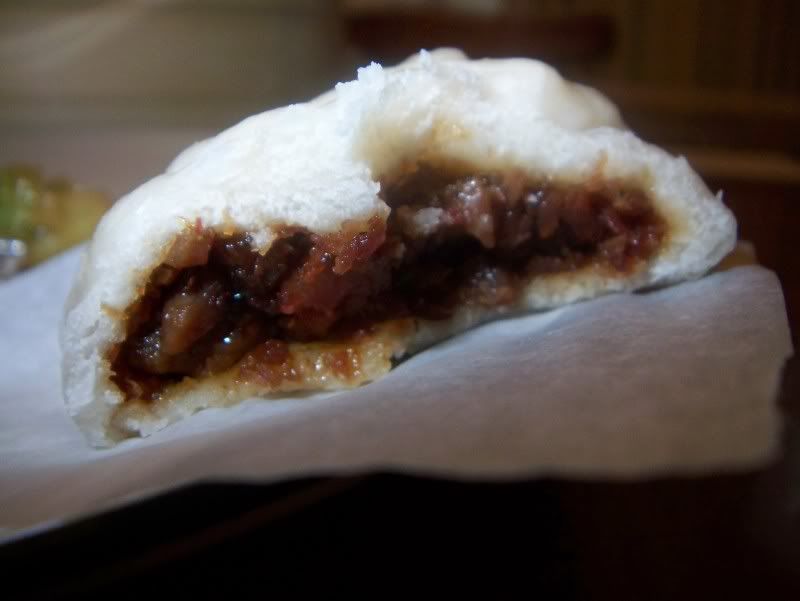
Unfortunately for my bao, I think my yeast was dead since I didn’t get a nice, puffy bao. I was really disappointed, until my husband said two things. First, he told me I nailed the filling. That was encouraging. At least I have half of the recipe right. Second, he mentioned that even though it wasn’t a bao bun, it was still a delicious dumpling – the dough had more of a pot sticker consistency. Despite having dead yeast and not getting a good rise out of my dough, I still ended up with something delicious, and we ate every last one of them.

I can’t wait to try again, and this time I will make sure my yeast blooms before I throw it all in the pot. And if the buns still fail, at least I know whatever comes out will be delicious, despite not being what I had planned on.

My moral is even if things don’t go as planned, go with it. I was so sad that my dumplings didn’t turn out anything like I had expected that I completely ignored the fact that I had managed to make something tasty.

Even failures can be delicious.

I’ll share the recipe for the filling, since that was so good, but I’m going to wait until I have success in the bao department before sharing the dough recipe.


Char Siu Bao Filling
Adapted From:
Char Siu Bao

Yields ~8 steamed pork buns.

Ingredients:
1 tablespoons oil
1 scallion, chopped fine
1 clove garlic, chopped fine
1/4 pound barbecued pork cut into small cubes
1 tablespoons light soy sauce
1 tablespoons oyster sauce
1 teaspoon sugar
1 teaspoon cornstarch, dissolved in 2 teaspoons water or chicken stock

Heat 1 tablespoons oil in wok. Stir fry scallion and garlic 30 seconds. Add pork. Stir fry 1 minute. Add soy sauce, oyster sauce, and sugar.

Pour in dissolved cornstarch. Stir fry quickly until pork is glazed. Remove to bowl and allow to cool.

If you have dough you want to make into Bao Buns, continue on with the recipe.

On a floured board, knead dough 1 minute and roll into one long, sausage-like roll 2 inches in diameter.

Slice the roll crosswise into 1 inch pieces.

Flatten each piece with the palm of your hand and roll with rolling pin into 3 inch rounds.

Place 2 tablespoons of filling in center of each round.

Gather dough up around the filling by pleating along the edges.

Bring the pleats up and twist securely and firmly.

Place each bun on 2 inch square of aluminum foil on steamer tray. Cover with a towel. Let rise 1 hour, until dough springs back when touched with finger. Remove towel.

Steam over briskly boiling water 10 minutes.

May be prepared in advance. May be frozen. Thaw out in plastic bag and resteam 10 minutes.

Saturday, July 3, 2010

Chili Chicken Wings

I’m glad these wings were good, because these nearly made me cry. If you have ever gotten raw ginger juice in your eyes, you know what I’m talking about. If you haven’t, take it from me – don’t. I always peel my ginger with a spoon, because I like to stand over the trash so the peel falls in, and I don’t have the manual dexterity to peel ginger skin with a knife without risking losing a pinky or needing stitches. I always thought it was safer to use a spoon, but when I got that squirt of fresh ginger juice in my eye, I just about would have sacrificed my whole hand to get the pain to stop. Ten minutes later, I was finally able to open my eye, only to have it tear up relentlessly. Thankfully, the more time that passed, the better my eye felt, and I no longer had to walk around the house with a permanent wink.

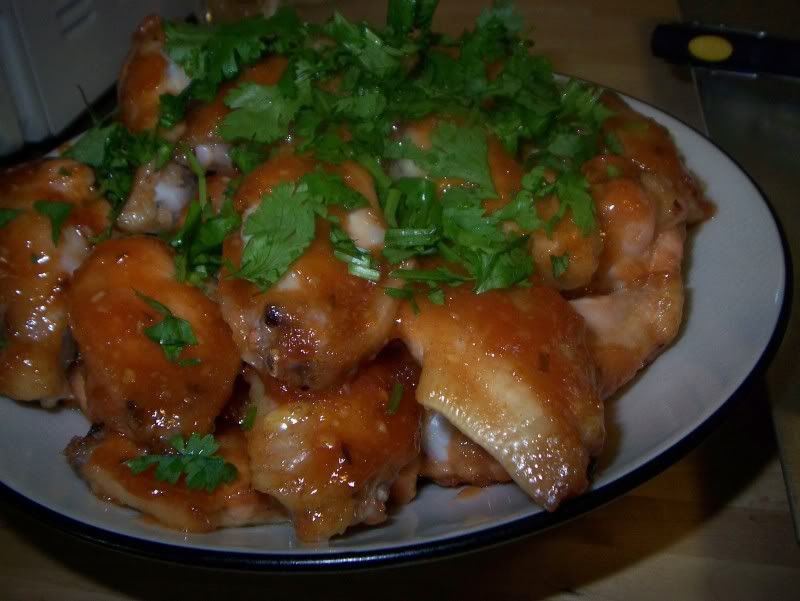
Minus the ginger incident, the rest of the dish came together really easily. I did use a little more cornstarch/water mixture than in the recipe, because I like my sauces a little thicker. Other than that, I kept everything the same, and they were delicious. I left the skin on the wings, so I don’t think I’d call these “health food,” but I did make a point to find a wing recipe that was baked, and not deep-fried (though this sauce would be great on fried wings as well). This was a great cookout food, and one that will certainly be gracing our table again in the future.


Chili Chicken Wings

From: Epicurious.com

For the sauce:
1 1/2 cups rice or cider vinegar
1 cup sugar
3/4 cup ketchup
6 tablespoons Chinese plum sauce
1 tablespoon hoisin sauce
2 tablespoons finely chopped garlic
2 tablespoons (or to taste) finely chopped fresh red, jalapeño or serrano chili, with seeds (I removed the seeds to keep the heat down a little bit)
3 tablespoons finely minced fresh ginger
1 teaspoon salt, or to taste
2 tablespoon cornstarch mixed with 2 tablespoon cold water

30 chicken wings (tips removed), rinsed and patted dry
2 tablespoons chopped cilantro, for garnish

Prepare the sauce: Combine all the sauce ingredients in a small, heavy saucepan. Bring to a boil over medium-high heat, reduce to medium-low and simmer, stirring constantly to blend the flavors, about 5 minutes. Remove from the heat and cool to room temperature. Puree in a food processor until nearly smooth. (Makes 3 cups.) Store, covered, in the refrigerator for up to 2 weeks.

Preheat the oven to 350ºF.

Using a sharp knife, separate the chicken wings at the joint. Set aside. (I also take the ‘pointy part’ off the end of the wing as well)

Place the chicken wings in a large bowl and toss well with 1 1/2 cups of the sauce.

Lay the chicken wings in a single layer on 2 or 3 baking sheets (do not overcrowd them). Bake for 45 to 50 minutes, basting once or twice with additional sauce. Place the wings on a platter, sprinkle with cilantro and serve.

Sunday, June 27, 2010

Asian Chicken Lettuce Wraps

This is a fantastic dish that almost had a tragic ending.

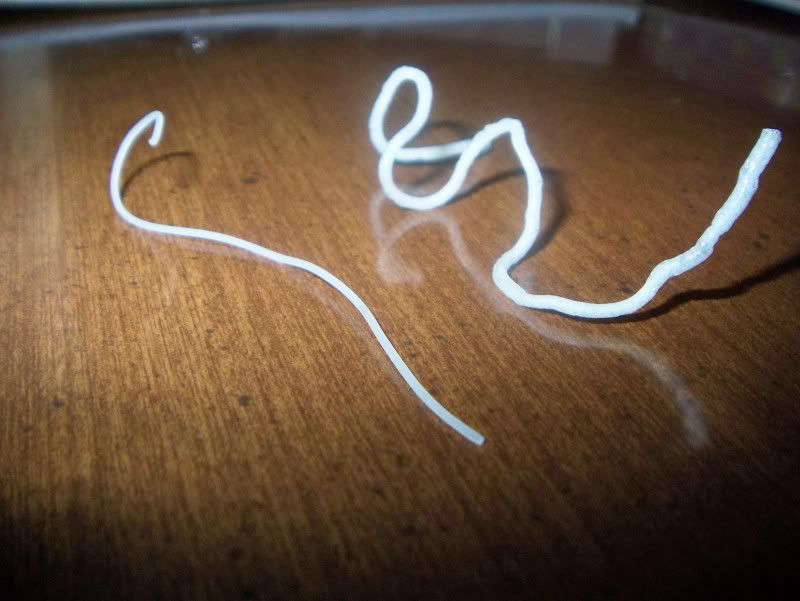
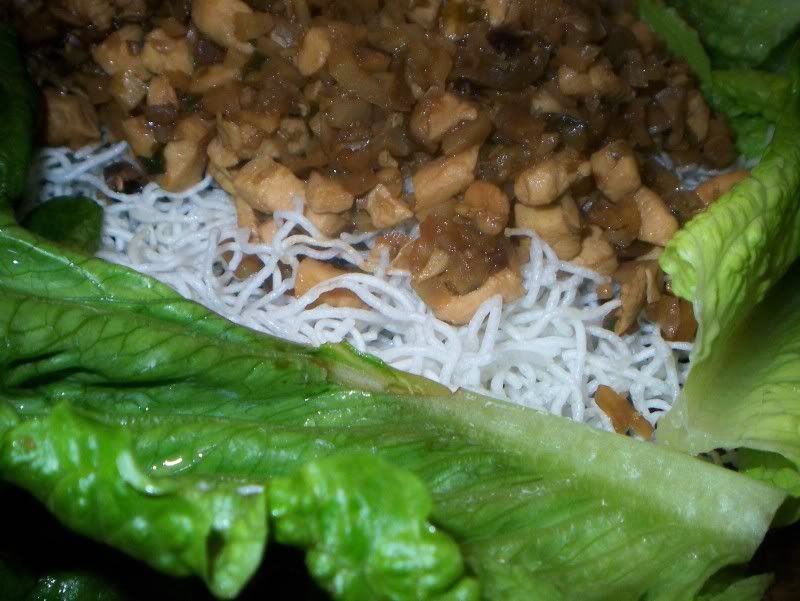
I made this meal for a picnic appetizer, since you need relatively few utensils to enjoy this dish. The only time I had to make it was the night before we were to leave for our picnic, and due to other obligations that night, I was able to start cooking around 10 pm. I started off frying up the maifun rice sticks. Let me tell you, at 1030, watching those suckers puff up is one of the coolest things I’ve seen. I never imagined that little translucent noodle would become those curly, puffy sticks.
Before (left) After (right)


After setting those aside, I then started cooking the chicken. This was where the fun began. We have a terrible blower on top of our stove, and it pretty much does nothing when you turn it on. Therefore, it typically receives very little use in our kitchen. This evening, however, I decided I’d turn it on, because sautĂ©ing the chicken was a little smoky, and I wanted to try and clear out the fumes from the kitchen. I’m not really sure what happened, but when I turned on the blower, bright pink insulation from our attic started shooting out the front of the blower housing into the kitchen. It looked like a cotton candy was snowing from our stove. Amidt cries of “Nooooooo!” and my furious attempts to cover my saucepan so that the insulation wouldn’t ruin my food (or be set ablaze by the gas burner), the smoke alarm in our living room was triggered.

The rest was a bit of a blur. My husband stepped in and managed to turn off the first smoke alarm, only to have another one down the hall start going off. He turned that one off, while I opened the window and the patio door to start airing out the kitchen. I turned off the blower and managed to get most of the insulation cleaned up.

Amazingly, the dish didn’t suffer at all. The smoke was only because I used olive oil by accident, which has a much lower smoke point than the vegetable oil I had intended on using. I guess that’s what happens when you’re cooking late at night. And when you have blizzard conditions in your kitchen thanks to insulation.
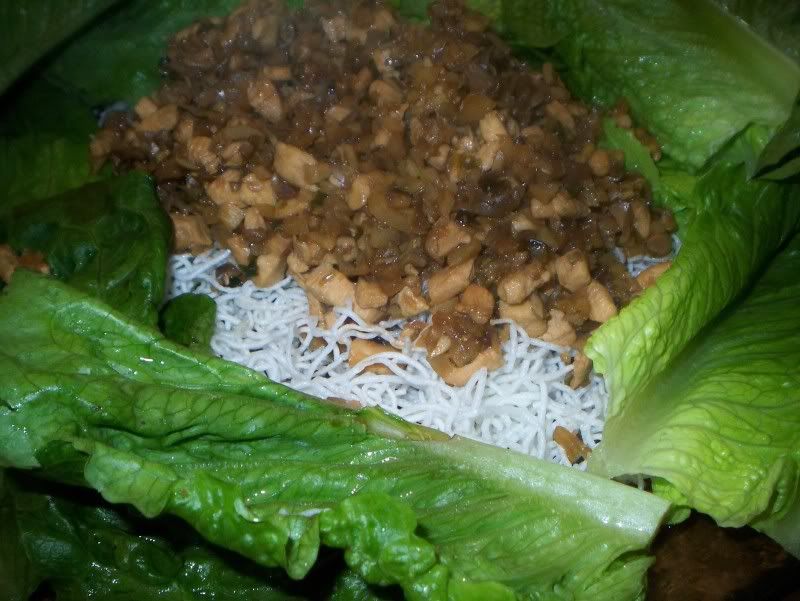
With all the excitement in preparing the dish, I hadn’t really thought about what to expect once the dish was finished. I was pleasantly surprised when I tasted it that it was reminiscent of the lettuce wraps at P.F. Changs. Truly a delight.
I have already made these a second time and thankfully had much less excitement. These are most likely becoming staple appetizer whenever we need one. Minus the smoke alarms and insulation, it is a relatively simple dish to prepare.

Enjoy!
Asian Chicken Lettuce Wraps
serves 2-3 as appetizer
Frying up Maifun Rice Noodles

Pour two inches of vegetable oil in a pan and heat until around 400 degrees F. Add maifun noodles, a little at a time and remove to a paper towl once puffed.

Filling
2 tsp Minced Ginger root
2 Tbsp Vegetable Oil
1 Large chicken breast, cut into small pieces(dime-sized)
1 c water chestnuts
2/3 c canned straw mushrooms
3 Tbsp green onion, chopped
3 cloves garlic, minced
Stir-fry sauce (see below)

Mince water chestnuts and straw mushrooms until the size of small peas. Set aside.
Bring two tablespoons of vegetable oil to high heat in wok or large frying pan. Saute cut up chicken until cooked through.
Add garlic, ginger, water chestnuts, straw mushrooms and green onion.
Add stir fry sauce to pan and saute 2-3 minutes or until hot.

Stir Fry Sauce
2 Tbsp Soy Sauce
2 Tbsp Brown Sugar
1/2 tsp Rice Vinegar

Mix in small bowl and set aside until needed.

Serving Sauce
1/4 c sugar
1/2 c water
2 Tbsp soy sauce
2 Tbsp rice vinegar
1 Tbsp lemon juice
1/8 tsp sesame oil

Dissolve sugar in water over low heat. Add soy sauce, rice vinegar, ketchup, lemon juice and sesame oil. Transfer to bowl and refrigerate until ready to use.

To serve:
Serve filling on top of a bed of fried maifun rice noodles. Have lettuce cups ready. To eat, spoon filling, noodles and sauce into a lettuce cup, roll like a burrito and eat. And for what it's worth, it's usually pretty messy - Go with it!

Tuesday, June 8, 2010

Spicy Asian Burgers

As much as I love a good burger, sometimes the classic beef patty can use a little ‘pick me up.’ When I first thought of suggesting a burger with an Asian flair, I thought it was going to be a hard sell. Most of the time, when I want a burger, I want a burger. A juicy, quarter-pound of beef with Worcestershire sauce, salt and pepper grilled over hot coals to perfection. To my surprise, however, the idea was well-received, and our burgers got a one way ticket to Asia.

I am familiar with cilantro, fresh ginger, lemon, soy sauce and sriracha being in some classically asian dishes, but I have to admit I scratched my head for a bit when I saw apple in the recipe. I did think for a short second that I’d omit it, because it seemed like such a strange addition to the burger. But, in a moment of culinary derring-do, I decided to go for it, and include the apple. What’s the worst that could happen? After all, it wouldn’t have been the first time a new recipe has landed us in a fast-food drive-through.

In the finished burger, the lemon, ginger and cilantro are the key players to its flavor. The apple didn't adversely affect the flavor as I was expecting and I feel like it is the reason we ended up with such an incredibly moist and tender burger.

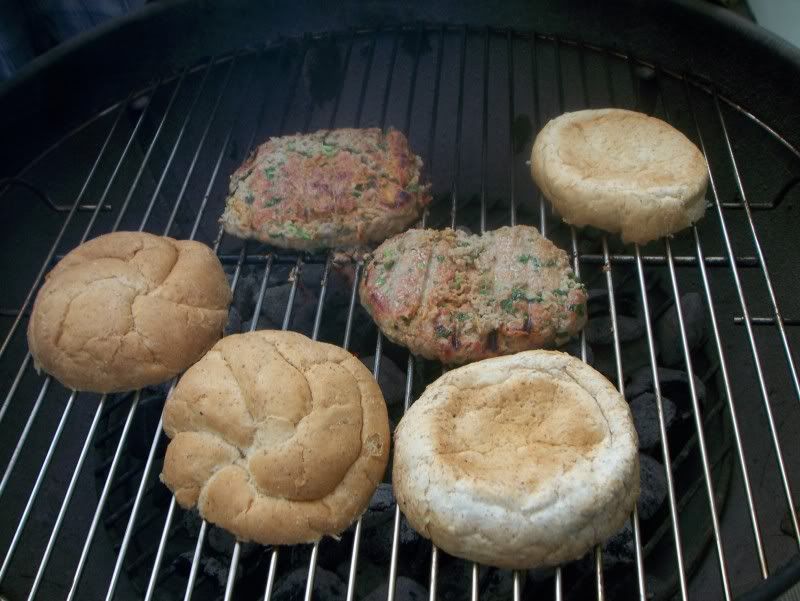
One thing you need a warning about - these are delicate. There is no egg to serve as binder, and only a little bit of bread crumb. The original recipe instructed to cook the burgers in a heavy bottomed pan or cast iron skillet as a way to be a little more careful with the burger, I’m guessing. We chose to throw caution to the wind and grill ours. It takes a little bit of skill, and we still break one in half every once in a while, but it still tastes great, even if it’s in a couple of pieces.

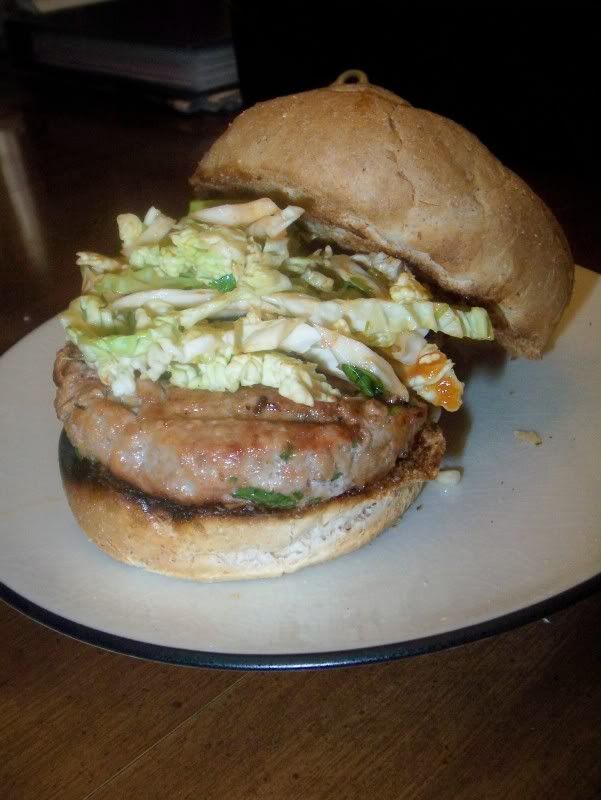
The slaw which accompanies the burger couldn’t be easier. Considering how little effort is needed to make it, I’m definitely putting this in my arsenal for weeknight sides. I used my mandolin slicer to finely slice a half head of cabbage, and even that was too much for us. My picture does show the slaw on top of my burger, however, I decided to eat it as a side dish, as did my husband. I topped my burger with a little bit of fresh, chopped cilantro and a good slathering of sriracha.
Spicy Asian Burgers
Adapted from Once Upon a Plate

Important: At least an hour before planning to cook them make patties as directed and refrigerate for at least 1 hour, up to 8 hours. *

Ingredients:
6 oz lean ground pork, chicken or turkey
1 tablespoons Panko (dry Japanese bread crumbs)
1/2 small to medium size Granny Smith apple, peeled, and very finely diced or coarsely shredded
1 tablespoon finely grated fresh ginger root ~ do not substitute (omit if unavailable)
Pinch ground pepper
2 teaspoons hot chili sauce (Sriracha), more if you like spicy
1 garlic clove, finely minced
1/2 tablespoon fresh lemon juice, and 1/2 teaspoon grated zest
2 teaspoon soy sauce
1 1/2 teaspoons scallions, thinly sliced (white and green parts)
2 tablespoons cilantro leaves (or flat leaf parsley), finely chopped


For the Slaw:
Mix together at the last minute while burgers cook as it quickly wilts)
2 cups finely shredded cabbage (lightly packed - less than half a head)
1 tablespoon cilantro leaves, chopped
1 tablespoon scallion (white and green parts), thinly sliced
2 to 3 teaspoons (or to taste) Sweet Chili Sauce

Optional Garnishes:
Additional Cilantro leaves
Chopped Cashews or Peanuts
Drizzles of dark, flavorful Sesame oil
Additional hot sauce, or sweet chili sauce

To make the patties:
Place the ground meat of choice in a medium mixing bowl. Add the remaining ingredients, mix thoroughly so ingredients are evenly distributed through the meat. Shape into two regular size burgers. Chill in refrigerator for at least 1 hour(up to 8 hours) This step is necessary to firm the patties so they hold their shape while cooking.

To cook:
Preheat a heavy frying pan (well seasoned cast iron works great) over medium heat until hot (or use your grill like we did, just be careful!). Add about 1 tablespoon vegetable oil. Add meat patties to hot oil (don't crowd). Cook for 6 to 7 minutes per side (depending upon how thick the burgers are), turning once, until meat is thoroughly cooked. Remove to a plate and allow to rest for 5 minutes; keep warm by tenting loosely with foil.

Tuesday, May 25, 2010

New Comfort Foods

I’ve been feeling sick the past few days. Just a head cold, but it has been really can really taking a toll. These are the days when I want to curl up on the couch, watch some TV and hopefully fall asleep for a couple of hours. I also feel bad because when I am under the weather, my appetite is the first thing to go, which means cooking a meal is not high on my priority list (though baking is another story). My list of comfort foods is the typical chicken soup, grilled cheese and tomato soup, and anything with chocolate (hey, there are antioxidants in chocolate, so it’s not all bad!) Thanks to my husband, who so graciously made dinner last night, I have a new one to add to the list: Napa soup.

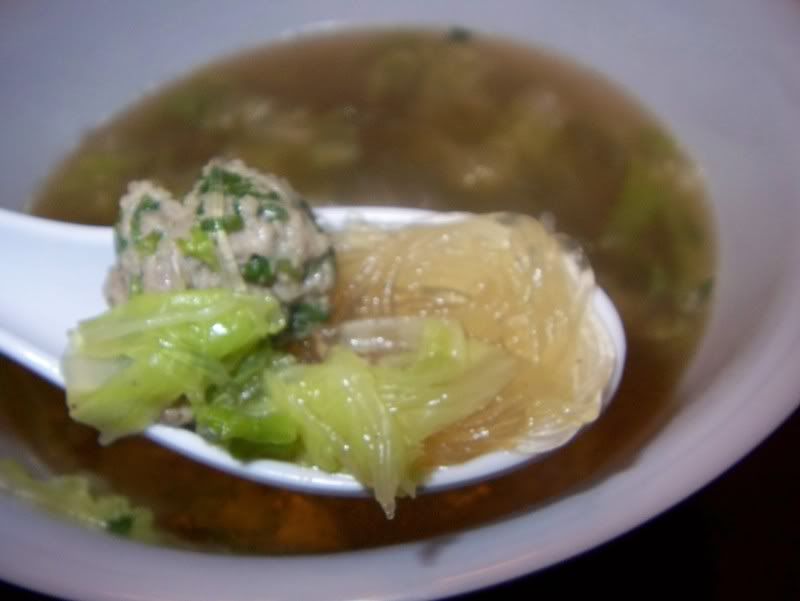
This soup features a chicken bouillon based broth with cilantro and soy sauce pork balls, mung bean threads and chopped napa cabbage. He was able to whip up the whole meal in just over 20 minutes and was exactly what the doctor ordered. It’s comforting in the way chicken noodle soup is, but with a decidedly asian flair. And it’s light enough that you can eat a decent sized bowl without feeling overstuffed.

I’m feeling better already.

My husband doesn’t follow a recipe, he goes by taste. The preparation is simple enough. The following recipe is just a guide, as this recipe is mostly determined by taste.


Napa Soup
To make the Pork Balls:
6 oz Ground Pork
Cilantro
1 Tbsp Sugar
Pepper
1 tsp Fish Sauce
1 tsp Maggi
2 tsp White Soy Sauce
2 tsp Regular Soy Sauce

Take ground pork, a small handful of chopped cilantro, sugar soy sauces, fish sauce and maggi and mix until combined. Divide into small balls.

To make the soup:
Small Handful Mung Bean threads
1 cube Chicken Boullion
Pork Balls (see above)
5 leaves of Napa
3-4 c boiling water
pepper
Fish Sauce
Soy Sauce

Stir chicken bouillon into water and wait until dissolved. Add pork balls and bring back to boil. One pork balls float, add noodles, then napa. Season to taste using pepper, fish sauce and regular soy sauce.


Come join Soup-a-Palooza at TidyMom and Dine and Dish sponsored by Bush’s Beans, Hip Hostess, Pillsbury and Westminster Crackers

Wednesday, May 12, 2010

Fondue Night!

Typically my husband and I try to make meals that come together quickly because we are always starving by the time dinner rolls around on weeknights. The weekends, however, are a different story. I love taking an afternoon and putting together a nice meal that we wouldn’t have time to make and eat on a work night. We make these our date nights - A nice dinner, a bottle of wine and a movie from our Netflix queue. Even with the extra time on weekends, there are occasions that I like dinner preparation to be easy, but still special enough for our date night. I have found the perfect solution: Fondue.

For me, ‘fondue’ used to evoke images of VW buses and slug bugs, bell bottoms, shag carpets and lava lamps. I thought it was a novelty of the 70’s that had no real place on more contemporary tables. While most of these things are now distant memories of the past (well, minus the lava lamp, our guest room has my pink one as a night light…), fondue is fortunately making a modern comeback – just look at the success of The Melting Pot . After my first trip there for dinner, I now understand why fondue is making a return.

We are a part of a fast-paced culture where time is money, and as a result, we are becoming increasingly more focused on convenience foods and and less on the importance of sitting down as a family for a meal. Fondue transforms dinner into the social event I think it deserves to be, instead of just sitting at the table just long enough to stuff your face full of whatever is in front of you and then continuing on with life. I now associate ‘fondue’ with intimacy, family and relaxation because, while the food is important, the meal is more about slowing down and enjoying your company. If you really want to have fun with it, there are also cute little fondue traditions. One tradition says that a woman who drops food in the pot has to kiss the person next to her (sometimes all the men at the table). And since I am not a big fan of that one, I like the other tradition which dictates that the person who loses food in the pot buys a round of drinks or the next pot of fondue. That's more my speed.

As much as I love The Melting Pot, I still have a hard time justifying the cost of their meals. First, you are going there and paying a premium to cook your own food. Second, for about the cost of a two person dinner, you could easily invest in a little fondue pot and make your own in the comfort of your home for a fraction of the price. Let’s do a little comparison, shall we?

From the menu of my local Melting Pot, the least expensive entrĂ©e selection is 16 dollars a person. 32 dollars doesn’t sound too bad for diner, but don’t forget drinks, tax and tip! So for us, our overall dinner cost would be about 40 dollars. That’s being optimistic, because we would each almost certainly have a seven-dollar glass of wine as well. If you were to look at Bed Bath and Beyond, you would see that they have a good selection of at-home fondue pots, even some under 60 dollars. And you know you have some of those 20% off coupons sitting around that come all the time in the mail. So, for about eight dollars more than just your bare-bones dining experience at the Melting pot, you can have your own fondue, anytime. I particularly love our electric fondue pot because it takes a lot of guesswork out of the process and I can switch from broth to chocolate because it has a temperature dial.

Finally, the last big benefit of at-home-fondue is that you have the liberty customize your meal based on your likes, and aren’t limited to the options on a menu. The word “fondue” comes from the French word ‘fonder’ meaning “to melt” and originally referred to a cheese dish mixed with wine and eaten with bread. It has progressed to oil and broth bases used to cook entrees such as meats, seafood, and veggies, and now has even made its way into the dessert world with chocolate fondue for dipping fruits, marshmallows, pound cake or brownies. There's something for everyone.

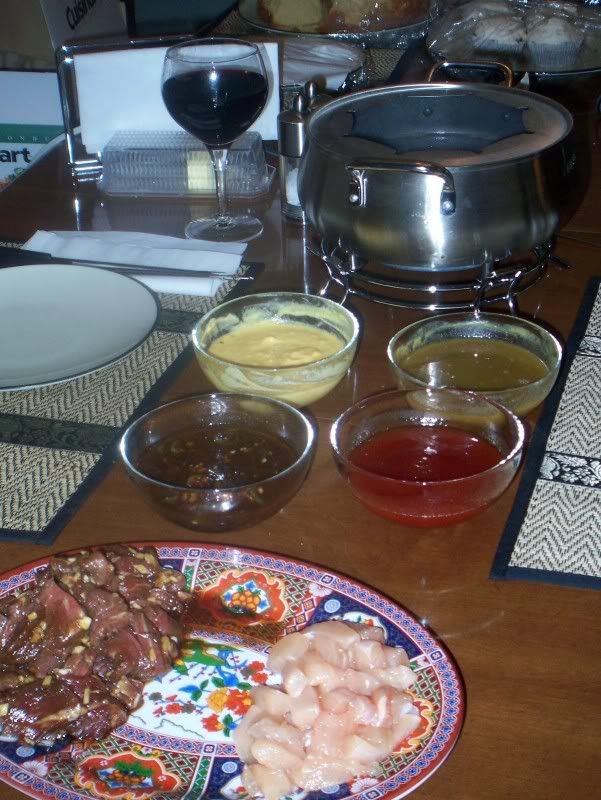
Of all the options, I choose a broth-based cooking method versus oil, simply because I feel I can make the broth more flavorful and it’s healthier than essentially deep-frying everything. The menu is relatively simple, and easy to put together. Last time I even prepared everything but the veggies the night before. I also love mixing lots of dipping sauces, the last meal included sweet and sour, asian and honey mustard sauces.

I do have to caution that if you’re starving, fondue is not a quick fix. Dinner can take up to two hours. Imagine the look on my poor husband’s face when he told me he was hungry and I pulled out only two forks. He looked devastated. By the end of the night, he had convinced me to use all six forks in the pot: 2 for meat, 2 for potatoes and 2 for mushrooms.

If you do have a fondue pot collecting dust in your closet, I suggest you to give it a try. It's a long recipe, but easy. This is one of our favorite date nights, and I look forward to having friends over to share in my fondue love.

Fondue Broth
1 tbsp Vegetable oil
2 Garlic clove, crushed
1 Onion, finely chopped (I had one large scallion and 1/4 leftover onion which I subbed for this)
8 cups Water
Beef bouillon cubes or concentrate
1 Celery stalk, finely chopped
1 Tomato, finely chopped
1/2 tsp Freshly ground pepper
1/2 tsp Salt
1 Bay leaf
1 cup Red wine

1. In a large pot, warm the oil and cook the garlic and onion until soft.
2. Add the water, bring to a boil and add enough beef bouillon cubes for 2 L (8 cups) of broth.
3. Lower the heat and add the vegetables, spices and wine.
4. Cook on low heat for about 3 hours. Add more water as needed.
5. Filter the broth and refrigerate.
6. Prior to serving, remove the fat that has hardened on the surface.
7. Warm up the broth on the stove top.
8. Pour into your fondue pot and adjust the heat.

What to dip in your broth?
On average, you plan to have 1/3 lb of meat per person. I usually have several veggies on hand as well. Here is a standard list of options, but feel free to experiment!

Marinated Beef or pork tenderloin (see marinade recipe below)
Chicken Breast
Loin of Lamb
Regular sirloin
Button or Portabello Mushrooms cut into bite-sized pieces
Par-cooked Potatoes
Sausage
Shrimp
Lobster

Dipping Sauces

Honey Mustard Dip
1 cup Honey
1/2 cup Dijon mustard
Salt and pepper

Mix the ingredients and let chill for a day if possible.
Add salt and pepper to taste.
Serve at room temperature.

Sweet and Sour Sauce
1/2 cup ketchup
1/2 cup white vinegar
1/2 cup sugar
Combine all ingredients and heat until the sugar has dissolved. Serve warm or at room temperature. This sauce may be prepared a few days in advance and warmed before serving.

Asian Dipping Sauce
4 Tbsp Light Soy Sauce
3 Tbsp Lemon Juice
3 Green Chilis
3 Cloves Garlic, minced
2 tsp Sesame Oil
1 Tbsp Cornstarch
1 tsp Water, cold

Combine soy sauce, lemon juice, chilis, garlic and sesame oil in saucepan over low heat. In small bowl, mix cornstarch and cold water until thoroughly blended. Add cornstarch mixture to saucepan and bring to a boil until thickened. Serve warm or at room temperature.

Beef marinade
3 Tbsp Soy Sauce
2 tsp Minced Ginger
1 Tbsp Vegetable Oil
1 Tbsp Honey
1 Tbsp Water
2 Cloves garlic, minced
1/2 lb beef tenderloin, sliced thin or cut into bite-sized chunks.


Chocolate Fondue
Ingredients
12 oz. of semisweet chocolate chips (dark or milk chocolate may be substituted)
1/3 c. heavy cream
1/3 c. milk
2 TBSP liqueur (may be omitted) such as coffee, chocolate, mint or fruit flavored liquors. Rum and brandy also work well.
Combine all of the ingredients in a fondue pot, stirring constantly until the chocolate is melted and smooth. Spear and immerse assorted dipping items.

Dessert Dippers
Pineapple
Strawberries
Bananas
Pound Cake

Sunday, May 2, 2010

Beef and Bok Choy Stir-Fry

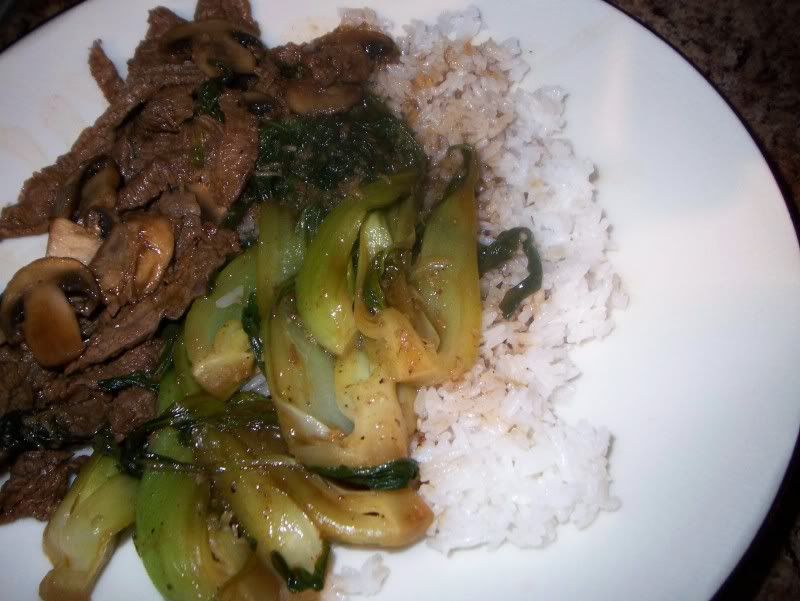
I’m an impulse buyer when it comes to food magazines. They have such pretty pictures on the covers and tote headlines promising meals on the table in under half an hour; it totally sucks me in. Though I love browsing the more gourmet magazines, I have found that the ones typically in my hand at checkout time are Real Simple and Cooking Light. No matter what other magazines I’d browse on a whim, I always gravitate back to these two, mainly because I’ve had the most success finding recipes that have become staples in our repertoire. This magazine had a two-week meal planner and the Asian flavors of this recipe piqued our interest. The fact that is an easy, delicious recipe to prepare with only a few ingredients already stocked in our pantry is why it keeps returning to our household menu rotation.

I’ve modified the recipe because, while I’ve found the amount of meat sufficient, I was starving for more vegetables the first time around. We used the same amount of baby bok choy that is in the four-person recipe for our two-person dinner. The other change was that my husband, the sauce man, insisted that I keep the amount of sauce in the recipe the same versus halving it for our dinner. I’ve already made this dish several times, but, this last time, I also added leftover sliced button mushrooms that were in our fridge. I’d highly recommend adding them if you have some lying around. I’m pretty sure this has now become a permanent recipe amendment for our dinner table.

Beef and Bok Choy Stir Fry
Serves 2
Adaptd from Real Simple Magazine, October 2009

Ingredients
1/2 cup long-grain white rice
1/2 tablespoon olive oil
1/2 pound flank steak, thinly sliced
4 oz mushrooms, sliced
kosher salt and black pepper
4 heads baby bok choy, quartered
1/4 cup low-sodium soy sauce
2 tablespoons rice vinegar
1 tablespoon grated fresh ginger
1 tablespoon brown sugar

Directions
Cook the rice according to the package directions. Meanwhile, heat the oil in a large skillet over high heat. Season the steak with 1⁄4 teaspoon each salt and pepper and cook, turning often, until cooked through, 3 to 4 minutes. Transfer the steak to a plate.
Wipe out the skillet. Add mushrooms, season with salt and pepper and saute until cooked down. Transfer onto the plate with the steak.
Add the bok choy and 1⁄4 cup water and simmer, covered, until tender, 3 to 4 minutes.
Meanwhile, in a bowl, mix the soy sauce, vinegar, ginger, and sugar. Add to the bok choy in the skillet and bring to a boil. Add the steak, mushrooms and any accumulated juices and cook, tossing, until heated through, 1 to 2 minutes. Serve over the rice.

Related Posts Plugin for WordPress, Blogger...