Showing posts with label autumn. Show all posts

Saturday, January 1, 2011

Feeding my “Swagoonchy” Craving (Recipe: Caramel Apple Crisp)

Happy New Year Everyone!!! I hope everyone had a wonderful time ringing in the new year!

Even though the holidays are over, the cold is still hanging around, most likely will until April. This is when I start wishing for the warmer weather, and that someone would shovel our sidewalk and driveway for us. It's days like this where I just feel like I need something that is, for lack of a better word, “swagoonchy.” For everyone that’s not inside my head, that would be sweet, warm, gooey, and crunchy. This caramel apple crisp satisfied this craving, and I’m sure if you were just craving something simple and delicious for dessert, this would work as well.

The combination of caramel, cinnamon, nutmeg and apples resembles an apple pie, but this is so much easier to make. And the ramekins help with portion control (because I’d be the one finishing an entire pan of this stuff). There is a little prep-work involved in the recipe, but I made this on a work night, so I know it can be done, even on a tight schedule.


Caramel Apple Crisp
2 Apples
8-10 caramel chews
2-3 Tbsp milk
1/4 tsp Nutmeg
1/2 tsp Cinnamon
3 Tbsp Oatmeal
1 Tbsp Butter
1 Tbsp Brown sugar

Preheat oven to 325.

In a small pot, combine milk and caramels over low heat until caramels have melted and mixed with the milk. (Alternatively, you could also do this in the microwave, at full power for 30 seconds, stir and repeat until combined.)

In another bowl, slice the apples, fairly thin. Pour in the caramel/milk mixture and stir to coat.

In a separate bowl, combine oats, brown sugar, cinnamon, nutmeg and butter. Mix until well combined.

Put apple mixture into ramekins, and top with the oatmeal/butter mixture.

Bake for 20-30 minutes, or until toasted on top and bubbly.

Tuesday, December 7, 2010

Butternut Squash and Shrimp Risotto

This is a meal I’ve made before, and thanks to autumn finally arriving and butternut squash being on sale, I decided it would be fun to make it again. After having made it by the recipe the first time around, I decided it might be fun to tweak with it a little bit this time. After peeling the shrimp, I put all the shells into the vegetable broth and simmered that for about 30 minutes to infuse some of the shrimp flavor into the broth before using. I used about half of a 187ml bottle of pinot grigio wine (approximately equal to six-seven tablespoons) in my pot with the rice first, before adding any of my broth to get a little more flavor into the rice as it cooked. I ended up not even replacing the liquid in the recipe for the wine, I just added it in addition to the four cups of broth, and it still turned out fine.

One of the nice things about this dish is that it is not as fussy as a classic risotto. Yes, you do have to stand next to it a stir it nearly the entire time it cooks, but you don’t have to mess with adding the liquid in increments – just pour it all in at once and stir. Even better? It’s a one-pot meal. Cleanup was a breeze, which is especially nice when you have company and want something delicious for dinner, but don’t want to spend the rest of the evening cleaning up afterwards.

I served this risotto with crusty Italian bread and a dish with olive oil, parmesan and pepper for dipping, as well as a green salad.

(And don't forget to save the seeds from your squash to make Toasted Butternut Squash Seeds!)

Butternut Squash Risotto with Shrimp

Adapted From Bon Appetit

6 servings

Ingredients
3 ounces pancetta (Italian bacon), chopped
1 pound large uncooked deveined peeled shrimp, with shells set aside (if available)
1 tablespoon olive oil
1 large onion, chopped (about 1 3/4 cups)
1 garlic clove, chopped
1 cup short-grain rice (such as arborio or carnaroli)
4 cups vegetable broth, heated in microwave
½ c Dry White Wine
1 1-pound package peeled butternut squash, cut into 1/2-inch cubes (about 3 cups)
1 tablespoon chopped fresh sage
1/4 cup whipping cream
Preparation
If you have your shrimp shells, put them in a both with your broth and let them simmer over low to medium-low heat for 20 minutes or so.

Sauté pancetta in heavy large saucepan over medium-high heat until fat renders and pancetta is browned and almost crisp. Using slotted spoon, transfer to medium bowl.

Sprinkle shrimp with salt and pepper; add to saucepan. Sauté until browned and just opaque in center, about 3 minutes. Add to bowl with pancetta.

Add oil to same saucepan, then onion and garlic; cook until onion is translucent, stirring often, about 5 minutes.

Add rice; stir 1 minute. Add wine and stir until mostly absorbed. Add hot broth; increase heat and bring to boil.

Add squash and sage; reduce heat to medium and simmer until rice is tender but still firm to bite and mixture is creamy, stirring often, about 15 minutes. Stir in cream, shrimp, and pancetta. Season to taste with salt and pepper.

Transfer to large shallow bowl.


Butternut Squash on Foodista

Tuesday, November 30, 2010

Cranberry Relish

Is there anyone else out there who is very particular about their cranberry sauce? Or is it just me?

I didn’t even realize I liked cranberry sauce until I finally had homemade sauce – and not the stuff out of the can. Don’t get me wrong, the canned stuff has its place (my favorite stuffing recipe incorporates it), but to eat with my turkey just seems wrong. That turkey spends eight hours in the oven, cooking to perfection. I feel like the least I can do is top it with a sauce I made at home, in about 10 minutes, instead of just opening a can of what reminds me of jell-o. There seems like something slightly unnatural about a cranberry sauce that maintains the shape of the can once it’s on the plate.

This recipe was passed along by a friend who said she got rave reviews every time she makes it. Understandably. This relish is as easy as it is tasty. Just make sure the bowl you use is big enough to handle the swelling berries. That’s a sticky mess to clean up if your bowl overflows.

You could also make this one your stovetop, letting the mixture simmer until the berries pop and the sauce thickens slightly, but I prefer simply nuking my berries.

Easy Cranberry Relish
Ingredients:

Yield: 3-4 cups
16 ounces cranberries, fresh or frozen
1 1/2 cups sugar (a little more sugar, if you prefer it sweeter)
1 cup orange juice
1 tablespoon grated orange rind

Combine all ingredients in a 3-qt microwave safe bowl; mix well.
Cover with wax paper.
Microwave on high for 5 minutes.
Stir well; recover with wax paper.
Microwave on high for 5 minutes again.
Stir well; recover with wax paper.
Microwave another 5-7 mins longer until cranberries pop, and sauce has thickened.
Let stand, covered until cool.
Transfer to serving bowl and chill for 3-4 hours.

Sunday, November 28, 2010

Maple Pecan Pumpkin Cheesecake

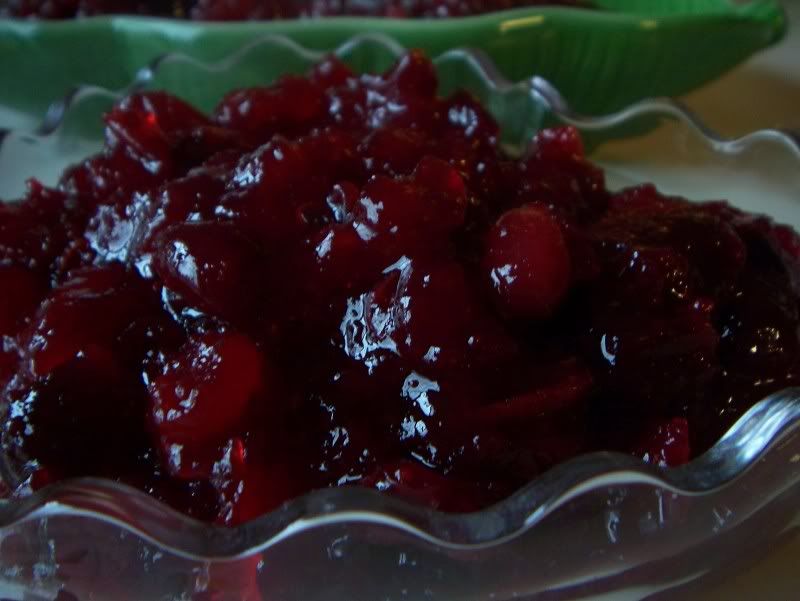
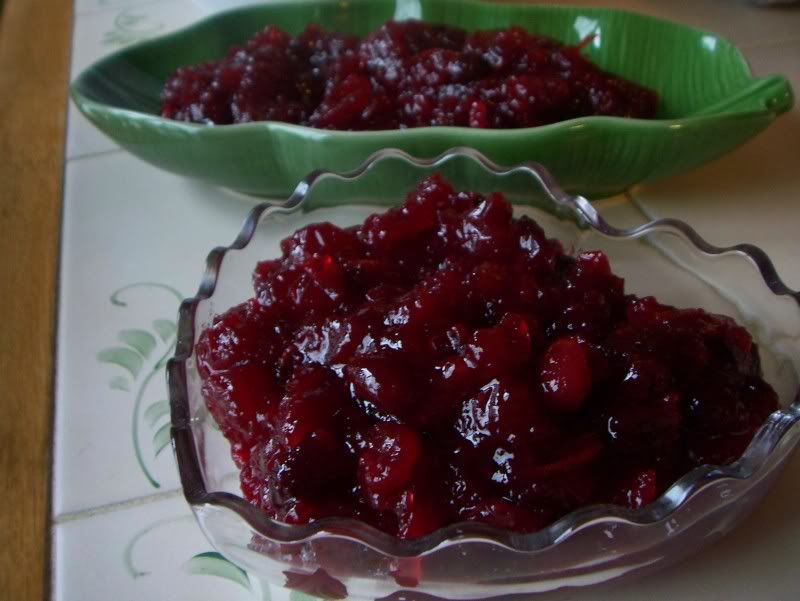
This year, Thanksgiving was hosted by my in-laws. I say that with a little sigh of relief. As much as I love preparing Thanksgiving dinner for a group of people, I do also enjoy being able to socialize with my family, instead of being paranoid about how much longer the turkey is going to need in the oven. Just because I’m not hosting doesn’t mean I come empty-handed. As of last year, we have a new favorite cranberry relish (recipe coming!) which I made, and I had really wanted to find a dessert that I could bring that wouldn’t duplicate what was already there.

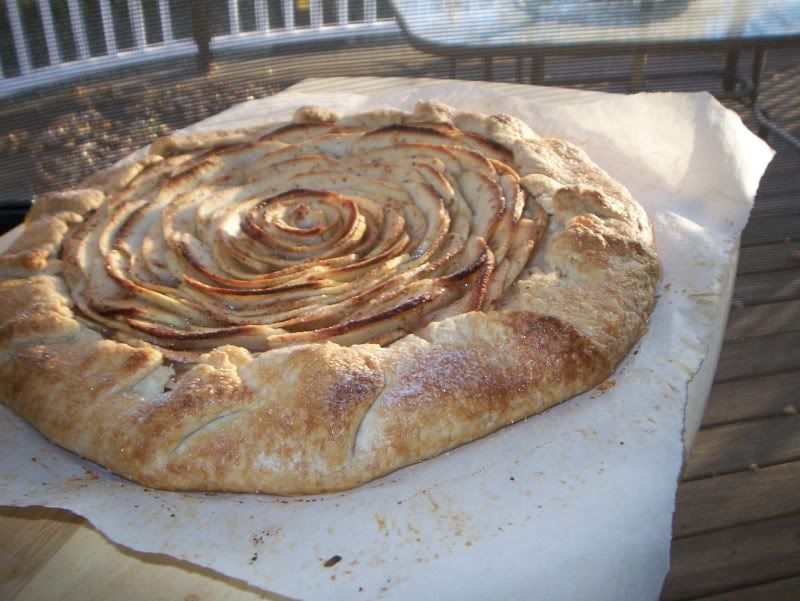
With the classic pumpkin and apple pies spoken for, I had the chance to find something a little different to prepare from our usual desserts. My mother-in-law and her mother make fabulous pies – who wants to compete with that?

One early Saturday morning Food Network was having their Thanksgiving show extravaganza. A show called Dessert First came on, and the host, Anne Thornton, prepared a cheesecake that looked like a winner. What better time than Thanksgiving to try it out? This cheesecake still encompassed the autumn spirit, but wouldn’t be too similar to the already-delicious desserts there.


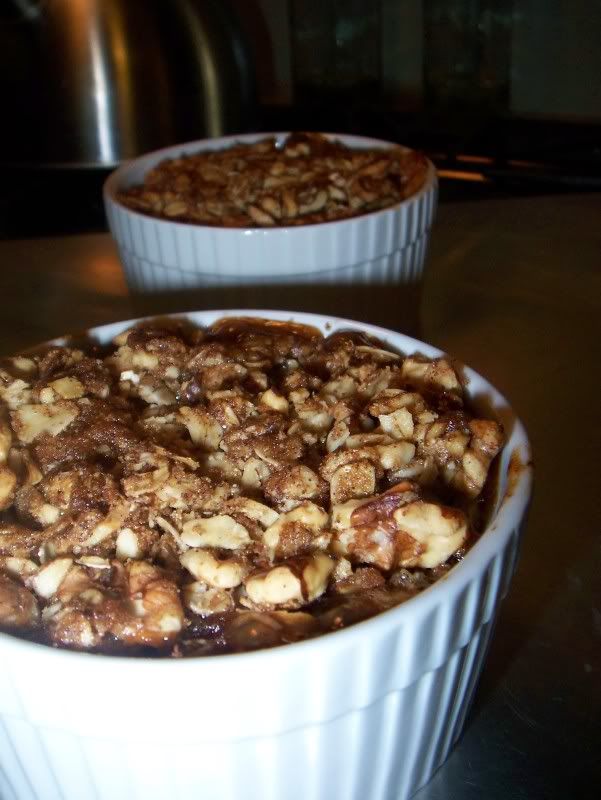
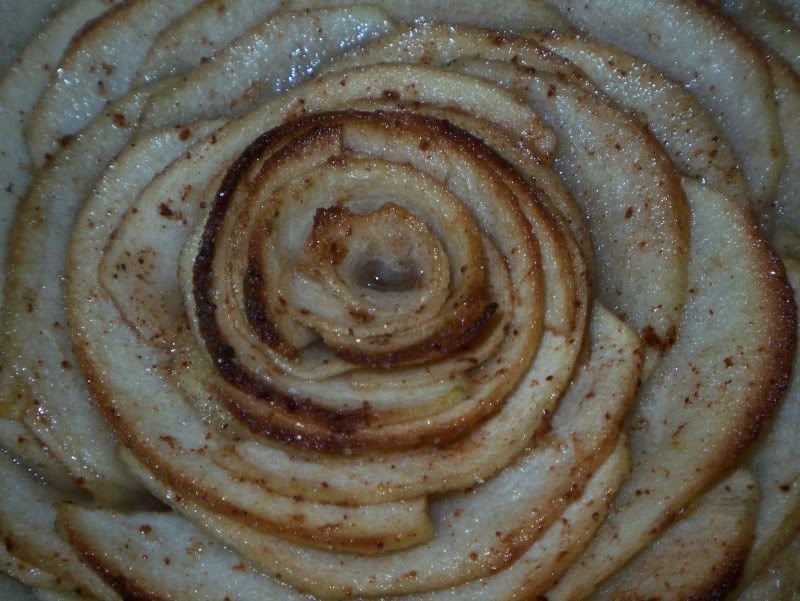
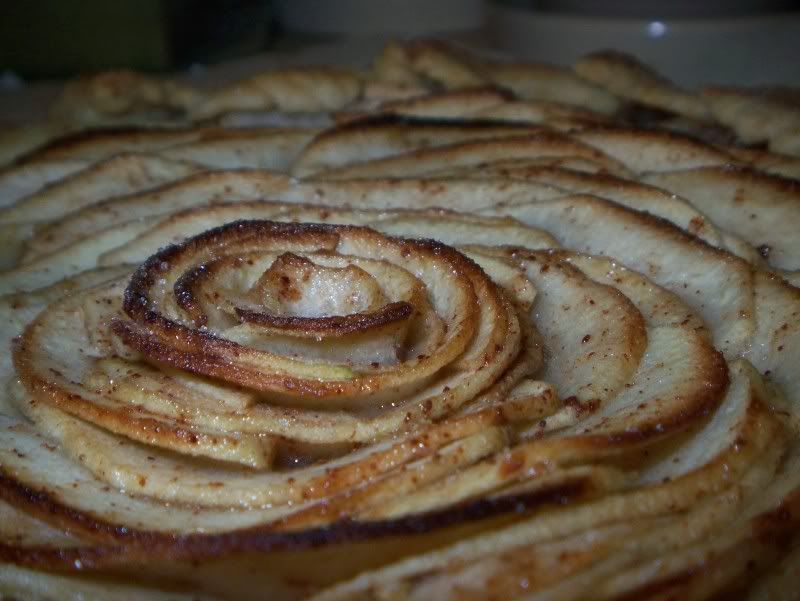
A peek into the oven with the cooling cheesecake!

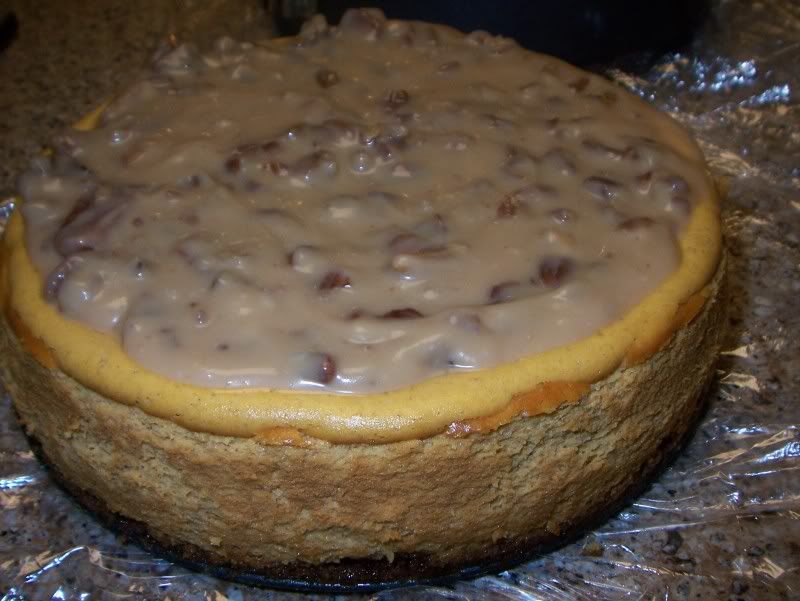
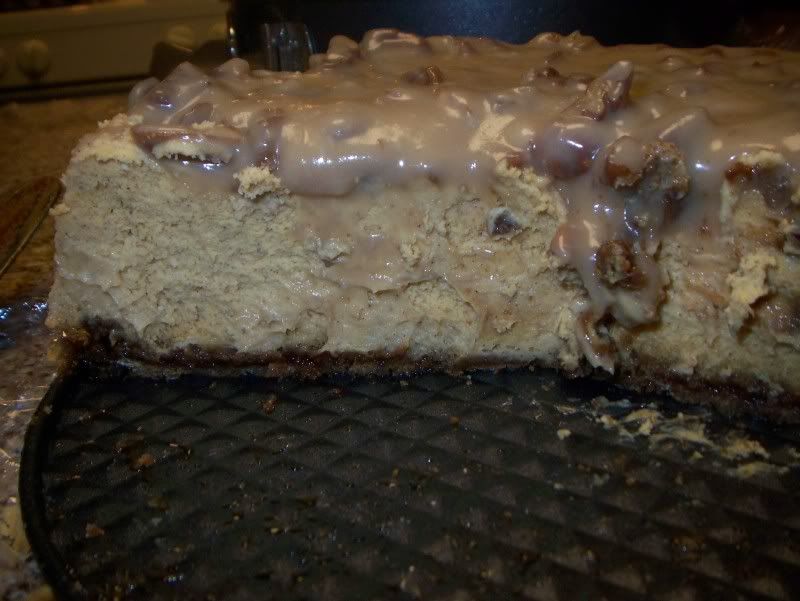
The cheesecake itself wasn't cloyingly sweet, with a slight tang from the cream cheese and the warmth from the spices complimenting each other nicely. The topping was fabulous, it added the extra sweetness without overwhelming the entire cake. I decided to tweak the recipe by substituting a gingersnap crust for a graham cracker one, and I'm glad I did. The spicy gingersnaps added a little zing to the crust that the graham crackers would have lacked. But, if graham crackers are the only thing in your pantry, they would make a fine crust, too.

My only issue with the recipe was that when I baked the cheesecake, butter from the crust seeped out of my springform pan. I am not sure how to avoid that happening again other than using less butter.

The flavors only improve after a couple of days, so this is one dessert you don't have to wait until the last minute to prepare.

Maple Pecan Pumpkin Cheesecake
Adapted from Anne Thornton via
FoodNetwork.com (there is also a very similar version on the Eagle Brand website)

Cheesecake:
1 1/3 cups gingersnap crumbs (from approximately 25 gingersnaps)
1/4 cup sugar
1/4 cup butter, melted
3 (8-ounce) packages cream cheese, softened
1 (14-ounce) can sweetened condensed milk
1 (15-ounce) can pumpkin
3 large eggs, at room temperature for 30 minutes
1/4 cup pure grade B maple syrup
1 1/2 teaspoons ground cinnamon
1 teaspoon ground nutmeg
1/2 teaspoon fine sea salt

Maple Pecan Glaze:
1 cup whipping cream
3/4 cup pure grade B maple syrup
3/4 cup chopped pecans
Directions
Preheat the oven to 325 degrees F.

For the cheesecake: Finely crush the gingersnaps in a plastic bag with a rolling pin or use a food processor. In a large bowl, combine the gingersnap crumbs, sugar, and melted butter and firmly press into the bottom of 9-inch springform pan.

Cook the crust for 10 minutes at 325 and let it cool completely in pan. Stack 3 large sheets of foil on work surface. Place same cake pan in center. Gather foil snugly around pan bottom and up sides to waterproof.

In a standing mixer with a paddle attachment, mix the cream cheese until fluffy. Gradually mix in the sweetened condensed milk until smooth. With the mixer on medium, add the pumpkin, eggs, maple syrup, cinnamon, nutmeg, and salt. Mix well and pour into the springform pan.

Place wrapped cake pan in large roasting pan. Pour enough hot water into roasting pan to come halfway up sides of cake pan. Bake cake until filling is slightly puffed and moves only slightly when pan is shaken gently, about 1 hour 25 minutes. Remove cake pan from water bath; remove foil. Cool cake in pan on rack 2 hours.

Bake until the center appears nearly set, but jiggles a little when shaken, 1 hour and 15 minutes. Cool for 1 hour. Cover and chill overnight, or for at least 4 hours.

For the glaze: In a medium-sized saucepan, combine the whipping cream and pure maple syrup and bring it to a boil. Boil until slightly thickened, 15 to 20 minutes, stirring occasionally. Stir in the chopped pecans. Cover and chill until time to serve. Stir before serving.

To serve: Spoon the Maple Pecan Glaze over the cheesecake.

Tuesday, November 23, 2010

Apple Crostata

I find making pies a very relaxing process. It is very straightforward, few ingredients, and the result is warm and satisfying. I have been making pies since I was probably 12 years old or so. I started with the refrigerated pie crusts, but soon graduated to making scratch crusts. Making a crust requires minimal time and effort, and the taste is far superior to anything you can purchase in the stores. With a little preparation and a little practice, anyone can make a delicious, flaky pie dough.

Recently, I found myself with an excess of apples in our refrigerator, and with the family coming over for dinner, I really wanted to make something with apples for dessert. It has been a long time since I’ve made a pie, mainly because the commitment required for my husband and I to finish a pie ourselves is usually too much for us to handle. This was the perfect time to attempt my first crostata.

Martha’s pie dough was a snap to assemble, though I had to make it in two batches because I have a four-cup food processor and the entire recipe for a double crust wouldn’t fit. I’ve heard that when rolling out pie dough you should use parchment paper instead of dusting with flour, because the flour actually can cause the dough to get tough on you. After taking so much care not to overwork a dough in the process, it’d be a shame to toughen it up at the very end. So, I used the parchment paper, and it rolled out beautifully. It also makes the transfer from counter to sheet pan (or pie plate, if you desire) so much easier!

The filling only has a few ingredients and can be simply dumped into the crust or arranged a little more elegantly, depending on your mood. I really wanted to try to make a pretty dessert, but definitely kept the option open to just pile the apples in if my design idea failed. It must have been my lucky day, because the crostata turned our beautifully, and captured everything that is wonderful about an apple pie without requiring ten people to finish it.


Making pie dough from scratch can be intimidating. But, there are only a few simple things to keep in mind when making them, and you are well on your way to success:

Cold butter.
When you work butter into your crust, you want it to stay slightly chunky – about pea-sized. You do not want it to become a paste with the flour. The finished crust should have little pockets of butter visible in the dough. When the crust bakes, the butter releases steam in the crust, which is what creates the flakiness in the crust.

Do not overwork your dough.
When making pie crust (or biscuits or muffins) you want to develop as little of the gluten in the flour as possible. Gluten creates long strands of proteins within the dough when activated, like when working with bread dough. You knead the dough to created those long protein strands which results in a very elastic dough. For pies, though, you want tender and flaky, not tough and elastic. Work with the dough as little as possible just until everything is incorporated and you can press it together with your fingers. It may still look crumbly in your bowl, but if you pinch a little bit and it stays together, you’re done.

Chill your dough.
Just as cold butter is important in the beginning of the process, keeping the dough chilled during the process is key. Letting the dough sit after it comes together allows the water to really hydrate the flour in the dough, and you will have a better crust if you can refrigerate your dough for 30 minutes to an hour before rolling it out. Also, once you have your crust in your pie plate, it wouldn’t hurt to freeze it for 30 minutes before adding your fillings, just to make sure it’s super cold one last time. It will help keep your crust from getting soggy on the bottom.

Refrigerate or Freeze extra dough.
Don’t let the extra dough go to waste even if you can’t use it! My crostata only used half of this recipe, but I can save my crust to make a pie up to three later! Tightly wrap the dough with plastic wrap, and then put in a zip-top freezer-safe bag. Make sure to label it so you know how long it’s been sitting! I’ve seen recommendations of freezing for anywhere from one to three months, so if you want to be safe, use it sooner rather than later. Thaw your dough overnight in your refrigerator the prior to using it, and then continue making your pie as if you had a fresh dough.
Pies need to breathe, too! If making a double-crusted pie, cut vents in the top crust. If you don’t, steam may build up inside your crust and you might end up with a pie-blowout!

If making a double-crusted pie seems like too much, try this crostata. After rolling the dough flat, you dump in the filling and fold the edges over. Tears and breaks in your dough? No problem, that’s the beauty of a rustic dish – you can say it’s supposed to be like that! There isn’t even need for a pie dish, so you can see if you enjoy making the dough before going out and buying anything special!

This would be a wonderful addition to any Thanksgiving table. Give it a try, you might surprise yourself!
Apple Crostata

Ingredients
3 apples (I used 1 Braeburn and 2 granny smith)
1 tbsp lemon juice
1 tsp lemon zest
1/2 tsp cinnamon
1/4 tsp nutmeg
2 tbsp sugar
1/2 Recipe of Pie Crust (recipe follows)

Roll 1 disk of pie crust recipe to 1/8-inch thickness between two sheets of parchment paper. Remove top sheet of parchment paper and move dough to a rimmed baking sheet. Refrigerate while preparing the filling.

Preheat oven to 350 degrees.

Peel, core and slice apples into 1/8-inch thicknesses. Put into large bowl, drizzling lemon juice on apples as you go so they don’t oxidize and turn brown.

Mix flour, nutmeg, cinnamon, lemon zest and sugar in with the apples. Let sit for five to ten minutes.

Remove crust from oven and either spread your apple filling on the crust, or arrange on the crust, leaving a 1-1/2” border around the edge.

Fold edges over the filling (it’s supposed to look ‘rustic!’)

Brush cream on crust, and sprinkle with sugar.

Bake for 50-60 minutes until apples are cooked and crust is brown.

Pie Crust
From
Martha Stewart
Makes one 9-inch double crust
2 1/2 cups all-purpose flour, plus more for surface
1 teaspoon salt
1 teaspoon sugar
8 ounces (2 sticks) cold unsalted butter, cut into small pieces
1/4 to 1/2 cup ice water


Pulse flour, salt, and sugar in a food processor until combined. Add butter, and pulse until mixture resembles coarse crumbs with some larger pieces remaining, about 10 seconds.

Evenly drizzle 1/4 cup water over mixture (Alton brown actually suggests using a squirt bottle so that you more evenly distribute the water and don’t have ‘puddles’ in the flood processor). Pulse until mixture just begins to hold together (it should not be wet or sticky). If dough is too dry, add more water, 1 tablespoon at a time, and pulse. Divide dough in half. Place each half on a piece of plastic wrap, and wrap. Press dough into 2 disks using a rolling pin. Refrigerate until firm, about 1 hour or overnight.


Monday, November 22, 2010

Caramel Apple Spice

This post will be just like this recipe – short and sweet.

On the days that coffee, tea and hot chocolate just won’t do – I make my own version of Starbucks’ Caramel Apple Spice drink. It’s easy, and the only special ingredient is the Cinnamon Dolce Syrup. You can buy it online for 10.95 plus 2.99 shipping and whatever else in taxes, but here’s a helpful little tip – if you go into any Starbucks and ask for it, if they have it they’ll sell it to you for 7.99 plus tax. Granted, you won’t get the pump, but I have successfully lived without it.

Caramel Apple Spice


1 c apple juice (preferably not cider)
1-1.5 Tbsp Cinnamon Dolce Syrup (more or less depending on personal tastes)
Whipped cream
Caramel ice cream topping (not the stuff that hardens up)

Heat apple juice either in microwave or over low heat on your stovetop until steaming, but not boiling. Pour into mug, add cinnamon dolce syrup and stir.
Top with whipped cream and drizzle caramel ice cream topping on top.
Enjoy!


Apple Juice on Foodista

Friday, November 12, 2010

Toasted Butternut Squash Seeds

Halloween has come and gone, and November has rolled in with a cold punch in these parts. The high today is only supposed to be in the high 40's! What is up with that? Just a few weeks ago we had high 60's - and now we're barely hitting 50.

As much as I dread the impending cold weather (ahem, snow flurries are in our forecast this week, what?!) Fall and winter do have their charms. Falling leaves, snow, pot roast, pumpkin pie, apples, gingerbread and squash!

The colder weather also typically means I start preparing more stick-to-your rib types of meals. I love making foods on a cold day that warm you from the inside out. I've managed to make some of these recipes a little lighter so I can enjoy the food of the season without all the guilt, though my snacking choices leave a lot to be desired. Cookies, gingerbread, and a myriad of other sweets typically replace my more sensible choices.

After prepping butternut squash for a few recipes, I decided it might be fun to try roasting the seeds, since they looked essentially like mini pumpkin seeds. These were savory, crunchy, and a handful provided a satisfying snack without all the backlash from my bathroom scale.

Roasted Butternut Squash Seeds
(Though would work with pumpkin seeds too!)

Ingredients
Old Bay
Tbsp Olive Oil
(The amounts are highly dependent on how many seeds you have, so just make your best judgement)

Directions
Preheat oven to 325.

Throroughly clean and squash or pupmkin "goop" from your seeds and lay them out on paper towels or a kitchen towel to dry.

Put the seeds in a half sheet pan, drizzle with about olive oil until lightly coated, but not swimming in oil. Sprinkle old bay evenly to coat (use as much or as little as you like). Stir in pan, spread out again, and place pan in the oven.

Roast for 20-30 minutes, stirring often, until slightly browned.


Butternut Squash on Foodista
Related Posts Plugin for WordPress, Blogger...