Tuesday, December 7, 2010

Butternut Squash and Shrimp Risotto

This is a meal I’ve made before, and thanks to autumn finally arriving and butternut squash being on sale, I decided it would be fun to make it again. After having made it by the recipe the first time around, I decided it might be fun to tweak with it a little bit this time. After peeling the shrimp, I put all the shells into the vegetable broth and simmered that for about 30 minutes to infuse some of the shrimp flavor into the broth before using. I used about half of a 187ml bottle of pinot grigio wine (approximately equal to six-seven tablespoons) in my pot with the rice first, before adding any of my broth to get a little more flavor into the rice as it cooked. I ended up not even replacing the liquid in the recipe for the wine, I just added it in addition to the four cups of broth, and it still turned out fine.

One of the nice things about this dish is that it is not as fussy as a classic risotto. Yes, you do have to stand next to it a stir it nearly the entire time it cooks, but you don’t have to mess with adding the liquid in increments – just pour it all in at once and stir. Even better? It’s a one-pot meal. Cleanup was a breeze, which is especially nice when you have company and want something delicious for dinner, but don’t want to spend the rest of the evening cleaning up afterwards.

I served this risotto with crusty Italian bread and a dish with olive oil, parmesan and pepper for dipping, as well as a green salad.

(And don't forget to save the seeds from your squash to make Toasted Butternut Squash Seeds!)

Butternut Squash Risotto with Shrimp

Adapted From Bon Appetit

6 servings

Ingredients
3 ounces pancetta (Italian bacon), chopped
1 pound large uncooked deveined peeled shrimp, with shells set aside (if available)
1 tablespoon olive oil
1 large onion, chopped (about 1 3/4 cups)
1 garlic clove, chopped
1 cup short-grain rice (such as arborio or carnaroli)
4 cups vegetable broth, heated in microwave
½ c Dry White Wine
1 1-pound package peeled butternut squash, cut into 1/2-inch cubes (about 3 cups)
1 tablespoon chopped fresh sage
1/4 cup whipping cream
Preparation
If you have your shrimp shells, put them in a both with your broth and let them simmer over low to medium-low heat for 20 minutes or so.

Sauté pancetta in heavy large saucepan over medium-high heat until fat renders and pancetta is browned and almost crisp. Using slotted spoon, transfer to medium bowl.

Sprinkle shrimp with salt and pepper; add to saucepan. Sauté until browned and just opaque in center, about 3 minutes. Add to bowl with pancetta.

Add oil to same saucepan, then onion and garlic; cook until onion is translucent, stirring often, about 5 minutes.

Add rice; stir 1 minute. Add wine and stir until mostly absorbed. Add hot broth; increase heat and bring to boil.

Add squash and sage; reduce heat to medium and simmer until rice is tender but still firm to bite and mixture is creamy, stirring often, about 15 minutes. Stir in cream, shrimp, and pancetta. Season to taste with salt and pepper.

Transfer to large shallow bowl.


Butternut Squash on Foodista

Saturday, December 4, 2010

Healthier Shephard's Pie

I’ve been lucky enough to have many amazing people in my life. One of those people was my Aunty Pat. My brother and I grew up with her and my Uncle Kenny only a short fence-hop away from our yard. They entered our lives somewhat by chance, as my parents needed someone to babysit their kids and they were nearby and available. Over the years, we grew closer and closer to them, with them coming to family functions, holiday parties and visiting them on a near daily basis.

My Aunty Pat and Uncle Kenny would always let my brother and I have a sip of their coffee, which we loved probably because it looked more like chocolate milk than coffee. At our house, my Aunty Pat would always laugh at my mom’s tiny little sugar spoon, put the spoon aside, and simply grab the sugar bowl to pour the sugar into her mug, because it would have taken her three weeks otherwise.

I remember fondly feeding Charles the Squirrel outside their screened porch door, my first experiences fishing off of a small boat in the local reservoir, painting ceramics she had fired in the kiln in her basement, and having sleepovers a little before Christmas to ‘help’ them set up and decorate their Christmas tree.

One of my more vivid food memories when I was younger involves my Aunty Pat telling me to grab a stick of butter, reach deep into the turkey sitting on the counter, and rub ever last surface with my hands. (And for the record, butter does make everything taste better, as much as I hate to admit it!)

She was always the person that brought some sort of decadent dessert when invited for dinner (something along the lines of a chocolate and peanut butter Reese Cup cheesecake). She was also the first one over with comfort food when our family suffered a loss. You could always count on her food to be three things: rich, delicious, and comforting.

Sadly, our family lost Uncle Kenny in October of 2001 and Aunty Pat in February of 2009. While I miss both of them every single day, cooking certain foods helps me remember some of my favorite moments with them. My Auntie Pat had made us Shepherd’s Pie in the past to help us cope with a recent family loss, and it was comfort food at its best. You could really taste the love that went into making that meal.

Though this recipe is not quite as heavy and stick-to-your-ribs as I know my Aunty Pat’s original version was, I always feel like they’re both a little bit closer to me when the smell of the Shepherd’s Pie starts wafting through the kitchen. I’m taken back to their front porch, the sweeter-than-sin coffee, and being elbow deep in the southern end of a northbound turkey.

This is one of those occasions where instead of halving the recipe for the two of us, I make this full-sized recipe for the filling, and halve the amount of mashed potatoes. The filling freezes well, so for the effort of one meal, we get instant gratification of dinner that night, and then in the future, when we’re feeling especially lazy, we’ll pull the other half of the filling out of the freezer for an encore of this delicious meal.


Cheddar Topped Shepherd’s Pie
Adapted from Everyday Food's October 2008 Issue.
Yield: 4 Servings.

Ingredients:
1 lb Baking potatoes, peeled and thinly sliced
1 Tbsp Canola Oil
5 Medium Carrots, halved lengthwise and thinly sliced
4 Celery stalks, thinly sliced
1/2 c Chopped Onion
2 Garlic Cloves, minced
1/2 tsp Dried Thyme
4 oz button mushrooms
3/4 c frozen Corn
2 Tbsp AP Flour
2 Tbsp Tomato Paste
2 tsp Worcestershire Sauce
1 lb Ground Turkey
1/2 c Beef Broth or water
1/2 c Milk
3 oz Shredded sharp or white cheddar cheese, divided

Directions:
Preheat oven to 450 degrees.

In a large saucepan, add potatoes and enough water to cover - season generously with salt. Bring to a boil - reduce heat to a simmer and cook until potatoes are tender, about 12 to 18 minutes.

Meanwhile, in a large Dutch oven, heat oil over medium-low heat. Stir in onion and garlic. Cook, stirring constantly until soft and translucent, about 5-8 minutes. Add mushrooms and cook until soft, about 5 minutes.

Increase heat to medium/medium-high. Stir in carrots, celery, corn and thyme - cook until the vegetables are tender, about 8 to 10 minutes.

Stir in flour, Worcestershire and tomato paste - cook, stirring, 1 minute.

Add turkey - cook, stirring to crumble, until the beef has cooked through, about 6 to 8 minutes. Add broth (or water) - bring mixture to a boil and let simmer for 1 minute. Remove pot from the heat and set aside.

When the potatoes are done, drain well and place back into the hot pot. Cook over medium heat, stirring, until any excess liquid evaporates, about 1 minute. Remove from the heat and add milk and 2 ounces (1/2 cup) cheese. Mash to desired consistency - season with salt and fresh ground black pepper

Scoop the beef mixture into a 8" by 8" baking dish coated with cooking spray (or into individual ramekins) - spread to an even layer. Drop dollops of the mashed potatoes all over the top and spread smooth with an off-set spatula. Scatter the top with the remaining cheese (~1/4 c) - place into the oven and bake until the potatoes have browned and the filling is hot, about 20 minutes. Remove and let cool slightly before serving.

Thursday, December 2, 2010

Pumpkin Banana Bread

When autumn and winter roll around, it’s finally acceptable to crave foods containing baked apples, nutmeg, cinnamon and, my favorite, pumpkin. After the canned pumpkin shortage last year, I may have gotten a little excited over seeing the first cans of pumpkin appearing on our store shelves. I may have been excited enough to buy over 100 ounces of pumpkin (that would be over six pounds). While I wasn’t ready for pumpkin pie, I wanted to use one of my smaller cans of pumpkin as soon as possible. I pulled out some banana mash I had frozen a long time ago, the remnants of brown, spotted bananas too soft to eat fresh, and decided I’d make a pumpkin banana bread. There are a few recipes out in cyberspace, so I figured one of them must be worth trying.

This recipe called for two mashed bananas, but because my bananas were already mashed, I don’t exactly recall how many were in there. I guessed and put in one and a half cups of mash. The batter itself was very loose, but smelled amazing, with the addition of the pumpkin and spices, it really brought an autumnal scent to the kitchen.

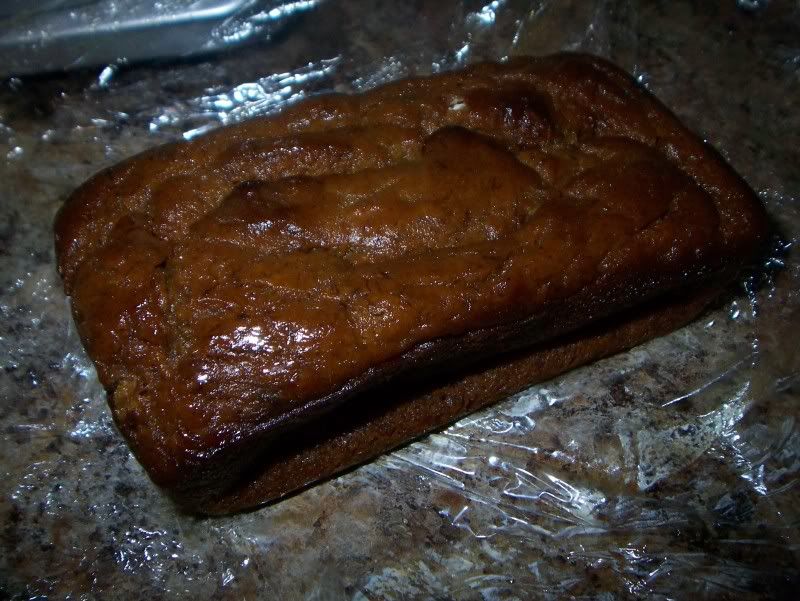
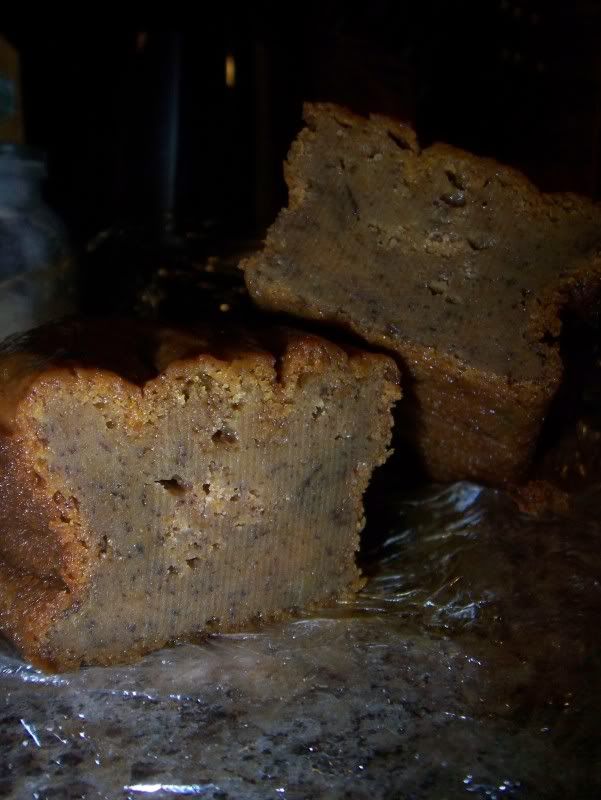
The bread itself puffed up nicely when it baked, but then sank as soon as it came out of the oven. It didn’t surprise me, considering the batter was fairly wet, and I was pretty inexact when it came to the addition of the banana mash. The finished consistency was somewhat akin to a bread pudding – it was dense and moist, less like bread and set more like a silky pumpkin pie texture. Both the banana and pumpkin flavors are present in each bite, and they work surprisingly well together.

I would definitely make this again, and if I didn’t mess up the recipe beyond repair with my initial tweaking, I’m curious what other tweaks I’ll make next time to improve the end product even more.


Pumpkin Banana Bread
From
Allrecipes.com

Ingredients
2 ripe bananas, mashed
2 eggs
1/3 cup vegetable oil
1 1/3 cups canned pumpkin puree
1/2 cup honey
1/2 cup white sugar
2 1/2 cups all-purpose flour
1 teaspoon baking powder
1 teaspoon baking soda
1/2 teaspoon salt
2 teaspoons pumpkin pie spice
1 teaspoon ground cinnamon
3/4 cup raisins (optional)
1/2 cup walnut pieces (optional)
Directions
1.Preheat oven to 350 degrees F (175 degrees C). Grease an 9x5 inch loaf pan.
2.In a large bowl, stir together the mashed banana, eggs, oil, pumpkin, honey and sugar. Combine the flour, baking powder, baking soda, salt, pie spice and cinnamon, stir into the banana mixture until just combined. Fold in the raisins and walnuts if desired. Pour batter into the prepared pan.
3.Bake at 350 degrees F (175 degrees C) for 45 minutes, or until a toothpick inserted into the center of the loaf comes out clean. Cool loaf in the pan for 10 minutes before moving to a wire rack to cool completely.

Tuesday, November 30, 2010

Cranberry Relish

Is there anyone else out there who is very particular about their cranberry sauce? Or is it just me?

I didn’t even realize I liked cranberry sauce until I finally had homemade sauce – and not the stuff out of the can. Don’t get me wrong, the canned stuff has its place (my favorite stuffing recipe incorporates it), but to eat with my turkey just seems wrong. That turkey spends eight hours in the oven, cooking to perfection. I feel like the least I can do is top it with a sauce I made at home, in about 10 minutes, instead of just opening a can of what reminds me of jell-o. There seems like something slightly unnatural about a cranberry sauce that maintains the shape of the can once it’s on the plate.

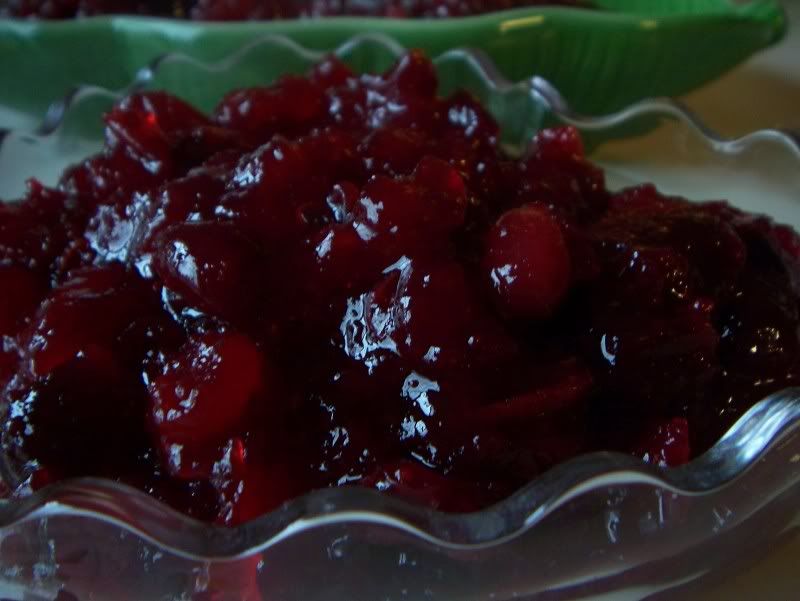
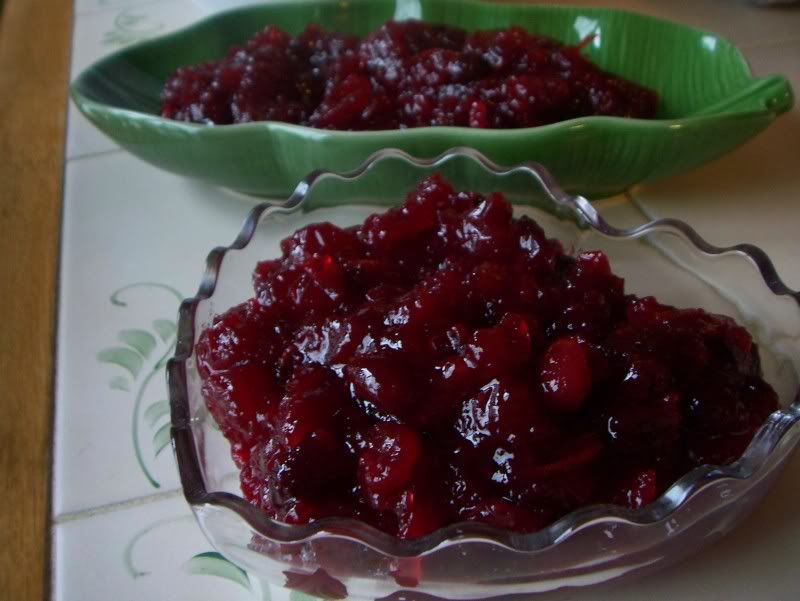
This recipe was passed along by a friend who said she got rave reviews every time she makes it. Understandably. This relish is as easy as it is tasty. Just make sure the bowl you use is big enough to handle the swelling berries. That’s a sticky mess to clean up if your bowl overflows.

You could also make this one your stovetop, letting the mixture simmer until the berries pop and the sauce thickens slightly, but I prefer simply nuking my berries.

Easy Cranberry Relish
Ingredients:

Yield: 3-4 cups
16 ounces cranberries, fresh or frozen
1 1/2 cups sugar (a little more sugar, if you prefer it sweeter)
1 cup orange juice
1 tablespoon grated orange rind

Combine all ingredients in a 3-qt microwave safe bowl; mix well.
Cover with wax paper.
Microwave on high for 5 minutes.
Stir well; recover with wax paper.
Microwave on high for 5 minutes again.
Stir well; recover with wax paper.
Microwave another 5-7 mins longer until cranberries pop, and sauce has thickened.
Let stand, covered until cool.
Transfer to serving bowl and chill for 3-4 hours.

Sunday, November 28, 2010

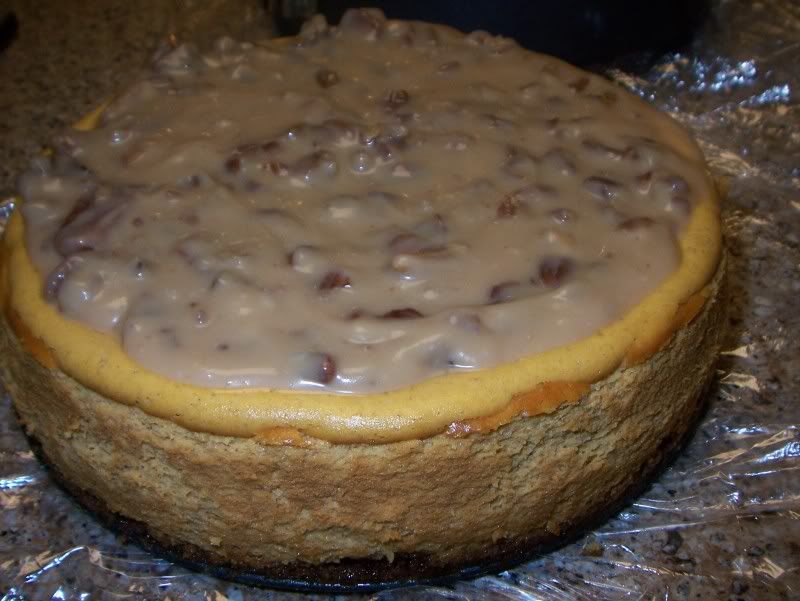
Maple Pecan Pumpkin Cheesecake

This year, Thanksgiving was hosted by my in-laws. I say that with a little sigh of relief. As much as I love preparing Thanksgiving dinner for a group of people, I do also enjoy being able to socialize with my family, instead of being paranoid about how much longer the turkey is going to need in the oven. Just because I’m not hosting doesn’t mean I come empty-handed. As of last year, we have a new favorite cranberry relish (recipe coming!) which I made, and I had really wanted to find a dessert that I could bring that wouldn’t duplicate what was already there.

With the classic pumpkin and apple pies spoken for, I had the chance to find something a little different to prepare from our usual desserts. My mother-in-law and her mother make fabulous pies – who wants to compete with that?

One early Saturday morning Food Network was having their Thanksgiving show extravaganza. A show called Dessert First came on, and the host, Anne Thornton, prepared a cheesecake that looked like a winner. What better time than Thanksgiving to try it out? This cheesecake still encompassed the autumn spirit, but wouldn’t be too similar to the already-delicious desserts there.


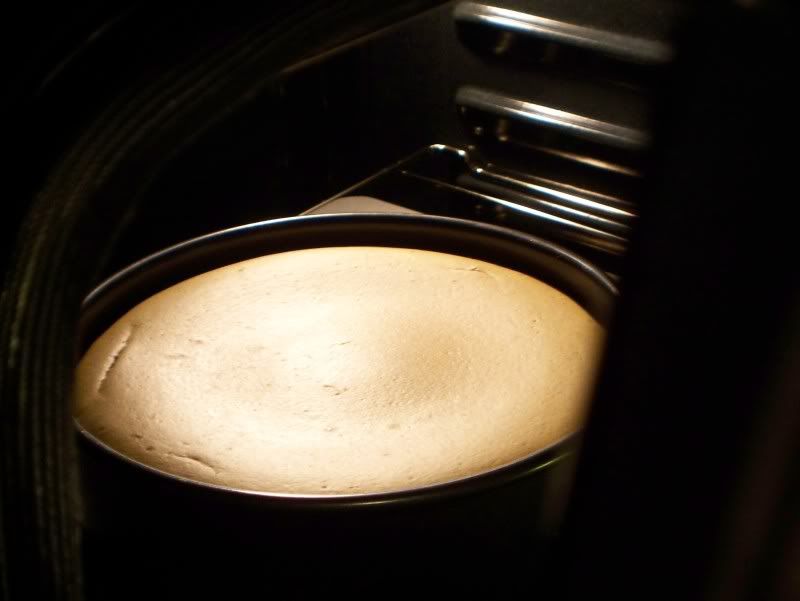
A peek into the oven with the cooling cheesecake!

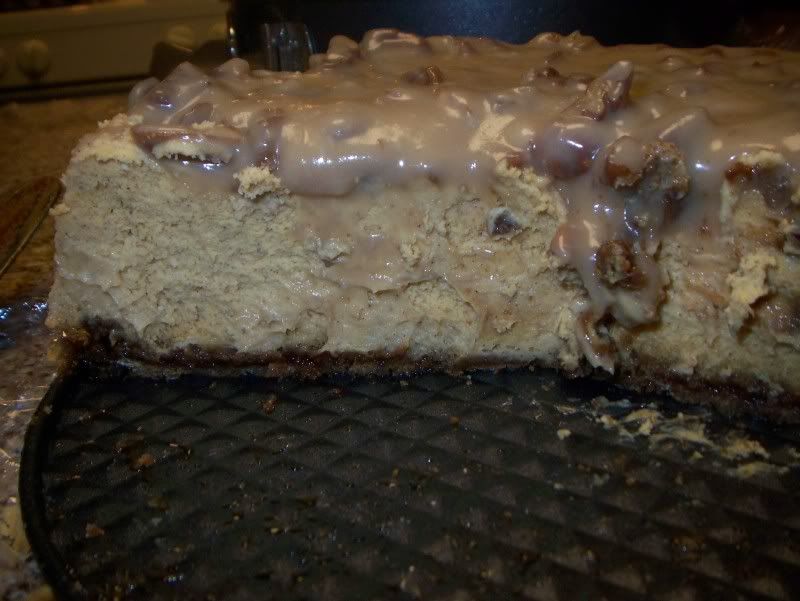
The cheesecake itself wasn't cloyingly sweet, with a slight tang from the cream cheese and the warmth from the spices complimenting each other nicely. The topping was fabulous, it added the extra sweetness without overwhelming the entire cake. I decided to tweak the recipe by substituting a gingersnap crust for a graham cracker one, and I'm glad I did. The spicy gingersnaps added a little zing to the crust that the graham crackers would have lacked. But, if graham crackers are the only thing in your pantry, they would make a fine crust, too.

My only issue with the recipe was that when I baked the cheesecake, butter from the crust seeped out of my springform pan. I am not sure how to avoid that happening again other than using less butter.

The flavors only improve after a couple of days, so this is one dessert you don't have to wait until the last minute to prepare.

Maple Pecan Pumpkin Cheesecake
Adapted from Anne Thornton via
FoodNetwork.com (there is also a very similar version on the Eagle Brand website)

Cheesecake:
1 1/3 cups gingersnap crumbs (from approximately 25 gingersnaps)
1/4 cup sugar
1/4 cup butter, melted
3 (8-ounce) packages cream cheese, softened
1 (14-ounce) can sweetened condensed milk
1 (15-ounce) can pumpkin
3 large eggs, at room temperature for 30 minutes
1/4 cup pure grade B maple syrup
1 1/2 teaspoons ground cinnamon
1 teaspoon ground nutmeg
1/2 teaspoon fine sea salt

Maple Pecan Glaze:
1 cup whipping cream
3/4 cup pure grade B maple syrup
3/4 cup chopped pecans
Directions
Preheat the oven to 325 degrees F.

For the cheesecake: Finely crush the gingersnaps in a plastic bag with a rolling pin or use a food processor. In a large bowl, combine the gingersnap crumbs, sugar, and melted butter and firmly press into the bottom of 9-inch springform pan.

Cook the crust for 10 minutes at 325 and let it cool completely in pan. Stack 3 large sheets of foil on work surface. Place same cake pan in center. Gather foil snugly around pan bottom and up sides to waterproof.

In a standing mixer with a paddle attachment, mix the cream cheese until fluffy. Gradually mix in the sweetened condensed milk until smooth. With the mixer on medium, add the pumpkin, eggs, maple syrup, cinnamon, nutmeg, and salt. Mix well and pour into the springform pan.

Place wrapped cake pan in large roasting pan. Pour enough hot water into roasting pan to come halfway up sides of cake pan. Bake cake until filling is slightly puffed and moves only slightly when pan is shaken gently, about 1 hour 25 minutes. Remove cake pan from water bath; remove foil. Cool cake in pan on rack 2 hours.

Bake until the center appears nearly set, but jiggles a little when shaken, 1 hour and 15 minutes. Cool for 1 hour. Cover and chill overnight, or for at least 4 hours.

For the glaze: In a medium-sized saucepan, combine the whipping cream and pure maple syrup and bring it to a boil. Boil until slightly thickened, 15 to 20 minutes, stirring occasionally. Stir in the chopped pecans. Cover and chill until time to serve. Stir before serving.

To serve: Spoon the Maple Pecan Glaze over the cheesecake.

Thursday, November 25, 2010

Happy Thanksgiving! {Roasting a Turkey}

Happy Thanksgiving everyone!!!

Hope you have a wonderful Thanksgiving filled with good food, delicious drinks and fantastic friends and family.

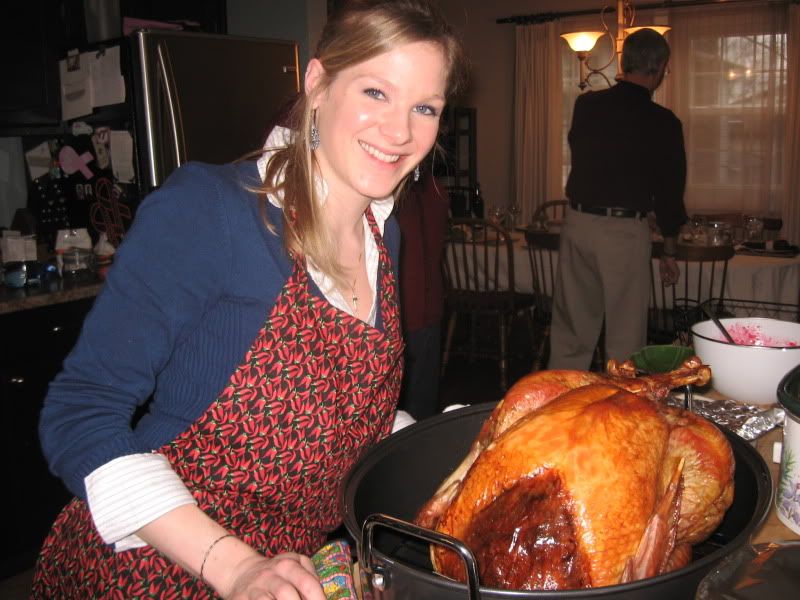
Since this year we are having Thanksgiving over at my in-laws, I figured now would be a good time to share the story about my first time hosting turkey day, which was just last year. This was our first major holiday we were hosting, our first as a married couple, and the first in our new house! Needless to say, I wanted everything to be perfect. We had put a lot of money into home renovations (heck, we still are to this day!) but that meant that our funds for any decorations were somewhat limited. So, I decided I would make the necessary decorations for our house. I was a busy bee a few weeks before the holidays so that I could finish all my projects on time.

I made:

Festive plush pumpkins for the house:

Turkey trivets for the table:


and embroidered napkin rings for our table.


I am lucky enough that I have a set of fine china that was passed down from my grandmother, to my mother, to me. They really are beautiful. And you can also see the reversible Thanksgiving/Christmas placemats I made to go underneath each place setting here.

Once the non-food items were taken care of, the few days leading up to thanksgiving was filled with a lot of planning and preparation. Our entire oven would be in use most of the day to roast the turkey, so I had to have a plan in place as to how to schedule everything else that needed oven-time.


Enter the turkey day prep-schedule.

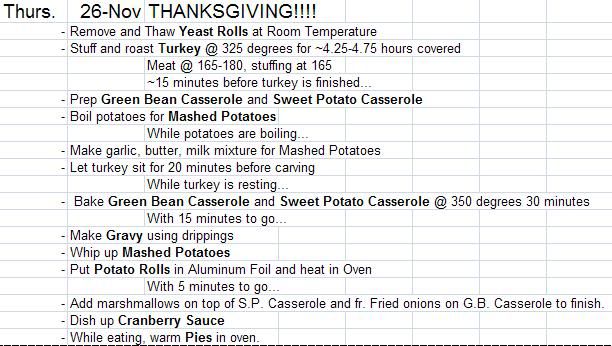
My schedule started the Saturday before thanksgiving, planning out the dishes I could prep beforehand and freeze or refrigerate so that I could make sure that everything would be complete by the time Thanksgiving rolled around. I also had a pretty detailed schedule for the day of, to make sure I wouldn’t forget something important like gravy or reheating a dish. So you can really get a grasp of how much of a planner I am, I’ll give you a snapshot of the schedule. This doesn’t even include the hand-written one that details the day by time. That was my master list for the day.

Why yes, I am a list person. Why do you ask?

The turkey was the first thing to be taken care of in the morning. I had to get it out of the brine, rinsed, stuffed, and in a 325 degree oven before 8 am if I was to stick to my schedule. And be advised, my schedule is based on having a fresh turkey. If you get a frozen turkey, be sure to give it plenty of time to thaw in the fridge before T-day. And I don’t mean hours, I mean days. Nothing is worse than realizing your turkey is still 80% frozen when you go to stuff it.

After the turkey was in the oven, things went pretty smoothly. I checked the bird around 9:30 am, and noticed it was already looking pretty browned. I figured I would let it go a little longer and see what happened. Sure enough, 10 am rolls around and the turkey is getting even darker, not burnt, thankfully, but dark. I decided to loosely tent the bird with foil to protect the skin from getting much darker, especially since it wasn’t even halfway finished. I had planned to have the turkey come up to temperature around 12:30-1:00 pm, but when I checked the temperature at 11:45, it was still only at about 140 degrees.

The meat (and stuffing if you stuffed your bird) should register at a temperature of 165 degrees to be considered safe from any food-borne illnesses. At 12:30 pm, I finally increased the oven temperature to 375 degrees, hoping to speed up the process.

It still took another one and a half hours for the bird to come to temperature, and by that point, I was starting to have visitors in the kitchen every few minutes – they made it seem like they were coming in to chat, but I know they were checking on the status of the turkey! We were all starving!

At 2:00 pm the bird is finally out of the oven, but it still has to rest before it’s carved, and I still had to finish up the gravy, mashed potatoes, sweet potato and green bean casseroles and reheat the dinner rolls I had made earlier in the week.

We ended up eating right around 3:00 pm, about two hours later than anticipated. The wait was worth it, though. Despite having spent longer in the oven than anticipated, the brine kept the turkey - even the white meat - moist, juicy and flavorful. This definitely converted me into a brine supporter. I was so proud that the turkey turned out as good as it did.


Hosting my first Thanksgiving was a success, but definitely not without its challenges. I felt terrible that the turkey was so late coming out of the oven, but there are only so many things that are under your control. Just always make sure to have some snacks or appetizers ready, just in case!

In the end, I do not dwell on the fact that things didn’t go exactly according to plan. I was just thankful that we were able to spend time as a family in front of a wonderful (albeit late) meal and truly appreciate the good things in life. I am looking forward to many more Thanksgivings, Christmases, dinner parties and yes, even dinner disasters, because even when everything else goes wrong in the kitchen, I at least know I’m surrounded by friends and family (and that we have lots of wine in our house – that always helps!)

Have a Happy Thanksgiving!!!


Tuesday, November 23, 2010

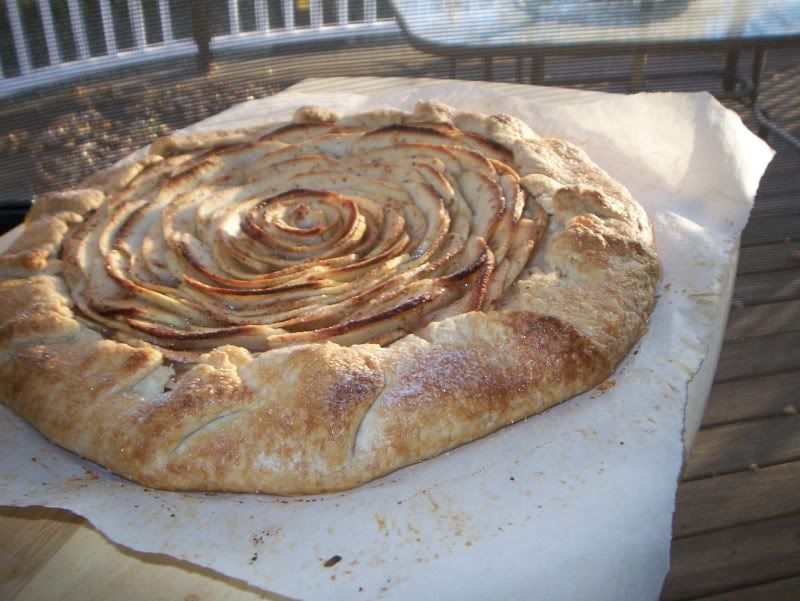
Apple Crostata

I find making pies a very relaxing process. It is very straightforward, few ingredients, and the result is warm and satisfying. I have been making pies since I was probably 12 years old or so. I started with the refrigerated pie crusts, but soon graduated to making scratch crusts. Making a crust requires minimal time and effort, and the taste is far superior to anything you can purchase in the stores. With a little preparation and a little practice, anyone can make a delicious, flaky pie dough.

Recently, I found myself with an excess of apples in our refrigerator, and with the family coming over for dinner, I really wanted to make something with apples for dessert. It has been a long time since I’ve made a pie, mainly because the commitment required for my husband and I to finish a pie ourselves is usually too much for us to handle. This was the perfect time to attempt my first crostata.

Martha’s pie dough was a snap to assemble, though I had to make it in two batches because I have a four-cup food processor and the entire recipe for a double crust wouldn’t fit. I’ve heard that when rolling out pie dough you should use parchment paper instead of dusting with flour, because the flour actually can cause the dough to get tough on you. After taking so much care not to overwork a dough in the process, it’d be a shame to toughen it up at the very end. So, I used the parchment paper, and it rolled out beautifully. It also makes the transfer from counter to sheet pan (or pie plate, if you desire) so much easier!

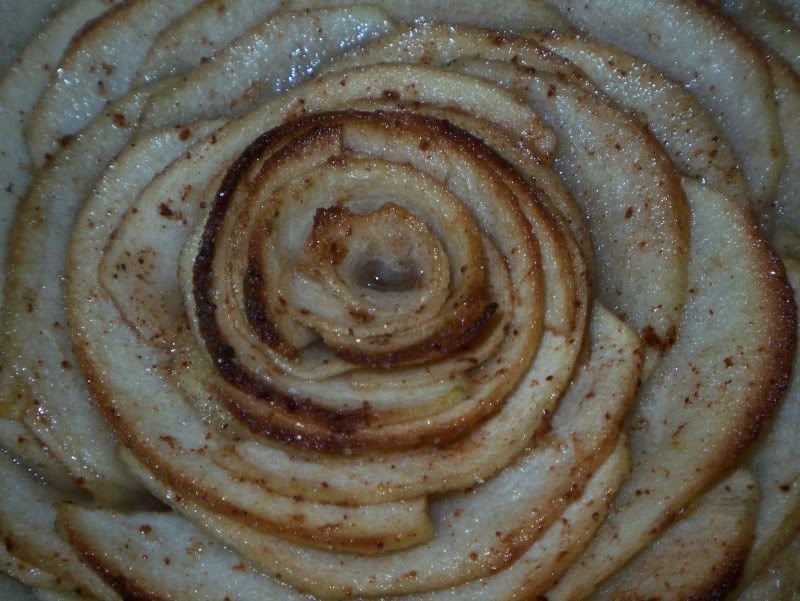
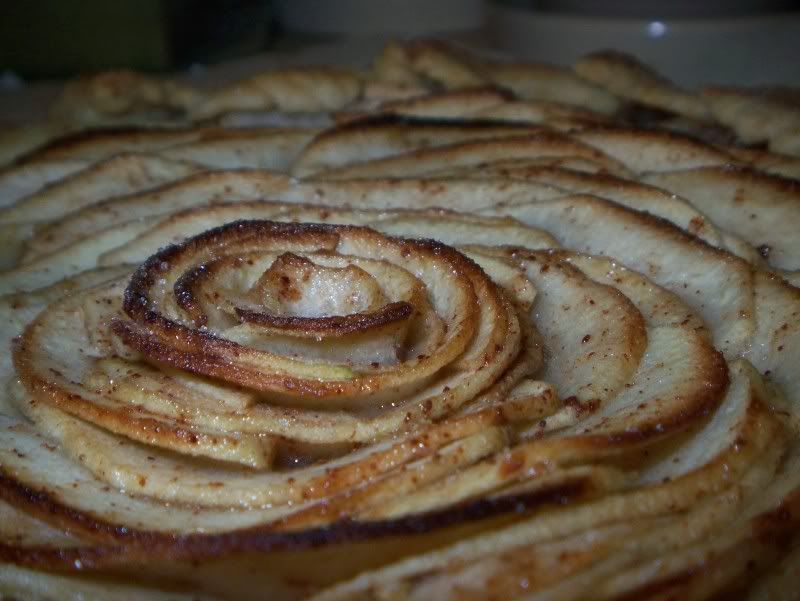
The filling only has a few ingredients and can be simply dumped into the crust or arranged a little more elegantly, depending on your mood. I really wanted to try to make a pretty dessert, but definitely kept the option open to just pile the apples in if my design idea failed. It must have been my lucky day, because the crostata turned our beautifully, and captured everything that is wonderful about an apple pie without requiring ten people to finish it.


Making pie dough from scratch can be intimidating. But, there are only a few simple things to keep in mind when making them, and you are well on your way to success:

Cold butter.
When you work butter into your crust, you want it to stay slightly chunky – about pea-sized. You do not want it to become a paste with the flour. The finished crust should have little pockets of butter visible in the dough. When the crust bakes, the butter releases steam in the crust, which is what creates the flakiness in the crust.

Do not overwork your dough.
When making pie crust (or biscuits or muffins) you want to develop as little of the gluten in the flour as possible. Gluten creates long strands of proteins within the dough when activated, like when working with bread dough. You knead the dough to created those long protein strands which results in a very elastic dough. For pies, though, you want tender and flaky, not tough and elastic. Work with the dough as little as possible just until everything is incorporated and you can press it together with your fingers. It may still look crumbly in your bowl, but if you pinch a little bit and it stays together, you’re done.

Chill your dough.
Just as cold butter is important in the beginning of the process, keeping the dough chilled during the process is key. Letting the dough sit after it comes together allows the water to really hydrate the flour in the dough, and you will have a better crust if you can refrigerate your dough for 30 minutes to an hour before rolling it out. Also, once you have your crust in your pie plate, it wouldn’t hurt to freeze it for 30 minutes before adding your fillings, just to make sure it’s super cold one last time. It will help keep your crust from getting soggy on the bottom.

Refrigerate or Freeze extra dough.
Don’t let the extra dough go to waste even if you can’t use it! My crostata only used half of this recipe, but I can save my crust to make a pie up to three later! Tightly wrap the dough with plastic wrap, and then put in a zip-top freezer-safe bag. Make sure to label it so you know how long it’s been sitting! I’ve seen recommendations of freezing for anywhere from one to three months, so if you want to be safe, use it sooner rather than later. Thaw your dough overnight in your refrigerator the prior to using it, and then continue making your pie as if you had a fresh dough.
Pies need to breathe, too! If making a double-crusted pie, cut vents in the top crust. If you don’t, steam may build up inside your crust and you might end up with a pie-blowout!

If making a double-crusted pie seems like too much, try this crostata. After rolling the dough flat, you dump in the filling and fold the edges over. Tears and breaks in your dough? No problem, that’s the beauty of a rustic dish – you can say it’s supposed to be like that! There isn’t even need for a pie dish, so you can see if you enjoy making the dough before going out and buying anything special!

This would be a wonderful addition to any Thanksgiving table. Give it a try, you might surprise yourself!
Apple Crostata

Ingredients
3 apples (I used 1 Braeburn and 2 granny smith)
1 tbsp lemon juice
1 tsp lemon zest
1/2 tsp cinnamon
1/4 tsp nutmeg
2 tbsp sugar
1/2 Recipe of Pie Crust (recipe follows)

Roll 1 disk of pie crust recipe to 1/8-inch thickness between two sheets of parchment paper. Remove top sheet of parchment paper and move dough to a rimmed baking sheet. Refrigerate while preparing the filling.

Preheat oven to 350 degrees.

Peel, core and slice apples into 1/8-inch thicknesses. Put into large bowl, drizzling lemon juice on apples as you go so they don’t oxidize and turn brown.

Mix flour, nutmeg, cinnamon, lemon zest and sugar in with the apples. Let sit for five to ten minutes.

Remove crust from oven and either spread your apple filling on the crust, or arrange on the crust, leaving a 1-1/2” border around the edge.

Fold edges over the filling (it’s supposed to look ‘rustic!’)

Brush cream on crust, and sprinkle with sugar.

Bake for 50-60 minutes until apples are cooked and crust is brown.

Pie Crust
From
Martha Stewart
Makes one 9-inch double crust
2 1/2 cups all-purpose flour, plus more for surface
1 teaspoon salt
1 teaspoon sugar
8 ounces (2 sticks) cold unsalted butter, cut into small pieces
1/4 to 1/2 cup ice water


Pulse flour, salt, and sugar in a food processor until combined. Add butter, and pulse until mixture resembles coarse crumbs with some larger pieces remaining, about 10 seconds.

Evenly drizzle 1/4 cup water over mixture (Alton brown actually suggests using a squirt bottle so that you more evenly distribute the water and don’t have ‘puddles’ in the flood processor). Pulse until mixture just begins to hold together (it should not be wet or sticky). If dough is too dry, add more water, 1 tablespoon at a time, and pulse. Divide dough in half. Place each half on a piece of plastic wrap, and wrap. Press dough into 2 disks using a rolling pin. Refrigerate until firm, about 1 hour or overnight.


Monday, November 22, 2010

Caramel Apple Spice

This post will be just like this recipe – short and sweet.

On the days that coffee, tea and hot chocolate just won’t do – I make my own version of Starbucks’ Caramel Apple Spice drink. It’s easy, and the only special ingredient is the Cinnamon Dolce Syrup. You can buy it online for 10.95 plus 2.99 shipping and whatever else in taxes, but here’s a helpful little tip – if you go into any Starbucks and ask for it, if they have it they’ll sell it to you for 7.99 plus tax. Granted, you won’t get the pump, but I have successfully lived without it.

Caramel Apple Spice


1 c apple juice (preferably not cider)
1-1.5 Tbsp Cinnamon Dolce Syrup (more or less depending on personal tastes)
Whipped cream
Caramel ice cream topping (not the stuff that hardens up)

Heat apple juice either in microwave or over low heat on your stovetop until steaming, but not boiling. Pour into mug, add cinnamon dolce syrup and stir.
Top with whipped cream and drizzle caramel ice cream topping on top.
Enjoy!


Apple Juice on Foodista

Friday, November 19, 2010

Chocolate Pound Cake

When I was younger and would visit my relatives in Virginia, my brother and I would almost always be greeted with two things: scratch off lottery tickets and chocolate pound cake. Inevitably, my brother always got the winning ticket, he was just lucky like that. But I didn’t mind, because I knew that the pound cake was guaranteed to be on my dessert plate, and that was enough for me. The cake itself was soft, with a dense, silky crumb, and sturdy. It is also not nearly as sweet as some of the other chocolate cakes I have had in the past, probably due to the fact that pound cake typically uses unsweetened cocoa instead of melted chocolate. It was always baked in a tube pan, and perfectly iced in chocolate frosting. I was so methodical when I at my slice. I would start from the unfrosted bottom, which had been compressed simply from the weight of the cake, and then eat my way through the inner portion of the cake, and leaving nothing but the edge my slice that had an equal frosting-to-cake ratio. I’d eat this part last. The cake alone was heavenly; those last few bites with the frosting were bliss. I loved how the top of the frosting would get just the slightest crust on it after sitting out for a day, and hiding just underneath was a velvety smooth layer sitting atop the cake.
There was only one thing you could do to ruin the cake. You could forget to use a serrated knife to cut it. That was a close to a mortal sin as you could get, and believe me, if you ever forgot to cut it with a serrated knife and were caught, you would never forget again!

It wasn’t until years later when I was talking with my mom about this recipe, and wondering if she had the amazing chocolate frosting recipe that accompanied the cake that I found out the frosting I loved so much was out of a can from the grocery store. I normally don’t care for grocery store icings, because they are they are incredibly sweet and then typically paired with boxed cake mixes, which tend to be on the sweeter side of the spectrum as well. But with this cake, it just works. The super-sweet icing balances the ever-so-slight bitterness from the unsweetened cocoa.

My mother-in-law’s birthday was recently, and I wanted to make a cake that I was sure would be a winner. As much as I love experimenting with new recipes, birthdays are not the time to do it – I want something reliable. Where better to turn than a tried-and-true family recipe? This recipe calls for three sticks of margarine, so I bought a box of four. Good thing I did, because as soon as I opened the box, one of the margarine sticks fell end-first onto the floor. At least I don’t have to figure out what I’m going to do with a fourth stick of margarine. The cake did scare me for a little bit in the oven, because it looked as though it was melting before it would have a chance to set, but I was worrying for nothing. The cake baked up perfectly, and looks and tastes just like I remember it.
This cake would be delicious sans frosting and I’m sure you could easily use a sour cream chocolate buttercream, or basic chocolate buttercream with this cake, but in keeping true to the spirit of my family’s cake, I’m using the good old canned stuff with pride.


Chocolate Pound Cake
Family Recipe

1 ½ c margarine
3 c flour
3 c sugar
1 c milk
1 tsp vanilla
5 eggs
4 Tbsp cocoa
½ tsp baking powder
½ tsp salt

Sift together dry ingredients. In a separate container, combine the milk and vanilla.
Cream butter and sugar (after my sugar was incorporated into my margarine, I let it go for 4 minutes, until it got light, fluffy, and almost white in color). Add in eggs one at a time. Add dry ingredients, alternating with the milk/vanilla mixture. Spoon into a greased and floured* bundt pan and bake for 1 hour 20 minute to 1 hour 30 minutes.
Let the cake cool for 20 minutes before unmolding onto a rack to cool completely. It should turn out with ease.
Once cool, frost and decorate as desired.


*I can’t stress this enough. Nothing is more depressing than turning your pan over, lifting it up, and not seeing cake on your rack because it’s still in the pan. I have to pry more than my share of cakes out with a knife because I get so focused on the recipe that I forget basic things like greasing your pan.

Tuesday, November 16, 2010

I've Been Adopted!

You may notice a new logo on the right-hand side of my screen. Thanks to the efforts of Kristen at Dine and Dish and her "Adopt-a-Blogger" program, I have been graciously adopted by a veteran blogger.

My blogging mentor is Hopie, of
Hopie's Kitchen. She is currently living in France (jealous!) and writing about her experiences there as well as dishing up delicious recipes using the ingredients available to her. Hopefully I can pick up some good French recipes to cook for my friends and family!

Thank you again to Kristen and Hopie, I appreciate the time and effort put into helping us newbies grow!
Related Posts Plugin for WordPress, Blogger...