Saturday, July 31, 2010

Enchiladas!

Mexican food is one of those things that I will eat out more often than I make it at home, simply because there are so many local places with delicious food at really reasonable prices. While I know it’s definitely less expensive to make it at home, I still have a difficult time replicating my favorite flavors.

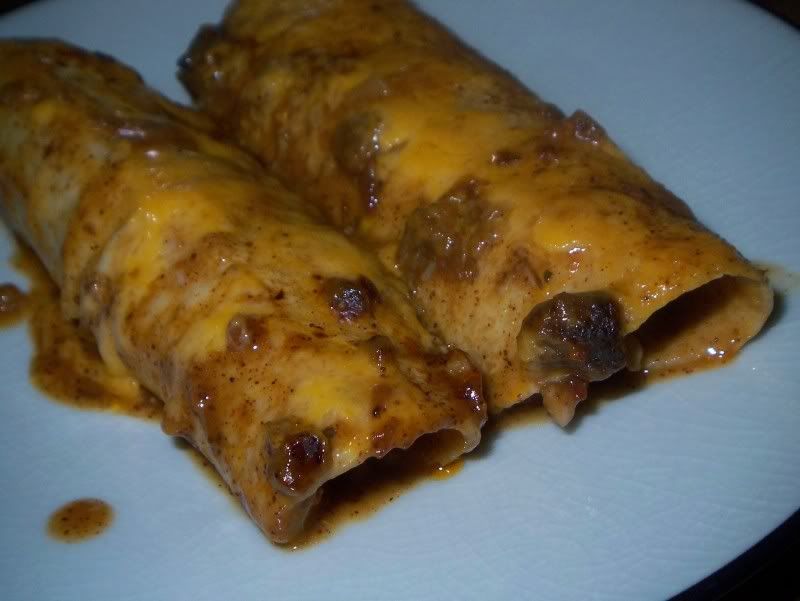
I finally decided to try my hand at homemade Mexican food. While it did taste really good, I will mention that I did have a problem with my flour clumping. Not sure what happened there, but no amount of whisking would get all the lumps out. Thankfully, with the help of a strainer, I was able to get out most of them, and it really didn’t compromise the flavor of the dish at all – I guess it just meant my sauce was a little runnier than the recipe had anticipated. I think it was mainly because of the way the flour was added, so I may amend the recipe next time around to not add dry flour to a hot liquid. The resulting meal was saucy, cheesy, melty and absolutely delicious. It may not be the meal from my favorite restaurant, but it definitely curbed the craving (and probably three-day's worth of sodium!). We realized after this baked that our cilantro was no good, so we had to eat them without, I'd definitely recommend it if you have it, as that would add a nice, crisp flavor that would beautifully compliment the sauce and cheese.


I am notorious for halving recipes since we do not typically need food for four on our dinner table. This time, however, I made all eight, but reserved two for freezing and made six to eat that night. I froze the enchiladas along with a little container of sauce, with the instructions written on the tinfoil, so when it comes time to eat, there will be no lost sauce and no scrambling to find the instructions for reheating them.
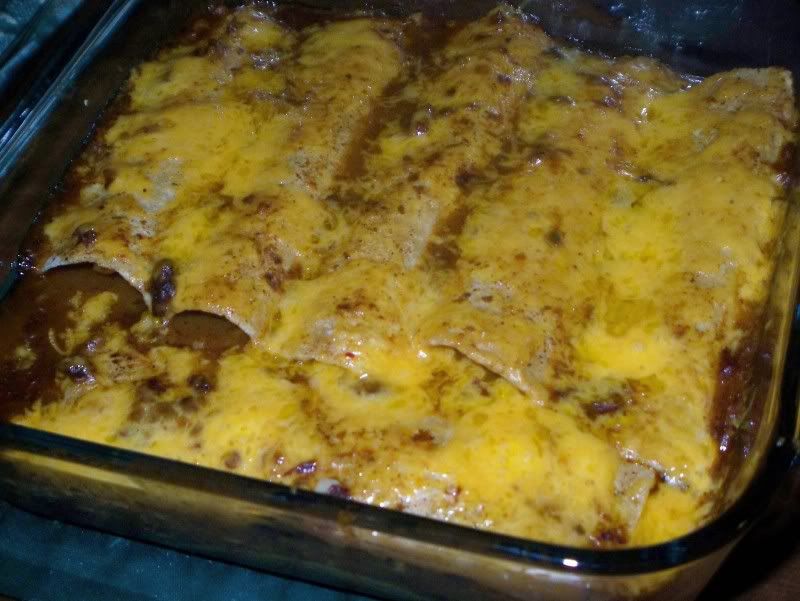

Tex-Mex Beef Enchiladas
Adapted from
Everyday Food

1 tablespoons olive oil
1/4 cup all-purpose flour (spooned and leveled)
1 1/2 tablespoons chili powder
1 teaspoon dried oregano
1 garlic clove, minced
1/2 teaspoon coarse salt
1 can (14 1/2 ounces) reduced sodium chicken broth
1 small chipotle chile in adobo, minced, plus 1 tablespoon sauce (from a small can)
1 tablespoon apple cider vinegar
1 small onion, finely chopped
2 garlic cloves, minced
3/4 pound lean ground turkey
1 teaspoon oregano
2 tsp cumin
2 tbsp chili powder
1 tbsp cayenne pepper
Coarse salt and ground pepper
8 flour tortillas
3/4 cup shredded cheddar cheese

Make sauce: In a medium saucepan, mix flour, chili powder, oregano, garlic, and salt into broth, then pour into pan, stirring to remove all lumps. Put the saucepan over medium heat and add chipotle, adobo sauce and 3/4 cup water, and vinegar; bring to a boil, whisking constantly. Reduce heat, and simmer until lightly thickened, about 10 minutes.
Make filling: In a 10-inch nonstick skillet, heat remaining 1 tablespoon oil over medium-high. Add onion, garlic, cayenne, cumin, chili powder, oregano, and beef; season with salt and pepper. Cook, stirring, until cooked through, about 8 minutes.
Preheat oven to 350 degrees. (If freezing, don't place any sauce in baking dish.) Spoon 1/4 cup sauce in bottom of an 8-inch square baking dish. Set aside. Make enchiladas: Stack tortillas; wrap in foil, and warm in oven, 10 minutes. Fill each with a heaping 1/4 cup beef mixture (and this was for 6-inch corn tortillas, which I don't even think I did for 10-inch flour tortillas, so do whatever works for you) and 2 tablespoons cheese; tightly roll up.
Raise oven heat to 450 degrees. Arrange enchiladas, seam side down, in baking dish. Top with remaining sauce; sprinkle with cheese. Bake, uncovered, until hot and bubbly, 15 to 20 minutes. (I sprinkled the cilantro on top a few minutes before end of cooking time) Let cool 10 minutes before serving. Serve garnished with cilantro and, if desired, a green salad.
To freeze: make sauce and enchiladas; arrange enchiladas in baking dish without sauce (so tortillas don't become soggy). Place sauce in an airtight container. Cover dish with plastic wrap and foil. Label, date, and freeze enchiladas and sauce. Use within 2 months; bake without thawing.To bake from frozen: Thaw sauce in refrigerator overnight. Preheat oven to 450 degrees. Remove foil and plastic wrap from baking dish. Pour sauce over top, and sprinkle with cheese; cover with foil. Bake 30 minutes. Uncover; bake until lightly browned and bubbly, about 15 minutes. Let cool 10 minutes; serve.If baking right away: Spoon 1/4 cup sauce in the bottom of baking dish; pour the rest over the enchiladas.


Thursday, July 29, 2010

Banana Chocolate Chip Muffins

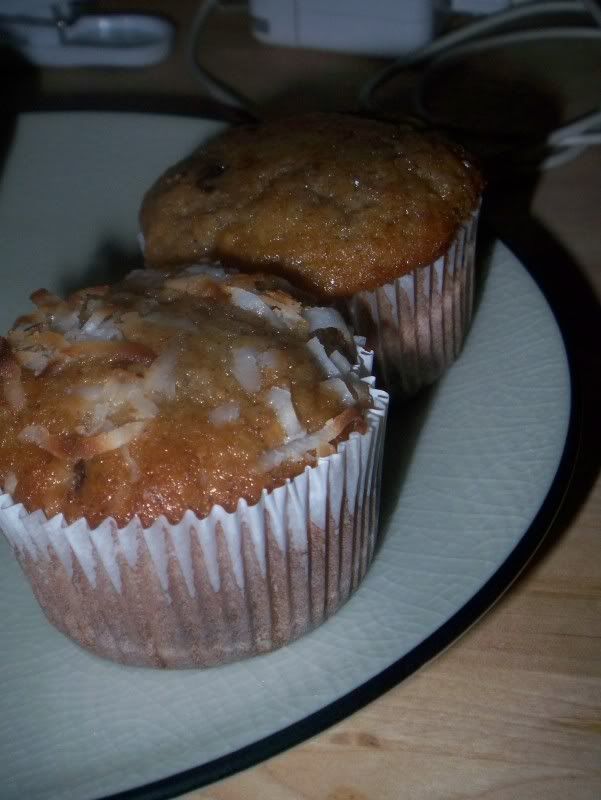
When I saw bananas for 33 cents a pound at the store recently, I went a little hog wild. Banana breads are such a wonderful way to use overly-ripe bananas, and I make them as muffins so I can freeze the batch and pull out a couple at a time. I get to enjoy these for a long time, whereas the bananas would have been rotten by now. I also jazzed up some of the muffins by added some shredded coconut to the batter. These muffins freeze really well, and I love popping one in the microwave for about 20 seconds and getting a warm muffins that is still moist and delicious, with a very obvious banana flavor. These would be great just plain, no chocolate, no coconut, or even subbing in some walnuts if you prefer.

Banana Chocolate Chip Muffins
Adapted From KAF Baker's Companion

1 cup all-purpose flour
1 cup whole wheat flour
1 1/2 teaspoons baking powder
1/2 teaspoon baking soda
1/2 teaspoon salt
1/2 teaspoon fresh grated nutmeg
1/2 teaspoon allspice
4 tablespoons unsalted butter, softened
1 cup granulated sugar
1 large egg
1 teaspoon vanilla
3/4 cup mashed ripe bananas
1/3 cup milk
3/4 cup bittersweet chocolate chunks

Preheat oven to 350

In a medium bowl, whisk together flours, baking powder, baking soda, salt, nutmeg and allspice.

In a large mixing bowl, cream together butter and sugar. Mix in the egg, vanilla, mashed bananas and milk. Add to dry ingredients and mix until just blended.

Evenly divide the batter between a 12 cup muffin tin coated with nonstick spray. After 6 tins are filled, and maybe a few minis, add a bit of coconut to the rest of the batter and scoop into remaining cups. Bake until a toothpick placed in the center comes out mostly clean - about 16-20 minutes. Remove from the oven and let cool for 5 to 10 minutes before carefully removing them from the pan to a wire rack to cool completely.

Makes 12 muffins. Plus a few Minis as well.

Sunday, July 25, 2010

Key Lime Pie

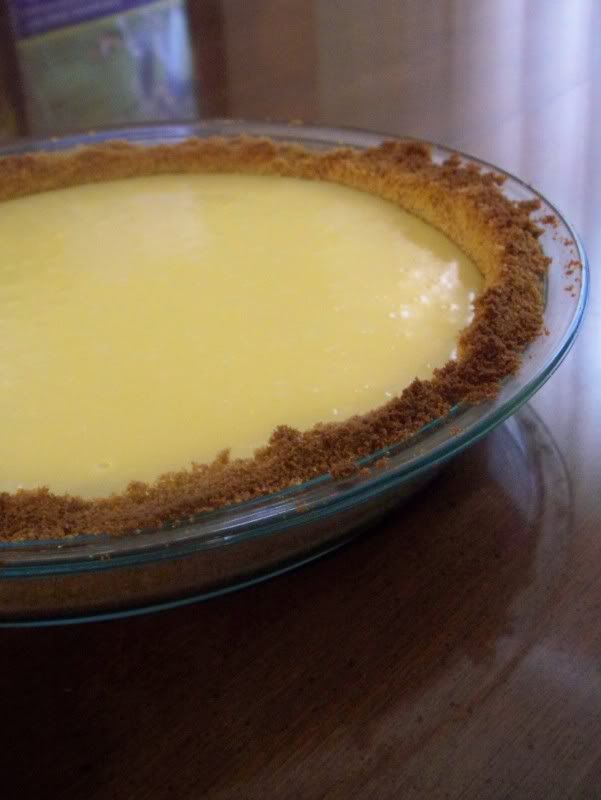
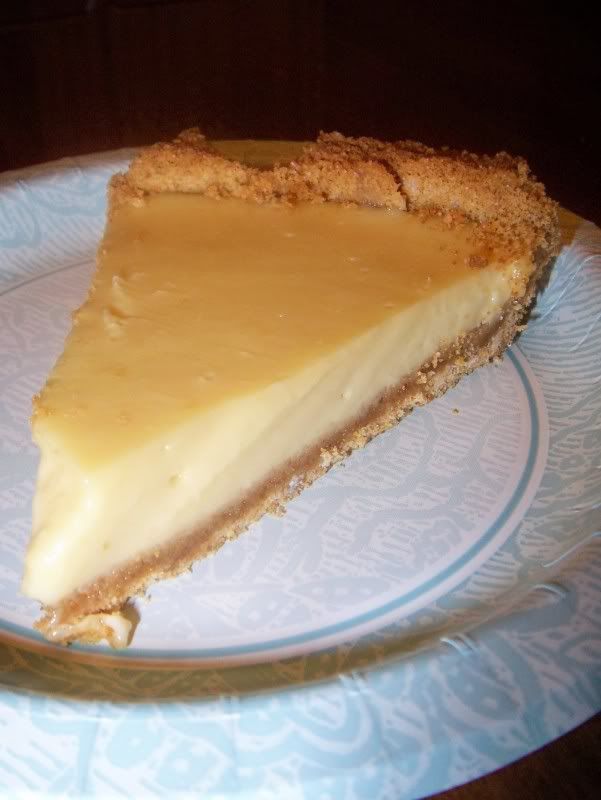
Ok, so I lied. It’ not really a Key Lime Pie. It’s a Persian Lime Pie. But that does not make it any less delicious. I also have yet to figure out how to make the perfect graham cracker crust. The ones I make taste great, but they tend to be very delicate and on the verge of crumbly. That is one of the perks of using the premade graham cracker crusts, I find them much sturdier than I could ever make mine. Even a crumbly crust could not stop me from finding homemade far superior than store-bought, however. I love having the freedom to make a crust as thin or as thick as I want, and I can control how much sugar I add.

For 2/3 cups of lime juice, I used all but five of my limes out of a pound of Persian limes. Those suckers are tiny. That afternoon, my juicer was my BFF for life. I did omit the lime zest that is originally called for in the recipe. Call me old-fashioned, but I love the homogenous color of a classic key lime pie. (It should probably also be noted that I do not have a microplane zester, and that is about the only way you’re getting any zest off of those things. I tried using my mini grater, and after grating my fingers three times and having no zest to my name, I quit. That may or may not have predominately influenced my decision to love the classic key lime pie.)

My family tends to like the embellishments simple; just a nice, healthy dollop of cool whip. I prefer it plain, though. I added a little extra juice than called for in the original recipe. I like my pies tart. This one did not disappoint. This pie has a pronounced tartness that is perfectly balanced with the sweetness and richness of the graham cracker crust.

My only complaint I have is that literally takes 30 minutes to assemble and bake, you have to wait over an hour for it to chill before you can finally dig in. That’s just plain cruel.


Key Lime Pie


Adapted from
The Pioneer Woman

Ingredients

Crust

13 whole Graham Crackers (the 4-section Large Pieces)
1/4 cups Sugar
1/4 cups Butter, Melted

Filling

2/3 cups Lime Juice
2 whole Egg Yolks
1 can (14 Oz) Sweetened Condensed Milk
Preparation Instructions
Preheat oven to 350 degrees

For the crust:
Crush crackers in a food processor or Ziploc bag. Pour them into a bowl and stir in sugar and melted butter. Press into a pie pan and bake for 5 minutes or until golden and set. Remove from oven and set aside to cool slightly.

For the filling:
Mix lime zest, lime juice, and egg yolks in a mixing bowl. Add in condensed milk and mix on high until smooth and thick. Pour mixture into crust and bake for 15 minutes.
Remove from oven, allow to cool, then refrigerate for at least 1 hour—more if possible.

Serve plain, with a dollop of Cool Whip, or the sweetened lime whipped cream as described in the original recipe.

Friday, July 23, 2010

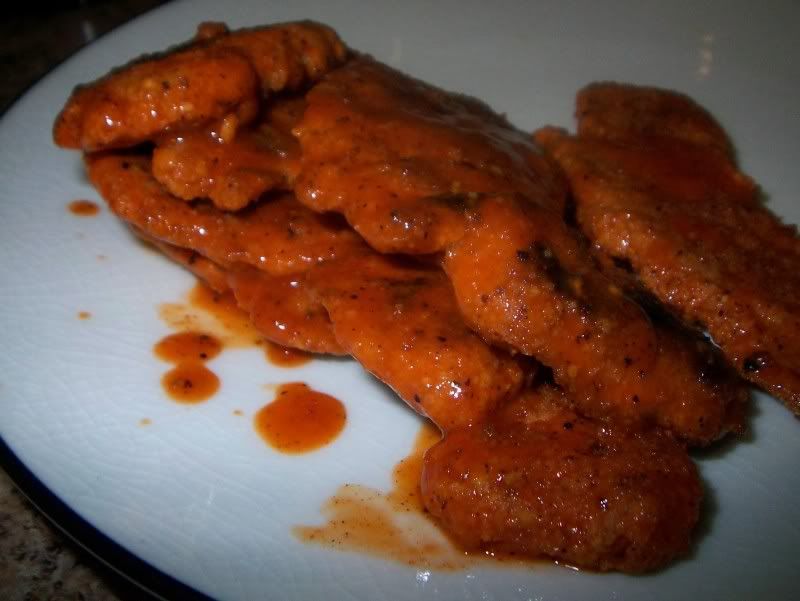
Buffalo Wings

My husband and I are pretty predictable on our date nights. A trip to Buffalo Wild Wings consisting of a boneless wing appetizer spun in mango habenero sauce, a couple of beers and dinner. Our meal is then followed by a trip next door to the movie theater. It’s the perfect night for us. We do enjoy fancy dinners on occasion, but when we want to relax and not worry about doing dishes, B-Dubs is the place for us.

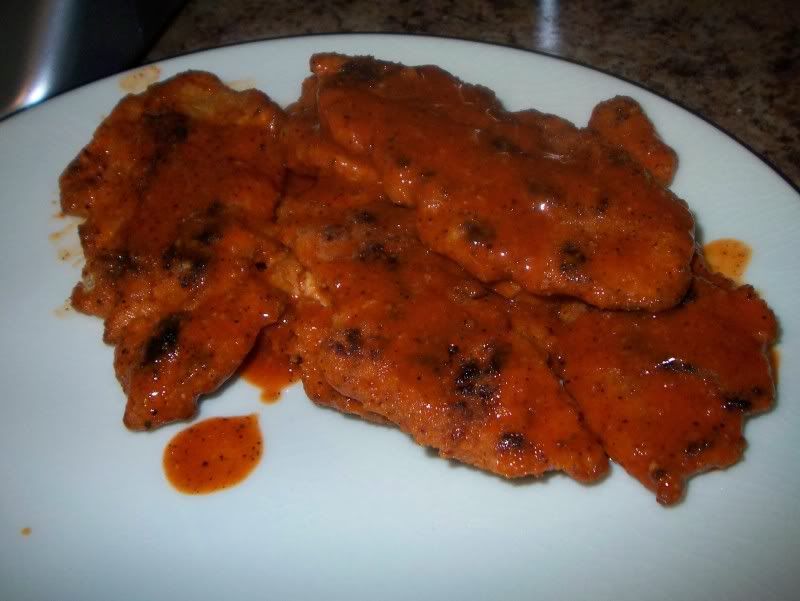
We haven’t been going out quite as much lately as we are saving for some pretty major home renovations, but that doesn’t mean we have to go without our wings. I must say, I enjoy the homemade version also because they are not deep-fried like their restaurant counterparts. If I wanted to get truly daring, I could evensplurge and purchase sauce from B-Dubs to get the real flavor, but the Frank’s Buffalo Hot Sauce fits the bill on a budget.

They do take a little time and prep-work to assemble, but I really enjoyed getting to have some hot wings at home. It’s classic bar food, but upgraded. I don’t feel quite as guilty after eating these, either.
I’ve tried double-breading the chicken tenders, but I think the extra step is completely superfluous. These wings are just as tasty with only one dredge through the bread crumbs, and you’ll get them on your table that much faster. If you want to double-coat, go ahead, but I’m sticking with a single layer from now on.

Buffalo Chicken Tenders

4 oz chicken tenderloins
1 c bread crumbs
3 eggs, lightly beaten
1/2 c flour
Cayenne Pepper
Salt
Pepper
1 c Franks Buffalo Hot Sauce
2-3 Tbsp Canola oil, for pan

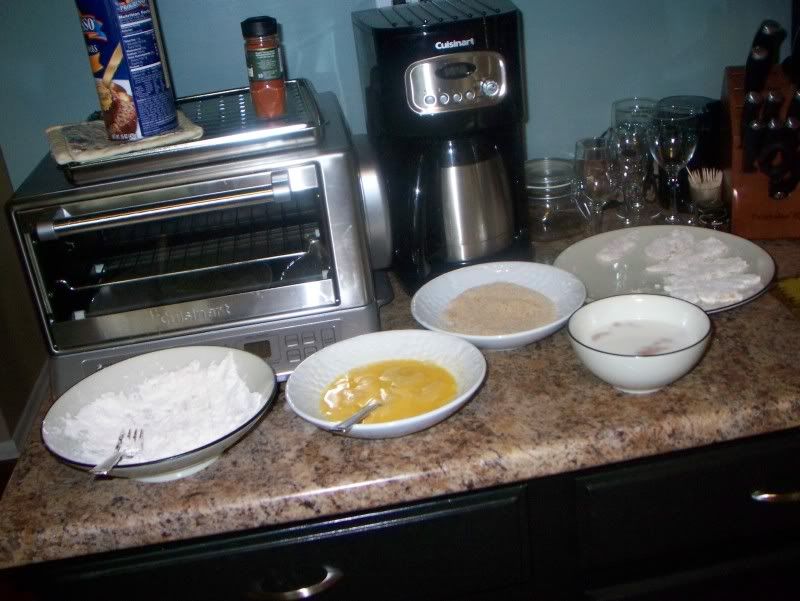
Get out three shallow serving bowls. Put flour in one. Mix in cayenne pepper, salt, pepper and paprika. In second shallow bowl, put your eggs. In last bowl, bread crumbs.

With a dry paper towel, pat your chicken dry. I like to cut my tenderloins into 2-3 pieces each, so each portion is a little more bite-sized. Lightly coat chicken with the flour, shake off excess and dip into eggs. Finally, coat your pieces with the breadcrumbs and set aside on a plate.

In a medium pan, heat up canola oil. Lightly pan fry the chicken pieces until golden brown and cooked all the way through. While waiting for the pieces to finish cooking, put about ¼ c of your hot sauce in the bottom of a bowl big enough to mix your chicken pieces. Add about half of your chicken, and layer on more hot sauce. Add the rest of your chicken, followed by the rest of the hot sauce. Shake, rattle, roll and stir your chicken until well coated.
Enjoy!

Tuesday, July 20, 2010

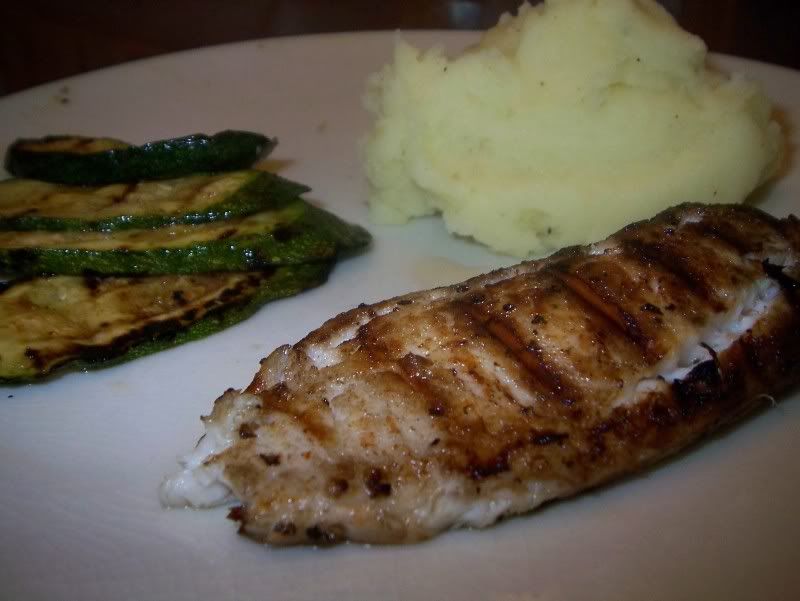
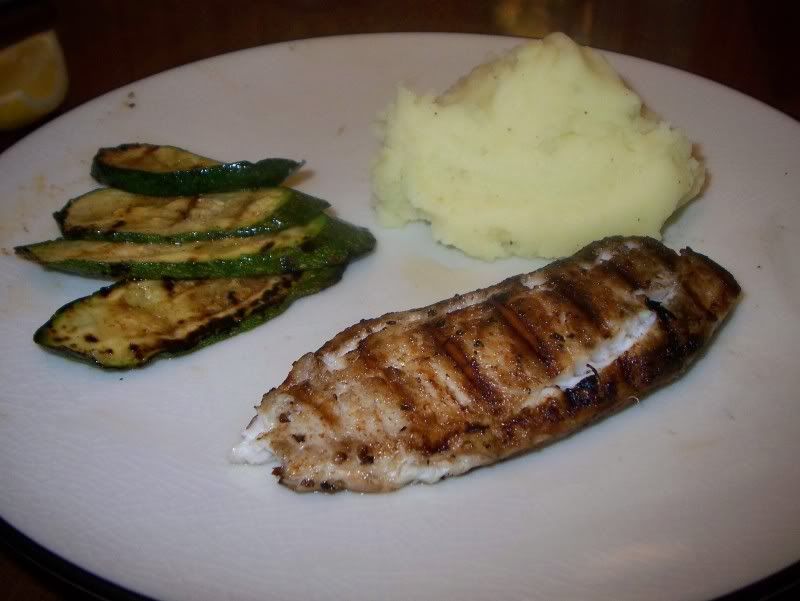
Sesame Tilapia

Summertime always comes as a shock.

I spend all winter bunkered down in sweats, eating stews, chilis and pot roasts. All of a sudden, the snow melts, the temperature rises, and the cream- and fat-laden comfort foods of winter no longer are nearly as appealing.

To me, the epitome of summer is grilling. Burgers, steaks, barbecue chicken, all your usual suspects. This year, however, we had been eating much more salmon and, while it’s tasty, I occasionally like to eat a milder, lighter-feeling fish that can handle more subtle flavors. Tilapia is a wonderfully delicate white fish that has no fishy flavor whatsoever, and really shines when complimented with subtle flavorings, instead of being overpowered by hoisin sauces or soy sauces.

This fish was super easy, and the flavor was further improved by the addition of the smoky flavor contributed by our grill. If you don’t want to grill or don’t have one, you can bake the fish for about 30 miuntes at 350 degrees F, until it flakes easily with a fork.

I can only predict that we will be eating a lot more tilapia in the near future.

Sesame Tilapia
adapted from Allrecipes

Ingredients
2 (4 ounce) fillets tilapia
1/4 cup sesame oil
1 clove garlic, minced
1 teaspoon Italian seasoning (or basil)
kosher salt to taste
fresh ground black pepper to taste
1 tsp lemon juice

Directions
Place the tilapia in a bowl, and drizzle with the sesame oil. Season with the garlic, lemon juice, Italian seasoning, kosher salt, and pepper. Cover, and marinate at least 30 minutes in the refrigerator.
Preheat oven to 350 degrees F (175 degrees C).
Grill fish pieces until easily flaked with a fork, turning once, about 9-10 minutes total.
Sprinkle with lemon juice before eating.

Friday, July 16, 2010

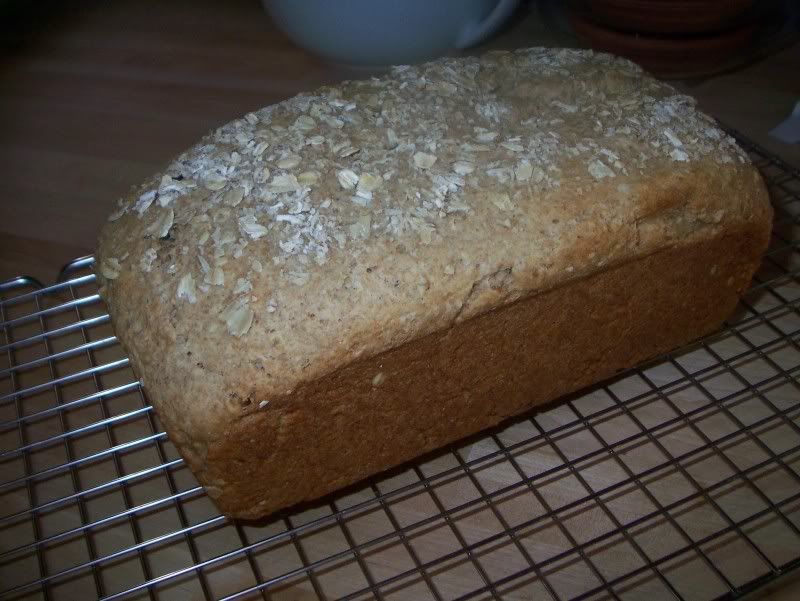
Honey Oatmeal Bread

I’ve always wanted to make my own sandwich bread. We go through so much bread every week packing our sandwiches for work. Nutrition is not really my issue since migrating to High Fructose Corn Syrup-Free Whole Wheat breads; it’s that I still find it hard to believe that bread is still as expensive as it is. And I do notice the unpronounceable ingredients acting as preservatives listed on a typical label. But finding the balance between nutrition and texture is difficult. I like dense, hearty breads for snacking, but for sandwiches, I prefer light and fluffy without being airy. Because I wanted to use whole wheat flour for my bread, I knew it would be tricky to find a recipe to produce the kind of bread I wanted.

I saw this recipe on the KAF website and thought it looked good, so I gave it a try. I enjoyed it immensely, but I found it much too dense and moist to be daily sandwich bread. This is a loaf where you’ll toast a slice and slather it with butter and eat it with (or for) breakfast. I do want to find a good sandwich bread recipe, but I can also appreciate what we’re purchasing at the store. It may not be made with love but I think we’re making a good choice balancing nutrition and value based on what we have available.

There are only so many hours in the day and, with a full time job, I can’t be whipping out loaves of bread like a bakery whenever I want. As much as I want to make my own bread for daily use, I am learning to appreciate convenience for the sake of sanity, but also to enjoy when I can relax, and have a loaf of freshly baked bread coming out of the oven.

Honey Oatmeal Bread
From KAF

3/4 cup lukewarm water
1 1/2 cups "quick" rolled oats
2 packets "highly active" dry yeast; or 1 tablespoon active dry yeast; or 2 3/4 teaspoons instant yeast
2 tablespoons honey
1 tablespoon brown sugar
6 tablespoons (3/4 stick) butter
1/2 cup unsweetened applesauce
1 1/2 teaspoons salt
1/2 cup instant mashed potato flakes
2 1/4 cups King Arthur Unbleached All-Purpose Flour
2 tablespoons oats, to sprinkle on top, optional

Directions
1) Combine the 3/4 cup water and oats, and let rest for 20 minutes. This gives the oats a chance to absorb the water and soften up.

2) If you're using active or "highly active" dry yeast, dissolve it in 2 tablespoons of the lukewarm water with a pinch of sugar. It should start to bubble as the oats and water rest.

3) Add the remaining ingredients to the oats (including the yeast/water/sugar mixture, if you're using active dry yeast), and mix and knead—by hand, electric mixer, or bread machine set on the dough cycle—until the dough feels springy; it will be quite stiff.

4) Place the dough in a lightly greased bowl, and allow it to rise, covered, for 2 hours; it's a slow riser.

5) Gently deflate the dough, and shape it into an 8" log. Place it in a lightly greased 8 1/2" x 4 1/2" loaf pan. Cover the pan loosely with lightly greased plastic wrap.

6) Allow the dough to rise at room temperature for 1 3/4 to 2 hours, till it's crowned about 1 1/2" over the rim of the pan. Towards the end of the rising time, preheat the oven to 350°F.

7) Brush the top of the loaf with milk, and sprinkle with oats, if desired.

8) Bake the bread for 20 minutes. Tent it loosely with aluminum foil, and bake for an additional 25 to 30 minutes. When the bread is done, it'll be golden brown, and an instant-read thermometer inserted into the center will register 190°F.

9) Remove the bread from the oven, wait 5 minutes, then turn it out of the pan onto a rack to cool. Cool completely before slicing. Store well-wrapped at room temperature.

Monday, July 12, 2010

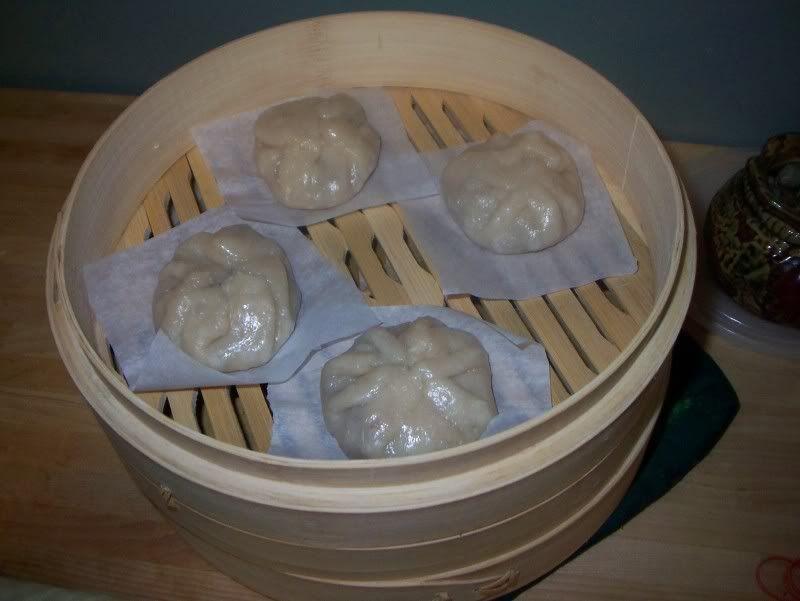
Bao Buns

My first experience with dim sum was with my in-laws at a now-closed restaurant called Triple Crown Seafood. It was next to this great Chinese supermarket where we could stock up on everything we would need for my husband to cook all his specialties. It is so much fun to sit down at a table and have cart after cart filled with bamboo steamer baskets pass with every type of dim sum imaginable – bao buns, pork shu mai, even chicken feet. There are no menus, you simply order by sight and smell.

Dim sum is so dangerous for me – there are three to four dumplings in each steamer basket, and after a while, I always seem to lose track of how many steamer baskets have been cleared off of our table. I know I should stop eating because I’m getting full, but I can’t stop because the food is just so amazingly delicious. I really need to work on my willpower.

My favorite dim sum is a Bao Bun. The bun itself is very light, but has a slight chew to it. It encases a small portion of filling, most classically one using Chinese barbecue pork. But there is a restaurant in Chicago serving the classic Char Siu Bao as well as the buns filled with anything from curried chicken to coconut custard. And let me tell you, the coconut cream filling is killer.

At a Chinese supermarket downtown, I found an entire aisle dedicated to flour. Glutinous rice flour, bao flour, dumpling flour, all types. Because I couldn’t read the labels, I bought a flour that had a picture of the bao bun on front, hoping it would work for me. We had also picked up some barbecue pork on this trip, so I found a filling recipe that incorporated this.

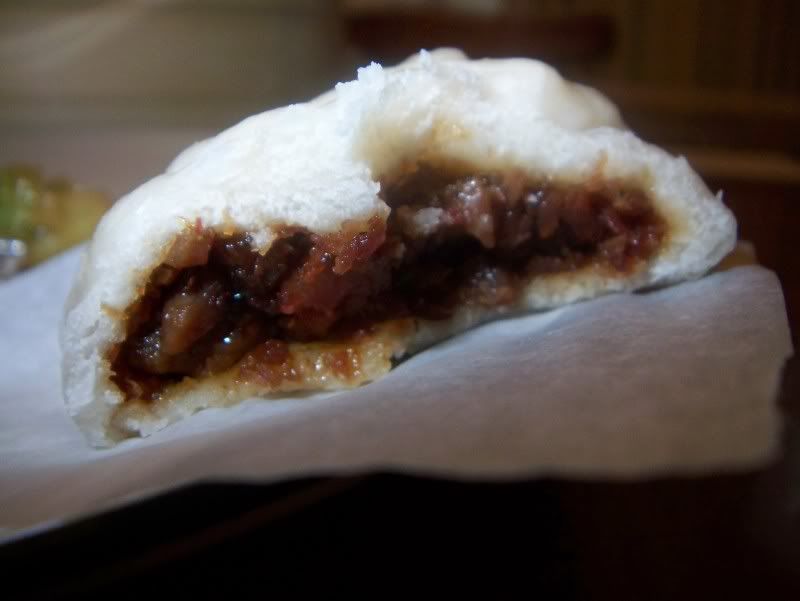
Unfortunately for my bao, I think my yeast was dead since I didn’t get a nice, puffy bao. I was really disappointed, until my husband said two things. First, he told me I nailed the filling. That was encouraging. At least I have half of the recipe right. Second, he mentioned that even though it wasn’t a bao bun, it was still a delicious dumpling – the dough had more of a pot sticker consistency. Despite having dead yeast and not getting a good rise out of my dough, I still ended up with something delicious, and we ate every last one of them.

I can’t wait to try again, and this time I will make sure my yeast blooms before I throw it all in the pot. And if the buns still fail, at least I know whatever comes out will be delicious, despite not being what I had planned on.

My moral is even if things don’t go as planned, go with it. I was so sad that my dumplings didn’t turn out anything like I had expected that I completely ignored the fact that I had managed to make something tasty.

Even failures can be delicious.

I’ll share the recipe for the filling, since that was so good, but I’m going to wait until I have success in the bao department before sharing the dough recipe.


Char Siu Bao Filling
Adapted From:
Char Siu Bao

Yields ~8 steamed pork buns.

Ingredients:
1 tablespoons oil
1 scallion, chopped fine
1 clove garlic, chopped fine
1/4 pound barbecued pork cut into small cubes
1 tablespoons light soy sauce
1 tablespoons oyster sauce
1 teaspoon sugar
1 teaspoon cornstarch, dissolved in 2 teaspoons water or chicken stock

Heat 1 tablespoons oil in wok. Stir fry scallion and garlic 30 seconds. Add pork. Stir fry 1 minute. Add soy sauce, oyster sauce, and sugar.

Pour in dissolved cornstarch. Stir fry quickly until pork is glazed. Remove to bowl and allow to cool.

If you have dough you want to make into Bao Buns, continue on with the recipe.

On a floured board, knead dough 1 minute and roll into one long, sausage-like roll 2 inches in diameter.

Slice the roll crosswise into 1 inch pieces.

Flatten each piece with the palm of your hand and roll with rolling pin into 3 inch rounds.

Place 2 tablespoons of filling in center of each round.

Gather dough up around the filling by pleating along the edges.

Bring the pleats up and twist securely and firmly.

Place each bun on 2 inch square of aluminum foil on steamer tray. Cover with a towel. Let rise 1 hour, until dough springs back when touched with finger. Remove towel.

Steam over briskly boiling water 10 minutes.

May be prepared in advance. May be frozen. Thaw out in plastic bag and resteam 10 minutes.

Friday, July 9, 2010

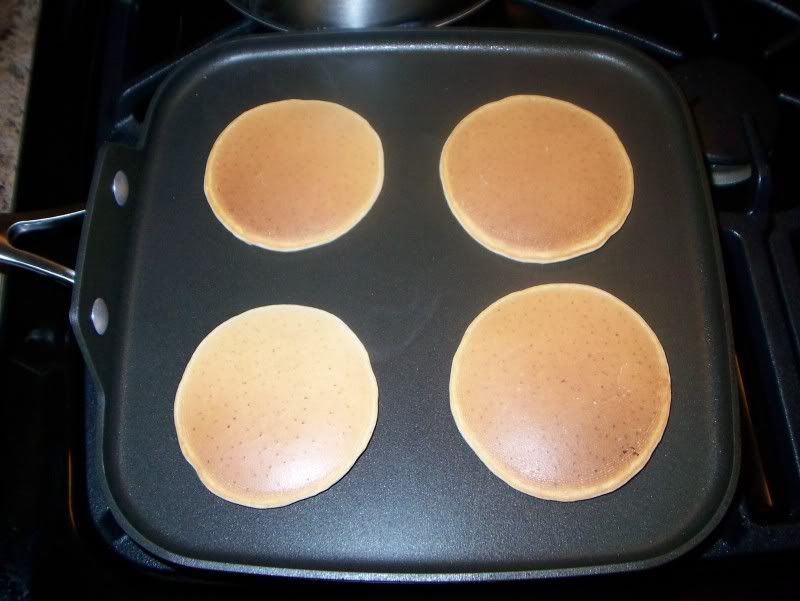
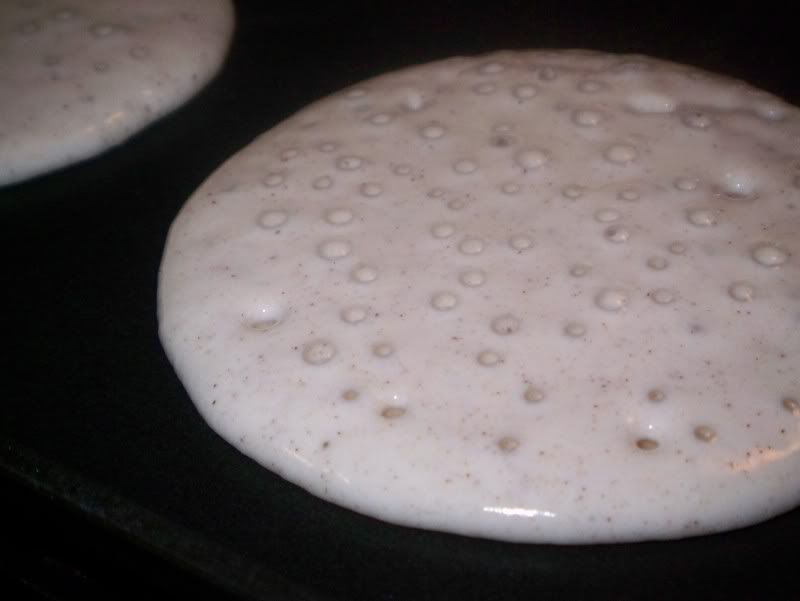
Brown Sugar and Cinnamon Pancakes

Breakfast. It’s the most important meal of the day. Some people can get by simply by pouring some cereal into a bowl, dousing it with milk and calling it a day. I will typically eat cereal only when I have to. I love omelets, french toast, pancakes, waffles, crepes, cinnamon buns and all the other glorious baked goods with tons of butter that are only fit to eat because they are breakfast foods!
Every once in a while, I enjoy breakfast dinners. There is something so comforting to me coming home after a long day of work and having pancakes, eggs and sausage. And because I’m usually really exhausted after work (and after working out) my pancakes have been coming from *gasp* the box! I don’t usually leave well-enough alone, though. I like jazzing up my pancakes, so it looks like I at least put a little effort into my dinner. Bananas, blueberries, nuts, chocolate sometimes just whatever I see laying around. My most recent discovery though, are brown sugar and cinnamon pancakes. Perfect for a late night or an early morning when you want something quick and easy on the table, but jazzed up enough that anyone eating them can feel the love.
Brown Sugar and Cinnamon Bisquick Pancakes
1 c Bisquick
½ c Milk
1 Egg
2 Tbsp Brown Sugar
2 tsp Cinnamon
Stir Bisquick, brown sugar and cinnamon together in a bowl. Add egg and milk, stirring until just combined. Batter will be lumpy. Do not overstir.
Cook on medium heat on one side until bubbles pop and top side appears to have dried out slightly.
Flip and cook on other side for 1-2 additional minutes.
Store, covered, in warm oven until ready to serve.

Wednesday, July 7, 2010

Summertime Cupcakes

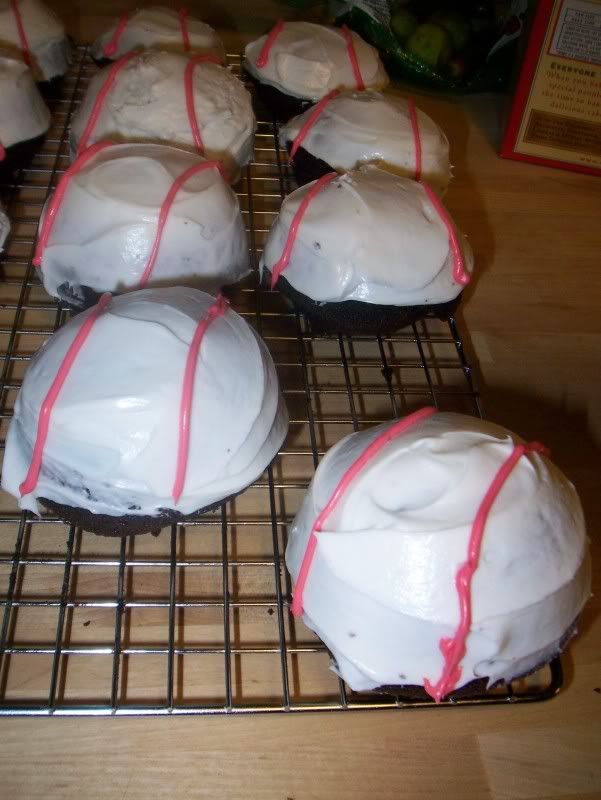
Playing in a company softball league this summer gives me the perfect excuse to try out new things without being required to consume all of them myself (or forcing my poor husband to eat them all!) I recently bought a mini ball pan from the Wilton Tent Sale here, and what a better excuse to see what perfectly round cupcakes look like than softball cupcakes! Because I was in a hurry, I used a devil’s food boxed cake mix and a can of vanilla icing.

One of the perks of this softball league is that you are allowed to bring your own booze to the games and drink while you play. (And, given our record, that’s probably a good thing!) So, of course, I had to incorporate booze into the cupcakes somehow. I made a brandy whipped chocolate ganache to fill the cupcakes and, let me tell you, you can definitely taste the raw brandy in the filling. I probably wouldn’t be serving these to any kiddos, but you can always leave the alcohol out for a kid-friendly filling. If you remember my Irish Car Bomb Cupcakes, I felt the filling was a little too dense, so I opted for a higher cream-to-chocolate ratio this time around, and whipped my ganache as it was cooling so it wouldn’t be quite so dense when it set up. While tasty, I think I over-compensated a little. I doubt I needed to whip the ganache, but I certainly did no harm in doing so.

Next time, I will use a little bit denser mix or make my own batter, because while I love the fact that the cake was light and airy, the crumb was a little too moist and delicate to handle as much as I needed to for the filling and frosting of the cupcakes. I only had one mini ball pan with six cavities for batter which meant I had to bake off four batches of cupcakes to use up the mix and noticed that the longer the cake mix sat, the funkier the cupcakes looked as they baked. The first batch were beautifully domed. The second batch, the outer edges rose first, and then they got a weird hump-thingy in the middle. The final batch did a similar thing to the second batch, but a little more pronounced. That was a little bizarre to see, but I guess that’s why the instructions say to bake the cake ‘immediately’ instead of baking the cake ‘whenever you feel like it.’ Good to know.

Also, don’t make the same mistake I did, and while waiting for my ganache to cool enough that I could whip it, I thought I’d get a head start icing my cupcakes. Anyone else notice a problem with this? After getting through three of the mini-balls, I realized that I cannot pick up my cupcakes to fill them now, so I had to poke a hole through the icing, fill it, and re-ice the whole dern cupcake. And I made an absolute mess of my piping bag. That’s the one problem of my mind constantly running faster than my logic filter.

Like I mentioned, the cupcakes were made from a box mix. The icing was just the can of vanilla icing, with part of it tinted pink/red for the stripes. The only thing I made ‘from scratch’ is the chocolate ganache, and even that is as easy as throwing together a box cake mix.

(I hesitated to post these because I'm still practicing my piping skills with my new decorating set. I'm sure if I had more than 20 minutes to decorate them, they'd look a whole lot better. But I guess if I post these now, I will one day be able to see an improvement on my skills in the future!)


Chocolate Ganache

2/3 c Chocolate chips
2/3 c cream
1 tbsp butter
1 tbsp brandy

I put all my ingredients into a pyrex cup and microwaved in 30 second intervals, stirring each time. It took about 2-2 1/2 minutes for the chocolate to completely melt. I then let it cool to room temperature, stirring every 15-20 minutes or so, and once it got thick, whipped it with a whisk until it was light and airy. And addictive.

Sunday, July 4, 2010

Festive 4th of July Cake

Happy Independence Day!


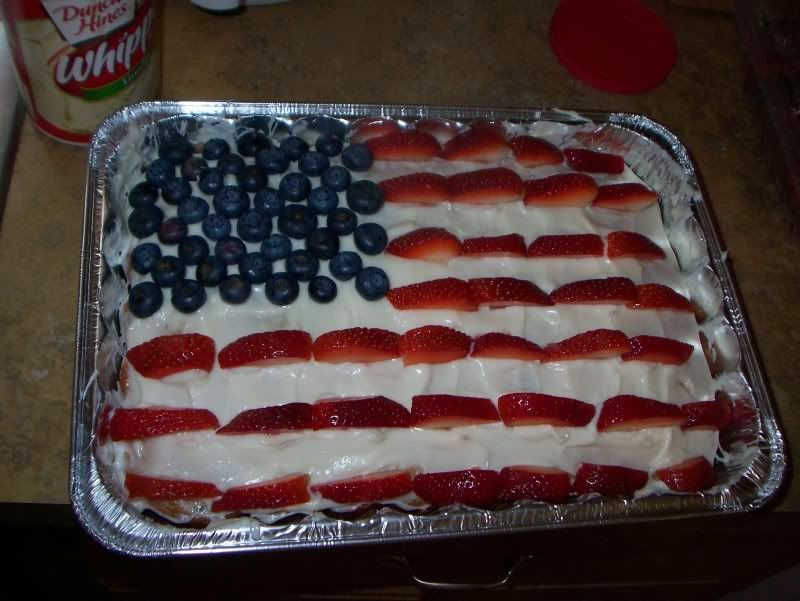
Want something easy and festive for the 4th of July? I made this last year for A good friend’s Independence Day party; heaven forbid I go to anything empty-handed. I was actually staying at my parents house for the weekend, and I didn’t want to make a huge mess in their kitchen, so this cake is a simple yellow boxed cake mix and a can of frosting (I didn't even hide the can for the picture!). I feel a little ashamed for admitting that. I don’t enjoy many of the vanilla canned frostings because they are way too sweet and taste artificial, but I will say that the fruit on top definitely made up for that. The acidity of the blueberries and strawberries cut through a lot of the sweetness and provided a nice balance of flavors.

You could easily make up your own scratch cake/frosting mix but, in a pinch, the other stuff works fine. And how cute is that? I really enjoyed decorating it, and being able to bring something celebratory.

Have a wonderful and safe Independence Day!

Saturday, July 3, 2010

Chili Chicken Wings

I’m glad these wings were good, because these nearly made me cry. If you have ever gotten raw ginger juice in your eyes, you know what I’m talking about. If you haven’t, take it from me – don’t. I always peel my ginger with a spoon, because I like to stand over the trash so the peel falls in, and I don’t have the manual dexterity to peel ginger skin with a knife without risking losing a pinky or needing stitches. I always thought it was safer to use a spoon, but when I got that squirt of fresh ginger juice in my eye, I just about would have sacrificed my whole hand to get the pain to stop. Ten minutes later, I was finally able to open my eye, only to have it tear up relentlessly. Thankfully, the more time that passed, the better my eye felt, and I no longer had to walk around the house with a permanent wink.

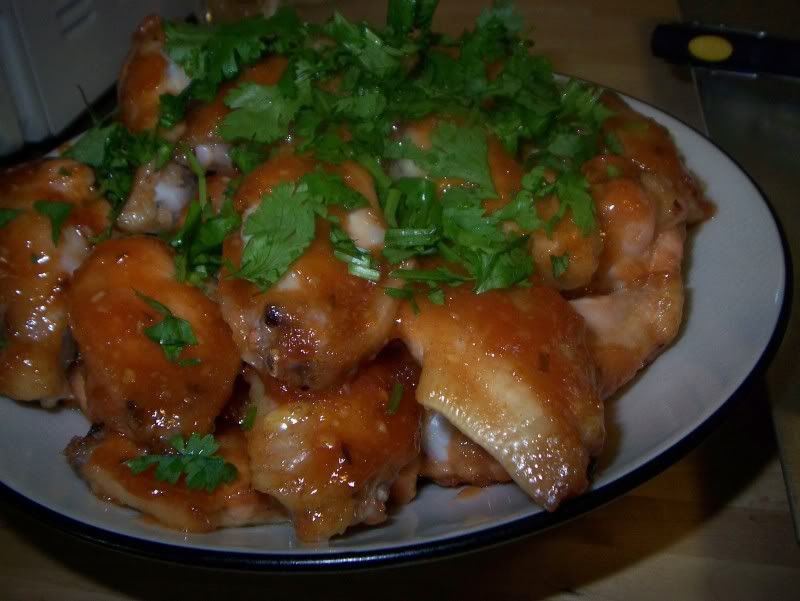
Minus the ginger incident, the rest of the dish came together really easily. I did use a little more cornstarch/water mixture than in the recipe, because I like my sauces a little thicker. Other than that, I kept everything the same, and they were delicious. I left the skin on the wings, so I don’t think I’d call these “health food,” but I did make a point to find a wing recipe that was baked, and not deep-fried (though this sauce would be great on fried wings as well). This was a great cookout food, and one that will certainly be gracing our table again in the future.


Chili Chicken Wings

From: Epicurious.com

For the sauce:
1 1/2 cups rice or cider vinegar
1 cup sugar
3/4 cup ketchup
6 tablespoons Chinese plum sauce
1 tablespoon hoisin sauce
2 tablespoons finely chopped garlic
2 tablespoons (or to taste) finely chopped fresh red, jalapeño or serrano chili, with seeds (I removed the seeds to keep the heat down a little bit)
3 tablespoons finely minced fresh ginger
1 teaspoon salt, or to taste
2 tablespoon cornstarch mixed with 2 tablespoon cold water

30 chicken wings (tips removed), rinsed and patted dry
2 tablespoons chopped cilantro, for garnish

Prepare the sauce: Combine all the sauce ingredients in a small, heavy saucepan. Bring to a boil over medium-high heat, reduce to medium-low and simmer, stirring constantly to blend the flavors, about 5 minutes. Remove from the heat and cool to room temperature. Puree in a food processor until nearly smooth. (Makes 3 cups.) Store, covered, in the refrigerator for up to 2 weeks.

Preheat the oven to 350ºF.

Using a sharp knife, separate the chicken wings at the joint. Set aside. (I also take the ‘pointy part’ off the end of the wing as well)

Place the chicken wings in a large bowl and toss well with 1 1/2 cups of the sauce.

Lay the chicken wings in a single layer on 2 or 3 baking sheets (do not overcrowd them). Bake for 45 to 50 minutes, basting once or twice with additional sauce. Place the wings on a platter, sprinkle with cilantro and serve.

Related Posts Plugin for WordPress, Blogger...