Thursday, December 30, 2010

Want to Wine and Dine But Short on Time? (Recipe – Rack of Lamb in Red Wine Sauce)

Getting a puppy has been such a huge blessing and source of joy for my hubby and I, but it is also not without its challenges. With Cody, we’re always trying to make sure he’s staying out of trouble, and we don’t give him free reign of the house yet; he’s a bit of a chewer – mostly on his toys, but sometimes on slippers, socks and chairs - and is still not 100% housebroken. He is usually pretty good about letting us know when he has to go outside, but he still has the rare ‘whoops’ moments.

Our weeknight dinner routine hasn’t really changed much since getting Cody; our quick and easy recipes still deliver satisfying meals in minimal time. However, I have noticed a change in my weekend cooking routine. Before Cody, when we would plan for a date night, I would almost always want to be in the kitchen a majority of the day preparing the meal. I enjoyed doing so, and I know it was appreciated.


Now with the puppy, our date nights have been mostly pushed aside. Instead of spending all of Saturday afternoon in the kitchen, we’re spending our time playing fetch, going for walks and doting on our puppy. So even on the weekends I would just be pulling dinner ideas from my typical weeknight repertoire.

Though my priorities in time management have shifted, I am realized that doesn’t have to mean we sacrifice our date nights. I needed to figure out how I could make a nice meal suitable for a romantic evening but still have time to spend with my family. So what can you prepare that sets a romantic vibe with limited time? This dish.


This meal only takes a little longer than my typical weeknight dinner menu items, but we are definitely setting the tone of a “Date Night” by straying a little from our typical weeknight proteins like chicken breast and pork chops, and splurging a little bit on things like filet mignon, or a rack of lamb. This meal is so deceptively simple, you’ll feel like you could have easily ordered it at a fancy restaurant, but you can take pride in knowing that you made it yourself, and didn’t spend your entire day in the kitchen. This meal produces maximum results with minimal effort.

The other thing I do on date night is that I plate the food for each of us as if we were getting it served to us from a restaurant. So, instead of seeing the dirty serving dishes sitting between me and my husband (which only leads me to thinking about having to wash them), I can just look across the table and see only food, wine, and my husband. The only thing left to do is to simply enjoy my lovely evening (and dinner!) with the hubby. I paired this with rosemary potato wedges and roasted carrots.

Leave the dishes in the sink. Nothing kills the ‘Date Night’ vibe like being up to your elbows in dirty dishes and soapy water, especially after a glass of wine (or two!). They won’t go anywhere. One night of romance is worth a few dirty dishes in the morning.

Trust me.


Rack of Lamb in Red Wine Sauce
From
Online Source

Ingredients:
2 racks of lamb
salt and pepper
1 1/2 to 2 tablespoons olive oil

Sauce
1/4 cup finely chopped onion or shallot
1 cup dry red wine, Pinot Noir is very good
1 teaspoon minced rosemary leaves
1/2 teaspoon minced thyme leaves
1 teaspoon chopped chives
1 cup beef broth
1 to 2 tablespoons butter
salt and pepper, to taste

Preparation:
Heat oven to 400°.
Sprinkle lamb with salt and pepper. Heat olive oil in a large skillet over medium-high heat. Place racks of lamb in skillet, meaty side down, until nicely seared. Turn to brown bottoms, letting the racks support each other. Transfer to a foil-lined roasting pan. Place pan in oven; roast for about 20 to 30 minutes.
In the same skillet, sauté onions until tender. Add wine and herbs; simmer briskly until the wine has boiled down to a syrup. Add broth and continue to simmer until reduced to about 3/4 cup. Add the butter; stir. Taste and season with salt and pepper. Serve sauce with the lamb. Makes 3/4 cup.
Cut lamb into portions and serve with the red wine sauce.

Serves 2 to 4, depending on the meat-eaters in your family

Monday, December 27, 2010

Butternut-Chickpea Soup with Thyme Croutons

Every year, thanks to Thanksgiving and Christmas, I always get it in my head that food is a free-for-all. What little self-control I had around sweets completely vanishes when I spy Thanksgiving leftovers in the fridge at midnight, or plate of Christmas cookies magically appears on the table in front of me. Even the normally healthier foods in my diet get in on the trend. Sweet potatoes, typically eaten plain the rest of the year, now must absolutely have marshmallows and brown sugar to be considered appropriate for my plate.

These seasonal foods make such a short appearance every year that I feel the need to stuff myself to the brim in hopes that it will tide me over until next year. And by the looks of the scale, it works.

Thankfully, with all of the sweets, cookies, stuffings, gravies, and treats, I have one respite – butternut squash. I love that I can get all the flavors of the season in a healthy yet satisfying dish (and I can eat as much as I want without feeling too guilty – ok, we’re still working on the self-control part, I guess).

I still had one butternut squash lying around from a few weeks ago when they were on sale. With my other squash, I made butternut squash and shrimp risotto and toasted the seeds as a little snack. This time I was craving soup. A feel-good-warms-you-from-the-inside-out-without-making-me-feel-guilty-about-eating-the-whole-pot kind of soup.

As I mentioned a little bit ago, I was adopted by a veteran blogger, who runs Hopie’s Kitchen. There I found a recipe for a butternut chickpea soup with thyme croutons that I just had to try. I adjusted the recipe only slightly, and that was simply because I had a whole butternut squash to use versus the half of one called for in the recipe. I also used homemade turkey stock we had in our freezer so that I can finally say we used it up! It turned the soup a beautiful auburn color, too, because the homemade stock is so much darker than chicken stock. A bowl of this just screams autumn to me.

This soup was like a warm hug, or wearing a snuggie. It is very filling, more than I’d expect, and the croutons with a hint of thyme provides a perfect crunch to the silky smooth soup.

After all the cookie, candy and cake recipes I posted these past two weeks, I figured I owed it to myself - and to you - to provide at least one recipe for something that is good, and good for you! Here's the way to start your New Year off, right!


Butternut-Chickpea Soup with Thyme Croutons
Adapted From
Hopie's Kitchen

The following recipe is the original, my notes are in italics.

Ingredients
1 Tbsp olive oil
1 large onion, chopped used a small sweet onion
3 garlic cloves, chopped used five because I was making a little more soup with a whole squash instead of half
1 tsp ground cumin omitted because apparently I haven’t restocked my pantry recently, I should get on that
1 tsp ground coriander
a pinch of nutmeg
a pinch of cayenne
1/2 butternut squash, peeled, seeded and cubed used one medium butternut squash
5 cups chicken or vegetable stock (more or less depending on how thick you want it) I probably used a little more, I didn’t measure exactly because the stock was previously frozen and I just dumped it all in the pot, but the ratio was perfect, not too thick, not too lose
1 (425ml) can of chickpeas, drained I think my can was 16 ounces
Heavy cream I used sour cream

For the croutons:
1 cup bread cut into cubes (a little stale is perfect) I used ciabbata
1 Tbsp shortening (Butter or olive oil is good too.)
1 tsp fresh thyme, minced

Heat the olive oil in a large pot and soften the onions for about 5 minutes. Add the garlic and cook another few minutes. Add the cumin, coriander, nutmeg and cayenne and stir well for 1 minute. Add the cubes of butternut squash and pour in the stock. Bring to a boil, cover, lower the heat and simmer until the squash is tender (about 20 minutes).

In the meantime, heat the shortening for the croutons in a frying pan. When hot, sprinkle in the thyme and then the bread. Stir well and cook on medium-high, stirring occasionally, until the pieces of bread start to brown. Remove from heat and set aside.

When the squash is tender, add the chickpeas to the soup and heat through. Blend the soup. Serve with a dollop of heavy cream in each bowl and a sprinkling of croutons.

Butternut Squash on Foodista

Saturday, December 25, 2010

Cody's Christmas Poem

We interrupt your normally scheduled programming to deliver the following message:


I want to wish everyone a very
Merry Christmas!


May you enjoy the day with good friends, great family and delicious food!

I wish all of you a happy and healthy holiday!

Cody would like to wish you happy holidays as well, and share with you a little poem he penned just for the occasion!


‘Twas the night before Christmas, when all through the pack
Not a corgi was stirring, not even for snacks;

Snacks??

The stockings were hung by the chimney with care,
In hopes that Santy Paws soon would be there;
The humans were nestled all snugly for rest,
And I kept keen watch for our special guest;
I looked and I listened – heard nary a peep,
As my family settled down for a long winter’s sleep,

So sleepy!

When out on the lawn I heard quite a loud noise,
I barked and I ran to secure all my toys.
I ran to the windows as fast as I could,
To be on the lookout as any good Corgi should!
Then, what to my keen puppy eyes had I spied
But a cart with no wheels and a fat man inside.
On top of the roof was a miniature sleigh
Led by eight corgis with antlers – and super long legs!
There was a little old driver, white fur on his chin,
Was it old Santy Paws? Please, let it be him!
More rapid than beagles his coursers they came,
And he howled, and barked, and called them by name;
“Now, Dasher! now, Dancer! now, Prancer and Vixen!
On, Comet! on Cupid! on, Donder and Blitzen!
To the top of the porch! to the top of the wall!
Now dash away! dash away! Snacks for you all!”
As dry tufts of fur after the wild corgi ran,
When they meet with an obstacle, their flight began

I'm coming, Santa!! Wait for me!!

So up to the house-top the coursers they flew,
With the sleigh full of chew toys, and Santy Paws, too.
And then, on the roof I could hear loud and clear,
The prancing and pawing of his tiny reindeer.
As I drew in my head, and was turning around,
Down the chimney Santy had come with a bound.
He was dressed all in fur, from his head to his foot,
And his clothes were all covered with dog hair and soot;
A bundle of rawhides he had flung on his back,
I drooled in anticipation of my tasty snacks.
His eyes — how they twinkled! his dimples how merry!
His cheeks were like kong toys, his nose like a cherry!
In his droll little mouth was on a pipe, puffing,
And I played with his beard as I had Bobo's stuffing;

Mmmm, bobo.

With the stump of a Milk Bone held tight in his teeth,
The crumbs from it I begged for as I eyed from beneath;
He had a broad face and a little round belly,
That shook, when he laughed like a bowl full of jelly.
He was chubby and plump, a right jolly old elf,
And I FRAP-ed when I saw him, in spite of myself;
A wink of an eye and a bone as a bribe,
Was offered as incentive to lure me aside;
He barked not a word, but went straight to his work,
And filled up our stockings; then turned with a jerk,
And laying his finger aside of his snout,
And moved to the chimney to make his way out;
He sprang to his sleigh, to his team gave a yell,
And away they all flew as I barked them "farewell!"
But I heard him exclaim, as he drove out of sight,

“Happy Christmas to all, and be good corgis tonight!”


Friday, December 24, 2010

Italian Seven-Layer Cookies

Merry Christmas Eve! I hope I have time to share one last recipe with you before Christmas. These are really worth the wait, and definitely some of the most festive ones that have exited my kitchen.

These seven-layer cookies are the last ones I’m making this season, but they were the first on my ‘must make’ list. They seem like such a nice change of pace from a traditional cookie, they have gotten rave reviews on the website where I acquired the recipe, and they’re just plain pretty to look at! I like having one ‘showpiece’ on the cookie plate because, let’s face it, even if the fruitcake is good, it still is a little bit like the ugly duckling on the table.

Aside from the almond paste and apricot preserves, I had everything I needed in my pantry to make these already. The almond paste shouldn’t be difficult to find, either, it was in the baking aisle of our local grocery store, right under the jars of mincemeat filling and canisters of marshmallow fluff.

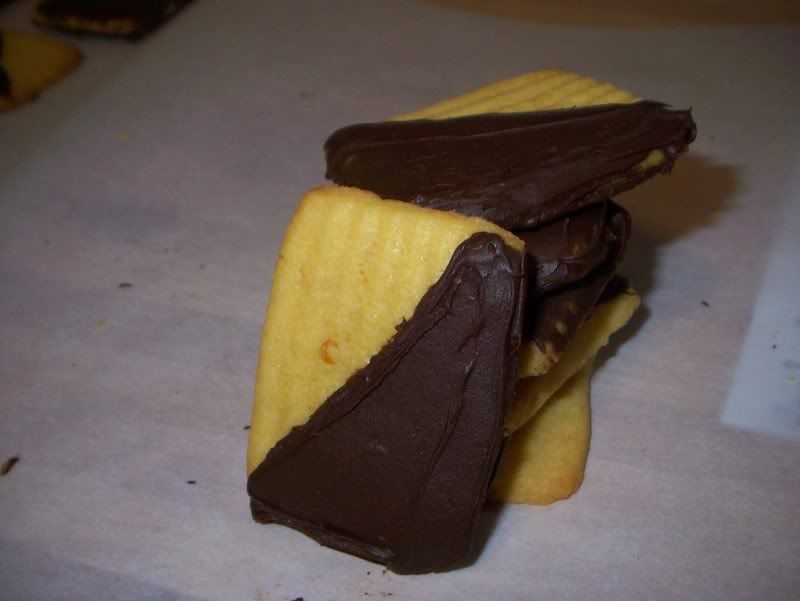
With three layers of almond cake sandwiching apricot preserves, book-ended with a chocolate coating, these bars are more layer-cake or petit-four than cookie. They simple and straight forward to make, but the projected time required to make these beauties, 11 hours, can be a little intimidating. Most of the 11 hours is inactive time, so if you can find some patience, you’ll be rewarded with a fantastic, show-stopper of a treat. I actually find something strangely satisfying about spending a long time in the kitchen preparing only one thing. I can focus fully on one recipe, instead of multitasking between three of four, which I’ve done before, and requires a lot of effort to keep things situated.

I find myself constantly reaching in the container of these and pulling one out to munch on. They're bite sized, so they don't feel like a complete over-indulgence, but they are a step above most of the other treats I've made in terms of visual appeal and complexity of flavors.

I'm pretty sure I am going to need to make these every year now. And maybe just change the colors of the layers to make it more appropriate for other holidays throughout the year, because I'm not sure I can handle waiting eleven more months to have another one of these once this batch is gone!

Curious about what I’ve made already? Check out:
White Trash
Quick Mix Spritz Cookies
Peppermint Icicle Candy
Spiced Pecans and Pralines
Fresh orange Spritz Cookies
Fruitcake
Ginger Molasses Cookies
Paper-Thin Sugar Cookies
Peppermint-Chocolate Fudge


Seven Layer Cookies
Gourmet 2005 and seen on Smitten Kitchen
yield: Makes about 5 dozen cookies
active time: 1 1/2 hr
total time: 11 hr

4 large eggs, separated
1 cup sugar
1 (8-oz) can almond paste
2 1/2 sticks (1 1/4 cups) unsalted butter, softened
1 teaspoon almond extract
2 cups all-purpose flour
1/2 teaspoon salt
25 drops red food coloring
25 drops green food coloring
1 (12-oz) jar apricot preserves, heated and strained
7 oz fine-quality bittersweet chocolate (not unsweetened), chopped

Special equipment: a heavy-duty stand mixer; a small offset spatula

Put oven rack in middle position and preheat oven to 350°F. Butter a 13- by 9-inch baking pan and line bottom with wax paper, leaving a 2-inch overhang on 2 ends, then butter paper.

Beat whites in mixer fitted with whisk attachment at medium-high speed until they just hold stiff peaks. Add 1/4 cup sugar a little at a time, beating at high speed until whites hold stiff, slightly glossy peaks. Transfer to another bowl.

Switch to paddle attachment, then beat together almond paste and remaining 3/4 cup sugar until well blended, about 3 minutes. Add butter and beat until pale and fluffy, about 3 minutes. Add yolks and almond extract and beat until combined well, about 2 minutes. Reduce speed to low, then add flour and salt and mix until just combined.

Fold half of egg white mixture into almond mixture to lighten, then fold in remaining whites gently but thoroughly.

Divide batter among 3 bowls. Stir red food coloring into one and green food coloring into another, leaving the third batch plain. Set white batter aside. Chill green batter, covered. Pour red batter into prepared pan and spread evenly with offset spatula (layer will be about 1/4 inch thick).

Bake red layer 8 to 10 minutes, until just set. (It is important to undercook.)

Using paper overhang, transfer layer to a rack to cool, about 15 minutes. Clean pan, then line with wax paper and butter paper in same manner as above. Bake white layer in prepared pan until just set. As white layer bakes, bring green batter to room temperature. Transfer white layer to a rack. Prepare pan as above, then bake green layer in same manner as before. Transfer to a rack to cool.

When all layers are cool, invert green onto a wax-paper-lined large baking sheet. Discard paper from layer and spread with half of preserves. Invert white on top of green layer, discarding paper. Spread with remaining preserves. Invert red layer on top of white layer and discard wax paper.

Cover with plastic wrap and weight with a large baking pan. Chill at least 8 hours.

Remove weight and plastic wrap. Bring layers to room temperature. Melt chocolate in a double boiler or a metal bowl set over a saucepan of barely simmering water, stirring until smooth. Remove from heat. Keep chocolate over water.

Trim edges of assembled layers with a long serrated knife. Quickly spread half of chocolate in a thin layer on top of cake. Chill, uncovered, until chocolate is firm, about 15 minutes. Cover with another sheet of wax paper and place another baking sheet on top, then invert cake onto sheet and remove paper. Quickly spread with remaining chocolate. Chill until firm, about 30 minutes.

Cut lengthwise into 4 strips. Cut strips crosswise into 3/4-inch-wide cookies.

Cooks' note: Cookies keep, layered between sheets of wax paper or parchment, in an airtight container at room temperature 2 weeks.

Thursday, December 23, 2010

Chocolate-Peppermint Fudge

Even the most die-hard Christmas cookie fanatics can use a change of pace at times.

This fudge is a rendition of my family’s recipe for Mamie’s Million Dollar Fudge. I’ve looked up several recipes online and all of them are different, so I can only speak of the specific recipe I got from my mom’s recipe stash. I love plain chocolate fudge, but in the spirit of the holidays (and the lack of any other peppermint treats in my baking menu) I wanted to add a peppermint twist to it as well. So instead of making one 13 x 9 inch pan of all chocolate, I made two 8x8 pans of fudge, one plain chocolate, and one peppermint-chocolate. Other than that, I kept the recipe the same.

There are two and three-quarters pounds of chocolate in this fudge. This recipe is not for the faint of heart. I thought that I for sure had written it down wrong, so I started looking up recipes online. The next closest recipe had more sugar and only 24 ounces of chocolate. I finally emailed my mom to make sure I transcribed the recipe correctly and, sure enough, I had.

I’m sure you’ll figure out why this produces such a large batch. Even a big batch doesn’t last long! Creamy, soft, smooth and decadent; everything you want out of a good piece of fudge. I always thought that using evaporated milk and marshmallow fluff was cheating – along the lines of using boxed cake mix and canned icing - and that I’d never make fudge that way. Man, did I ever get knocked off my high horse.

This mouth-watering fudge is fantastic, and I don’t have to worry about spending all the time making it, only to have it become grainy at the end. I may try making my other ‘real’ fudge recipes again just to see if I can ever get it as smooth and creamy as this recipe, but the bar has been set pretty high. I now have a recipe I can turn to when I just want a perfect piece of fudge with minimal effort. How can you beat that?

Now please excuse me while I eat a piece of humble pie fudge.

And another.

And another.

Curious about what I’ve made already? Check out:
White Trash
Quick Mix Spritz Cookies
Peppermint Icicle Candy
Spiced Pecans and Pralines
Fresh orange Spritz Cookies
Fruitcake
Ginger Molasses Cookies
Paper-Thin Sugar Cookies


Mamie Eisenhower Fudge
Family Recipe

4 c Granulated sugar
Dash Salt
2 Tbsp butter
1 14 oz Can Evaporated Milk
32 oz Packages semi-sweet chocolate chips
3 pkgs (4 oz each) German Sweet chocolate bars
1 pint (2 c) marshmallow fluff
2 teaspoons peppermint flavoring (or divide into two batches and do 1 tsp peppermint in one batch and one tsp vanilla in the other)

Boil together sugar, salt butter and evaporated milk for 6 minutes. In large bowl combine chocolate chips and marshmallow fluff. Pour boiling syrup over mixture. Beat with electric mixer by hand until well blended. Pour immediately into greased 9 x 13 pan and allow to stand for 2 hours before cutting. 

Wednesday, December 22, 2010

Home is Where the Heart Is {Recipe: Paper-Thin Sugar Cookies}

Every family has holiday traditions, and mine is no different. We would usually watch our first Christmas movie usually the evening of Thanksgiving, fighting off the food coma induced by too much turkey and way too much stuffing. My brother and I always got one gift to unwrap on Christmas eve, after coming home from the evening church service. We knew it was always going to be pajamas, but it was so exciting, and felt a little rebellious to be able to open a gift early.

Mostly though, when I think about the holidays at our house, I think of the music we have playing. Of all the Christmas songs that play on the radio these days, I am still drawn to the music of Burl Ives, Perry Como and Bing Crosby to make my holiday feel complete, because that is what our family listened to while trimming our tree, opening presents on Christmas morning, and while rolling, cutting and baking these sugar cookies - a holiday staple at our house.
Though my top ten favorite Christmas songs do change from year to year, the song that inevitably tops my list is “There’s No Place Like Home for the Holidays,” sung by Perry Como. As I got older and moved out of the house to go to college, this song always made me look forward to the end of finals, and being able to go home and relax with my family for my month long winter break. I knew, too that I at least still had my summers at home, so being away wasn’t too difficult, but there were moments I got very homesick my first year of school.

Then, I got older, and I moved out to Indiana during the summers to work as an intern, leaving only my winter breaks for the relaxing month-long visit with my family.

Then, I got older still. I graduated college, moved out to the Midwest, got a job, married my sweetheart, bought a house and adopted a puppy. There are no more winter breaks, no more relaxing month-long visits with my family, just a few long weekends several times a year. Back on the east coast with my family, I’ve missed weddings, funerals and babies being born. I didn’t relaly think about it too much until my first winter in the Midwest. Turning on the Christmas music, I heard Perry Como’s voice singing “There’s No Place like Home for the Holidays.” and I started feeling a little depressed. I felt like I should feel at home in my new surroundings, but without my family, my traditions and my holiday routine, I just felt lost.

It took me a while to accept that while this is all part of growing up and moving on, I also realized that I am not lost, and am, in fact, lucky now to have gone from one place that I consider ‘home’ for the holidays, to having three – my home with my husband and puppy, my parent’s house and my in-laws’ house. My hubby and I now have incorporated some of each family’s traditions and now have some of our own.

Now when I hear “No Place Like Home for the Holidays,” I still occasionally get a little nostalgic for my childhood Christmases, but I can smile knowing that no matter where I am when Christmas rolls around, I’ll be at home. And as a little bit of insurance, I listen to Perry Como sing the Christmas classics while I bake these sugar cookies from a recipe that has been passed down from my grandmother, to my dad and now to me. I can hear both of them telling me that to know when the cookies have been rolled thin enough, you should be able to see the design of the table cloth through the dough. And, when I smell the buttery, sugary aroma of these cooking wafting through the house, and taste my first cookie of the season, I know I’m home for the holidays.

Curious about what I’ve made already? Check out:
White Trash
Quick Mix Spritz Cookies
Peppermint Icicle Candy
Spiced Pecans and Praline Candy
Fresh Orange Spritz Cookies
Fruitcake
Ginger Molasses Cookies


Paper-Thin Sugar Cookies
Family Recipe

½ c Margarine
½ c Shortening
2 c Sugar
2 eggs
1 tsp vanilla extract
½ tsp lemon extract
½ c evaporated milk
2 Tbsp Water
7 c Sifted Flour
1 tsp Salt
1 tsp Baking Soda

Cream together margarine and shortening. Add sugar and continue creaming. Add eggs, one at a time, vanilla, and lemon extract. Add canned milk and water. At flour, salt and baking soda. Use large mixer, start with beaters and finish with dough hooks. Chill and work with small sections of dough at a time. Roll extremely thin. Cut shapes and transfer to cookie sheet sprayed with PAM. Bake cookies at 375 degrees for 3-4 minutes or until edges start turning golden. Cool on racks.


Note:These cookies bake in a flash, as in, two to three minutes. Once these go in the oven, don’t get distracted. They will go from golden brown to Santa-shaped charcoal briquette faster than you can say”:
“HO HO HO-ly Christmas the cookies are burning!”


Dough can be frozen unbaked or stored, tightly wrapped, in refrigerator.

Tuesday, December 21, 2010

Gingeriest Ginger Molasses Cookies

If I could have one type of cookie for the rest of my life, it might possibly be a ginger molasses cookie. There is something that draws me in about the sweetness of the molasses and brown sugar with the sharp bite of ginger and cinnamon.

When I was in college, one of my treats on a fairly regular basis was to get a coffee and molasses chew cookie from Starbucks. Those cookies were chewy, spicy and had a wonderful crusty sugary outside. That love affair lasted until I made the mistake of looking up the nutrition information for one of those cookies. Now they are only an occasional indulgence.

You didn’t think I’d give them up forever, did you?

I have since researched recipes in an attempt to imitate that molasses chew cookie so I could have my little indulgence during the holidays. I ran across this recipe, and figured it looked good. Even if it isn’t the Starbucks cookie I know and love, I’ll still get a delicious molasses cookie with a gingery kick.

This cookie did not disappoint. The candied ginger as well as the ground ginger lent a definite spiciness to the cookie. I was a little tentative taking them out of the oven, because for chewy cookies, you usually have to remove them before they look done so that they don't overcook; but I typically don't trust that my cookies will set up properly when I take them out early. I went against my instinct with this one and took them out of the oven when the middles still seemed slightly damp and, much to my surprise, they turned out perfect once they cooled. They have a distinct chew, and the chunks of candied ginger throughout the cookie give a nice textural contrast.

According to the informal poll of my family - this cookie has been one of the favorites I've made this season. Maybe it'll be one of yours, too!

Curious about what I’ve made already? Check out:
White Trash
Quick Mix Spritz Cookies
Peppermint Icicle Candy
Spiced Pecans and Praline Candy
Fresh Orange Spritz Cookies
Fruitcake


Gingeriest Ginger Molasses Cookies
From
Sweetapolita

Ingredients:
2 1/4 cups all-purpose flour
1/2 teaspoon ground ginger
1 teaspoon cinnamon
2 teaspoons baking soda
1/2 teaspoon salt
3/4 cup (1 1/2 sticks) unsalted butter, at room temperature
1 cup dark brown sugar
1/4 cup unsulphured molasses
1 large egg
3 1/2 ounces (1/2 can) Ginger Chips I used chopped up candied ginger
Granulated Sugar for coating

Method:

Preheat oven to 375 F. Sift dry ingredients together, in medium-sized bowl, whisk, and set aside. In electric mixer fitted with paddle attachment (or you can use hand mixer), cream butter and brown sugar until light and fluffy (about 2 mins). Add egg and molasses and mix for another minute or so, until well-blended. Add dry ingredients to mixer and mix until well incorporated. With the mixer on the lowest setting, mix in ginger chips.

With a cookie scoop (or 2 spoons), make equal balls of dough (1″ ball yields small cookies, but I did 2″), then roll in granulated sugar. Place on cookie sheet with parchment paper or baking mat, approximately 2″ apart. Using the palm of your hand, gently flatten each ball slightly. Refrigerate sheets for approximately 15 minutes, then bake on middle rack (one sheet at a time works best), for 8-10 minutes. Be careful not to over bake, because they are meant to be chewy. Let cookies cool on sheet before gently removing to cooling rack. Makes approximately 18 med-large cookies (a la Starbucks), or 3 dozen small cookies. 

Monday, December 20, 2010

Nuttier than a Fruitcake!

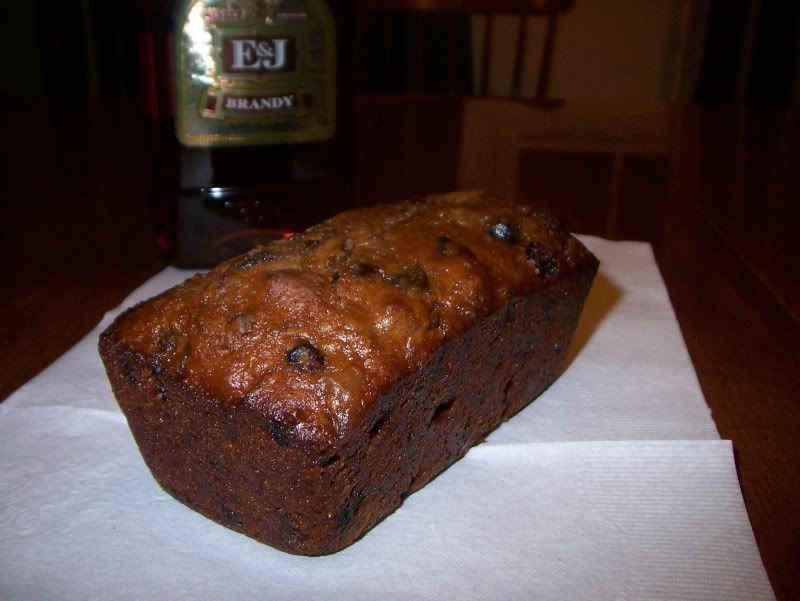
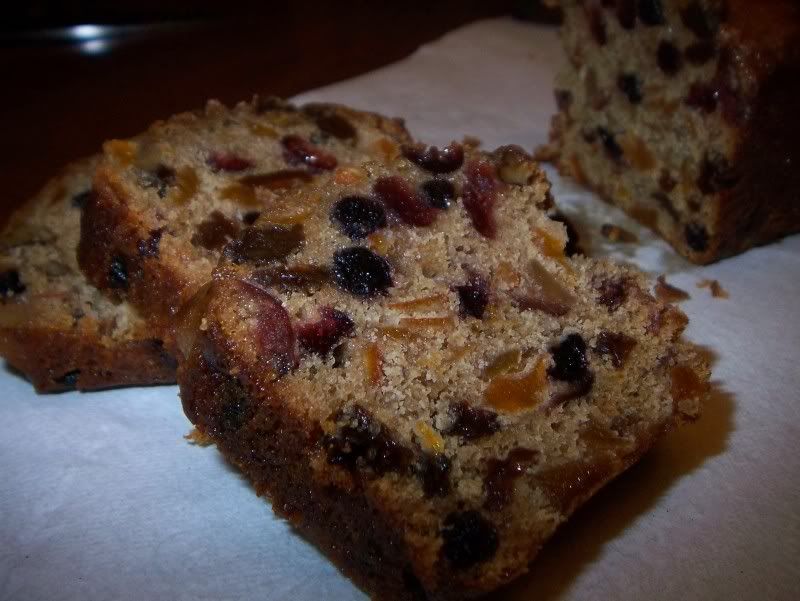
I really do understand why people think of fruitcakes as doorstops. This one is no exception. It is not a light cake - literally and calorically. This cake must have weighed 5 pounds, and it cost a small fortune to send one of them halfway across the country. But you know what? This one is worth picking up from in front of the door and actually enjoying. This is by far the BEST fruitcake I have ever come across, with dried fruit, warm holiday spices and the fact it requires being bathed in bourbon anywhere from several days to several weeks before serving. It packs a punch.

My dad loves fruitcake and rations his so that he can enjoy it throughout the year. My mom, who rarely eats it is now eating small pieces of my dad’s rations, and he's getting sad that he's ahead of schedule with his fruitcake consumption. This is going to be a yearly favorite in my family. And I’ll make sure to make my family extra this year so that they don’t have to worry about their rations.

We're lucky enough to have a Trader Joe's nearby, and between there and our local grocery store, we can find all the dried fruits for this recipe at a relatively low cost, including the candied ginger, which I've heard can be pretty pricey in other stores.

There are a lot of ingredients to this cake as well, which can make it a little intimidating. But this one is worth it. The ingredients for the most part are interchangeable. Don’t like currants? Try dried pineapple, or any other dried fruit your heart desires. If you can’t find any of the dried fruit listed in the recipe, you can easily adjust the amounts of the ones you do have to compensate for the missing ingredient. Change out the alcohol for vanilla rum, or dark rum. Use walnuts or hazelnuts instead of pecans, or omit the nuts completely, if you prefer.

And the best part is you can make it weeks before the holidays! I baked mine on November 21, over a month before Christmas. My one big loaf and seven mini loaves have just been hanging out in my kitchen, getting basted every few days with brandy since being baked. If you do not have a 10-inch loaf pan, you can make two standard-sizes loaves filled 2/3 of the way full, one 10-inch bundt, or six mini loaves – perfect for gift-giving!

Even the biggest fruitcake haters should give this recipe a try. The cake might change your mind, and if nothing else, the alcohol in this cake will definitely fill your holidays with a little more cheer.

Curious about what I’ve made already? Check out:
White Trash
Quick Mix Spritz Cookies
Peppermint Icicle Candy
Spiced Pecans and Praline Candy
Fresh Orange Spritz Cookies


Free Range Fruitake
From Alton Brown via
FoodNetwork.com

Ingredients
1 cup golden raisins
1 cup currants
1/2 cup sun dried cranberries
1/2 cup sun dried blueberries
1/2 cup sun dried cherries
1/2 cup dried apricots, chopped
Zest of one lemon, chopped coarsely
Zest of one orange, chopped coarsely
1/4 cup candied ginger, chopped
1 cup gold rum (I used brandy instead)
1 cup sugar
5 ounces unsalted butter (1 1/4 sticks)
1 cup unfiltered apple juice
4 whole cloves, ground (between 1/4 and 1/2 tsp)
6 allspice berries, ground (about ¾ tsp allspice)
1 teaspoon ground cinnamon
1 teaspoon ground ginger
1 3/4 cups all purpose flour
1 1/2 teaspoons salt
1 teaspoon baking soda
1 teaspoon baking powder
2 eggs
1/4 to 1/2 cup toasted pecans, broken
Brandy for basting and/or spritzing

Directions
Combine dried fruits, candied ginger and both zests. Add rum (I used brandy) and macerate overnight, or microwave for 5 minutes to re-hydrate fruit.

Place fruit and liquid in a non-reactive pot with the sugar, butter, apple juice and spices. Bring mixture to a boil stirring often, then reduce heat and simmer for 5 to 10 minutes. Remove from heat and cool for at least 15 minutes. (Batter can be completed up to this point, then covered and refrigerated for up to 2 days. Bring to room temperature before completing cake.)

Heat oven to 325 degrees.

Combine dry ingredients and sift into fruit mixture. Quickly bring batter together with a large wooden spoon, then stir in eggs one at a time until completely integrated, then fold in nuts. Spoon into a 10-inch non-stick loaf pan and bake for 1 hour (40 minutes for mini loaves). I also erred on the side of caution and used Pam for baking to grease my pans. The recipe doesn’t mention greasing the pans, but I figured it’s better safe than sorry.. Check for doneness by inserting toothpick into the middle of the cake. If it comes out clean, it's done. If not, bake another 10 minutes, and check again. My large loaf took about an hour and twenty minutes to bake all the way, and I used a wooden skewer to test for doneness, since a toothpick doesn’t reach all the way to the middle of the cake, which is the part that would be undercooked and gummy.

Remove cake from oven and place on cooling rack or trivet. Baste or spritz top with brandy and allow to cool completely before turning out from pan.

When cake is completely cooled, seal in a tight sealing, food safe container. Every 2 to 3 days, feel the cake and if dry, spritz with brandy. The cake's flavor will enhance considerably over the next two weeks. If you decide to give the cake as a gift, be sure to tell the recipient that they are very lucky indeed.

Sunday, December 19, 2010

Fresh Orange Spritz Cookies

I didn’t get to do my usual Christmas baking last year because we were on vacation in Thailand. I managed to eat more than my fair share of goodies there, even if they aren’t what is considered traditional American holiday treats. But, this did mean that my newly-acquired spritz cookie press has been sitting idle since I got it last Christmas. I already made one batch of Spritz Cookies, I wanted to get double-use out of my cookie press this year. Wilton has a lot of great recipes to use with their products, and this cookie press is no expectation. There are not only several variations of the spritz cookie available, but they also developed several savory cracker-like recipes to be used with the press as well.

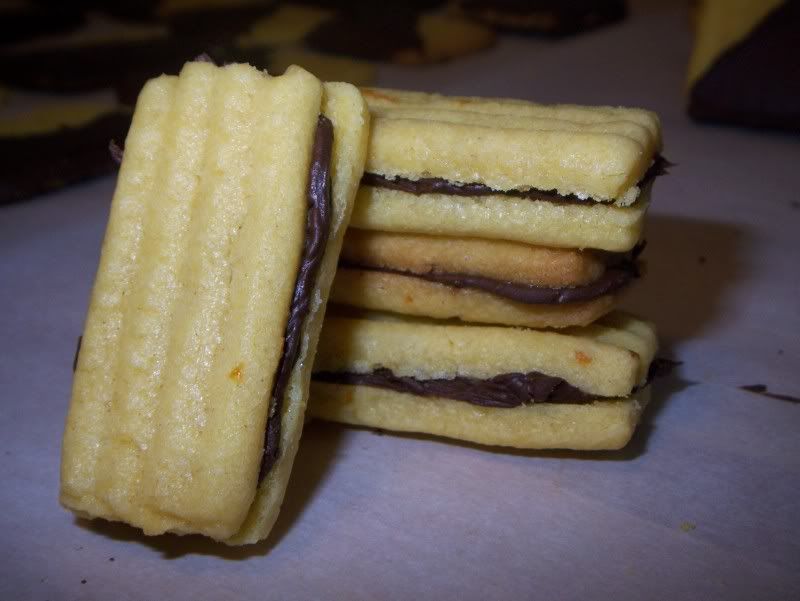
This orange spritz cookie recipe caught my eye, and I thought this would be great turned into a sandwich cookie with a chocolate filling. I have only ever made the almond/vanilla spritz cookie recipe posted above, so I felt a little daring using a whole new recipe in my cookie press for the first time ever. New recipes scare me a little bit, too, because I am always fearful that I will spend all the time prepping a recipe that turns out to be a failure in the end.

Putting the dough together, my worries calmed a little. It felt as a spritz cookie dough should feel and the orange zest and juice radiated a fresh, citrusy aroma in the kitchen. While they were good, the chocolate sent it over the top. The sweetness of the chocolate and the slight citrusy tang of the cookie is a winning combination. My cookie press will definitely be seeing this recipe again. It's perfect for anytime, not just the holidays, which means my cookie press will not be simply gathering dust the other eleven months of the year this time.

Curious about what I’ve made already? Check out:
White Trash
Quick Mix Spritz Cookies
Peppermint Icicle Candy
Spiced Pecans and Pralines


Fresh Orange Spritz Cookies
Adapted slightly from Wilton.com

Ingredients:
1 cup butter , softened
1 cup granulated sugar
1 egg yolk
2 tablespoons orange juice
2 1/4 cups all-purpose flour
1 tablespoon orange rind , finely chopped
1/4 cup pecans , finely chopped (optional – I left out)
Dash of orange food coloring, if desired

Makes: About 5 dozen cookies.

Instructions

Preheat oven to 350.

In mixer bowl, cream butter and sugar. Beat in egg and orange juice.

Mix in flour, orange rind and optional pecans.

Mix just until combined, add food coloring, if using. Dough should be soft but not sticky.

Shape dough into small logs and place in Cookie Master Plus.

Using desired disk, press shapes onto ungreased cookie sheet.

Bake 10-12 minutes or until edges are lightly browned.

Cool 2 minutes on cookie sheet on rack.

Remove from cookie sheet and cool completely on rack.

The filling was simple tempered chocolate. Simple as in only one ingredient, but tempering chocolate is a delicate process. This is my first try at doing this, but it was pretty straight forward. I got the instructions here. You could probably easily just sandwich the cookies with plain melted chocolate, but having dipped cookies before and ending up with blooming chocolate, I wanted to give tempering a try. It's a simple process, but definitely time consuming. If you want to avoid blooming chocolate, you can try chocolate candy melts sold at most craft stores. Either way, it's a winner.

Friday, December 17, 2010

Two for the Price of one: Spiced Pecans and Pralines

Sam’s club is a fantastic place to pick up specialty baking supplies in bulk. I get Nestle and Ghiradelli chocolate chips, fruits and, one of my favorite bulk-store buy: pecans. Because I needed pecans for my cheesecake as well as my fruitcakes, it was easier and cheaper to buy the two-pound bag that Sam’s club carried than the ones at my local grocery store, even if both those recipes didn’t need a total of two pounds of pecans between them.

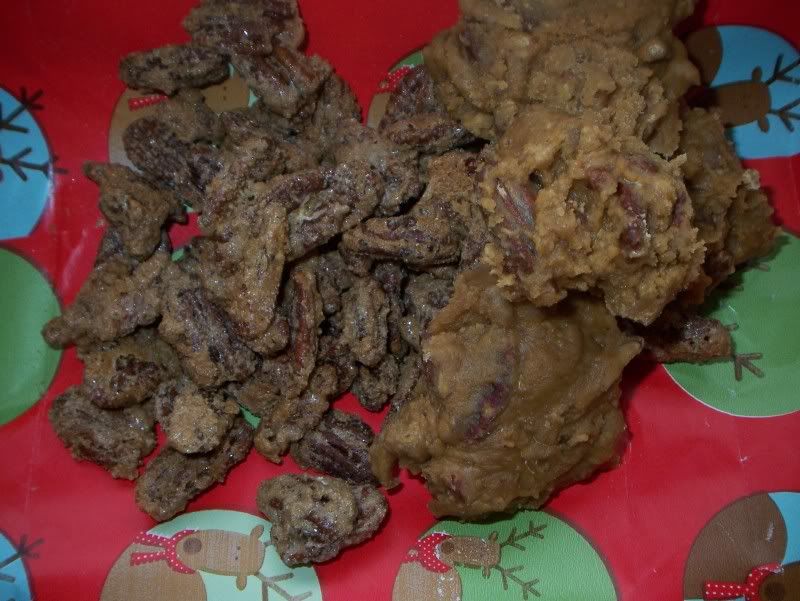
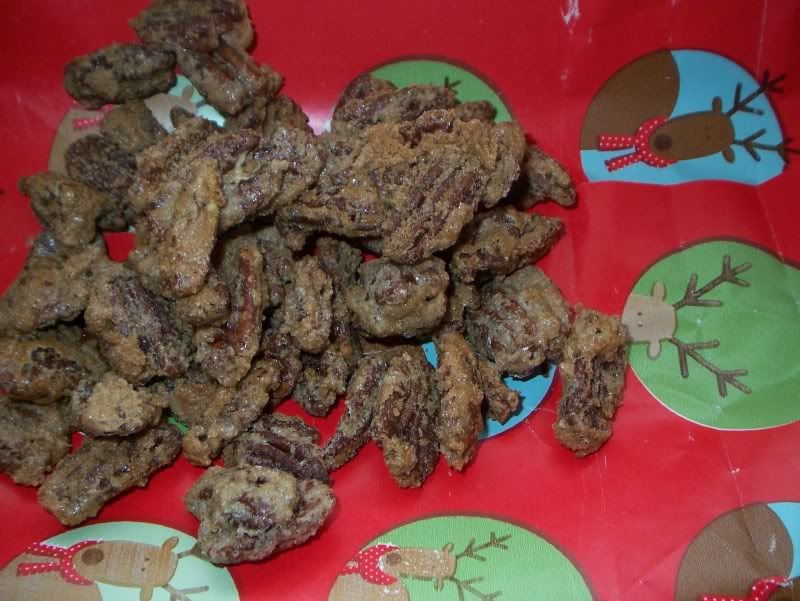
Usually in my family, leftover pecans during the holidays are turned into spiced nuts, something we have had around for as long as I can remember. These little bites were dangerous, let me tell you. It starts with one. Then you decide you should eat a second. After that, you reach in for a handful. Next thing you know, you’ve got two handfuls, shoving them in your mouth as fast as you can chew, if you chew them at all.

The pecans get nice and toasted while they bake, and the spiced sugar coating gets slightly crunchy on the outside. The aromas wafting around in the kitchen while these bake are heavenly.

My mom used to make these by the boatload when my brother and I were in school. We would give them to our bus drivers, crossing guards, teachers and neighbors. The pecans are a nice twist on gifting a batch of more traditional Christmas cookies, and were so portable (all you need is a bit of cellophane and a twist tie) that my mom could send us off with half a dozen bags of them and not worry whether we would break them to smithereens before reaching their intended recipients.

I had wanted to make them for when my family came to visit for the holidays, but my mom beat me to it! And because they travel well, I know when she brings them, they will be just as good as if they had originated from my oven. Nonetheless, I wanted to share this recipe with you because it’s been a family favorite of ours, maybe it will become on for you, too!

But now, I had a decision to make. What do I do with my spare pecans?

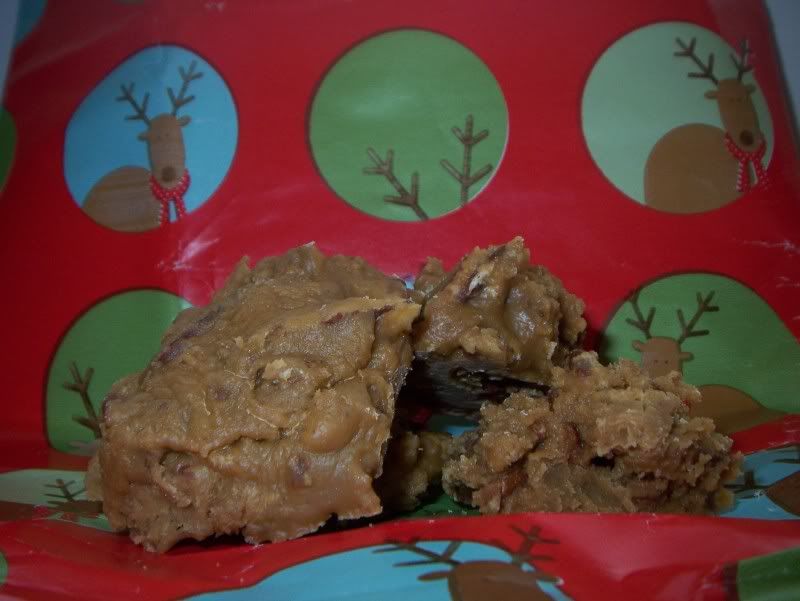
Instead of making the spiced nuts as originally planned, I decided to take a different route and attempt making pralines for the first time. A while ago, I bought a small pot just for my candy-making, so I can clip on my candy thermometer with no fear of scratching the pot. I’ve only used my candy thermometer and pot a couple of times since I bought them, but figured I will justify my purchase by using them again, now.

Pralines vary by geography, but they all refer to nuts being cooked in a sugar mixture of some sort. While some are more like a maple sugar hard candy with nuts, some are a soft, semi-chewy and caramel-y candy with a higher nut-to-candy ratio. I’m aiming for the latter. And that’s why the candy thermometer comes in so handy.

The longer the sugar mixture boils, the more water evaporates from your pot. As the ratio of water to sugar decreases due to evaporation, the boiling point of the sugar mixtures as a whole increases. So, essentially what you’re measuring with the candy thermometer is the percentage of water that has boiled out of your sugar mixture. There isn’t a huge temperature difference between the soft ball stage (235-240 degrees F), firm ball (245-250 degrees F) and hard ball stage (250-265 degrees F), but the end results are very different both in texture and hardness. I also know that it is difficult to tell how hot your mixture is just by counting how many minutes it’s been boiling. I’ve been on the losing end of that equation before – both undercooking and overcooking my sugar mixtures. A cheap candy thermometer will be your best friend.

This recipe sets up quickly, so I would refrain from making a double batch. If you want more pralines, start from scratch and make another batch. Or else you might be eating a gigantic praline that solidified itself to the bottom of your pot.

Curious about what I’ve made already? Check out:
White Trash
Quick Mix Spritz Cookies
Peppermint Icicle Candy


Spiced Pecans
Family Recipe

1 egg white, slightly beaten with fork
1/2 c brown sugar
1/2 c white sugar
1 tsp cinnamon
1/4 tsp nutmeg
1 lb of pecan halves

Preheat oven to 300 degrees.
Put nuts in egg white, stir gently until all nuts are coated.
Put dry ingredients in gallon zip-top bag.
Dump in nuts and shake until coated with dry mixture.
Spread in single layer on cookie sheet.
Bake for 30 minutes, turning once.


Pralines
From Paula Deen via
FoodNetwork.com
My notes are in italics

1 1/2 cups sugar
1 1/2 cups packed light brown sugar
1/8 teaspoon salt
3 tablespoons dark corn syrup (I substituted a mixture of 3 parts light corn syrup to 1 part unsulphered molasses – I made 4 tbsp of mixture – 3 tbsp light corn syrup, 1 tbsp molasses - but only used 3 for the recipe)
1 cup evaporated milk
2 tablespoons butter
1 teaspoon pure vanilla extract
1 1/2 cups pecan halves, toasted, if desired at 275 degrees for 25 minutes

Directions
Butter the sides of a heavy 2-quart saucepan. Put the sugars, salt, corn syrup, milk, and butter in saucepan. Over medium heat, stir mixture constantly with a wooden spoon until sugars have dissolved and mixture comes to a boil. Continue to cook to a soft ball stage, approximately 236 degrees F on a candy thermometer. (If you do a cold water test, drizzle a drop of candy into a glass of cold water, the ball of candy will flatten between your fingers when you take it out of the water.) Remove from heat and allow it to cool for 10 minutes.

Add the vanilla and nuts, and beat with a spoon by hand for approximately 2 minutes or until candy is slightly thick and begins to lose its gloss. Quickly drop heaping tablespoons onto waxed paper. If the candy becomes stiff, add a few drops of hot water.


Thursday, December 16, 2010

Peppermint Icicle Candy

Growing up within a short drive from the Pennsylvania Dutch communities, my family would often take trips to their markets for baked goods, sausage, breads and other specialty items. I have yet to find anything available there that isn’t amazing (maybe because of all the butter and lard in the recipes!) but their baked treats and candies take the figurative cake. The other fun thing about these markets is that they still make certain foods that you can’t find anywhere else, especially treats that my parents and grandparents grew up with.

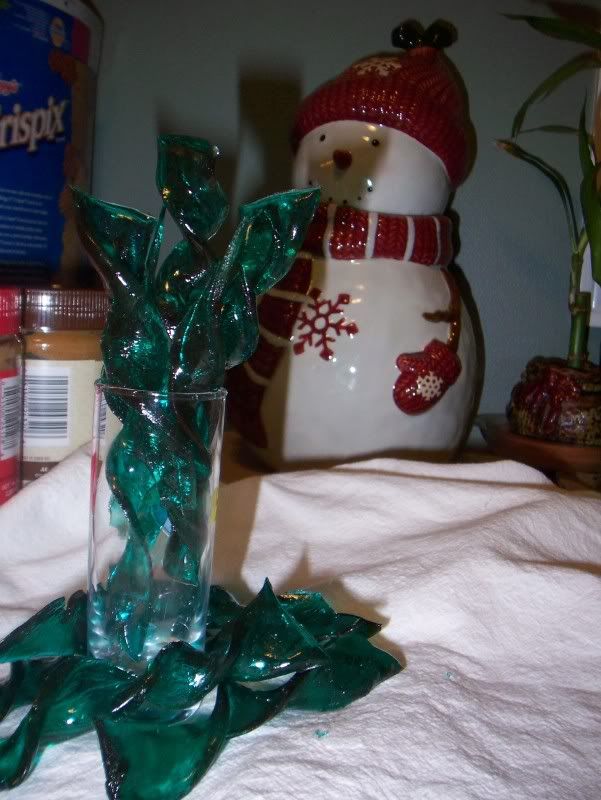
Every time we go to the market, we’ll pick up a small bag of a confection called Clear Toy candy. It’s essentially a hard sugar candy that they either have loose in a bag or on sticks as lollipops. My grandfather fondly remembers growing up with the candy, so we’ll always bring him some back. This recipe caught my eye a little bit ago, because it seemed to embrace the Clear Toy candy spirit, even if it’s not exactly the real thing. Aside from being slightly dangerous with the boiling sugar mixture, it’s an easy recipe, a batch of candy took me about 45 minutes total.

These set up beautifully, and hold their shape well. I will also mention that they shatter like broken glass into a million-and-one pieces if dropped on the floor.

If candy recipes requiring specific temperatures and candy thermometers intimidate you, I’d suggest giving this recipe a try. And if you don’t want to handle the hot sugar to twist into icicles, you could always pour the hot mixture onto the cookie sheet, let the puddle set, break it up into bite-sized pieces and package them in little gift bags as “Ice Shards” instead of “Icicles.” Rustic is beautiful, too.

Next time I’ll use a little less food coloring, but other than that, the recipe is wonderful as is.

Curious about what I’ve made already? Check out:
White Trash
Quick Mix Spritz Cookies

Icicle Candy
Adapted from
LorAnn Oils, originally seen on SprinkleBakes .
12-15 pieces

1 cup granulated sugar
1/2 cup light corn syrup
1 tsp flavoring oil such as peppermint or blueberry
Blue food coloring

Preheat oven to 185 degrees. Spray a cookie sheet and large knife with cooking spray (I found that a pizza cutter worked very well in place of the knife).

In a 4 cup glass measure, mix sugar and corn syrup together until a thick, uniform paste forms. Cover with plastic wrap. Microwave on high for 3 minutes 15 seconds. Quickly stir mixture and cover with a new piece of plastic wrap. Microwave for another 3 minutes 15 seconds. Remove from microwave and stir with a clean spoon. After the mixture stops boiling, add the food color and flavoring. The cooked candy mixture will have a golden appearance, so when you add the blue food coloring you will get a blue/green (turquoise) color result.

Pour melted candy onto the prepared pan. Tilt the sheet to spread the candy to a 6x8 inch puddle. As the sugar starts to set (one or two minutes after pouring) cut candy into 1/2 x 4 inch strips. Remove one strip and twist gently. Allow to cool on wire rack. Repeat with remaining pieces. To keep the candy malleable, place in the oven for 1-2 minutes. You may prefer to keep the cookie sheet heated and work out of the oven.

*This recipe is meant to be prepared in a standard household microwave (600-700 watts). Mini microwaves and commercial microwaves are not recommended.

*Please use caution when making this recipe. Candy mixture is extremely hot when in liquid state.

*Be careful when adding you extracts and food coloring, the hot sugar mixture will cause it to bubble up, so stand back when adding, to make sure you aren’t hit with any splatter.

Wednesday, December 15, 2010

Quick Mix Spritz Cookies

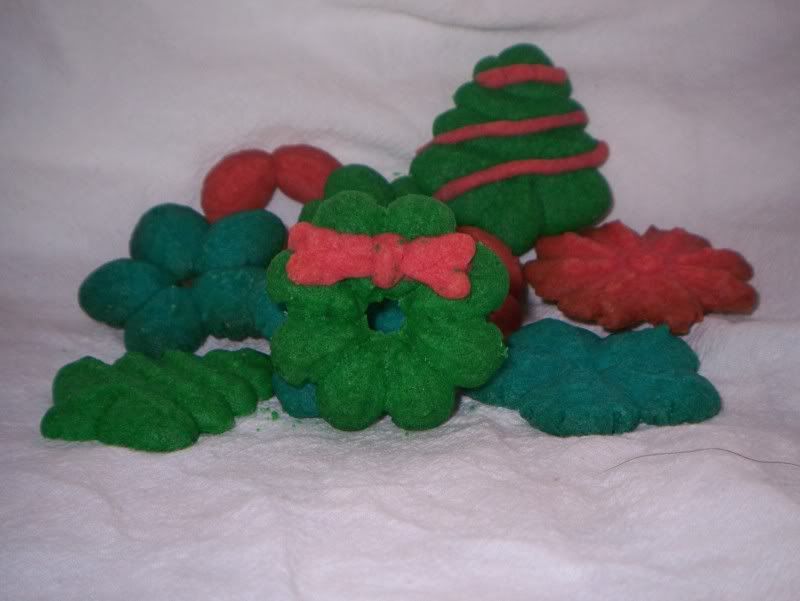
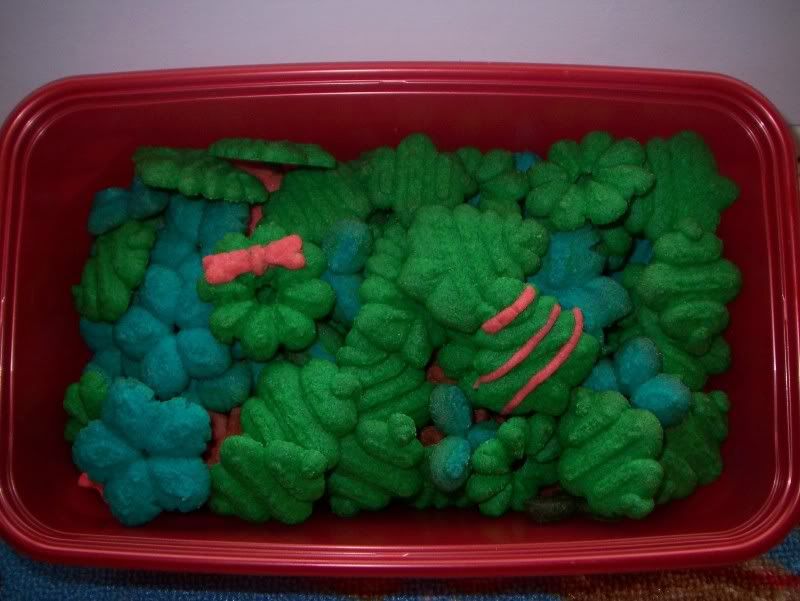
I am really not sure who brought the spritz cookie tradition to our family, but I can remember making and eating these cookies for as long as I have celebrated Christmas. My parents would mix up a batch of the dough, and divide it in half, and give my brother and I each a portion of dough to color however we pleased. We usually ended up with neon blue and pink wreaths, Christmas trees and what I think were supposed to be reindeer, but they always ended up looking like amoebas with extremities.

The spritz gun we always used in my family was a metal canister with a twist-on top and bottom. The bottom held the shape disk, and the bottom was a twist-top handle that extruded the dough. My new spritz gun looks more like a caulking gun than something used to make cookies, but I love that is has a pump handle instead of the twist-top. And the clear plastic canister makes it easy to see how much dough is left in the press, so you don’t run out of dough mid-cookie. My new spritz press has a lot of disks, it doesn’t include the reindeer disk - I wish it did, for nostalgia’s sake. It does include disks that our old press doesn’t have, including disks to make mini-cookies, which I think is fantastic.

Though you do need to buy the press to make the cookies, the process is super simple. The dough comes together quickly and easily, and short of putting too much dough or too little dough on the cookie sheet, these are pretty much fool-proof. I love experimenting with all the shapes, and, in the true form of my family, we have blue spritz cookies this year,as well.

Curious about what I’ve made already? Check out:
White Trash


Quick Mix Spritz Cookies
From Family Recipe

2 1/4 c sifted flour
3/4 c granulated sugar
1/2 tsp salt
1/4 tsp baking powder
1 c shortening
1 egg
1 tsp vanilla (I use 1/2 tsp vanilla, 1/2 tsp almond)

Preheat oven to 375.
Sift dry ingredients.
Cut shortening into dry mix.
Measure egg in meauring cup, add water if less than 1/4 c of liquid.
Add egg and extracts, mix well.
Roll into logs and put in cookie press.
Press out shapes onto ungreased cookie sheet.
Bake for 10-12 minutes, or until slightly brown.

Tuesday, December 14, 2010

White Trash

It seems like I’m a little late to the Christmas baking bandwagon. I feel like I’ve been seeing cookie and candy recipes since mid-November. Better late than never, right?

Every time I make Christmas treats, I try to balance our family favorites with new recipes for holiday goodies that I’ve had my eye on. I am also very calculating when it comes to planning my menu, I want a wide variety of different flavors, textures and appearances. I have a very ambitious list for this season, but I am ready to crank out some holiday treats!
My baking agenda this holiday season, in no particular order:

My Grandmother’s Paper Thin Sugar cookies - Family Favorite
Orange Spritz Cookie Sandwiches with Chocolate - New recipe this year
Classic Almond/Vanilla Spritz Cookies - Family Favorite
Peppermint Icicles - New Recipe this year
Chocolate and peppermint fudge - New recipe this year
Two for one: Spiced Pecans and Pecan Pralines - Family favorite and New Recipe
White Trash (or Puppy Chow, or Monkey Munch – whatever you call it) - Family Favorite
Chewy Molasses Ginger Spice Cookies - New recipe this year
Fruitcake - Family Favorite
Seven-Layer Cookies - New recipe this year

It’s an ambitious list for me, but I’m excited to fill my kitchen (and cookie jar!) with some Holiday cheer!

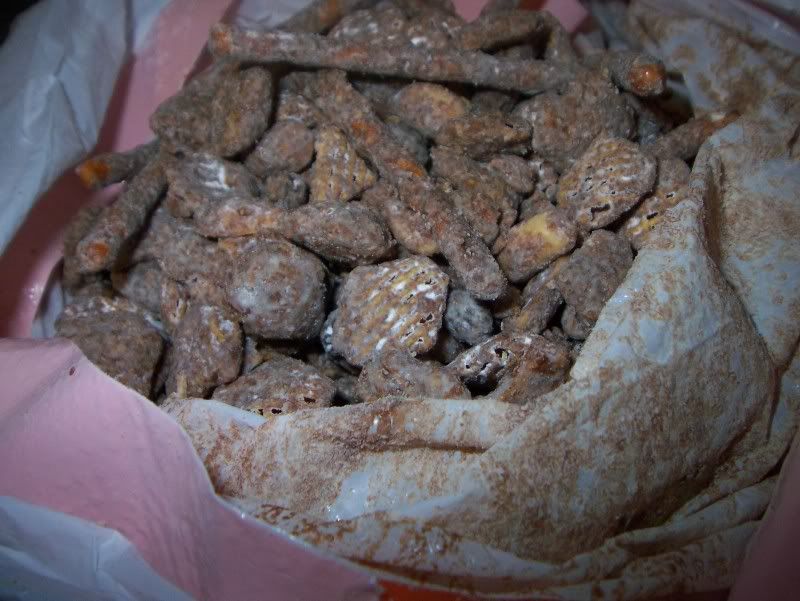
This year, I wanted to start off with the cookie that really screams “Christmas” to me: White Trash!

I hope no one finds the recipe title offensive - you’ll have to pardon my family’s vernacular. It wasn’t until recently that I realized that not everyone (read as: practically no one) knows this recipe by the name of “White Trash.” I was talking with some friends about our holiday baking plans, and I had mentioned making this, and initially I could not figure out why it had elicited such a strange response when I mentioned it. I always thought ‘it’s white, and it comes out of a trash bag,” so the name always made sense. Meanwhile, it seems like everyone else has a very different definition of that term. I have tried to catch myself when I say it, and exchange it for a better phrase – I’ve heard variations called Monkey Munch, Puppy Chow, Reindeer Food and Nuts N’ Bolts – but I just can’t break the habit.

I finally looked it up, and lo-and-behold, other people do make stuff called “White Trash” – though it apparently means different things to different people. I’ve seen recipes with M&M’s, Chex cereal, pretzels and white chocolate to versions much more similar to what my family makes with milk chocolate, peanut butter and pretzels.
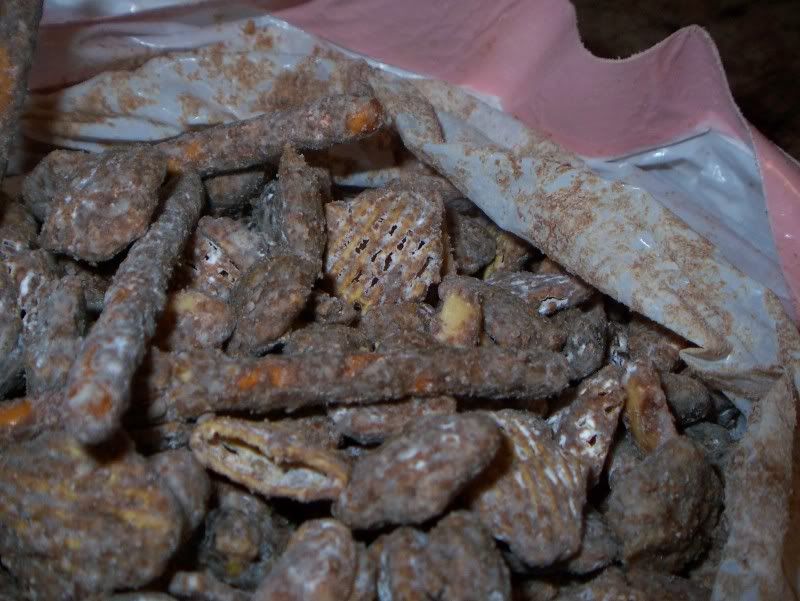
I love this recipe for the holidays because it is so fun. You actually do use a trash bag to mix everything together with the powdered sugar. So I would urge against odor-shield or any of those bags that have special additives that might get on your treats. This is definitely a fun recipe to do with kids, they can pour the ingredients into the bag, and once the top of the bag is tied off, they can shake it around gently until everything is coated.

After coating everything, I move it to gallon Ziploc bags to let the chocolate set up in the freezer. I think this transfer is my favorite part, because that’s when I discover the couple pieces that didn’t separate while being shaken, so you end up with a huge chocolate chunk of cereal, peanuts and raisins. As any kind-hearted person would do, I did everyone a favor and ate it right then and there. That way no one could fight over it later. While you can pull it out of the freezer after an hour or so, I leave most of it in there until we need it, so it stays super fresh. You could also keep it in the refrigerator as well.


White Trash(Or if you don’t like that name, you can call it ‘Blizzard Bites.’)
Recipe from my Aunt, 7/2/1990

1 box Crispix Cereal
1 – 12 oz can peanuts (I got the lightly salted cocktail peanuts)
2 c pretzel sticks
1 - 1 lb box 10x sugar, sifted
½ box raisins
1 stick margarine
1 c peanut butter
1 – 12 oz package semisweet chocolate chips

Mix dry ingredients (minus sugar) in large container. Melt margarine, chips and peanut butter and pour over mixture. Pour confectioners’ sugar in garbage bag, dump in dry mixture and shake. Put in freezer for an hour or so.
Remove and store in fridge in Tupperware container.

Sunday, December 12, 2010

Cheddar Bay Biscuits

A good biscuit is a thing of beauty. It can be a vehicle for sausage gravy or a delivery system for your favorite jam. You can stick a sausage patty inside for a sandwich or plop it on top of chicken stew to make quick dumplings. But the best biscuit is the one that can stand on its own, with only a smear of butter.

I’m guilty of serving my fair share of hockey puck biscuits, especially the first few times after I vehemently swore off of Bisquick for my recipes. I do not know why I feel better about making biscuits without Bisquick, but I think it is mostly attributed to the fact that I use it so infrequently that a box hits its expiration date before I can use half of it. I hate wasting things, so I decided to start making things like pancakes and biscuits from scratch, without the help of Bisquick.

I’ve made cutout biscuits that could probably be used in the NFL, and I’ve made drop biscuits that were so strangely wet that the bottoms burnt before the inside lost its gumminess. I put the biscuit recipe search off to the side after having to eat several sub-par biscuits.

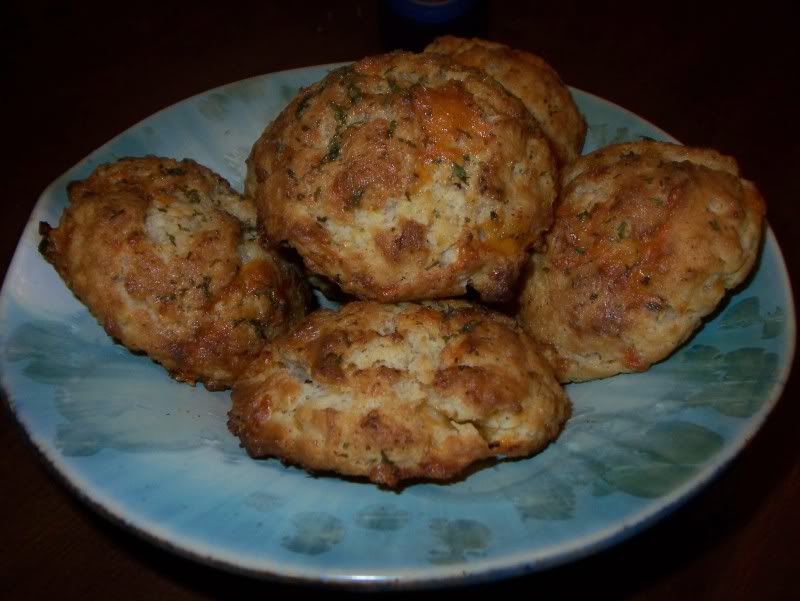
One evening, my husband came home after a really long day, and I wanted to make something special for him. I know he loves Red Lobster’s Cheddar Bay biscuits, so I ventured back into the biscuit world again to find a recipe that would be similar to that one.

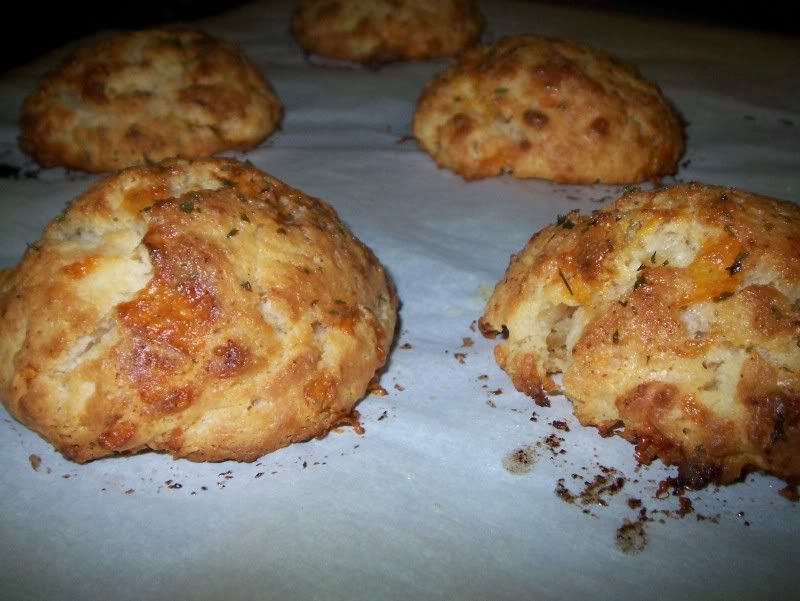
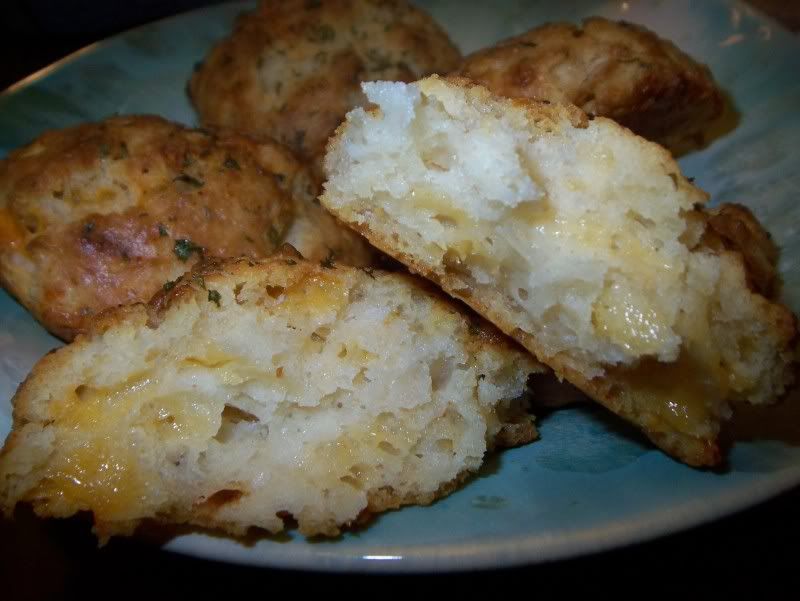
I landed on this recipe, and am thrilled that I did. While outside was slightly crisp with a crunch - not quite identical to the Red Lobster counterparts - these were definitely winners nonetheless. The outside, though different than the authentic cheddar bay biscuits was delicious, the buttery topping added a nice punch of flavor. The inside of these biscuits are the things dreams are made of - tender, soft, cheesy and light as air inside. Perfection.


While I may keep looking for another Cheddar Bay biscuit recipe, I will definitely be keeping this cheddar cheese biscuit in my repertoire. I may also try leaving out all the cheese and spices and see what this biscuit would be like topped with some sausage gravy. It would be a vast improvement from my last few attempts.


The Ultimate Cheddar Bay Biscuits
From
Chickens in the Road

Biscuits
2 1/2 cups all-purpose flour
1 tablespoon baking powder
2 teaspoons sugar
1/2 teaspoon cream of tartar
1/4 teaspoon salt
1/4 teaspoon ground cayenne pepper
1/2 teaspoon garlic powder
1/2 cup butter, softened
1 1/4 cups grated cheddar cheese
1/2 cup sour cream
1 1/4 cups milk
Note: If using a baking mix, replace first 5 ingredients with 2 1/2 cups baking mix.
Place first 5 ingredients (or 2 1/2 cups baking mix) in a large bowl. Add cayenne pepper and garlic powder.

Work in the butter with a pastry cutter. Stir in cheese then add sour cream and milk. Scoop biscuit dough out by big spoonfuls and place in a greased 9 x 13 casserole pan. (Or other type of pan with an edge to it–if you use a flat baking sheet, butter sauce will spill down into your oven. Ask me how I know that……)

Topping
6 tablespoons butter, melted
1 teaspoon garlic powder
1 teaspoon parsley
dash of salt
Melt butter. Stir in garlic powder, parsley, and a dash of salt. Spoon half of topping over unbaked biscuits.
Bake at 450 degrees for 25 minutes.* After removing biscuits from the oven, spoon the rest of the topping over them.

*Your baking time may vary! I make 20 biscuits from this recipe. If you make your biscuits smaller or larger, it will change your baking time.

Thursday, December 9, 2010

Mojito Cupcakes

I loved mixed drinks. I just wish they loved me back. Nowadays I typically stick to beer simply because they don’t slap me in the face like mixed drinks tend to do.

Some of my favorite drinks are Mudslides, Long Island Iced teas, and Mojitos. Mudslides are my drink of choice when I’m sitting on a beach, long islands will cure what ails ya, and Mojitos are so light and refreshing, they mentally transport me to somewhere much more tropical than Chicago.

I figured that a mojito cupcake would be the perfect non-chocolate cupcake option (paired with none other than the Car Bomb Cupcakes) for my dessert spread. I love when I can bake with a little creativity. And it’s not that bar-themed cupcakes have never been done before, but I always love when I get to chance to create something a little out of the ordinary for my friends. When I mentioned the idea of making a yellow cupcake with rum, lime and mint to my husband, he faltered a little bit before tentatively saying ‘it should be fine... I think.’ This got me thinking about the fact that I had not used mint a lot before in my baking and I was wondering if the cakes would end up with a strange flavor or aftertaste that I wasn’t anticipating. The only way to find out was to try it and hope for the best.

The cupcake consists of a cake using mint infused milk, lime and rum, which is then coated lightly with a rum, mint and lime glaze and finally topped with a rum and lime buttercream. The cupcake recipe yields a light, fluffy and moist cupcake that has a nice punch of citrus from the lime juice and zest. The addition of the mint infused milk gives it an ever-so-subtle flavor, but resulted in a wonderful freshness and lightness to the cake. The glaze was probably an unnecessary step, but certainly dialed up the rum notes a little bit more.

The cake itself was delicious, but the icing sent it over the top. A lot of the recipes I’ve seen use a cream cheese-based frosting, and I was just too hesitant about the tangy flavor overpowering the subtle flavor components of the cake, so I settled on a lime and rum buttercream frosting. My husband and I both agreed though that the icing was what tied the whole cake together. And because this recipe starts with a killer cupcake, by omitting the rum and mint you make a wonderfully summery lime cupcake that would be perfectly suited for an afternoon tea or baby/bridal shower. You could also jazz the cake up with a coconut buttercream (yum!) or a lime curd filling. Or switch out the rum for tequila, omit the mint and glaze, and you’re on your way to a margarita.


Delicious.


Mojito Cupcakes

Mojito Icing:
Group Recipes

1 1/2 cups powdered (icing) sugar (or more, depending on rum amount)
3 T butter, softened
zest and juice of half a lime
half shot of spiced or dark rum (or more or less to taste)
12 sprigs of mint garnish (optional)

Mojito Icing:
Mix the butter and sugar together in a bowl until smooth.
Add the rum and lime, mix further until stiff peaks form (add more powdered sugar if necessary).
Taste to see if it needs more rum, and add as appropriate.
I use a flat knife to spread the icing onto the tops of the mojito cupcakes because a spatula is just too big.
Then add a sprig of mint on each to garnish.

Rum Syrup Glaze
Cream Puffs in Venice
For the rum syrup:
1 cup sugar
1/4 cup water
1/4 cup butter
1/4 cup dark rum
2 or 3 pieces of lime zest
a few sprigs of fresh mint
In a small pot, combine the sugar, water and butter over medium-high heat.
Bring the mixture to a boil, stirring often.
Once the butter has completely melted and the sugar has dissolved, remove from the heat.
Carefully add the rum. The mixture will bubble and spurt so take care not to burn yourself.
Once you’ve mixed in all the rum, add the lime zest and mint and let the syrup infuse for 5 minutes before spooning over the warm cupcakes.

Mojito Cupcakes
Alpine Berry

makes 12 regular cupcakes

1 1/2 cups all-purpose flour
1 1/4 tsp baking powder
1/4 tsp baking soda
1/4 tsp salt
1/2 cup mint leaves, loosely packed
3/4 cup whole milk, hot
1/4 pound (1 stick) unsalted butter, at room temp.
1 cup granulated sugar
2 eggs
grated zest of 2 limes
1/2 tsp vanilla extract
1 tsp rum (optional)

Preheat to 350F.

Add mint leaves to hot milk. Let steep for 10-15 minutes. Pour milk through a fine-mesh sieve into a small bowl. Press liquid from mint leaves. Discard leaves and allow milk to cool slightly.

Sift flour, baking powder, baking soda and salt. Set aside.

In the bowl of a stand mixer, beat butter on medium speed until creamy, about 30 seconds. Add sugar and continue beating until light and fluffy, 3-5 minutes. Scrape the sides of the bowl occasionally.

Add eggs, one at a time, beating after each addition. Mix in lime zest, vanilla and rum (if using).

On very low speed, add flour mixture in 3 additions, alternating with milk and ending with flour, mixing until just incorporated.

Fill 18 standard muffin cups half full. Bake until cupcakes spring back when touched, 18-22 minutes. Allow to cool in pan for 5 minutes. Remove cupcakes from pan and cool completely.
Related Posts Plugin for WordPress, Blogger...