
 Our dinner planning always starts the same way:
“I don’t know. What are you in the mood for?”
“I don’t care. What do you want? I asked you first.”
This back-and-forth banter continues for a bit, until we realize that we’re getting no closer to figuring out what to eat. We then realized that we actually default to a couple of some dinner-decision-making-tools that work for us.
Tool 1: Choose a protein. Choose a side. Decide from there how you want to prepare them. I’ve found it is so much easier for me to narrow down choices when I have specifics to focus on. Example: Protein = Beef and Side = Potatoes. This would give us a few options right off the bat – filet mignon and gilled potatoes, thinly sliced flank steak with hasselbeck potatoes, philly cheesesteaks and smashed potatoes or even jazzed up hamburgers with baked potato fries. And if none of those sound good, I’ll check any of a number of food blogs or recipe websites for new inspiration.
Tool 2: The elimination process. Decide what you don’t want to eat and figure out what’s left. Then, seeTool 1.
My husband was recently on a basketball team for his office which had games on Tuesdays. This meant we needed something quick and light so that he wouldn’t get halfway down the court then double over with indigestion. This came to mean Tuesday nights were almost always pasta nights. After the end of his league, we enjoyed this routine so much that we’ve since adopted Tool 3: “Pasta Tuesday.” By initiating “Pasta Tuesday” we’ve been able to remove more guesswork from menu planning. It’s a specific enough choice that it limits the options, but it’s broad enough that any flavors we crave can be incorporated into the meal.
This Mac n cheese will be a great addition to our ‘Pasta Tuesday” rotation. I’ve tried several recipes, and this is by far the tastiest that has come out of my kitchen. I found the original recipe on epicurious.com, and with a 3.5 fork rating and 130-some reviews, I figured I’d give it a try. And, I think the fact it includes one of my new favorite things:
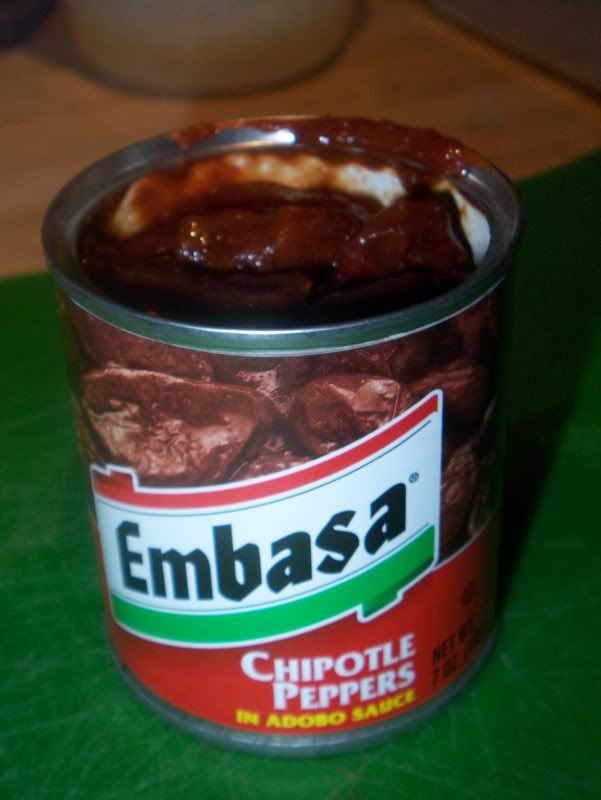
tipped the scales in favor of this recipe. I only started cooking with chipotles maybe about a month ago, and I’m kicking myself that I didn’t start sooner. The smoky heat they add to pretty much everything is fantastic.
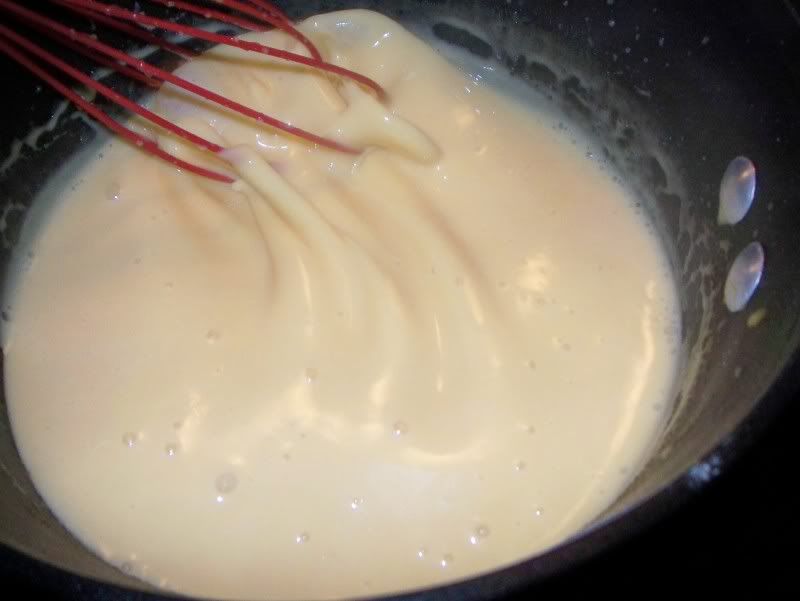
This recipe was a “make and bake” recipe, where you combined the cooked components into a casserole dish and let it finish up in the oven. I have really wanted to make a stove-top cheese sauce, so I adjusted the recipe even more to accommodate this. I will admit, though, I thought I had made a huge mistake by trying to make a stove-top sauce without ever having done it before. Because I also lightened the recipe up so that instead of whole milk and heavy cream I used 1% milk, I was terrified that I would curdle my cheese sauce again. Yes, again. Curdled cheese sauce is not pretty. I learned from my mistakes experience that fat is what keeps sauce from curdling, and the less fat you have, the greater chance of curdling. Temperature also plays a big role. 180 degrees F is a key temperature when working with lower-fat products. I never let the heat on my pot get up to “medium.” This is where patience pays off. I started low, but my cheese wasn’t melting entirely, so I’d get oily, cheesy strings attached to my whisk. Gradually I would increase the heat, stir some more, and check again. Eventually I found the magic temperature on my stove that melted all the cheese but didn’t curdle the milk. Also white wine or sherry was supposed to aid in keeping a creamy sauce together, so I popped open my bottle of sherry and dumped some in. What could it hurt? Alcohol makes everything better.
By the time I was finished, the cheese sauce melted nicely and thickened up. Look how beautiful it is.
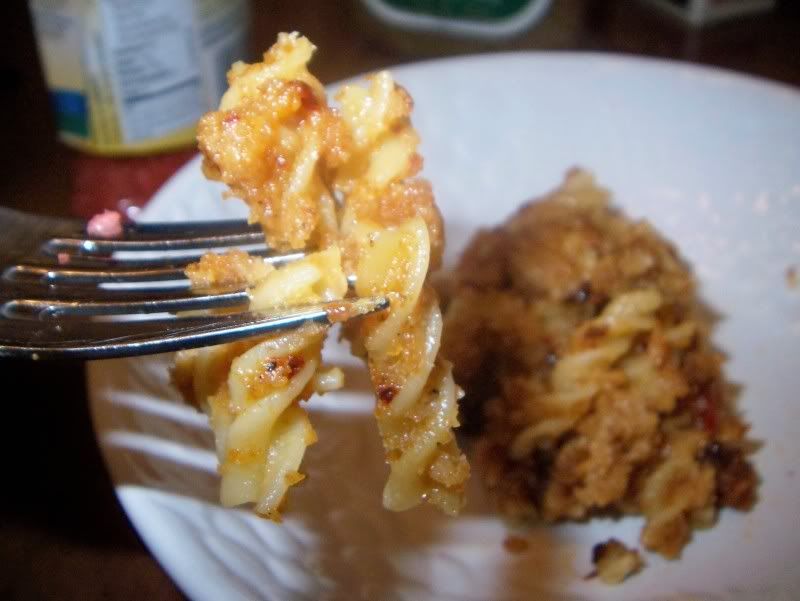
The pasta then jumps in the pool with the cheese and transferred to a baking dish. If you like it really cheesy and saucy, I’d say skip the baking dish and eat right that second. The ten minutes of baking to toast up the bread crumbs on top also lets some of the cheese absorb, which results in a denser, less saucy mac and cheese.
This meal was delicious, and even the hubby said it was a great improvement over my last attempt which was definitely cheesy, but lacked any discernible flavor or zing. With three chipotles, this one definitely had zing. If you don’t like as much spice, or even any at all, you can reduce or omit completely the chipotles in this recipe. I might recommend a dash of cayenne pepper as a replacement just because I think the heat plays off the richness of the cheese and makes a more well-rounded dish.
My four-cheese mix consisted of extra-sharp cheddar, smoked gouda, Monterey jack and parmesan only because I was trying to use our cheese drawer remnants. Feel free to improvise and experiment with your own mixtures. Another good mix would be 3 oz Cheddar, 2.5 oz havarti, 1.5 oz gouda and 1 oz fontina, swiss or gruyere.
Adapted from Epicurious.com
http://www.epicurious.com/recipes/food/views/Macaroni-and-Cheese-with-Garlic-Bread-Crumbs-Plain-and-Chipotle-102738#ixzz0n9hESbMX
For bread crumbs:
1 1/2 teaspoons unsalted butter
1 1/2 teaspoons olive oil
2 large garlic cloves, finely chopped
1/2 cups bread crumbs
For macaroni:
1 to 1.5 tablespoons chopped chipotle chiles in adobo (I used 3 chilis)
1 Tbsp unsalted butter
1 Tbsp all-purpose flour
3/4 cups 1% milk
1-2 Tbsp sherry (I just opened and dumped it in, so this is just an estimate)
1 tsp dijon mustard
1/4 pound macaroni (4 oz)
1/2 pounds cheese blend of choice, grated (my blend was 3 oz cheddar, 1 oz monterey jack, 2.5 oz gruyere 1.5 oz parmesan)
Pepper to taste
Preparation
Make bread crumbs:
Heat butter and oil in a 10-inch heavy skillet over moderate heat until foam subsides, then cook garlic and bread crumbs, stirring, until crumbs are golden. Transfer to paper towels to drain and season with salt.
Make macaroni:
Preheat oven to 350°F. Chop chipotles.
Melt butter in a medium saucepan over moderate heat, then reduce heat to low add flour and cook, whisking, several minutes. This will not make a ton of roux, so don’t worry if you just have a couple little clumps whisking around the pan. That’s ok. Gradually whisk in milk, mustard and cook on low to med-low, whisking occasionally.
Cook macaroni in a large pot of boiling salted water until just tender (I undercooked mine ever so slightly so that they wouldn’t overcook when in the oven). Drain in a colander and transfer to a large bowl.
Over low heat, mix in ½ cup of cheese into your milk mixture until melted, stirring frequently. Continue adding half cup cheese at a time until all is used and thoroughly blended. Mix in pasta, pepper, and chipotles, if using.
Serve now or spoon into an 8x8 baking dish and sprinkle with bread crumbs. Bake in middle of oven for amount 10 minutes.
Here are the original oven directions from the recipe. I did not follow these so I can’t vouch for them. But it seemed like a lot of reviewers had success with it. This is from the point you finished the white sauce and cooked the pasta:
To the pasta, stir in white sauce, cheese, and salt to taste.
Stir chipotles (if using) into macaroni. Spoon into an 8x8 baking dish and sprinkle with bread crumbs. Bake casserole in middle of oven 15-20 minutes, or until bubbly.
Cook's note: • Macaroni and cheese may be made 2 days ahead, put into casseroles, cooled completely, and chilled, covered. Do not add bread crumbs until ready to bake. (Baking may take longer than 15-20 minutes if reheating from refrigerator.)
2 comments:
I just started making mac and cheese at home myself, and my recipe is very similar to yours however with a few differences that I think will definitely help you! After I cook my roux and add the milk, I cook it until it gets super thick. So far going with low heat and slower cooking is key here. The milk should not boil! If it's too hot then you're going to have a problem. The last thing is pretty big and it makes a big difference: Never add the cheese while the pot is on the heat! This will break your sauce, not good for mac and cheese. Take the pot off the heat, then add the cheese. Trust me this makes a huge difference, good luck!
Thank you so much for the tips and advice! I will definitely keep your suggestions in mind the next time I make a batch of Mac and cheese! A lot of times I'll mix the cheese in (off the heat, like you suggested) just prior to throwing the whole thing in the oven to get all melty. That has been working for me!
Can't wait to try some of your tips and see if that helps my sauce be more consistent!
Post a Comment